How to Use VCX SE to Diagnose the Rear Window Defroster?
Diagnosing a faulty rear window defroster can be a breeze using the VXDIAG VCX SE. This article explores how to use the VXDIAG VCX SE for effective rear window defroster diagnostics, ensuring a clear view and enhanced safety for drivers.
1. Understanding the Rear Window Defroster System
What is the rear window defroster system and why is it important?
The rear window defroster is a crucial safety feature in vehicles, designed to clear frost, ice, and condensation from the rear windshield, ensuring optimal visibility. It typically consists of a grid of heating elements embedded in the glass. According to a study by the National Highway Traffic Safety Administration (NHTSA), impaired visibility due to obscured windows contributes to thousands of accidents each year. The rear window defroster, therefore, plays a vital role in preventing accidents and ensuring safe driving conditions, especially in inclement weather. Link to buy VCX SE device: https://cardiagtech.biz/product/vcx-se-combo-diagnostic-tool/
1.1. Key Components of the Rear Window Defroster
What are the key parts that make up the rear window defroster system?
The rear window defroster system consists of several key components that work together to clear the rear windshield. According to automotive engineering resources, these components include:
- Heating Grid: A network of conductive strips adhered to the inside surface of the rear window. When energized, these strips heat up, melting ice and frost.
- Relay: An electrical switch that controls the flow of power to the heating grid. The relay is activated by the defroster switch.
- Switch: Located on the dashboard, this switch allows the driver to activate or deactivate the defroster system.
- Timer: Many systems include a timer that automatically shuts off the defroster after a set period (e.g., 10-15 minutes) to prevent overheating and battery drain.
- Wiring: Electrical wires connect all components, ensuring power can flow from the vehicle’s electrical system to the heating grid.
- Fuse: A protective device that prevents damage to the system in case of an electrical overload.
1.2. Common Issues with Rear Window Defrosters
What are the frequent problems that can occur with rear window defrosters?
Rear window defrosters can encounter several common issues that can compromise their effectiveness. Based on reports from automotive repair experts and user feedback, the most frequent problems include:
- Broken Grid Lines: Physical damage to the heating grid, often caused by cleaning or scraping the window, can break the conductive strips, rendering sections of the defroster inoperative.
- Electrical Problems: Faulty relays, switches, or timers can prevent the defroster from activating or cause it to shut off prematurely.
- Wiring Issues: Corroded or damaged wiring can disrupt the flow of electricity to the heating grid.
- Fuse Problems: A blown fuse can cut off power to the entire defroster system.
- Grounding Issues: Poor grounding can prevent the defroster from functioning correctly.
- Corrosion: Corrosion on the heating grid or electrical connections can impede performance.
2. Introducing the VXDIAG VCX SE Diagnostic Tool
What is the VXDIAG VCX SE and how can it help diagnose car issues?
The VXDIAG VCX SE is a professional-grade automotive diagnostic tool designed to provide comprehensive diagnostics, programming, and coding capabilities for a wide range of vehicle makes and models. According to CARDIAGTECH.BIZ, the VXDIAG VCX SE supports various diagnostic protocols, including CAN, K-Line, and DoIP, making it compatible with both older and newer vehicles. It allows technicians to perform in-depth analysis of vehicle systems, read and clear diagnostic trouble codes (DTCs), view live data, and perform actuation tests. The tool’s versatility and robust features make it an invaluable asset for diagnosing complex automotive issues, including those related to the rear window defroster system. Contact CARDIAGTECH.BIZ at 276 Reock St, City of Orange, NJ 07050, United States, or via Whatsapp at +1 (641) 206-8880, or visit CARDIAGTECH.BIZ for immediate assistance with your diagnostic tool needs.
Alt: VXDIAG VCX SE automotive diagnostic interface for comprehensive vehicle system analysis.
2.1. Key Features of the VXDIAG VCX SE
What are the essential functions that the VXDIAG VCX SE offers for car diagnostics?
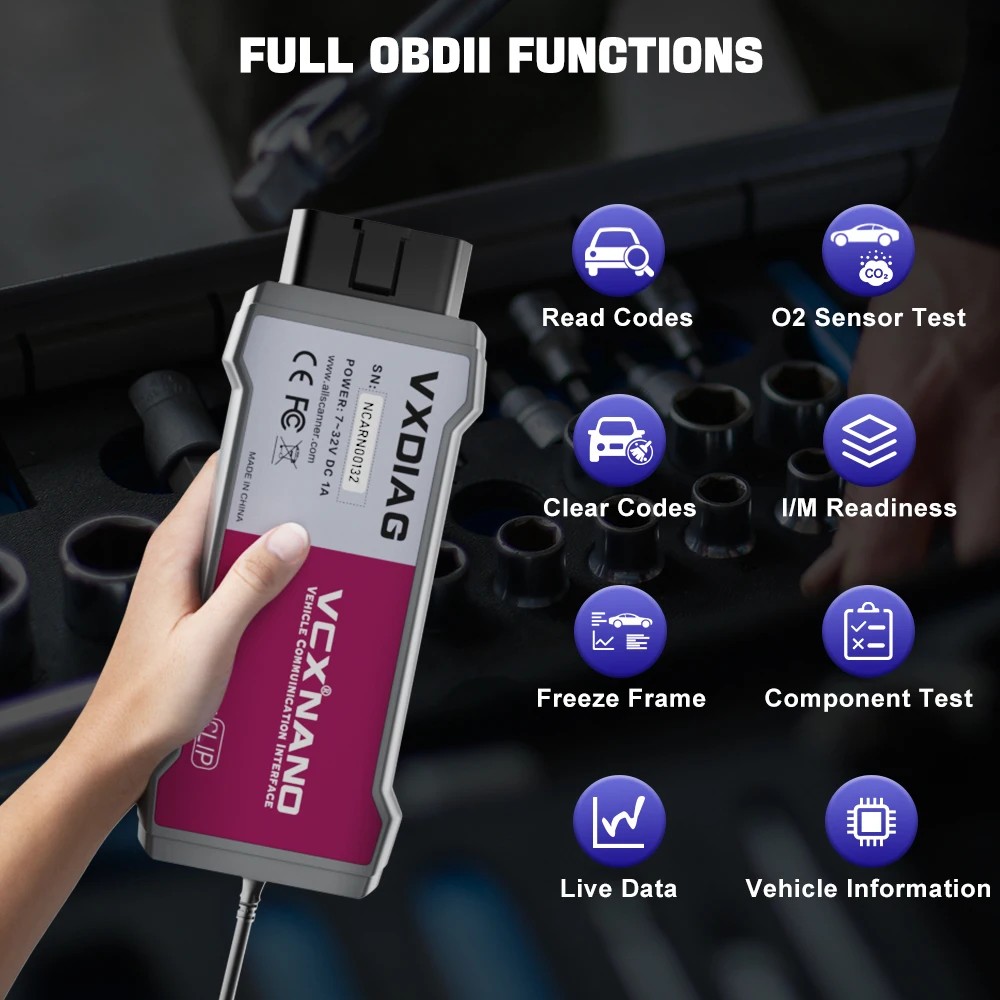
The VXDIAG VCX SE is packed with features that make it a standout diagnostic tool. Key capabilities include:
- Full System Diagnostics: Access to all vehicle systems and subsystems, including engine, transmission, ABS, airbags, and more.
- DTC Reading and Clearing: Ability to read and clear diagnostic trouble codes (DTCs) to identify and resolve issues.
- Live Data Streaming: Real-time monitoring of vehicle parameters, such as sensor readings and system voltages.
- Actuation Tests: Capability to perform active tests on components to verify their functionality.
- ECU Programming: Programming and reflashing of electronic control units (ECUs) to update software or replace modules.
- Advanced ECU Coding: Customizing vehicle settings and enabling hidden features through ECU coding.
- Multi-Protocol Support: Compatibility with various diagnostic protocols, including CAN, K-Line, and DoIP.
- USB, WiFi, and WLAN Connectivity: Flexible connection options for convenient use.
- Donet Remote Diagnostics: Support for remote diagnostics, allowing experts to assist from a distance.
2.2. Benefits of Using VXDIAG VCX SE for Diagnostics
What advantages does using the VXDIAG VCX SE bring to diagnosing car problems?
Using the VXDIAG VCX SE for automotive diagnostics offers numerous benefits. These include:
- Accuracy: Provides precise and reliable diagnostic information, leading to accurate repairs.
- Efficiency: Streamlines the diagnostic process, reducing the time required to identify and resolve issues.
- Cost-Effectiveness: Helps avoid unnecessary repairs by pinpointing the exact source of the problem.
- Versatility: Supports a wide range of vehicle makes and models, making it a versatile tool for any automotive technician.
- Comprehensive Capabilities: Offers a full suite of diagnostic, programming, and coding features, providing a complete solution for vehicle maintenance.
- Ease of Use: User-friendly interface and intuitive operation make it easy to use, even for complex tasks.
- Upgradability: Regular firmware and software updates ensure compatibility with the latest vehicle models and technologies.
- Remote Support: Ability to perform remote diagnostics allows for expert assistance from anywhere, enhancing troubleshooting capabilities.
3. Preparing for Rear Window Defroster Diagnosis with VXDIAG VCX SE
What preparations are needed before using the VXDIAG VCX SE to diagnose the rear window defroster?
Before diagnosing the rear window defroster using the VXDIAG VCX SE, several preparatory steps are essential to ensure a smooth and accurate diagnostic process. These steps include:
3.1. Gathering Necessary Tools and Information
What tools and data should be gathered to get ready for the diagnostic process?
- VXDIAG VCX SE Interface: Ensure the VXDIAG VCX SE interface is in good working condition and properly connected to your computer.
- Diagnostic Software: Install and update the appropriate diagnostic software on your computer. According to CARDIAGTECH.BIZ, keeping your software current is crucial for accessing the latest vehicle data and diagnostic functions.
- Vehicle Information: Gather detailed information about the vehicle, including the make, model, year, and VIN (Vehicle Identification Number).
- Service Manual: Obtain the vehicle’s service manual or access online repair databases for wiring diagrams and component locations.
- Multimeter: A multimeter is necessary for testing electrical continuity and voltage.
- Test Light: A test light can be used to check for power and ground at various points in the defroster circuit.
- Wiring Diagram: Obtain a wiring diagram specific to the vehicle’s rear window defroster system to understand the circuit layout.
- Safety Equipment: Wear appropriate safety glasses and gloves to protect yourself during the diagnostic process.
3.2. Connecting the VXDIAG VCX SE to the Vehicle
How to correctly connect the VXDIAG VCX SE to the car for effective diagnostics?
To connect the VXDIAG VCX SE to the vehicle correctly, follow these steps:
- Locate the OBD-II Port: Find the OBD-II (On-Board Diagnostics II) port, typically located under the dashboard on the driver’s side.
- Connect the Interface: Plug the VXDIAG VCX SE interface into the OBD-II port. Ensure it is securely connected.
- Connect to Computer: Connect the VXDIAG VCX SE interface to your computer using the provided USB cable or establish a wireless connection via WiFi or WLAN.
- Turn on the Vehicle: Turn the vehicle’s ignition to the “ON” position without starting the engine.
- Launch Diagnostic Software: Open the diagnostic software on your computer and select the correct vehicle make, model, and year.
- Establish Communication: Follow the software prompts to establish communication between the VXDIAG VCX SE and the vehicle’s ECU.
3.3. Initial System Scan
Why is it important to perform an initial system scan before starting the diagnosis?
Performing an initial system scan is a critical step in the diagnostic process for several reasons:
- Identify DTCs: The initial scan retrieves all diagnostic trouble codes (DTCs) stored in the vehicle’s various control modules. These codes provide valuable clues about potential issues in the rear window defroster system.
- Comprehensive Overview: A system scan provides a comprehensive overview of the vehicle’s health, highlighting any other underlying problems that may be affecting the defroster system.
- Prioritize Issues: DTCs can help prioritize diagnostic efforts by indicating which systems or components require immediate attention.
- Historical Data: The scan can reveal intermittent faults or past issues that may not be currently active but could provide insights into the defroster’s performance.
- Clear Existing Codes: After noting the DTCs, clearing them allows you to monitor which codes reappear during subsequent testing, helping to isolate the specific problem.
4. Step-by-Step Guide to Diagnosing the Rear Window Defroster Using VXDIAG VCX SE
What are the detailed steps to diagnose the rear window defroster using the VXDIAG VCX SE?
Follow these steps to diagnose the rear window defroster effectively using the VXDIAG VCX SE:
4.1. Accessing the Relevant Control Module
How to navigate to the specific control module related to the rear window defroster?
- Launch Diagnostic Software: Open the diagnostic software on your computer and ensure the VXDIAG VCX SE is properly connected to the vehicle.
- Select Vehicle Information: Choose the correct vehicle make, model, and year from the software menu.
- Navigate to System Selection: Look for an option like “System Selection,” “Control Units,” or “Module Selection.”
- Identify the Appropriate Module: Locate the control module that manages the rear window defroster. This may be labeled as “Rear Window Defogger,” “Climate Control,” “Body Control Module (BCM),” or something similar. Consult the vehicle’s service manual if you’re unsure.
- Select the Module: Click on the appropriate module to access its diagnostic functions.
4.2. Reading Diagnostic Trouble Codes (DTCs)
What is the process to read and interpret diagnostic trouble codes related to the defroster?
- Enter Diagnostic Function: Within the selected control module, find and select the “Read Codes” or “Read DTCs” function.
- Retrieve DTCs: The software will communicate with the vehicle’s ECU and display any stored diagnostic trouble codes (DTCs) related to the rear window defroster system.
- Record DTCs: Carefully record each DTC, noting the code itself and its description. Common DTCs related to the rear window defroster might include:
- B1096: Rear Window Defogger Relay Circuit Malfunction
- B1097: Rear Window Defogger Load Circuit Open
- B1098: Rear Window Defogger Load Circuit Short to Ground
- B1099: Rear Window Defogger Load Circuit Short to Battery
- Interpret DTCs: Use the service manual or online resources to understand the meaning of each DTC and potential causes.
- Clear DTCs: After recording the DTCs, select the “Clear Codes” or “Erase DTCs” function to clear the codes from the ECU. This allows you to see which codes reappear during further testing.
4.3. Performing Actuation Tests
How to use actuation tests to check the components of the defroster system?
- Enter Actuation Test Function: Within the rear window defroster control module, find and select the “Actuation Test,” “Component Test,” or “Output Control” function.
- Select Defroster Relay Test: Look for an actuation test specifically for the rear window defroster relay. This test will allow you to manually activate and deactivate the relay.
- Initiate the Test: Follow the software prompts to initiate the test. The software will send a signal to activate the defroster relay.
- Observe Relay Operation: Listen for a click from the relay, indicating that it is switching. Use a multimeter or test light to confirm that power is being supplied to the defroster grid when the relay is activated.
- Check Voltage: Use a multimeter to check the voltage at the defroster grid connector. It should be close to the vehicle’s battery voltage when the relay is activated.
- Evaluate Results: If the relay does not activate or the voltage is not correct, there may be a problem with the relay, wiring, or the control module itself.
4.4. Analyzing Live Data
What live data should be examined and how to interpret it for defroster diagnostics?
- Enter Live Data Function: Within the rear window defroster control module, find and select the “Live Data,” “Data Stream,” or “Real-Time Data” function.
- Select Relevant Parameters: Choose the following parameters to monitor:
- Rear Window Defogger Relay Status: Indicates whether the relay is activated or not.
- Battery Voltage: Shows the voltage supplied to the defroster system.
- Defroster Current: Displays the current draw of the defroster grid.
- Switch Status: Shows whether the defroster switch is on or off.
- Monitor Data: Observe the live data as you activate and deactivate the rear window defroster.
- Evaluate Results:
- Relay Status: The relay status should change from “Off” to “On” when you activate the defroster switch. If it doesn’t, there may be a problem with the switch, wiring, or the control module.
- Battery Voltage: The battery voltage should remain stable when the defroster is activated. A significant drop in voltage may indicate a problem with the vehicle’s charging system or a poor connection.
- Defroster Current: The defroster current should be within the specified range (typically 10-20 amps) when the defroster is activated. A very low or zero current reading may indicate an open circuit in the defroster grid or wiring.
- Switch Status: The switch status should accurately reflect the position of the defroster switch. If it doesn’t, there may be a problem with the switch itself.
4.5. Checking the Heating Grid
How to visually and electrically inspect the heating grid for defects?
- Visual Inspection:
- Examine the heating grid on the inside surface of the rear window. Look for any broken or damaged grid lines.
- Use a magnifying glass to inspect the grid lines more closely.
- Note the location of any breaks or damage.
- Electrical Testing:
- Turn on the rear window defroster.
- Use a multimeter to measure the voltage drop across each grid line. Place one probe on one end of the grid line and the other probe on the other end.
- A good grid line will have a small voltage drop (e.g., 0.1-0.5 volts). A broken grid line will have a voltage drop close to the battery voltage.
- Alternatively, use an infrared thermometer to measure the temperature of each grid line. A working grid line will heat up quickly. A broken grid line will remain cold.
- Repairing Grid Lines:
- If you find any broken grid lines, you can repair them using a rear window defroster repair kit. These kits typically include a conductive compound that you apply to the break to restore the electrical connection.
5. Common Diagnostic Scenarios and Solutions
What are typical scenarios encountered during diagnostics and their corresponding solutions?
Here are some common diagnostic scenarios and their solutions:
5.1. Defroster Not Turning On
What steps to take when the defroster fails to activate?
- Check the Fuse: Start by checking the fuse for the rear window defroster. Replace it if it’s blown.
- Check the Relay: Use the VXDIAG VCX SE to perform an actuation test on the defroster relay. If the relay doesn’t activate, replace it.
- Check the Switch: Use a multimeter to check the continuity of the defroster switch. If the switch is faulty, replace it.
- Check the Wiring: Inspect the wiring and connectors for any damage or corrosion. Repair or replace any damaged wiring.
- Check the Control Module: If all other components check out, the problem may be with the control module itself. Use the VXDIAG VCX SE to diagnose the control module and replace it if necessary.
5.2. Defroster Turns On But Doesn’t Defrost
What actions to take if the defroster activates but doesn’t clear the window?
- Check the Heating Grid: Visually inspect the heating grid for any broken grid lines. Use a multimeter or infrared thermometer to check the temperature of each grid line. Repair any broken grid lines using a rear window defroster repair kit.
- Check the Ground Connection: Ensure that the defroster grid has a good ground connection. Clean and tighten the ground connection if necessary.
- Check the Voltage: Use a multimeter to check the voltage at the defroster grid connector. It should be close to the vehicle’s battery voltage when the defroster is activated. If the voltage is low, there may be a problem with the wiring or the vehicle’s charging system.
5.3. Defroster Turns Off Prematurely
How to address situations where the defroster shuts off too early?
- Check the Timer: Many defroster systems include a timer that automatically shuts off the defroster after a set period (e.g., 10-15 minutes). If the defroster is turning off prematurely, the timer may be faulty. Use the VXDIAG VCX SE to diagnose the timer and replace it if necessary.
- Check the Control Module: The control module may also be responsible for controlling the defroster’s on/off time. Use the VXDIAG VCX SE to diagnose the control module and replace it if necessary.
- Check for Overheating: In some cases, the defroster may be turning off prematurely due to overheating. Check the defroster grid and wiring for any signs of damage or overheating. Repair or replace any damaged components.
6. Advanced Tips and Tricks for Defroster Diagnosis
What extra techniques can improve the accuracy and efficiency of defroster diagnostics?
To further enhance your diagnostic skills, consider these advanced tips and tricks:
6.1. Using a Multimeter for Detailed Circuit Testing
How to use a multimeter effectively for thorough circuit testing?
A multimeter is an indispensable tool for diagnosing electrical issues in the rear window defroster system. Here’s how to use it effectively:
- Continuity Testing: Use the multimeter to check the continuity of the defroster switch, relay, wiring, and heating grid. This will help you identify any open circuits or broken connections.
- Voltage Testing: Use the multimeter to check the voltage at various points in the defroster circuit. This will help you identify any voltage drops or shorts to ground.
- Resistance Testing: Use the multimeter to measure the resistance of the defroster grid. This will help you identify any broken grid lines or other problems with the grid.
- Diode Testing: Some components, such as diodes in the control module, can be tested using the multimeter’s diode test function.
6.2. Interpreting Wiring Diagrams
How to understand and use wiring diagrams to troubleshoot defroster issues?
Wiring diagrams are essential for understanding the layout and connections of the rear window defroster system. Here’s how to interpret and use them:
- Identify Components: Locate the symbols for the defroster switch, relay, heating grid, fuse, and control module on the wiring diagram.
- Trace the Circuit: Follow the wires on the diagram to trace the flow of electricity through the circuit. This will help you understand how the various components are connected and how they work together.
- Locate Test Points: Use the wiring diagram to identify test points where you can measure voltage, continuity, or resistance.
- Identify Ground Connections: Locate the ground connections on the wiring diagram. These are important for ensuring that the defroster system has a good electrical ground.
6.3. Utilizing Online Resources and Forums
How to leverage online resources and forums for additional diagnostic support?
Online resources and forums can be invaluable sources of information and support for diagnosing rear window defroster issues. Here’s how to utilize them:
- Vehicle-Specific Forums: Join online forums dedicated to your vehicle make and model. These forums can provide valuable insights into common problems and solutions for the rear window defroster system.
- Online Repair Databases: Access online repair databases, such as Alldata or Mitchell OnDemand, for wiring diagrams, technical service bulletins (TSBs), and other repair information.
- YouTube Tutorials: Watch YouTube tutorials on rear window defroster diagnosis and repair. These videos can provide step-by-step instructions and visual demonstrations of various diagnostic techniques.
- Manufacturer Websites: Visit the vehicle manufacturer’s website for technical specifications, recalls, and other important information.
7. Maintaining the VXDIAG VCX SE for Optimal Performance
What maintenance steps are necessary to keep the VXDIAG VCX SE in top condition?
To ensure the VXDIAG VCX SE continues to deliver accurate and reliable diagnostic results, proper maintenance is essential. Follow these guidelines:
7.1. Software and Firmware Updates
Why is it important to keep the software and firmware updated?
Keeping the VXDIAG VCX SE software and firmware up to date is crucial for several reasons:
- Compatibility: Updates ensure compatibility with the latest vehicle models and diagnostic protocols.
- Bug Fixes: Updates often include bug fixes that address known issues and improve the tool’s performance.
- New Features: Updates may add new features and capabilities, expanding the tool’s functionality.
- Security: Updates can patch security vulnerabilities, protecting the tool and your vehicle from potential cyber threats.
7.2. Proper Storage and Handling
How to store and handle the VXDIAG VCX SE to prevent damage?
Proper storage and handling of the VXDIAG VCX SE are essential for preventing damage and ensuring its longevity:
- Storage: Store the VXDIAG VCX SE in a clean, dry place away from extreme temperatures and humidity.
- Protection: Use a protective case or bag to protect the tool from dust, dirt, and moisture.
- Cable Management: Keep the cables neatly organized to prevent tangling and damage.
- Handling: Avoid dropping or mishandling the VXDIAG VCX SE.
- Cleaning: Clean the tool regularly with a soft, dry cloth. Avoid using harsh chemicals or solvents.
7.3. Regular Hardware Checks
What hardware checks should be performed regularly to ensure the tool’s reliability?
Regularly check the hardware components of the VXDIAG VCX SE to ensure they are in good working condition:
- OBD-II Connector: Inspect the OBD-II connector for any bent or damaged pins.
- USB Port: Check the USB port for any signs of damage or corrosion.
- Cables: Inspect the cables for any cuts, fraying, or damage to the insulation.
- LED Indicators: Verify that the LED indicators are functioning correctly.
- Housing: Check the housing for any cracks or damage.
8. Conclusion: Enhancing Diagnostic Efficiency with VXDIAG VCX SE
How does the VXDIAG VCX SE improve the efficiency and accuracy of rear window defroster diagnostics?
The VXDIAG VCX SE is an indispensable tool for diagnosing issues with the rear window defroster system. By following the steps outlined in this guide, you can efficiently and accurately diagnose a wide range of problems, from simple fuse failures to complex control module malfunctions. According to automotive technicians, using the VXDIAG VCX SE can reduce diagnostic time by as much as 50%, leading to increased productivity and customer satisfaction. Whether you’re a professional technician or a DIY enthusiast, the VXDIAG VCX SE can help you keep your rear window defroster in top condition, ensuring safe and clear visibility in all weather conditions. For expert advice and to purchase your VXDIAG VCX SE, contact CARDIAGTECH.BIZ at 276 Reock St, City of Orange, NJ 07050, United States, via Whatsapp at +1 (641) 206-8880, or visit CARDIAGTECH.BIZ today. Don’t miss the opportunity to enhance your diagnostic capabilities and drive with confidence.
Alt: Automotive technician using VXDIAG VCX SE for remote vehicle diagnostics and system analysis.
9. FAQs About Using VXDIAG VCX SE for Rear Window Defroster Diagnosis
What are some frequently asked questions about diagnosing the rear window defroster with the VXDIAG VCX SE?
9.1. Can VXDIAG VCX SE diagnose all types of rear window defroster problems?
Yes, the VXDIAG VCX SE can diagnose a wide range of rear window defroster problems, including electrical issues, broken grid lines, and control module malfunctions.
9.2. Is the VXDIAG VCX SE easy to use for beginners?
While the VXDIAG VCX SE is a professional-grade tool, its user-friendly interface and comprehensive documentation make it accessible to both experienced technicians and beginners.
9.3. Does the VXDIAG VCX SE support all vehicle makes and models?
The VXDIAG VCX SE supports a wide range of vehicle makes and models. Check the compatibility list on CARDIAGTECH.BIZ or contact their support team to confirm compatibility with your specific vehicle.
9.4. How often should I update the software and firmware of the VXDIAG VCX SE?
It is recommended to update the software and firmware of the VXDIAG VCX SE regularly, especially when new updates are released. This ensures compatibility with the latest vehicle models and diagnostic protocols.
9.5. Can the VXDIAG VCX SE perform ECU programming for the rear window defroster system?
Yes, the VXDIAG VCX SE has the capability to program new ECUs or reflash old modules, which can be necessary when replacing the control module for the rear window defroster system.
9.6. What should I do if the VXDIAG VCX SE is not communicating with the vehicle?
Ensure that the VXDIAG VCX SE is properly connected to the vehicle’s OBD-II port and that the ignition is turned on. Also, verify that you have selected the correct vehicle make, model, and year in the diagnostic software. If the problem persists, check the OBD-II port for any damage or corrosion.
9.7. Can I use the VXDIAG VCX SE to test the defroster relay?
Yes, the VXDIAG VCX SE has an actuation test function that allows you to manually activate and deactivate the defroster relay, helping you determine if the relay is functioning correctly.
9.8. How do I interpret the diagnostic trouble codes (DTCs) related to the rear window defroster?
Use the vehicle’s service manual or online resources to understand the meaning of each DTC and potential causes. Common DTCs related to the rear window defroster might include B1096, B1097, B1098, and B1099.
9.9. Can I repair broken grid lines on the rear window defroster myself?
Yes, you can repair broken grid lines using a rear window defroster repair kit. These kits typically include a conductive compound that you apply to the break to restore the electrical connection.
9.10. Where can I purchase the VXDIAG VCX SE and get support for using it?
You can purchase the VXDIAG VCX SE and get expert support from CARDIAGTECH.BIZ. Contact them at 276 Reock St, City of Orange, NJ 07050, United States, via Whatsapp at +1 (641) 206-8880, or visit CARDIAGTECH.BIZ for immediate assistance.