Mercedes CLS Window Regulator Replacement: A Comprehensive Guide
Mercedes Cls Window Regulator Replacement is a common repair. If your Mercedes CLS window is stuck, grinding, or making unusual noises, the window regulator is likely the culprit. This comprehensive guide, brought to you by CARDIAGTECH.NET, walks you through the entire replacement process, ensuring a smooth and successful repair. Learn about identifying the problem, acquiring the right tools, and step-by-step instructions for replacing the window regulator, all while optimizing performance and longevity.
1. Identifying the Need for Mercedes CLS Window Regulator Replacement
Recognizing the signs of a failing window regulator is the first step in addressing the issue. Early detection can prevent further damage and more costly repairs. Look out for these common symptoms:
- Slow or Jerky Window Movement: The window moves slower than usual, or the movement is uneven and jerky.
- Grinding or Clicking Noises: Unusual sounds coming from inside the door panel when operating the window.
- Window Falling into the Door: The window suddenly drops down into the door cavity.
- Window Tilting: The window appears to be misaligned or tilted when opening or closing.
- Complete Window Failure: The window doesn’t move at all, regardless of switch operation.
These symptoms indicate that the window regulator, responsible for the window’s up and down movement, is failing and needs replacement. Ignoring these signs can lead to the window becoming completely inoperable, posing a security risk and potentially damaging the window glass.
2. Essential Tools and Materials for Window Regulator Replacement
Having the right tools and materials on hand is crucial for a successful Mercedes CLS window regulator replacement. Gathering everything beforehand saves time and frustration during the repair process. Here’s a comprehensive list:
| Tool/Material | Description | Quantity | Notes |
|---|---|---|---|
| New Window Regulator | Specifically designed for your Mercedes CLS model and year. Available at CARDIAGTECH.NET | 1 | Ensure compatibility with your vehicle’s specifications. |
| Socket Set | A variety of sizes to remove bolts and nuts. | 1 set | Metric sizes are essential for Mercedes vehicles. |
| Torx Bit Set | Includes TX30, TX25, and TX20 bits for removing screws and fasteners. | 1 set | Torx screws are commonly used in Mercedes door panels. |
| Panel Removal Tools | Plastic pry tools to safely remove the door panel without damaging it. You can purchase these at CARDIAGTECH.NET. | 1 set | Avoid using metal tools, which can scratch or dent the door panel. |
| Screwdrivers | Phillips head and flat head screwdrivers for various tasks. | 1 set | Different sizes may be needed for different screws. |
| Ratchet and Extension | To reach bolts in tight spaces. | 1 | Extensions provide added reach. |
| Work Gloves | To protect your hands. | 1 pair | Prevents cuts and abrasions. |
| Safety Glasses | To protect your eyes from debris. | 1 pair | Important when working with mechanical parts. |
| Shop Rags | For cleaning and wiping surfaces. | Several | Keep your work area clean. |
| Masking Tape | To secure the window in place after detaching it from the regulator. | 1 roll | Prevents the window from falling into the door. |
| Marker | To mark the window’s position before removal. | 1 | Helps with realignment during reinstallation. |
| Penetrating Oil (Optional) | To loosen stubborn bolts. | 1 can | Apply to rusted or corroded bolts before attempting to remove them. |
| Multimeter (Optional) | To test electrical connections. | 1 | Useful for diagnosing electrical issues. |
| WD-40 or Silicone Spray | To lubricate the window tracks and regulator mechanism after installation. Available at CARDIAGTECH.NET. | 1 can | Ensures smooth window operation. |
| Flashlight or Work Light | To provide adequate lighting. | 1 | Essential for seeing inside the door cavity. |
| Car Jack and Stands (Optional) | Use to lift your vehicle and ensure safety before beginning repairs. | 1 | Provides secure support for repairs. |
Having these tools and materials ready will make the Mercedes CLS window regulator replacement process more efficient and less prone to complications. Ensure that you choose high-quality replacement parts and tools from trusted suppliers like CARDIAGTECH.NET for optimal performance and longevity.
3. Step-by-Step Guide to Replacing the Mercedes CLS Window Regulator
Replacing a window regulator can seem daunting, but with a systematic approach and the right tools, it is manageable. Here’s a detailed step-by-step guide for Mercedes CLS window regulator replacement:
3.1. Safety First: Disconnect the Battery
Before starting any electrical work on your Mercedes CLS, disconnect the negative terminal of the battery. This prevents accidental electrical shorts and ensures your safety.
- Open the hood and locate the battery.
- Use a wrench to loosen the nut on the negative terminal (usually marked with a “-” sign).
- Carefully disconnect the negative cable and secure it away from the battery terminal.
3.2. Remove the Door Panel
Removing the door panel is essential to access the window regulator. Follow these steps carefully to avoid damaging the panel or its components:
- Locate and Remove Screws: Identify and remove all screws holding the door panel in place. These are typically located around the edges of the panel, behind the door handle, and in the armrest. Use the appropriate Torx bits (TX20, TX25, TX30) for these screws.
- Pry Off Plastic Covers: Use a plastic pry tool to gently remove any plastic covers concealing additional screws or fasteners.
- Detach the Door Panel: Once all screws and fasteners are removed, use the panel removal tools to pry the door panel away from the door frame. Start at the bottom and work your way around the edges. Be careful not to pull too hard, as there may still be wires connected.
- Disconnect Electrical Connectors: Carefully disconnect all electrical connectors attached to the door panel, such as those for the power windows, door locks, speakers, and lights. Take photos or make notes of the connector locations to ensure proper reassembly.
- Remove the Door Panel Completely: Once all connections are disconnected, you can fully remove the door panel and set it aside in a safe place.
Alt text: Removing the door panel of a Mercedes CLS, exposing the inner mechanisms for window regulator replacement.
3.3. Access the Window Regulator
With the door panel removed, you now have access to the inner door components, including the window regulator.
- Peel Back the Plastic Sheeting: Carefully peel back the plastic sheeting or vapor barrier that covers the inside of the door. This sheeting protects the door’s internal components from moisture.
- Locate the Window Regulator: Identify the window regulator, which is typically a metal frame with a motor and cables or a scissor-like mechanism that moves the window up and down.
3.4. Secure the Window
Before removing the window regulator, it’s crucial to secure the window to prevent it from falling into the door cavity.
- Raise the Window: If the window is not already in the fully raised position, use the window switch to raise it as far as it will go. If the regulator is completely broken, you may need to manually lift the window.
- Use Masking Tape: Apply wide strips of masking tape across the top of the window and onto the door frame to hold the window in place. Ensure the tape is strong enough to support the weight of the window.
3.5. Disconnect the Window from the Regulator
Now, disconnect the window from the old regulator.
- Locate the Window Clamps: Find the points where the window is attached to the regulator. These are usually clamps or bolts.
- Loosen or Remove the Clamps: Use the appropriate tools to loosen or remove the clamps or bolts. Be careful not to drop any hardware into the door cavity.
- Detach the Window: Gently detach the window from the regulator. If it’s stuck, try wiggling it slightly to loosen it.
3.6. Remove the Old Window Regulator
With the window secured and detached, you can now remove the old window regulator.
- Disconnect the Motor: Disconnect the electrical connector to the window regulator motor.
- Remove Mounting Bolts: Locate and remove all the bolts or screws that hold the regulator to the door frame. These are typically located around the perimeter of the regulator.
- Carefully Remove the Regulator: Maneuver the regulator out of the door cavity. This may require some twisting and turning to clear the door’s internal structures.
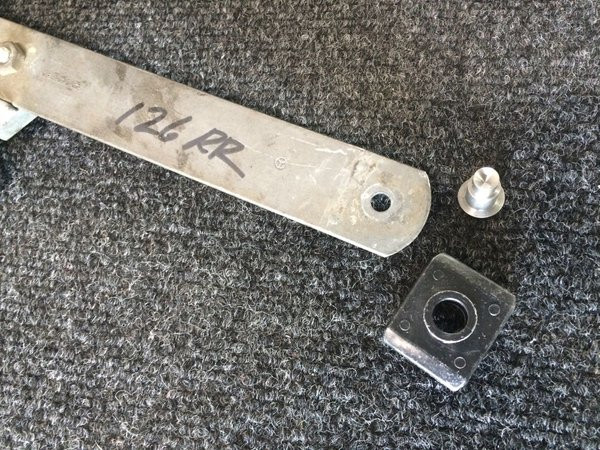
Alt text: Close-up of a disassembled Mercedes CLS window regulator, highlighting the components needing replacement.
3.7. Install the New Window Regulator
Installing the new window regulator involves reversing the removal process.
- Position the New Regulator: Carefully maneuver the new regulator into the door cavity, aligning it with the mounting holes.
- Secure with Bolts: Install the mounting bolts or screws, tightening them securely.
- Connect the Motor: Connect the electrical connector to the new window regulator motor.
3.8. Reconnect the Window to the Regulator
Reconnect the window to the new regulator, ensuring it is properly aligned.
- Align the Window: Carefully align the window with the regulator’s clamps or mounting points.
- Secure the Clamps: Tighten the clamps or bolts to secure the window to the regulator. Ensure the window is firmly attached and properly seated in the clamps.
3.9. Test the Window Operation
Before reassembling the door, test the window operation to ensure everything is working correctly.
- Reconnect the Battery: Reconnect the negative terminal of the battery.
- Test the Window Switch: Use the window switch to raise and lower the window. Check for smooth and even movement.
- Adjust if Necessary: If the window is not moving correctly, adjust the regulator or window clamps as needed.
3.10. Reassemble the Door
If the window operates correctly, you can now reassemble the door.
- Reattach the Plastic Sheeting: Carefully reattach the plastic sheeting or vapor barrier to the inside of the door.
- Reconnect Electrical Connectors: Reconnect all electrical connectors to the door panel, ensuring they are securely attached.
- Reinstall the Door Panel: Align the door panel with the door frame and snap it into place.
- Reinstall Screws: Reinstall all screws and fasteners that hold the door panel in place.
- Replace Plastic Covers: Replace any plastic covers that conceal screws or fasteners.
3.11. Final Testing and Adjustments
Perform a final test of the window operation and make any necessary adjustments.
- Test Window Operation: Raise and lower the window several times, checking for smooth and even movement.
- Check for Leaks: Close the door and check for any air or water leaks around the window.
- Adjust as Needed: If you notice any issues, such as the window not sealing properly, adjust the regulator or window clamps as needed.
By following these detailed steps, you can successfully complete a Mercedes CLS window regulator replacement. Remember to use high-quality replacement parts and tools from trusted suppliers like CARDIAGTECH.NET for optimal performance and longevity.
4. Troubleshooting Common Issues During Replacement
Even with a detailed guide, you might encounter some common issues during the Mercedes CLS window regulator replacement process. Here are some troubleshooting tips:
| Issue | Possible Cause(s) | Solution(s) |
|---|---|---|
| Window Doesn’t Move | Motor not connected, faulty wiring, regulator not properly installed | Check motor connection, test wiring with a multimeter, ensure regulator is securely mounted and aligned |
| Window Moves Slowly | Regulator not lubricated, window tracks dirty, incorrect regulator installation | Lubricate the regulator mechanism and window tracks with silicone spray (available at CARDIAGTECH.NET), clean window tracks, ensure correct regulator installation |
| Grinding Noises | Misalignment of regulator, debris in window tracks, regulator components rubbing | Realign the regulator, clean window tracks, inspect regulator components for damage or obstructions |
| Window Falls into the Door | Window not properly secured to regulator, regulator failure | Ensure window is securely clamped to regulator, inspect regulator for broken components, replace regulator if necessary (available at CARDIAGTECH.NET) |
| Difficulty Removing Door Panel | Hidden screws or fasteners, panel clips stuck | Double-check for hidden screws or fasteners, use panel removal tools to gently pry the panel away from the door frame, avoid excessive force |
| Stripped Screws | Using the wrong size Torx bit, excessive force | Use the correct size Torx bit, apply penetrating oil to loosen stubborn screws, use a screw extractor tool if necessary |
| Electrical Connectors Won’t Reconnect | Bent or damaged pins, incorrect connector orientation | Inspect pins for damage and straighten if necessary, ensure correct connector orientation, use a small amount of dielectric grease to ease reconnection |
| Window Not Aligned Properly | Regulator not properly aligned, window clamps not adjusted correctly | Realign the regulator, adjust window clamps to ensure proper window alignment, use a marker to mark the original window position before removal to aid in realignment |
| Regulator Motor Not Working | Faulty motor, wiring issue, blown fuse | Test motor with a multimeter, check wiring for damage, check and replace blown fuses |
By addressing these common issues with a systematic approach, you can overcome challenges and complete your Mercedes CLS window regulator replacement successfully. If you encounter any persistent problems, consider consulting a professional mechanic.
5. Choosing the Right Replacement Parts from CARDIAGTECH.NET
Selecting the right replacement parts is crucial for the longevity and performance of your Mercedes CLS window regulator. CARDIAGTECH.NET offers a range of high-quality regulators and components designed specifically for your vehicle. Here’s what to consider when making your selection:
- Compatibility: Ensure the replacement regulator is compatible with your Mercedes CLS model year and door (front or rear, driver or passenger side).
- Quality: Opt for regulators made from durable materials with robust construction. High-quality regulators are less prone to failure and provide smoother window operation.
- Brand Reputation: Choose reputable brands known for their reliability and performance.
- Warranty: Look for regulators with a warranty, which indicates the manufacturer’s confidence in their product.
- Customer Reviews: Read customer reviews to get insights into the regulator’s performance and durability.
- Price: While price is a factor, prioritize quality and reliability. A slightly more expensive, high-quality regulator can save you money in the long run by reducing the need for future repairs.
CARDIAGTECH.NET provides detailed product descriptions and specifications to help you make an informed decision. Our knowledgeable staff is also available to answer any questions and assist you in selecting the right replacement parts for your Mercedes CLS.
6. Maintaining Your New Window Regulator
Proper maintenance can extend the life of your new Mercedes CLS window regulator and ensure smooth, trouble-free operation. Here are some tips:
- Lubrication: Regularly lubricate the window tracks and regulator mechanism with silicone spray (available at CARDIAGTECH.NET). This reduces friction and prevents wear.
- Cleaning: Keep the window tracks clean by removing dirt, debris, and grime. Use a soft cloth and mild cleaner.
- Avoid Overloading: Avoid forcing the window if it encounters resistance. This can strain the regulator and cause premature failure.
- Regular Inspections: Periodically inspect the window regulator for signs of wear or damage. Address any issues promptly to prevent further damage.
- Smooth Operation: Ensure the window moves smoothly and evenly. If you notice any jerky or slow movement, address the issue immediately.
- Professional Check-ups: Consider having a professional mechanic inspect the window regulator during routine maintenance.
By following these maintenance tips, you can maximize the lifespan of your new window regulator and enjoy smooth, reliable window operation for years to come.
7. Understanding Window Regulator Types
Mercedes CLS window regulators come in different types, each with its own design and mechanism. Understanding these types can help you choose the right replacement and troubleshoot issues effectively.
| Regulator Type | Description | Advantages | Disadvantages |
|---|---|---|---|
| Cable Regulator | Uses cables and pulleys to move the window up and down. | Lightweight, cost-effective, compact design. | Cables can stretch or break over time, more prone to failure, difficult to repair. |
| Scissor Regulator | Uses a scissor-like mechanism to raise and lower the window. | More robust and durable than cable regulators, provides smoother window operation. | Heavier, more expensive, larger design. |
| Mechanical Regulator | Manually operated, typically found in older vehicles. | Simple design, no electrical components. | Requires manual effort, not as convenient as power windows. |
| Power Regulator | Electrically operated, uses a motor to move the window. | Convenient, easy to use. | More complex, requires electrical components, prone to electrical issues. |
| Hybrid Regulator | Combines features of different regulator types, such as cable and scissor mechanisms. | Balances advantages and disadvantages of different types, offers a compromise between cost, durability, and performance. | Can be more complex to diagnose and repair. |
Knowing the type of window regulator in your Mercedes CLS can assist you in selecting the appropriate replacement and addressing any specific issues related to its design. Always refer to your vehicle’s specifications and consult with professionals at CARDIAGTECH.NET to ensure you choose the correct regulator type.
8. Cost Analysis: DIY vs. Professional Installation
Deciding whether to replace the Mercedes CLS window regulator yourself (DIY) or hire a professional installer involves weighing the costs and benefits. Here’s a cost analysis to help you make the right decision:
DIY Replacement
- Parts Cost: The cost of a new window regulator from CARDIAGTECH.NET typically ranges from $50 to $200, depending on the brand and quality.
- Tools Cost: If you don’t already have the necessary tools, you may need to purchase them. A basic set of tools can cost between $50 and $150.
- Labor Cost: Your labor is free, but factor in the time and effort required for the job.
- Total DIY Cost: $100 to $350
Professional Installation
- Parts Cost: The cost of the window regulator is similar to DIY, ranging from $50 to $200.
- Labor Cost: Professional labor rates vary, but typically range from $100 to $300 per hour. A window regulator replacement can take 1 to 3 hours, resulting in labor costs of $100 to $900.
- Total Professional Cost: $150 to $1100
Factors to Consider
- Skill Level: If you’re comfortable working on cars and have experience with basic repairs, DIY can save you money.
- Time Availability: DIY requires time and effort. If you’re short on time, professional installation may be a better option.
- Tool Availability: If you don’t have the necessary tools, the cost of purchasing them can offset the savings from DIY.
- Warranty: Professional installers typically offer a warranty on their work, providing peace of mind.
- Complexity: Some window regulator replacements are more complex than others. If you’re unsure, professional installation is recommended.
By carefully considering these factors and weighing the costs and benefits, you can make an informed decision about whether to DIY or hire a professional for your Mercedes CLS window regulator replacement.
9. Safety Precautions During the Repair
Safety should be your top priority during a Mercedes CLS window regulator replacement. Here are some essential safety precautions to follow:
- Disconnect the Battery: Always disconnect the negative terminal of the battery before starting any electrical work.
- Wear Safety Glasses: Protect your eyes from debris by wearing safety glasses.
- Wear Work Gloves: Protect your hands from cuts and abrasions by wearing work gloves.
- Secure the Window: Properly secure the window before removing the regulator to prevent it from falling into the door cavity.
- Use Proper Tools: Use the correct tools for the job to avoid damaging components or injuring yourself.
- Work in a Well-Lit Area: Ensure you have adequate lighting to see what you’re doing.
- Follow Instructions: Carefully follow the instructions in this guide and any instructions provided with the replacement regulator.
- Take Breaks: If you’re feeling tired or frustrated, take a break to avoid mistakes.
- Ask for Help: If you’re unsure about any step, ask a qualified mechanic for assistance.
- Dispose of Waste Properly: Dispose of old parts and waste materials properly.
By following these safety precautions, you can minimize the risk of injury and ensure a safe and successful Mercedes CLS window regulator replacement.
10. Frequently Asked Questions (FAQ) About Mercedes CLS Window Regulator Replacement
Here are some frequently asked questions about Mercedes CLS window regulator replacement:
- How do I know if my window regulator needs to be replaced? Look for symptoms such as slow or jerky window movement, grinding noises, the window falling into the door, or complete window failure.
- Can I replace a window regulator myself? Yes, if you have basic mechanical skills and the right tools, you can replace a window regulator yourself.
- How much does it cost to replace a window regulator? The cost can range from $100 to $1100, depending on whether you DIY or hire a professional.
- What tools do I need to replace a window regulator? Essential tools include a socket set, Torx bit set, panel removal tools, screwdrivers, a ratchet and extension, work gloves, and safety glasses.
- Where can I buy a replacement window regulator? You can purchase high-quality replacement window regulators from CARDIAGTECH.NET.
- How long does it take to replace a window regulator? The replacement process can take 1 to 3 hours, depending on your skill level and the complexity of the job.
- What type of window regulator does my Mercedes CLS have? Mercedes CLS models typically use cable or scissor-type window regulators. Refer to your vehicle’s specifications to determine the exact type.
- Is it safe to drive with a broken window regulator? It’s not recommended to drive with a broken window regulator, as the window may fall into the door or become a security risk.
- How can I prevent window regulator failure? Regularly lubricate the window tracks and regulator mechanism, keep the window tracks clean, and avoid forcing the window if it encounters resistance.
- What should I do if I encounter problems during the replacement process? Refer to the troubleshooting section of this guide or consult with a professional mechanic.
These FAQs provide quick answers to common questions about Mercedes CLS window regulator replacement, helping you make informed decisions and address any concerns you may have.
11. The Importance of Regular Vehicle Maintenance
Regular vehicle maintenance is crucial for the longevity, safety, and performance of your Mercedes CLS. Proper maintenance can prevent costly repairs, improve fuel efficiency, and ensure a smooth and reliable driving experience. Here are some essential maintenance tasks:
- Oil Changes: Change the engine oil and filter according to the manufacturer’s recommendations.
- Fluid Checks: Regularly check and top off all fluids, including coolant, brake fluid, power steering fluid, and transmission fluid.
- Tire Maintenance: Check tire pressure, inspect tires for wear and damage, and rotate tires regularly.
- Brake Service: Inspect brake pads, rotors, and calipers, and replace worn components as needed.
- Battery Service: Check the battery’s condition and clean terminals to ensure reliable starting power.
- Filter Replacements: Replace air filters, fuel filters, and cabin air filters at recommended intervals.
- Tune-Ups: Perform tune-ups to ensure optimal engine performance and fuel efficiency.
- Inspections: Regularly inspect belts, hoses, and other components for wear and damage.
By following a regular maintenance schedule, you can keep your Mercedes CLS in top condition and avoid costly repairs down the road. Consult your vehicle’s owner’s manual for specific maintenance recommendations.
12. Contact CARDIAGTECH.NET for Expert Advice and Quality Parts
Replacing your Mercedes CLS window regulator can be a smooth and successful process with the right guidance and quality parts. At CARDIAGTECH.NET, we are committed to providing you with the best products and expert advice to ensure your vehicle is running at its best.
If you’re experiencing issues with your window regulator or any other automotive component, don’t hesitate to reach out to us. Our team of knowledgeable professionals is ready to assist you with any questions or concerns you may have. We offer a wide range of high-quality replacement parts specifically designed for Mercedes CLS models, ensuring compatibility and optimal performance.
13. Call to Action
Don’t let a faulty window regulator compromise your driving experience. Contact CARDIAGTECH.NET today for expert advice and premium replacement parts. Our team is ready to assist you in finding the perfect solution for your Mercedes CLS.
Address: 276 Reock St, City of Orange, NJ 07050, United States
WhatsApp: +1 (641) 206-8880
Website: CARDIAGTECH.NET
Reach out now to experience the CARDIAGTECH.NET difference. We’re here to help you get back on the road with confidence.