Who Fixes Water Leaks In Cars: Expert Guide
Water Leaks in cars can be a nightmare, leading to mold, electrical issues, and interior damage. Discovering who can accurately diagnose and repair these leaks is crucial for maintaining your vehicle’s value and comfort. CARDIAGTECH.NET offers the tools and equipment necessary for professionals to efficiently tackle these challenges, ensuring a dry and safe ride for every customer. Find top-notch solutions for water intrusion, leak detection, and auto body repair right here.
1. Understanding the Challenge of Car Water Leaks
Identifying and fixing water leaks in vehicles can be notably complex. The difficulty stems from several factors, including the multiple potential entry points and the intricate design of modern vehicles.
1.1. Why Water Leaks are Hard to Find
- Concealed Pathways: Water can enter through small openings and travel along hidden channels before appearing in a completely different location.
- Multiple Entry Points: Cars have numerous seals, seams, and entry points for wiring and components, any of which can fail over time.
- Intermittent Nature: Leaks might only occur under specific conditions, like heavy rain or when the vehicle is parked on an incline, making replication difficult.
1.2. Common Areas Prone to Leaks
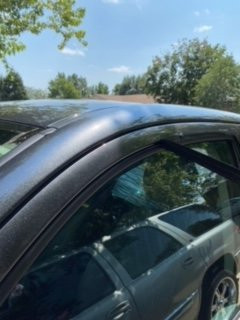
- Windshield and Windows: Seals around the windshield and windows can degrade, crack, or become misaligned.
- Sunroof: Sunroofs have drainage systems that can become clogged, leading to overflow and leaks into the cabin.
- Door Seals: Weather stripping around doors can wear out, especially in areas with extreme temperature variations.
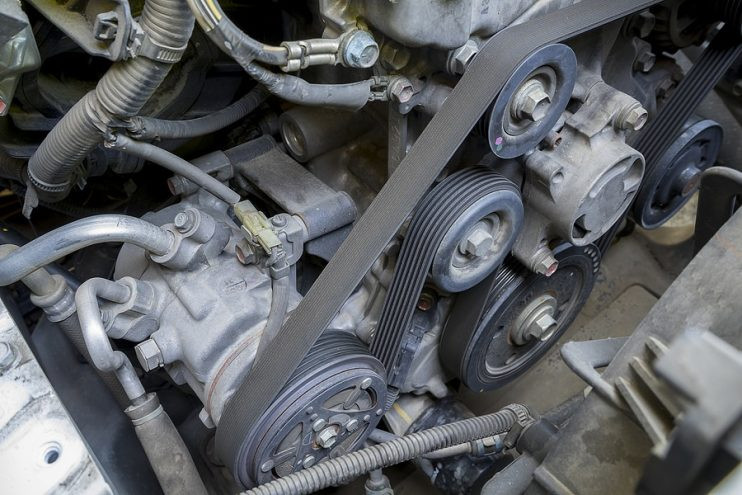
- Firewall: The firewall, which separates the engine compartment from the passenger cabin, has several openings for wiring and hoses that must be properly sealed.
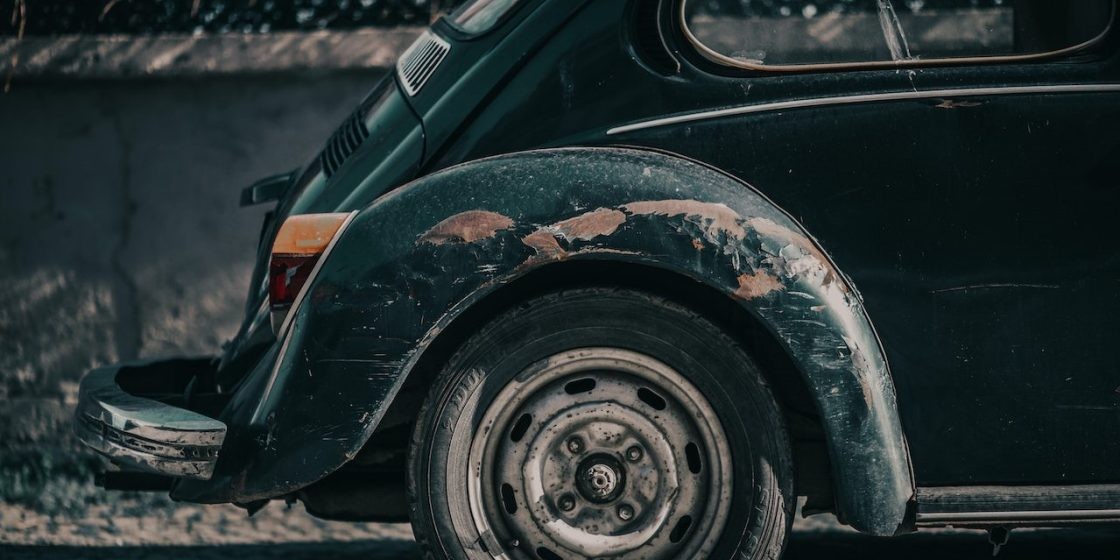
- Tail Lights: Seals around tail lights can deteriorate, allowing water to seep into the trunk or rear of the vehicle.
- Body Seams: The body of a car is made up of multiple panels joined together. Over time, the sealant in these seams can fail.
2. Identifying the Right Professionals for the Job
When facing a water leak, knowing which type of specialist to seek out can save time and money. Not all mechanics are equipped to handle the intricacies of water leak diagnosis and repair.
2.1. Auto Body Shops
Auto body shops typically handle structural repairs and cosmetic work but may also address water leaks, particularly those resulting from collision damage or corrosion.
- Expertise: They specialize in vehicle body repair, including welding, panel replacement, and sealing.
- Tools: They have the tools needed to remove and replace body panels, repair corrosion, and apply new sealant.
- When to Choose: If the leak is suspected to be caused by body damage or rust.
2.2. Auto Glass Specialists
These specialists focus on windshield and window repair and replacement. Leaks around the windshield or windows are common, making these professionals well-suited to address such issues.
- Expertise: Skilled in removing and resealing or replacing windshields and windows.
- Tools: They use specialized tools to safely remove and install glass without damaging the vehicle.
- When to Choose: Obvious leak around the windshield or windows.
2.3. General Mechanics
Some general mechanics are skilled in diagnosing and repairing water leaks, though not all have the specialized knowledge or equipment to do so effectively.
- Expertise: Good for initial diagnosis and simpler leak issues.
- Tools: Standard automotive tools, but may lack specialized leak detection equipment.
- When to Choose: Starting point for diagnosis; for simple, easily identifiable leaks.
2.4. Mobile Leak Repair Services
These services specialize in tracking down and repairing water leaks on-site. They come to you, saving you the hassle of taking your car to a shop. Ed H. of Interior Waters, LLC, found on the Water Doctors Int. website, exemplifies such a service, offering professional, knowledgeable, and efficient leak detection and repair at your location.
- Expertise: Specialists in finding and fixing leaks with mobile service convenience.
- Tools: Equipped with portable leak detection tools and sealants.
- When to Choose: Convenience is a priority, or when other shops have failed to locate the leak.
2.5. Upholstery Shops
If the water leak has caused damage to the interior, particularly the upholstery, consulting an upholstery shop is beneficial.
- Expertise: Skilled in removing and replacing damaged upholstery and carpets, as well as addressing mold issues.
- Tools: Use specialized cleaning and restoration equipment for vehicle interiors.
- When to Choose: Interior damage such as stains, mold, or damaged fabric is present.
3. Essential Tools for Diagnosing Water Leaks
Diagnosing water leaks accurately requires specialized tools that can help pinpoint the source of the leak without causing further damage. Here’s a breakdown of some indispensable tools for professionals in this field:
3.1. Water Leak Detector Spray
This spray helps identify leaks by creating bubbles at the point of escape when applied to pressurized systems.
- How it Works: Spray the solution on potential leak areas; bubbles form where air escapes.
- Benefits: Quick, non-invasive, and effective for pinpointing leaks in hoses, pipes, and seals.
- Example: “Snoop” liquid leak detector
3.2. Boroscopes/Endoscopes
These flexible cameras allow technicians to see inside tight spaces, such as door panels, dashboards, and under carpets, without extensive disassembly.
- How it Works: Insert the flexible probe into hidden areas to visually inspect for water trails or corrosion.
- Benefits: Minimizes disassembly, provides clear visual evidence, and allows access to hard-to-reach areas.
- Example: Teslong Endoscope Camera
3.3. Moisture Meters
Moisture meters measure the moisture content in materials, helping to identify damp areas that may indicate a leak.
- How it Works: Place the probes on the surface; the meter displays the moisture level.
- Benefits: Detects hidden moisture, helps assess the extent of water damage, and ensures thorough drying.
- Example: General Tools MMD4E Digital Moisture Meter
3.4. UV Dye and UV Light
Adding UV dye to water and then using a UV light allows technicians to trace the path of the water and identify the leak source.
- How it Works: Mix UV dye with water, apply to suspected area, and use UV light to trace the leak.
- Benefits: Highly effective for finding elusive leaks, works on various materials, and provides a clear visual trail.
- Example: Tracerline TP-3100 Leak Detection Kit
3.5. Ultrasonic Leak Detectors
These devices detect the ultrasonic sounds produced by air escaping from small leaks.
- How it Works: Scan the area with the detector; it amplifies and converts ultrasonic sounds into audible signals.
- Benefits: Non-invasive, detects leaks from a distance, and works well in noisy environments.
- Example: UE Systems Ultraprobe 2000
3.6. Thermal Imaging Cameras
Thermal cameras detect temperature differences, which can help identify wet areas by showing where evaporation is occurring.
- How it Works: Scan the area with the camera; it displays temperature variations as color gradients.
- Benefits: Detects hidden moisture, shows the extent of water intrusion, and non-invasive.
- Example: FLIR E6 Pro
3.7. Smoke Machines
Smoke machines generate smoke that can be used to pressurize the vehicle’s interior, making leaks visible as smoke escapes.
- How it Works: Introduce smoke into the cabin and observe where it exits.
- Benefits: Effective for finding multiple leaks simultaneously, works well for large or complex leaks, and easy to use.
- Example: Smoke Wizard Automotive Leak Detector
3.8. Pressure Testers
Pressure testers are used to pressurize the vehicle’s cabin or individual components like the cooling system, allowing technicians to identify leaks more easily.
- How it Works: Seal the system and introduce pressure; monitor for pressure drops and listen for hissing sounds.
- Benefits: Identifies leaks in pressurized systems, confirms the effectiveness of repairs, and simulates real-world conditions.
- Example: Stant Cooling System Pressure Tester
3.9. Multimeters
While not directly for leak detection, multimeters are crucial for diagnosing electrical issues caused by water intrusion.
- How it Works: Measure voltage, current, and resistance to identify shorts or open circuits.
- Benefits: Diagnoses electrical problems caused by water damage, verifies proper circuit function, and essential for modern vehicle diagnostics.
- Example: Fluke 117 Electricians Multimeter
3.10. Diagnostic Scan Tools
These tools read error codes and provide data that can help pinpoint electrical problems caused by water damage.
- How it Works: Connect the tool to the vehicle’s OBD-II port and read diagnostic codes and live data.
- Benefits: Identifies electrical issues, provides insights into system performance, and essential for modern vehicle diagnostics.
- Example: Autel MaxiSys MS906BT
Equipping yourself with these tools from CARDIAGTECH.NET enhances your ability to accurately diagnose and repair water leaks, increasing customer satisfaction and business reputation.
4. Step-by-Step Guide to Fixing Common Car Water Leaks
Here’s a detailed guide on how to address common car water leaks, including practical steps and required tools.
4.1. Windshield Leaks
Windshield leaks often occur due to damaged or degraded sealant.
Step 1: Inspection
Examine the windshield for cracks, chips, or gaps in the sealant. Use a flashlight to highlight any imperfections.
Step 2: Preparation
Clean the area around the windshield with soap and water, then dry it thoroughly. Use masking tape to protect the surrounding paint.
Step 3: Apply Sealant
Apply a high-quality automotive-grade sealant to the affected areas. Ensure the sealant fills all gaps and cracks.
Step 4: Curing
Allow the sealant to cure according to the manufacturer’s instructions, typically 24-48 hours.
Tools Needed:
- Automotive-grade sealant (e.g., 3M Window-Weld)
- Caulking gun
- Masking tape
- Razor blade or scraper
- Cleaning supplies
4.2. Sunroof Leaks
Sunroof leaks are frequently caused by clogged drainage tubes.
Step 1: Locate Drainage Tubes
Find the sunroof drainage tubes, usually located in the front and rear corners of the sunroof frame.
Step 2: Clear Blockages
Use compressed air or a flexible wire to clear any blockages in the tubes.
Step 3: Test Drainage
Pour water into the sunroof channel and check if it drains properly through the tubes.
Step 4: Seal Leaks (if necessary)
If clearing the tubes doesn’t solve the problem, apply sealant around the sunroof frame.
Tools Needed:
- Compressed air
- Flexible wire or tube
- Automotive-grade sealant
- Water for testing
4.3. Door Seal Leaks
Worn or damaged door seals can allow water to enter the cabin.
Step 1: Inspection
Inspect the door seals for cracks, tears, or deformation. Pay attention to corners and areas that contact the door frame.
Step 2: Cleaning
Clean the door seals and the door frame with a mild cleaner to remove dirt and debris.
Step 3: Sealant or Replacement
Apply automotive-grade sealant to damaged areas or replace the entire seal if necessary.
Step 4: Test the Seal
Close the door and check for a tight seal. Use a hose to spray water around the door and check for leaks inside.
Tools Needed:
- Automotive-grade sealant (e.g., 3M Weatherstrip Adhesive)
- Cleaning supplies
- Hose for testing
- New door seals (if replacing)
4.4. Tail Light Leaks
Cracks or deteriorated seals around tail lights can let water into the trunk.
Step 1: Inspection
Remove the tail lights and inspect the seals for damage. Check the tail light housing for cracks.
Step 2: Cleaning
Clean the tail light housing and the surrounding body panel.
Step 3: Sealant or Replacement
Apply sealant around the tail light housing or replace the seal. Reinstall the tail lights.
Step 4: Test for Leaks
Use a hose to spray water around the tail lights and check for leaks inside the trunk.
Tools Needed:
- Socket set
- Automotive-grade sealant
- Cleaning supplies
- Hose for testing
- New tail light seals (if replacing)
4.5. Firewall Leaks
Leaks in the firewall, where wires and hoses enter the cabin, require careful attention.
Step 1: Locate Leak
Inspect the firewall for gaps or damaged seals around wire harnesses and hoses.
Step 2: Preparation
Clean the area around the leak.
Step 3: Apply Sealant
Apply automotive-grade sealant to seal any gaps. Ensure the sealant is compatible with the materials.
Step 4: Test the Seal
Spray water on the firewall and check for leaks inside the cabin.
Tools Needed:
- Automotive-grade sealant
- Cleaning supplies
- Hose for testing
4.6. Body Seam Leaks
Leaks from body seams usually require professional attention.
Step 1: Inspection
Identify the leaking seams by looking for rust or water stains.
Step 2: Preparation
Clean the area around the seam.
Step 3: Sealant Application
Apply seam sealer to the affected area. This may require specialized tools and expertise.
Step 4: Test for Leaks
Spray water on the sealed area and check for leaks.
Tools Needed:
- Seam sealer
- Caulking gun
- Cleaning supplies
- Hose for testing
By following these steps and utilizing the right tools, professionals can effectively address common car water leaks, ensuring customer satisfaction and vehicle longevity.
5. Advanced Techniques for Complex Leak Detection
When basic methods fail, advanced techniques are required to pinpoint elusive water leaks. These methods often involve specialized equipment and a deeper understanding of vehicle construction.
5.1. Smoke Testing
Smoke testing involves filling the car’s interior with smoke and observing where it escapes, indicating the location of leaks.
How it Works
- Preparation: Seal all windows and doors.
- Smoke Introduction: Introduce smoke into the cabin using a smoke machine.
- Observation: Watch for smoke escaping from gaps or openings.
Benefits
- Effective for finding multiple leaks simultaneously.
- Works well for large or complex leaks.
- Easy to use and interpret results.
Tools Needed
- Smoke machine (e.g., Smoke Wizard Automotive Leak Detector)
- Sealing tape
5.2. Water Hose Testing with Assistance
This method involves spraying water on different areas of the car while an assistant checks for leaks inside.
How it Works
- Preparation: Have an assistant inside the car with a flashlight.
- Water Spray: Systematically spray water on the roof, windshield, doors, and other potential leak areas.
- Observation: The assistant identifies where water enters the cabin.
Benefits
- Simple and direct.
- Effective for replicating real-world conditions.
Tools Needed
- Water hose
- Flashlight
5.3. UV Dye Testing for Tracing Leaks
UV dye testing involves adding a fluorescent dye to water and using a UV light to trace the path of the water.
How it Works
- Dye Mixture: Mix UV dye with water.
- Application: Apply the mixture to suspected leak areas.
- UV Inspection: Use a UV light to trace the dye as it seeps through the leak.
Benefits
- Highly effective for finding elusive leaks.
- Works on various materials.
- Provides a clear visual trail.
Tools Needed
- UV dye (e.g., Tracerline TP-3100 Leak Detection Kit)
- UV light
- Water
5.4. Electronic Leak Detectors for Precise Detection
Electronic leak detectors use sensors to detect changes in humidity or ultrasonic sounds caused by escaping water.
How it Works
- Sensor Placement: Place the sensor near suspected leak areas.
- Monitoring: Monitor the device for changes in humidity or ultrasonic sounds.
- Identification: Pinpoint the leak based on the sensor readings.
Benefits
- Highly sensitive and accurate.
- Can detect leaks in hard-to-reach areas.
Tools Needed
- Electronic leak detector (e.g., UE Systems Ultraprobe 2000)
5.5. Thermal Imaging for Identifying Wet Spots
Thermal imaging cameras detect temperature differences, which can help identify wet areas by showing where evaporation is occurring.
How it Works
- Preparation: Ensure the area is dry.
- Scanning: Scan the area with the thermal camera.
- Analysis: Identify cooler spots, indicating moisture.
Benefits
- Detects hidden moisture.
- Shows the extent of water intrusion.
- Non-invasive.
Tools Needed
- Thermal imaging camera (e.g., FLIR E6 Pro)
5.6. Pressure Testing for Seal Integrity
Pressure testing involves sealing the car and pressurizing the interior to identify leaks.
How it Works
- Sealing: Seal all openings in the car.
- Pressurization: Introduce air pressure into the cabin.
- Leak Detection: Listen for hissing sounds or use soapy water to identify escaping air.
Benefits
- Identifies leaks in seals and seams.
- Confirms the effectiveness of repairs.
Tools Needed
- Pressure tester
- Sealing materials
- Soapy water
5.7. Using a Borescope for Hidden Areas
A borescope, or endoscope, is a flexible camera that can be inserted into tight spaces to visually inspect for leaks.
How it Works
- Insertion: Insert the borescope into hidden areas, such as door panels or under carpets.
- Visual Inspection: View the live feed to look for water trails or corrosion.
Benefits
- Minimizes disassembly.
- Provides clear visual evidence.
- Allows access to hard-to-reach areas.
Tools Needed
- Borescope (e.g., Teslong Endoscope Camera)
These advanced techniques, coupled with the right tools from CARDIAGTECH.NET, enable professionals to tackle even the most challenging water leaks, ensuring thorough and effective repairs.
6. Preventing Future Water Leaks
Preventing water leaks involves regular maintenance and proactive measures to protect your vehicle from the elements. Here are some key strategies:
6.1. Regular Inspection and Maintenance
- Check Seals and Weather Stripping: Regularly inspect door and window seals for cracks, tears, or wear. Replace damaged seals promptly.
- Clean Drainage Channels: Keep sunroof and cowl drainage channels clear of debris to ensure proper water flow.
- Inspect Windshield and Windows: Look for chips or cracks in the windshield and windows. Have them repaired to prevent leaks.
6.2. Proper Sealing Techniques
- Use Quality Sealants: When applying sealants, use automotive-grade products designed to withstand temperature changes and exposure to the elements.
- Apply Sealant Correctly: Follow the manufacturer’s instructions for sealant application. Ensure the surface is clean and dry before applying sealant.
6.3. Protective Measures
- Garage Parking: Park your car in a garage or under a carport to protect it from rain, snow, and sun.
- Car Covers: Use a car cover to shield your vehicle from the elements when parking outdoors.
6.4. Addressing Rust and Corrosion
- Rust Prevention: Apply rust inhibitors to vulnerable areas to prevent corrosion.
- Regular Washing and Waxing: Regularly wash and wax your car to protect the paint and prevent rust.
6.5. Timely Repairs
- Address Small Leaks Promptly: Fix small leaks as soon as they are detected to prevent them from becoming larger and causing more damage.
- Professional Inspections: Schedule regular inspections with a trusted mechanic to identify potential issues before they become major problems.
6.6. Maintaining Interior Cleanliness
- Vacuum Regularly: Vacuum the interior of your car to remove dirt and debris that can trap moisture.
- Dry Wet Areas: If water gets inside the car, dry the area thoroughly to prevent mold and mildew growth.
6.7. Sealant Maintenance
- Reapply Sealant: Regularly reapply sealant to areas prone to leaks, such as around windows and doors.
- Check Seams: Inspect body seams and apply seam sealer as needed to prevent water intrusion.
By following these preventive measures, you can significantly reduce the risk of water leaks and keep your vehicle in top condition.
7. Cost Considerations for Water Leak Repairs
The cost of repairing water leaks in cars can vary widely depending on the location and severity of the leak, as well as the type of vehicle. Understanding these costs can help you budget for repairs and make informed decisions.
7.1. Factors Affecting Repair Costs
- Location of the Leak: Leaks in easily accessible areas, such as door seals, are generally less expensive to repair than those in hard-to-reach areas like the firewall.
- Severity of the Leak: Small leaks that can be fixed with sealant are less costly than those requiring extensive bodywork or component replacement.
- Type of Vehicle: Luxury or specialized vehicles may have higher repair costs due to the complexity of their design and the availability of parts.
- Extent of Damage: Water leaks can cause additional damage, such as mold growth or electrical issues, which can increase repair costs.
7.2. Average Repair Costs for Common Leaks
The following table provides estimated repair costs for common water leaks in cars:
| Leak Type | Average Cost | Description |
|---|---|---|
| Windshield Leak | $150 – $400 | Repairing or replacing the windshield seal; may include windshield replacement if damaged. |
| Sunroof Leak | $100 – $300 | Clearing drainage tubes; may include resealing the sunroof or replacing components. |
| Door Seal Leak | $80 – $200 | Replacing door seals; may include adjusting the door for a better fit. |
| Tail Light Leak | $50 – $150 | Replacing tail light seals; may include repairing cracks in the tail light housing. |
| Firewall Leak | $200 – $600 | Sealing gaps around wire harnesses and hoses; may require removing components for access. |
| Body Seam Leak | $300 – $1000+ | Applying seam sealer; may require extensive bodywork to address rust and corrosion. |
| Electrical Damage | $100 – $1000+ | Repairing or replacing damaged wiring, sensors, or modules; cost varies widely based on the extent of the damage. |
| Mold and Mildew Removal | $150 – $500 | Cleaning and disinfecting the interior to remove mold and mildew; may include replacing carpets and upholstery. |
| Complete Leak Diagnosis | $75 – $150 | Cost of a professional inspection to diagnose the source of the leak. |
| Total Estimated Cost | $1105 – $4300+ | Depending on the number of leaks and level of damage, you can get a better estimate of the repair cost for water leaks in cars overall. |
7.3. DIY vs. Professional Repairs
- DIY Repairs: Fixing simple leaks, such as replacing door seals or clearing sunroof drains, can be done as a DIY project. This can save money on labor costs but requires the right tools and knowledge.
- Professional Repairs: Complex leaks, such as those in the firewall or body seams, are best left to professionals. They have the expertise and equipment to accurately diagnose and repair these issues.
7.4. Insurance Coverage
- Comprehensive Coverage: If the water leak is caused by an event covered under your comprehensive insurance policy, such as a flood or storm damage, your insurance may cover the repair costs.
- Documentation: Document the damage and gather estimates from reputable repair shops before filing a claim.
7.5. Long-Term Cost Savings
- Preventative Maintenance: Investing in regular maintenance and addressing small leaks promptly can prevent more costly repairs down the road.
- Quality Repairs: Choosing quality parts and professional repairs ensures the job is done correctly, reducing the risk of recurring issues.
Understanding the cost considerations for water leak repairs can help you make informed decisions and protect your vehicle from further damage.
8. Case Studies: Successful Water Leak Repairs
Examining real-world examples of successful water leak repairs can provide valuable insights and demonstrate effective techniques. Here are a few case studies:
8.1. Case Study 1: Sunroof Leak in a Luxury Sedan
- Problem: A luxury sedan was experiencing water leaks in the headliner, causing staining and a musty odor.
- Diagnosis: The technician used a borescope to inspect the sunroof drainage tubes and found they were clogged with debris.
- Solution: The drainage tubes were cleared using compressed air and a flexible wire. The headliner was cleaned and disinfected to remove stains and odors.
- Outcome: The leak was resolved, and the interior was restored to its original condition.
- Tools Used: Borescope, compressed air, flexible wire, cleaning supplies
8.2. Case Study 2: Windshield Leak in a Classic Car
- Problem: A classic car was leaking water through the windshield seal, causing rust on the dashboard.
- Diagnosis: The technician inspected the windshield seal and found it was cracked and deteriorated.
- Solution: The windshield was removed, and a new seal was installed. The rust on the dashboard was treated and repainted.
- Outcome: The leak was stopped, and the rust damage was repaired.
- Tools Used: Windshield removal tools, new windshield seal, rust treatment, paint
8.3. Case Study 3: Tail Light Leak in an SUV
- Problem: An SUV was leaking water into the trunk, causing mold and mildew growth.
- Diagnosis: The technician removed the tail lights and found the seals were damaged.
- Solution: The tail light seals were replaced, and the trunk was cleaned and disinfected.
- Outcome: The leak was resolved, and the mold and mildew were removed.
- Tools Used: Socket set, new tail light seals, cleaning supplies
8.4. Case Study 4: Firewall Leak in a Compact Car
- Problem: A compact car was leaking water through the firewall, causing electrical issues.
- Diagnosis: The technician inspected the firewall and found gaps around wire harnesses.
- Solution: The gaps were sealed with automotive-grade sealant. The damaged wiring was repaired.
- Outcome: The leak was stopped, and the electrical issues were resolved.
- Tools Used: Automotive-grade sealant, wiring repair tools
8.5. Case Study 5: Body Seam Leak in a Truck
- Problem: A truck was leaking water through body seams, causing rust and corrosion.
- Diagnosis: The technician inspected the body seams and found areas where the sealant had failed.
- Solution: The old sealant was removed, and new seam sealer was applied. The rust and corrosion were treated.
- Outcome: The leak was stopped, and the body was protected from further damage.
- Tools Used: Seam sealer, rust treatment tools
These case studies illustrate the importance of accurate diagnosis, effective solutions, and the right tools in addressing car water leaks.
9. Why Choose CARDIAGTECH.NET for Your Automotive Repair Needs
When it comes to automotive repair, having access to high-quality tools and equipment is essential for accurate diagnoses and effective solutions. CARDIAGTECH.NET offers a wide range of products specifically designed to meet the needs of automotive professionals.
9.1. Comprehensive Product Range
CARDIAGTECH.NET provides a comprehensive selection of tools and equipment, including:
- Leak Detection Tools: Water leak detector sprays, boroscopes, moisture meters, UV dye kits, ultrasonic leak detectors, thermal imaging cameras, and smoke machines.
- Diagnostic Equipment: Multimeters and diagnostic scan tools.
- Repair Tools: Sealants, caulking guns, socket sets, wiring repair tools, and rust treatment tools.
9.2. High-Quality Products
CARDIAGTECH.NET is committed to offering only the highest quality products from trusted brands. This ensures that you have reliable tools that perform effectively and stand the test of time.
9.3. Expert Support
CARDIAGTECH.NET provides expert support to help you choose the right tools and equipment for your specific needs. Their knowledgeable staff can answer your questions and provide guidance on product selection and usage.
9.4. Competitive Pricing
CARDIAGTECH.NET offers competitive pricing on all of their products, making it affordable for automotive professionals to access the tools they need to succeed.
9.5. Convenient Online Shopping
CARDIAGTECH.NET provides a convenient online shopping experience, allowing you to browse their product catalog, place orders, and track shipments from the comfort of your own home or office.
9.6. Fast Shipping
CARDIAGTECH.NET offers fast shipping to ensure that you receive your tools and equipment quickly and efficiently.
By choosing CARDIAGTECH.NET for your automotive repair needs, you can be confident that you are getting the best products, expert support, and competitive pricing.
9.7. Solving Customer Challenges
Understanding the challenges faced by auto repair professionals is at the core of CARDIAGTECH.NET’s mission. Here’s how CARDIAGTECH.NET addresses your needs:
- Enhancing Work Efficiency: The advanced tools available streamline the diagnostic process, reducing repair time and increasing the number of vehicles serviced.
- Increasing Accuracy and Safety: High-precision equipment ensures accurate diagnoses, minimizing the risk of errors and enhancing safety during repairs.
- Cost Savings: By providing durable and reliable tools, CARDIAGTECH.NET helps reduce the costs associated with frequent replacements and equipment failures.
- Boosting Revenue and Reputation: Equipping your garage with state-of-the-art tools elevates the quality of service, leading to increased customer satisfaction and higher revenues.
Don’t let water leaks dampen your success. Contact CARDIAGTECH.NET today at +1 (641) 206-8880 or visit our website CARDIAGTECH.NET for a consultation on the best tools to resolve water leak issues. Our address is 276 Reock St, City of Orange, NJ 07050, United States. Let us help you enhance your efficiency, accuracy, and customer satisfaction!
10. FAQ: Addressing Common Questions About Car Water Leaks
Here are some frequently asked questions about car water leaks, along with detailed answers to help you understand the issues and solutions.
- What are the common signs of a water leak in my car?
Common signs include water stains on the headliner or seats, a musty odor inside the car, damp carpets, and fogging of the windows. - How can I find the source of a water leak in my car?
Start by checking common areas such as the windshield, sunroof, door seals, and tail lights. Use tools like a flashlight, borescope, or UV dye to help pinpoint the source. - Is it safe to drive a car with a water leak?
Driving with a water leak can lead to electrical issues, mold growth, and corrosion. It’s best to address the leak as soon as possible to prevent further damage. - Can I fix a water leak in my car myself, or should I take it to a professional?
Simple leaks, like those in door seals or sunroof drains, can be fixed DIY. Complex leaks, such as those in the firewall or body seams, are best left to professionals. - How much does it cost to repair a water leak in a car?
Repair costs vary depending on the location and severity of the leak. Common repairs range from $50 for tail light seals to $1000+ for body seam leaks. - Will my insurance cover water damage from a car leak?
If the water leak is caused by an event covered under your comprehensive insurance policy, such as a flood or storm damage, your insurance may cover the repair costs. - How can I prevent water leaks in my car?
Regularly inspect and maintain seals, clean drainage channels, park in a garage, and address small leaks promptly to prevent water leaks. - What tools do I need to diagnose and repair water leaks in cars?
Essential tools include water leak detector spray, boroscopes, moisture meters, UV dye kits, ultrasonic leak detectors, thermal imaging cameras, and smoke machines. - What are the risks of ignoring a water leak in my car?
Ignoring a water leak can lead to electrical issues, mold growth, corrosion, and damage to the interior of your car. - How do I know if a mechanic is qualified to fix water leaks in cars?
Look for mechanics with experience in diagnosing and repairing water leaks, and who have access to specialized tools and equipment.