How To Fix Scraped Paint On Car: Your Ultimate Guide
Is your car’s once pristine paint job marred by unsightly scrapes? Don’t despair. This comprehensive guide from CARDIAGTECH.NET will show you How To Fix Scraped Paint On Car, restoring your vehicle’s appearance and protecting its value. We’ll cover everything from identifying the type of scrape to the step-by-step repair process, ensuring a professional-looking finish. Achieve perfect auto body repair and keep your car looking its best with these expert tips.
1. Understanding Car Paint Scrapes
Before diving into the repair process, it’s essential to understand the different types of car paint scrapes. Identifying the type of damage will help you choose the correct repair method and achieve the best results. Scrapes can range from minor surface imperfections to deep gouges that require more extensive attention.
1.1. Clear Coat Scrapes
Clear coat scrapes are the most superficial type of damage, affecting only the outermost layer of your car’s paint. They often appear as light scratches or swirl marks and are typically caused by minor abrasions, such as improper washing techniques or contact with soft objects.
1.2. Base Coat Scrapes
Base coat scrapes penetrate through the clear coat and into the colored layer of paint beneath. These scrapes are more noticeable and may require more aggressive repair methods to fully conceal. Common causes include brushes with other vehicles, shopping carts, or road debris.
1.3. Primer Coat Scrapes
Primer coat scrapes are the most severe type of damage, extending through the clear coat, base coat, and into the primer layer. These scrapes expose the bare metal underneath and require immediate attention to prevent rust and further deterioration. They are typically caused by significant impacts or collisions.
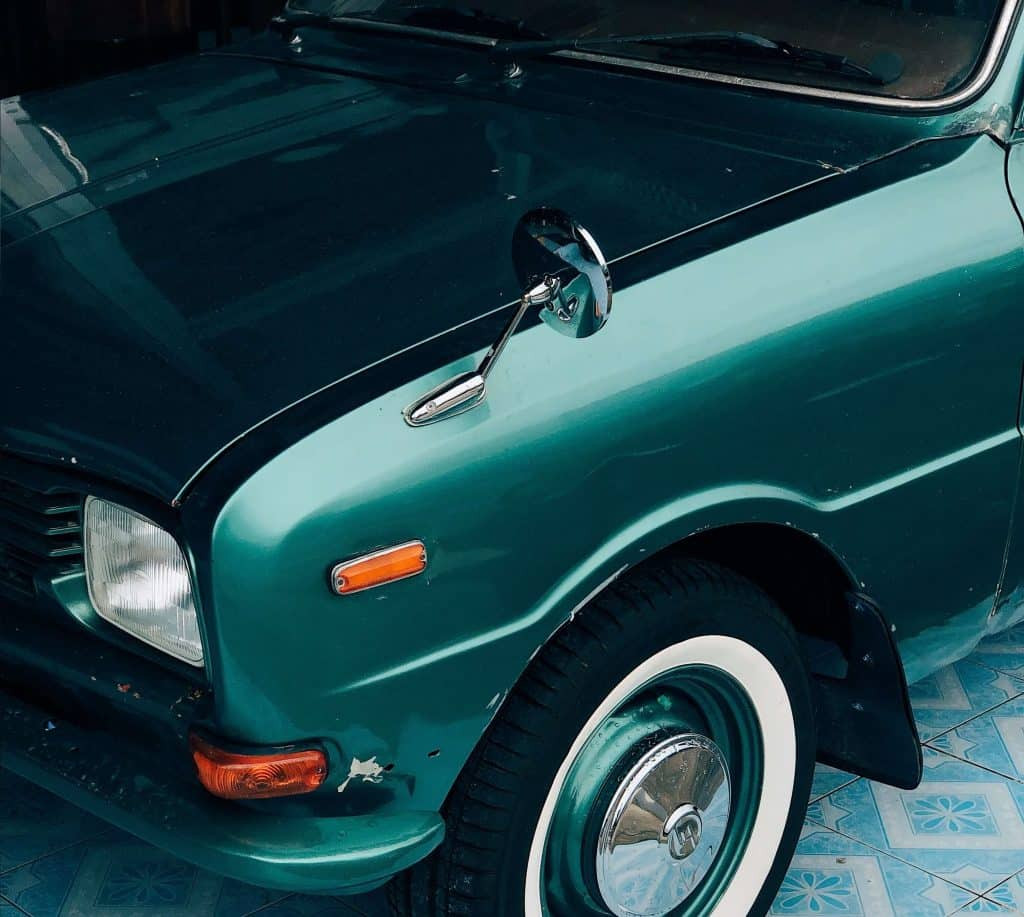
Car Scratch
2. Identifying the Type of Car Paint Scrape
Accurately identifying the type of scrape is critical for selecting the appropriate repair method. Here are two simple methods you can use to determine the severity of the damage:
2.1. The Fingernail Test
Gently run your fingernail across the scrape. If your fingernail catches on the edge of the scrape, it indicates that the damage is deeper than the clear coat. A scrape that catches your nail typically means you’re dealing with a base coat or primer coat scrape.
2.2. The Polish Test
Apply a small amount of car polish to a microfiber cloth and gently rub it onto the scraped area. If the scrape disappears after polishing, it’s likely a clear coat scrape. If the scrape remains visible, it indicates that the damage extends into the base coat or primer layer.
3. Essential Tools and Materials
Before you begin the repair process, gather all the necessary tools and materials. Having everything on hand will streamline the process and ensure a professional-looking finish. CARDIAGTECH.NET offers a comprehensive range of high-quality auto repair tools and equipment to help you achieve the best results.
3.1. Cleaning Supplies
- Car wash soap: Use a pH-balanced car wash soap to safely remove dirt and contaminants.
- Microfiber cloths: Soft, lint-free microfiber cloths are essential for cleaning and polishing without scratching the paint.
- Detailing clay: Detailing clay removes embedded contaminants that washing alone cannot eliminate.
- Isopropyl alcohol: Use isopropyl alcohol to clean the area before applying touch-up paint or other repair products.
3.2. Sanding Supplies
- Sandpaper: Various grits of sandpaper (e.g., 1000-grit, 2000-grit, 3000-grit) are needed for leveling the scrape and smoothing the repair area.
- Sanding block: A sanding block provides a flat, even surface for sanding, ensuring consistent results.
- Wet/dry sandpaper: Wet/dry sandpaper can be used with water to reduce friction and prevent clogging.
3.3. Paint and Application Supplies
- Touch-up paint: Obtain touch-up paint that matches your car’s paint code.
- Primer: Use a primer to promote adhesion and provide a uniform base for the touch-up paint.
- Clear coat: Apply a clear coat to protect the touch-up paint and restore the shine.
- Applicators: Small brushes, toothpicks, or paint pens can be used to precisely apply touch-up paint.
3.4. Polishing and Buffing Supplies
- Rubbing compound: Rubbing compound is an abrasive paste used to remove imperfections and blend the repair area.
- Polishing compound: Polishing compound is less abrasive than rubbing compound and is used to refine the finish.
- Car polish: Car polish enhances the shine and protects the paint.
- Buffing pads: Foam buffing pads are used with a polishing machine to achieve a smooth, glossy finish.
- Polishing machine: A dual-action or rotary polishing machine can significantly speed up the polishing process and produce professional-quality results.
3.5. Safety Gear
- Gloves: Wear gloves to protect your hands from chemicals and abrasives.
- Safety glasses: Protect your eyes from splashes and debris.
- Respirator: Use a respirator when sanding or spraying paint to avoid inhaling harmful particles.
4. Step-by-Step Guide to Fixing Clear Coat Scrapes
Clear coat scrapes are the easiest to repair and can often be fixed with a simple polishing process. Here’s a step-by-step guide to restoring your car’s clear coat:
4.1. Cleaning the Area
Thoroughly wash the area around the scrape with car wash soap and water. Rinse well and dry with a clean microfiber cloth. Use detailing clay to remove any embedded contaminants.
4.2. Applying Rubbing Compound
Apply a small amount of rubbing compound to a clean buffing pad. Using a polishing machine on a low speed setting, gently buff the scraped area in a circular motion. Apply light pressure and work in small sections.
4.3. Applying Polishing Compound
After using rubbing compound, switch to a polishing pad and apply a small amount of polishing compound. Buff the area again, using the same technique as with the rubbing compound. This will further refine the finish and remove any swirl marks left by the rubbing compound.
4.4. Applying Car Polish
Apply a small amount of car polish to a clean microfiber cloth and buff the area by hand. This will enhance the shine and protect the paint.
4.5. Applying Wax or Sealant
To protect your newly restored clear coat, apply a coat of wax or sealant. This will provide a barrier against the elements and help maintain the shine.
5. Step-by-Step Guide to Fixing Base Coat Scrapes
Base coat scrapes require a more involved repair process, including the application of touch-up paint. Here’s how to fix them:
5.1. Cleaning the Area
Thoroughly wash the area around the scrape with car wash soap and water. Rinse well and dry with a clean microfiber cloth. Use detailing clay to remove any embedded contaminants.
5.2. Sanding the Scrape
Use 2000-grit sandpaper to gently sand the edges of the scrape, feathering the transition between the damaged area and the surrounding paint. This will help the touch-up paint blend seamlessly.
5.3. Applying Primer (If Necessary)
If the scrape has exposed the bare metal, apply a thin coat of automotive primer to the area. Allow the primer to dry completely according to the manufacturer’s instructions.
5.4. Applying Touch-Up Paint
Using a small brush or applicator, carefully apply thin coats of touch-up paint to the scrape. Allow each coat to dry completely before applying the next. Apply enough coats to build the paint up to the level of the surrounding surface.
5.5. Wet Sanding the Touch-Up Paint
Once the touch-up paint is completely dry, use 3000-grit wet/dry sandpaper to gently sand the area, leveling the touch-up paint with the surrounding surface. Use a sanding block to ensure even pressure.
5.6. Polishing the Repaired Area
Apply rubbing compound to a buffing pad and gently buff the area with a polishing machine. Follow with polishing compound and car polish to restore the shine and blend the repair.
5.7. Applying Wax or Sealant
Protect your repair with a coat of wax or sealant.
6. Step-by-Step Guide to Fixing Primer Coat Scrapes
Primer coat scrapes are the most challenging to repair and may require professional assistance. However, you can attempt to repair them yourself using the following steps:
6.1. Cleaning the Area
Thoroughly wash the area around the scrape with car wash soap and water. Rinse well and dry with a clean microfiber cloth. Use detailing clay to remove any embedded contaminants.
6.2. Sanding the Scrape
Use 1000-grit sandpaper to remove any rust or corrosion from the exposed metal. Sand the edges of the scrape to create a smooth transition.
6.3. Applying Rust Converter (If Necessary)
If there is rust present, apply a rust converter to neutralize the rust and prevent it from spreading.
6.4. Applying Body Filler (If Necessary)
If the scrape is deep, you may need to apply body filler to level the surface. Follow the manufacturer’s instructions for mixing and applying the filler. Sand the filler smooth with 220-grit sandpaper, followed by 320-grit sandpaper.
6.5. Applying Primer
Apply several thin coats of automotive primer to the area, allowing each coat to dry completely. Sand the primer smooth with 400-grit sandpaper.
6.6. Applying Touch-Up Paint
Carefully apply thin coats of touch-up paint to the area, allowing each coat to dry completely. Apply enough coats to match the surrounding paint.
6.7. Wet Sanding the Touch-Up Paint
Once the touch-up paint is completely dry, use 3000-grit wet/dry sandpaper to gently sand the area, leveling the touch-up paint with the surrounding surface.
6.8. Polishing the Repaired Area
Apply rubbing compound to a buffing pad and gently buff the area with a polishing machine. Follow with polishing compound and car polish to restore the shine and blend the repair.
6.9. Applying Wax or Sealant
Protect your repair with a coat of wax or sealant.
7. Advanced Techniques for a Professional Finish
To achieve a truly professional finish, consider these advanced techniques:
7.1. Color Sanding
Color sanding involves using very fine sandpaper (e.g., 3000-grit or higher) to level the clear coat after applying touch-up paint or performing other repairs. This technique creates a perfectly smooth surface that is ideal for polishing.
7.2. Blending
Blending involves gradually fading the new paint into the surrounding area to create a seamless transition. This technique is often used when repairing larger areas or when the touch-up paint doesn’t perfectly match the original color.
7.3. Using a Paint Leveling Agent
Paint leveling agents are additives that help the touch-up paint flow more smoothly and evenly, reducing the appearance of brush strokes and other imperfections.
8. Preventing Car Paint Scrapes
Prevention is always better than cure. Here are some tips to help prevent car paint scrapes:
8.1. Park Smart
Park in well-lit areas away from other vehicles and potential hazards, such as shopping carts and trees.
8.2. Wash Your Car Regularly
Regular washing removes dirt and debris that can scratch the paint. Use a pH-balanced car wash soap and a soft microfiber cloth.
8.3. Apply Wax or Sealant
Wax or sealant provides a protective layer that helps prevent scratches and swirl marks. Apply wax or sealant every few months for optimal protection.
8.4. Use a Car Cover
If you park your car outside, use a car cover to protect it from the elements and prevent scratches.
8.5. Avoid Automatic Car Washes
Automatic car washes can be harsh on your car’s paint and can cause scratches and swirl marks. Opt for a touchless car wash or wash your car by hand.
9. The Benefits of Professional Auto Detailing
While you can repair minor car paint scrapes yourself, professional auto detailing offers several advantages:
9.1. Expertise and Experience
Professional detailers have the expertise and experience to properly assess the damage and choose the most effective repair method.
9.2. Specialized Tools and Equipment
Professional detailers have access to specialized tools and equipment that are not available to the average consumer.
9.3. Time Savings
Repairing car paint scrapes can be time-consuming. Hiring a professional detailer saves you time and effort.
9.4. Superior Results
Professional auto detailing can produce superior results that are difficult to achieve on your own.
10. CARDIAGTECH.NET: Your Partner in Auto Repair
At CARDIAGTECH.NET, we understand the importance of maintaining your vehicle’s appearance and value. That’s why we offer a comprehensive range of high-quality auto repair tools, equipment, and supplies to help you achieve professional-quality results. Whether you’re a seasoned auto repair technician or a DIY enthusiast, CARDIAGTECH.NET has everything you need to keep your car looking its best.
10.1. Our Product Range
- Polishing Machines: Dual-action and rotary polishing machines for achieving a flawless finish.
- Buffing Pads: A variety of foam and microfiber buffing pads for different polishing needs.
- Compounds and Polishes: Rubbing compounds, polishing compounds, and car polishes from leading brands.
- Touch-Up Paints: Custom-matched touch-up paints for all makes and models.
- Sanding Supplies: Sandpaper, sanding blocks, and wet/dry sandpaper in various grits.
- Cleaning Supplies: Car wash soaps, microfiber cloths, detailing clay, and more.
- Safety Gear: Gloves, safety glasses, and respirators to protect yourself during the repair process.
10.2. Expert Advice and Support
Our team of experienced auto repair professionals is available to provide expert advice and support. We can help you choose the right tools and materials for your specific needs and guide you through the repair process.
10.3. Convenient Online Ordering
Order your auto repair supplies online at CARDIAGTECH.NET and enjoy fast, reliable shipping. We offer a wide selection of products at competitive prices.
11. Real-World Examples and Case Studies
To illustrate the effectiveness of these techniques, let’s look at some real-world examples and case studies:
11.1. Case Study 1: Restoring a Classic Car
A classic car owner had a series of clear coat scrapes on his vintage vehicle. Using the steps outlined above, he was able to restore the clear coat to its original shine, enhancing the car’s value and appearance.
11.2. Case Study 2: Repairing a Daily Driver
A daily driver had a base coat scrape on the door. The owner used touch-up paint and blending techniques to seamlessly repair the damage, preventing rust and maintaining the car’s resale value.
11.3. Case Study 3: Addressing Primer Coat Damage
A truck owner had a deep primer coat scrape on the fender. After consulting with CARDIAGTECH.NET’s experts, he used body filler, primer, and touch-up paint to repair the damage, restoring the fender to its original condition.
12. Common Mistakes to Avoid
To ensure a successful repair, avoid these common mistakes:
12.1. Using the Wrong Products
Using the wrong products can damage your car’s paint. Always use products that are specifically designed for automotive use.
12.2. Applying Too Much Pressure
Applying too much pressure when sanding or polishing can damage the paint. Use light pressure and let the product do the work.
12.3. Skipping Steps
Skipping steps in the repair process can compromise the results. Follow each step carefully for a professional finish.
12.4. Working in Direct Sunlight
Working in direct sunlight can cause the products to dry too quickly, making them difficult to work with. Work in a shaded area or indoors.
12.5. Not Wearing Safety Gear
Not wearing safety gear can expose you to harmful chemicals and abrasives. Always wear gloves, safety glasses, and a respirator when working with auto repair products.
13. Maintenance Tips for a Lasting Finish
Once you’ve repaired your car’s paint scrapes, follow these maintenance tips to keep it looking its best:
13.1. Regular Washing
Wash your car regularly to remove dirt and debris that can scratch the paint.
13.2. Waxing and Sealing
Apply wax or sealant every few months to protect the paint and enhance the shine.
13.3. Promptly Address New Scrapes
Address new scrapes promptly to prevent them from worsening and causing further damage.
13.4. Avoid Abrasive Cleaners
Avoid using abrasive cleaners or harsh chemicals that can damage the paint.
13.5. Store Your Car Properly
Store your car in a garage or carport to protect it from the elements.
14. When to Seek Professional Help
While you can repair minor car paint scrapes yourself, there are times when it’s best to seek professional help. Consider hiring a professional detailer if:
14.1. The Damage is Extensive
If the damage is extensive or covers a large area, professional repair may be necessary.
14.2. You’re Not Comfortable with the Repair Process
If you’re not comfortable with the repair process or lack the necessary skills, it’s best to leave it to the professionals.
14.3. You Want a Flawless Finish
If you want a flawless finish that is indistinguishable from the original paint, professional auto detailing is the way to go.
14.4. You Lack the Necessary Tools and Equipment
If you lack the necessary tools and equipment, hiring a professional detailer can be more cost-effective than purchasing them yourself.
15. Cost Considerations for DIY vs. Professional Repair
When deciding whether to repair car paint scrapes yourself or hire a professional, consider the cost implications:
15.1. DIY Repair Costs
DIY repair costs include the cost of tools, materials, and your time. While DIY repair can be more affordable in the short term, it may require a significant investment in tools and equipment.
15.2. Professional Repair Costs
Professional repair costs include the cost of labor and materials. While professional repair may be more expensive upfront, it can save you time and ensure a high-quality finish.
15.3. Long-Term Value
Consider the long-term value of your vehicle. A professional repair can help maintain your car’s resale value and prevent further damage.
16. Conclusion: Restoring Your Car’s Beauty
Fixing scraped paint on car is a worthwhile investment that can enhance your vehicle’s appearance, protect its value, and boost your pride of ownership. Whether you choose to tackle the repair yourself or seek professional assistance, following the steps outlined in this guide will help you achieve a professional-looking finish. Remember, CARDIAGTECH.NET is your trusted partner for all your auto repair needs, offering high-quality tools, equipment, and expert advice. Don’t let car paint scrapes diminish your car’s beauty – restore it today and enjoy the road ahead with confidence.
17. Frequently Asked Questions (FAQs)
Here are some frequently asked questions about fixing scraped paint on car:
17.1. How do I match the touch-up paint to my car’s color?
Locate your car’s paint code, usually found on a sticker in the door jamb or glove compartment. Use this code to purchase touch-up paint from an auto parts store or online retailer.
17.2. Can I use a paint pen to fix car paint scrapes?
Paint pens can be useful for small, superficial scrapes. However, they may not provide the same level of coverage and blending as traditional touch-up paint.
17.3. How long does it take for touch-up paint to dry?
Touch-up paint typically dries to the touch in 30 minutes to an hour. However, it may take several hours or even overnight for the paint to fully cure.
17.4. Can I wash my car after applying touch-up paint?
Wait at least 24 hours before washing your car after applying touch-up paint. This will allow the paint to fully cure and prevent it from being washed away.
17.5. How do I prevent rust from forming on car paint scrapes?
Clean the area thoroughly and apply a rust converter to neutralize any existing rust. Apply primer and touch-up paint to seal the metal and prevent further rust formation.
17.6. Can I use a household cleaner to wash my car?
No, household cleaners can damage your car’s paint. Use a pH-balanced car wash soap that is specifically designed for automotive use.
17.7. How often should I wax my car?
Wax your car every few months to protect the paint and enhance the shine.
17.8. What is detailing clay?
Detailing clay is a pliable material that removes embedded contaminants from your car’s paint, such as tree sap, road tar, and brake dust.
17.9. Can I use a pressure washer to wash my car?
Use a pressure washer with caution, as it can damage the paint if used improperly. Use a wide nozzle and keep the pressure low.
17.10. How do I store touch-up paint?
Store touch-up paint in a cool, dry place away from direct sunlight. Make sure the lid is tightly sealed to prevent the paint from drying out.
Don’t let unsightly scrapes diminish the beauty of your vehicle. With the right tools and techniques, you can effectively address these imperfections and restore your car’s pristine appearance. For expert guidance and a comprehensive selection of auto repair tools, turn to CARDIAGTECH.NET.
Are you ready to take the first step towards restoring your car’s beauty? Contact CARDIAGTECH.NET today at 276 Reock St, City of Orange, NJ 07050, United States or via Whatsapp at +1 (641) 206-8880. Let our team of experts help you find the perfect tools and equipment to tackle any car paint scrape. Visit our website at CARDIAGTECH.NET and discover how easy it is to achieve a professional-quality finish from the comfort of your own garage. Don’t wait – your car deserves the best care possible!