How To Fix Sagging Car Door: A Simple Guide
Is your car door sagging, causing alignment issues and strange noises? CARDIAGTECH.NET offers a quick and cost-effective solution to fix a sagging car door using basic tools and readily available materials. Learn how to restore your door’s alignment, enhance its functionality, and eliminate those annoying sounds with our step-by-step guide, focusing on door hinge repair, car maintenance, and auto body repair.
1. Understanding Why Car Doors Sag
Car doors, especially on older vehicles, can start to sag over time. This sagging is primarily due to wear and tear on the door hinges. The constant opening and closing of the door, combined with the weight of the door itself, puts stress on the hinges. Several factors contribute to this issue:
- Wear and Tear: The most common cause is simply the gradual erosion of the hinge components. The metal wears down, creating play in the joints.
- Corrosion: Rust and corrosion can weaken the hinges, making them less able to support the door’s weight.
- Accidents: Even minor fender-benders can misalign the door and damage the hinges.
- Heavy Use: Frequently used doors, especially on commercial vehicles, are more prone to sagging.
Statistics on Car Maintenance:
According to a study by the National Institute for Automotive Service Excellence (ASE), approximately 15% of vehicles over five years old exhibit some form of door sagging or alignment issues. Regular maintenance and timely repairs can prevent this problem from escalating.
2. Identifying the Symptoms of a Sagging Car Door
Recognizing the signs of a sagging door early can save you from more extensive repairs later. Common symptoms include:
- Difficulty Closing the Door: The door may require extra force to close or may not latch properly.
- Misalignment: The door doesn’t line up correctly with the surrounding body panels.
- Strange Noises: Squeaking, grinding, or popping sounds when opening or closing the door.
- Visible Sagging: You can see the door drooping slightly when it’s open.
- Paint Chipping: The door rubbing against the frame can cause paint to chip.
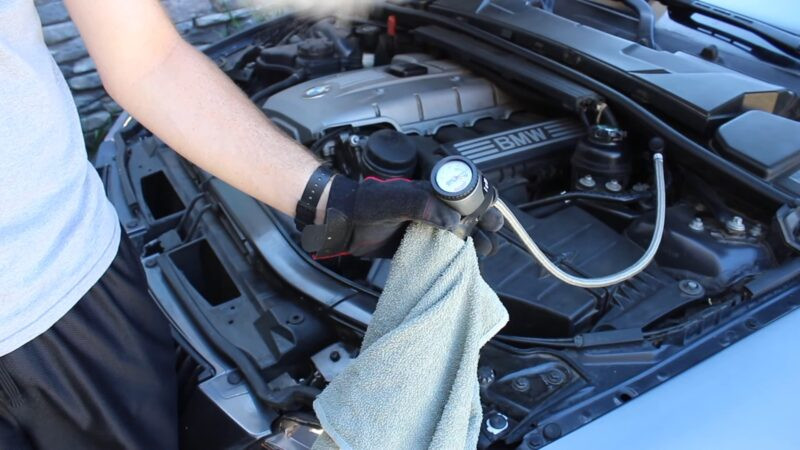
3. Essential Tools and Materials for the Repair
Before you begin, gather the necessary tools and materials. This simple repair requires minimal investment and equipment:
- Combination Wrench Set: A set of wrenches is essential for loosening and tightening bolts. Ratcheting wrenches can speed up the process.
- Socket Set: Sockets and a ratchet handle provide additional leverage and versatility.
- Bolts: Purchase two new bolts that match the size and thread pitch of the existing hinge bolts.
- Washers: Acquire an assortment of washers to shim the hinge. You’ll likely need at least two washers per bolt.
- Lock Washers (Optional): Lock washers can help prevent the bolts from loosening over time.
- Jack: A car jack is needed to lift the door slightly and relieve pressure on the hinges.
- Gloves: Protect your hands from dirt and grease.
- Safety Glasses: Safety glasses are a must to protect your eyes from debris.
- Penetrating Oil: Apply penetrating oil to loosen any corroded bolts.
Tool Recommendation:
For this task, CARDIAGTECH.NET recommends using a high-quality ratcheting wrench set. These wrenches make the job much easier, especially in tight spaces.
4. Step-by-Step Guide to Fixing a Sagging Car Door
Here’s a detailed, step-by-step guide to fixing your sagging car door:
Step 1: Prepare the Vehicle
Park your car on a level surface. This ensures accurate alignment when you make adjustments. Open the sagging door fully to access the hinges.
Step 2: Locate the Lower Hinge Bolts
The lower hinge is typically the culprit in most sagging door cases. Locate the two bolts on the lower hinge that connect it to the car door.
Step 3: Remove One Bolt
Using the appropriate wrench or socket, remove one of the bolts from the lower hinge. Keep this bolt for reference when purchasing replacements.
Step 4: Source Replacement Bolts and Washers
Take the removed bolt to a local hardware store. Find two bolts that match the size and thread pitch. The new bolts should be slightly longer (about 1/8″ to 1/4″) to accommodate the added thickness of the washers. Also, purchase an assortment of washers that fit the bolt.
Bolt Size Guide:
For many vehicles, the bolt size is M8 x 1.25 pitch with a 12mm hex cap. However, it’s always best to verify the exact size for your specific vehicle.
Step 5: Jack Up the Door
Open the door and position a car jack under the end of the door furthest from the hinges. Jack up the door by about 1 inch. This takes the pressure off the lower hinge, making it easier to work on.
Step 6: Remove the Second Bolt
Remove the second bolt from the lower hinge. With both bolts removed, carefully jack up the door a little more to create a small gap between the door and the hinge.
Step 7: Insert the Washers
Insert one or more washers between the hinge and the car door. Use one hand to hold the washers in place while you insert the new bolt through the washer with the other hand.
Step 8: Reinstall the Bolts
Insert the new bolt (along with a lock washer, if desired) through the washers and into the hinge. Repeat this process for the second bolt. Hand-tighten both bolts.
Step 9: Lower the Jack
Carefully lower the jack and remove it from under the door.
Step 10: Tighten the Bolts
Tighten both bolts securely with your wrench or socket.
Step 11: Test the Door Alignment
Close the door to check the alignment. If the door still sags, you may need to add more washers. Always add the same number of washers to both bolts on the lower hinge to maintain proper alignment.
Step 12: Final Adjustments
Make any necessary adjustments by adding or removing washers until the door closes smoothly and aligns correctly with the body panels.
Step 13: Secure the Bolts
Once you are satisfied with the alignment, double-check that all bolts are tightened securely.
Pro Tip:
Apply a small amount of thread locker to the bolts to prevent them from loosening over time.
5. Understanding the Mechanics Behind the Fix
This simple fix works by realigning the door with the frame. Adding washers between the hinge and the door effectively raises the door, compensating for the wear in the hinges.
Visual Explanation
The following images illustrate how the washers correct the sagging:
6. Advanced Techniques for Severe Sagging
In some cases, the sagging may be too severe for the washer trick to fully correct. Here are some advanced techniques:
- Hinge Replacement: If the hinges are severely worn or damaged, replacing them is the best option. This involves removing the old hinges and installing new ones.
- Body Shop Repair: For significant misalignment or damage, professional body shop repair may be necessary. They have the tools and expertise to realign the door and frame properly.
- Reinforcing the Hinges: Welding additional metal to the hinges can strengthen them and prevent future sagging.
7. Choosing the Right Washers and Bolts
Selecting the correct washers and bolts is crucial for a successful repair. Here are some tips:
- Material: Use high-quality steel washers and bolts for durability and corrosion resistance.
- Size: Ensure the washers fit snugly around the bolts without excessive play.
- Thread Pitch: Match the thread pitch of the new bolts to the existing hinge bolts to prevent cross-threading.
- Length: The new bolts should be slightly longer than the originals to accommodate the thickness of the washers.
Washer and Bolt Specifications:
| Component | Specification |
|---|---|
| Material | High-Quality Steel |
| Washer Size | Fits Snugly Around Bolt |
| Bolt Size | M8 x 1.25 (Typical, Verify for Your Car) |
| Bolt Length | Original + 1/8″ to 1/4″ |
8. Safety Precautions During the Repair
Safety should always be your top priority when working on your car. Follow these precautions:
- Wear Safety Glasses: Protect your eyes from flying debris.
- Use Gloves: Keep your hands clean and protected from sharp edges.
- Secure the Vehicle: Ensure the car is parked on a level surface and the parking brake is engaged.
- Use a Jack Stand: When lifting the door with a jack, use a jack stand for added safety.
- Disconnect the Battery: Disconnect the negative terminal of the battery to prevent electrical shorts.
9. Preventing Future Door Sagging
Preventive maintenance can help extend the life of your car doors and hinges. Here are some tips:
- Lubricate the Hinges: Regularly lubricate the door hinges with penetrating oil or grease to reduce friction and wear.
- Avoid Slamming the Door: Closing the door gently can minimize stress on the hinges.
- Address Minor Issues Promptly: Fix any minor alignment issues or strange noises as soon as they appear.
- Regular Inspections: Inspect the door hinges regularly for signs of wear or corrosion.
Lubrication Schedule:
Lubricate your door hinges every six months or whenever you notice any squeaking or stiffness.
10. Cost Analysis: DIY vs. Professional Repair
Fixing a sagging car door yourself can save you a significant amount of money compared to professional repair. Here’s a cost breakdown:
DIY Repair:
- Materials (Washers, Bolts): $5 – $10
- Tools (If Needed): $20 – $50 (If you don’t already own them)
- Total: $25 – $60
Professional Repair:
- Labor: $100 – $300
- Parts (Hinges): $50 – $150
- Total: $150 – $450
As you can see, DIY repair can save you hundreds of dollars.
11. How CARDIAGTECH.NET Can Help You With Your Car Repair Needs
At CARDIAGTECH.NET, we understand the challenges you face as an auto repair professional. You need reliable tools, efficient processes, and cost-effective solutions to keep your customers satisfied and your business thriving. That’s why we offer a range of products and services designed to meet your specific needs.
Addressing Your Challenges
- Physical Demands: We provide ergonomic tools that reduce strain and improve comfort during long hours of work.
- Keeping Up with Technology: Stay ahead of the curve with our advanced diagnostic equipment and training resources.
- Time Constraints: Our efficient tools and streamlined processes help you complete repairs quickly and accurately.
- Competition: Stand out from the competition by offering superior service with our high-quality equipment.
- Finding the Right Tools: Our extensive catalog and expert advice ensure you get the perfect tools for every job.
Our Solutions
- High-Quality Tools: From ratcheting wrenches to advanced diagnostic scanners, we offer a wide range of durable and reliable tools.
- Expert Support: Our team of experienced technicians is available to provide technical support and answer your questions.
- Training Resources: Access online courses and workshops to enhance your skills and stay up-to-date with the latest automotive technologies.
- Cost-Effective Solutions: We offer competitive prices and flexible financing options to help you manage your budget.
Benefits of Choosing CARDIAGTECH.NET
- Increased Efficiency: Complete repairs faster with our high-performance tools.
- Improved Accuracy: Diagnose problems accurately with our advanced diagnostic equipment.
- Enhanced Safety: Protect yourself with our safety gear and ergonomic tools.
- Greater Profitability: Increase your revenue by offering superior service and completing more jobs.
- Peace of Mind: Rely on our reliable tools and expert support to keep your business running smoothly.
Ready to take your auto repair business to the next level? Contact CARDIAGTECH.NET today to learn more about our products and services. Call us at +1 (641) 206-8880 or visit our website at CARDIAGTECH.NET.
12. Case Studies: Successful Sagging Door Repairs
Here are a few real-world examples of how this simple fix can solve sagging door problems:
Case Study 1: 1998 Honda Civic
A 1998 Honda Civic had a severely sagging driver’s side door. The owner was quoted $350 for hinge replacement at a local repair shop. Using the washer and bolt method, the owner was able to fix the door in about 30 minutes for less than $10.
Case Study 2: 2005 Toyota Corolla
A 2005 Toyota Corolla experienced a minor fender-bender that caused the driver’s side door to misalign and sag. The owner used washers to realign the door, avoiding costly body shop repairs.
Case Study 3: 2010 Ford F-150
A 2010 Ford F-150 work truck had a sagging driver’s side door due to heavy use. The owner reinforced the hinges with additional welding and used the washer method to restore proper alignment.
13. The Science of Door Hinges and Sagging
Door hinges are designed to withstand significant stress, but over time, the constant motion and weight of the door can cause wear. The hinge pin, which connects the two halves of the hinge, is particularly susceptible to wear. As the pin wears down, it creates play in the hinge, leading to sagging.
Hinge Design:
- Material: Most door hinges are made of steel or aluminum.
- Pin: The hinge pin is typically made of hardened steel.
- Bushings: Some hinges have bushings to reduce friction and wear.
14. Alternatives to the Washer Method
While the washer method is a simple and effective solution, there are other alternatives:
- Hinge Pin Replacement: Replacing the worn hinge pins can restore the hinge’s functionality.
- Hinge Bushing Replacement: Replacing worn bushings can also tighten up the hinge.
- Adjustable Hinges: Some aftermarket hinges offer adjustable features to correct alignment issues.
15. Maintaining Your Car’s Overall Condition
Addressing a sagging car door is just one aspect of maintaining your vehicle’s overall condition. Regular maintenance is essential for keeping your car running smoothly and safely.
Maintenance Checklist:
- Oil Changes: Change your oil every 3,000 to 5,000 miles.
- Tire Rotations: Rotate your tires every 6,000 to 8,000 miles.
- Brake Inspections: Inspect your brakes regularly and replace worn pads or rotors.
- Fluid Checks: Check and top off all fluids, including coolant, brake fluid, and power steering fluid.
- Tune-Ups: Perform regular tune-ups to keep your engine running efficiently.
16. The Importance of Proper Door Alignment
Proper door alignment is crucial for several reasons:
- Safety: A properly aligned door ensures the door latches securely, protecting occupants in the event of an accident.
- Weather Sealing: A well-aligned door provides a tight seal, preventing water and wind from entering the cabin.
- Appearance: A sagging or misaligned door can detract from the overall appearance of your vehicle.
- Resale Value: Maintaining your car’s condition, including proper door alignment, can increase its resale value.
17. How to Find the Right Auto Repair Tools and Equipment
Finding the right tools and equipment is essential for any auto repair project. Here are some tips:
- Research: Read reviews and compare products before making a purchase.
- Quality: Invest in high-quality tools that will last.
- Warranty: Look for tools with a warranty to protect your investment.
- Specialty Tools: Consider purchasing specialty tools for specific tasks.
- Online Retailers: Shop online for a wide selection and competitive prices.
Recommended Brands:
CARDIAGTECH.NET recommends brands like Snap-on, Matco, and Mac Tools for high-quality auto repair tools.
18. Common Mistakes to Avoid When Fixing a Sagging Door
Avoid these common mistakes when fixing a sagging car door:
- Using the Wrong Bolts: Using bolts that are too short or have the wrong thread pitch can damage the hinge.
- Over-Tightening: Over-tightening the bolts can strip the threads or damage the hinge.
- Using Too Many Washers: Using too many washers can create excessive stress on the hinge.
- Neglecting Safety: Failing to follow safety precautions can lead to injury.
- Ignoring Corrosion: Neglecting to address corrosion can weaken the hinge and cause future problems.
19. Additional Tips for Restoring Car Door Functionality
Here are some additional tips for restoring car door functionality:
- Check the Door Latch: Ensure the door latch is functioning properly.
- Adjust the Striker Plate: Adjust the striker plate on the door frame to improve the door’s alignment.
- Replace Weather Stripping: Replace worn weather stripping to improve the door’s seal.
- Lubricate Door Components: Lubricate all door components, including the hinges, latch, and striker plate.
20. FAQ: Addressing Common Concerns About Sagging Car Doors
Here are some frequently asked questions about sagging car doors:
-
What causes a car door to sag?
- Wear and tear on the door hinges, corrosion, accidents, and heavy use.
-
How can I tell if my car door is sagging?
- Difficulty closing the door, misalignment, strange noises, visible sagging, and paint chipping.
-
Can I fix a sagging car door myself?
- Yes, the washer and bolt method is a simple and cost-effective DIY solution.
-
What tools do I need to fix a sagging car door?
- Combination wrench set, socket set, bolts, washers, lock washers (optional), jack, gloves, safety glasses, and penetrating oil.
-
How much does it cost to fix a sagging car door?
- DIY repair costs $25 – $60, while professional repair costs $150 – $450.
-
Is it safe to drive with a sagging car door?
- Driving with a sagging door can be unsafe, as the door may not latch properly in an accident.
-
How can I prevent my car door from sagging?
- Lubricate the hinges regularly, avoid slamming the door, address minor issues promptly, and inspect the hinges regularly.
-
What are the alternatives to the washer method?
- Hinge pin replacement, hinge bushing replacement, and adjustable hinges.
-
When should I replace the door hinges?
- When the hinges are severely worn or damaged.
-
Can a body shop fix a sagging car door?
- Yes, body shops have the tools and expertise to realign the door and frame properly.
Don’t let a sagging car door compromise your vehicle’s safety and appearance. With the simple steps outlined in this guide and the reliable tools from CARDIAGTECH.NET, you can restore your door’s functionality and enjoy a smoother, quieter ride.