How to Fix Minor Dents and Scratches on a Car
Fixing minor dents and scratches on your car can be a rewarding DIY project, saving you money and keeping your vehicle looking its best. At CARDIAGTECH.NET, we understand the importance of maintaining your car’s appearance and protecting its value, which is why we offer top-quality tools and equipment to help you tackle these repairs with confidence. Discover effective techniques for addressing small imperfections, and explore how our products can assist you in achieving professional-level results. You’ll also find information on paint touch-up, body fillers, and auto detailing.
1. Understanding Car Paint and Damage Types
Before diving into the repair process, it’s essential to understand the layers of your car’s paint and the types of damage you might encounter. This knowledge will guide you in choosing the appropriate repair methods and products.
1.1 Layers of Car Paint
Modern car paint typically consists of several layers, each serving a specific purpose:
- Primer: The foundation layer that adheres to the metal body, providing corrosion protection and a smooth surface for subsequent layers.
- Base Coat: The layer that provides the actual color of your car. It can be either a solid color or a metallic/pearlescent finish.
- Clear Coat: A transparent layer applied over the base coat to protect it from UV rays, scratches, and environmental damage, while also adding gloss and depth.
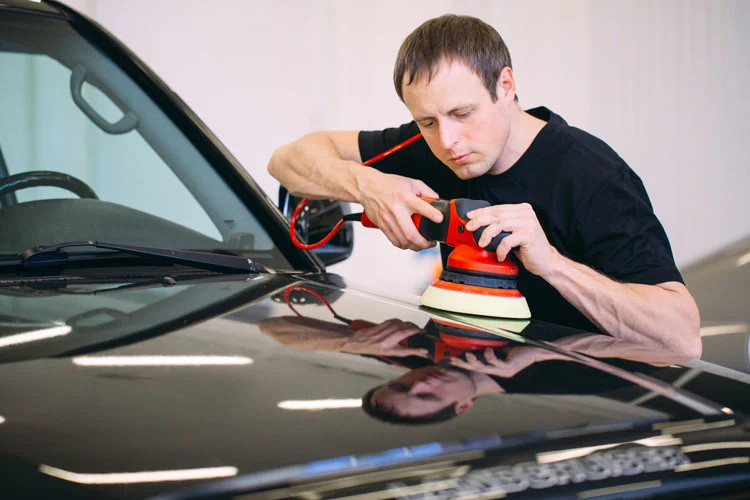
Car paint layers primer base coat clear coat
Alt text: Close-up of a mechanic polishing a car body to remove scratches, showing the importance of clear coat protection.
1.2 Types of Scratches
- Clear Coat Scratches: These are the most superficial type of scratch, affecting only the clear coat layer. They often appear as light swirl marks or haziness on the surface.
- Base Coat Scratches: These scratches penetrate the clear coat and reach the base coat layer, revealing the color underneath.
- Primer Scratches: These are deeper scratches that go through the clear coat and base coat, exposing the primer layer.
- Bare Metal Scratches: The most severe type of scratch, reaching all the way down to the bare metal of the car body. These scratches require immediate attention to prevent rust and corrosion.
1.3 Types of Dents
- Minor Dents: Small, shallow depressions that don’t significantly distort the panel’s shape.
- Sharp Dents: Deeper dents with a defined point of impact.
- Creases: Long, linear dents often caused by glancing blows.
- Complex Dents: Dents with multiple curves and contours, requiring more advanced repair techniques.
2. Essential Tools and Materials for DIY Repair
Having the right tools and materials on hand is crucial for achieving successful dent and scratch repairs. Here’s a list of essential items:
2.1 Cleaning and Preparation
- Car Wash Soap: To thoroughly clean the affected area and remove any dirt, grime, or wax.
- Detailing Clay: To remove embedded contaminants that washing alone can’t remove, such as tree sap, road tar, and overspray.
- Masking Tape: To protect surrounding areas from accidental damage during sanding or polishing.
- Microfiber Towels: Soft, lint-free towels for cleaning, drying, and polishing.
- Wax and Grease Remover: To remove any remaining wax, grease, or silicone from the surface before painting.
2.2 Scratch Repair
- Sandpaper: Assorted grits of sandpaper (e.g., 2000, 3000, 5000) for leveling the scratch and feathering the edges.
- Sanding Block: To provide a flat, even surface for sanding.
- Rubbing Compound: An abrasive compound used to remove scratches and oxidation from the paint surface.
- Polishing Compound: A less abrasive compound used to refine the finish after using rubbing compound, restoring gloss and clarity.
- Scratch Repair Pen: Fills in the scratch with color matched paint, available at CARDIAGTECH.NET.
- Touch-Up Paint: Factory-matched paint for filling deeper scratches and chips.
- Clear Coat: To protect the touch-up paint and restore the original gloss.
- Applicators: Small brushes, foam swabs, or paint pens for applying touch-up paint and clear coat.
2.3 Dent Repair
- Dent Puller Kit: Includes various tools like suction cups, glue tabs, and a slide hammer for pulling out dents.
- Heat Gun or Hair Dryer: To warm up the metal and make it more pliable for dent removal.
- Rubber Mallet: To gently tap and reshape the metal.
- Body Filler (Bondo): To fill in any remaining imperfections after the dent is pulled out.
- Spreader: To apply the body filler smoothly and evenly.
2.4 Safety Gear
- Gloves: To protect your hands from chemicals and sharp edges.
- Safety Glasses: To protect your eyes from dust, debris, and splashes.
- Respirator Mask: To protect your lungs from harmful fumes when sanding or painting.
3. Step-by-Step Guide to Fixing Minor Scratches
3.1 Assessing the Scratch
Before you start, carefully examine the scratch to determine its depth. Run your fingernail across the scratch. If your nail catches, the scratch is likely deep enough to require more than just a simple polish.
3.2 Cleaning the Area
Thoroughly clean the area around the scratch with car wash soap and water. Rinse well and dry with a microfiber towel. Use detailing clay to remove any embedded contaminants. Finally, wipe the area with wax and grease remover to ensure a clean surface for repair.
3.3 Sanding (if necessary)
If the scratch is deep enough to catch your fingernail, you may need to sand it down. Start with 3000-grit sandpaper, wet-sanding the area with light pressure in a circular motion. Gradually increase the grit to 5000 if needed, until the scratch is less noticeable. Be careful not to sand too aggressively, as you could damage the surrounding paint.
 Mechanic repairing scratches with a sandpaper
Alt text: A mechanic sanding scratches on a car body in a workshop, demonstrating the sanding process for scratch repair.
3.4 Applying Rubbing Compound
Apply a small amount of rubbing compound to a microfiber pad and buff the scratched area in a circular motion, using moderate pressure. This will help to remove the remaining scratches and blend the repair with the surrounding paint.
3.5 Polishing
After using rubbing compound, switch to a polishing compound and a clean microfiber pad. Polish the area in a circular motion, using lighter pressure. This will restore the gloss and clarity of the paint.
3.6 Applying Touch-Up Paint (for deeper scratches)
If the scratch is deep enough to expose the primer or bare metal, you’ll need to apply touch-up paint. First, prime the area with a thin coat of automotive primer. Once dry, apply several thin coats of touch-up paint, allowing each coat to dry completely before applying the next.
3.7 Applying Clear Coat
After the touch-up paint has dried, apply a thin coat of clear coat to protect the paint and restore the original gloss. Allow the clear coat to dry completely.
3.8 Final Polishing
Once the clear coat has dried, use a fine-cut polishing compound to smooth out any imperfections and blend the repair with the surrounding paint.
3.9 Waxing
Finally, apply a coat of car wax to protect the repaired area and enhance the shine.
4. Step-by-Step Guide to Fixing Minor Dents
4.1 Assessing the Dent
Examine the dent to determine its size, shape, and depth. Check for any sharp creases or complex contours that may require professional attention.
4.2 Cleaning the Area
Thoroughly clean the area around the dent with car wash soap and water. Rinse well and dry with a microfiber towel. Use detailing clay to remove any embedded contaminants.
4.3 Heat Application (optional)
For plastic bumpers, applying heat can make the material more pliable and easier to reshape. Use a heat gun or hair dryer to gently warm the dented area, being careful not to overheat the plastic.
4.4 Using a Dent Puller Kit
Attach a suction cup or glue tab to the center of the dent, following the instructions provided with your dent puller kit. Use a slide hammer or pulling tool to gently pull the dent outwards. Repeat this process as needed, working your way around the dent until it is mostly removed.
4.5 Tapping with a Rubber Mallet
Use a rubber mallet to gently tap around the edges of the dent, further reshaping the metal and smoothing out any imperfections.
4.6 Applying Body Filler (if necessary)
If the dent is not completely removed, you may need to apply body filler to fill in any remaining imperfections. Mix the body filler according to the manufacturer’s instructions and apply a thin, even layer to the dented area using a spreader.
4.7 Sanding the Body Filler
Once the body filler has dried, sand it down using progressively finer grits of sandpaper (e.g., 220, 320, 400) until it is smooth and flush with the surrounding surface.
4.8 Priming and Painting
Apply a thin coat of automotive primer to the repaired area. Once dry, apply several thin coats of touch-up paint, allowing each coat to dry completely before applying the next.
4.9 Clear Coating and Polishing
After the touch-up paint has dried, apply a thin coat of clear coat to protect the paint and restore the original gloss. Allow the clear coat to dry completely, then use a fine-cut polishing compound to smooth out any imperfections and blend the repair with the surrounding paint.
4.10 Waxing
Finally, apply a coat of car wax to protect the repaired area and enhance the shine.
5. Advanced Techniques and Considerations
5.1 Paintless Dent Repair (PDR)
PDR is a specialized technique that involves using tools to manipulate the metal from behind the panel, without the need for sanding, filling, or painting. PDR is best suited for minor dents that have not stretched the metal or damaged the paint.
 automobile scratch and dent repair
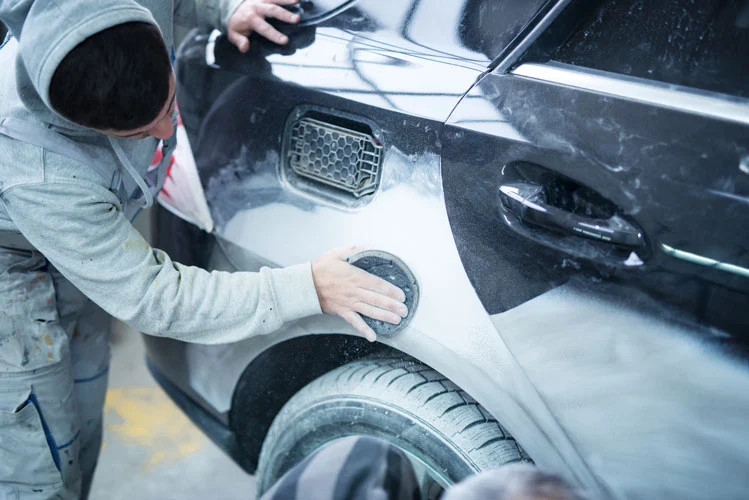
Alt text: Paintless dent repair in progress, showing the technician using specialized tools to manipulate the metal from behind the panel.
5.2 Color Matching
Achieving an exact color match can be challenging, especially for older vehicles where the paint may have faded over time. To ensure the best possible match, use the paint code specified by the manufacturer. You can usually find this code on a sticker located on the driver’s side door jamb or in the glove compartment.
5.3 Blending
Blending involves gradually fading the new paint into the surrounding paint to create a seamless transition. This technique is particularly useful when repairing larger areas or when an exact color match is difficult to achieve.
5.4 When to Seek Professional Help
While DIY dent and scratch repair can be a cost-effective solution for minor damage, there are certain situations where it’s best to seek professional help:
- Severe Damage: Deep scratches that have exposed the bare metal, large or complex dents, or damage that affects the structural integrity of the vehicle.
- Lack of Experience: If you’re not comfortable with the repair process or lack the necessary skills and tools.
- Time Constraints: If you don’t have the time or patience to complete the repair properly.
6. Maintaining Your Car’s Paint
Preventative measures can significantly reduce the likelihood of scratches and dents, keeping your car looking its best for longer.
6.1 Regular Washing and Waxing
Wash your car regularly with a pH-balanced car wash soap to remove dirt, grime, and contaminants. Apply a coat of car wax every few months to protect the paint from UV rays, oxidation, and environmental damage.
6.2 Avoiding Harsh Chemicals
Avoid using harsh chemicals or abrasive cleaners on your car’s paint, as these can damage the clear coat and cause fading or discoloration.
6.3 Parking Strategically
Park your car in covered or shaded areas whenever possible to protect it from the sun’s harmful UV rays. Avoid parking under trees that may drop sap or debris.
6.4 Using a Car Cover
When storing your car for extended periods, use a car cover to protect it from dust, dirt, and scratches.
7. Addressing Customer Challenges with CARDIAGTECH.NET
At CARDIAGTECH.NET, we understand the challenges faced by automotive technicians and DIY enthusiasts. We’re committed to providing solutions that enhance efficiency, accuracy, and safety in your repair projects.
7.1 Enhancing Efficiency
Our range of high-quality tools and equipment is designed to help you complete repairs quickly and efficiently, saving you valuable time and effort.
7.2 Ensuring Accuracy
We offer precision instruments and diagnostic tools that enable you to accurately assess the extent of damage and perform repairs with confidence.
7.3 Promoting Safety
We prioritize safety by providing protective gear and equipment that meet industry standards, ensuring a safe working environment for our customers.
8. Call to Action
Ready to tackle those minor dents and scratches and restore your car’s appearance? Contact CARDIAGTECH.NET today at +1 (641) 206-8880 or visit our website at CARDIAGTECH.NET to explore our wide selection of auto body repair tools and equipment. Our expert team is ready to assist you in finding the perfect solutions for your needs. Located at 276 Reock St, City of Orange, NJ 07050, United States, we are here to help you achieve professional-level results at home.
9. FAQ: How to Fix Minor Dents and Scratches on a Car
Here are some frequently asked questions about fixing minor dents and scratches on a car:
-
How do I know if a scratch is deep enough to require professional repair?
- Run your fingernail across the scratch. If your nail catches, the scratch is likely deep enough to require professional attention.
-
Can I use toothpaste to remove scratches from my car?
- Yes, toothpaste can be used to remove very minor scratches or scuff marks. However, it’s not as effective as dedicated scratch removal products.
-
What is paintless dent repair (PDR), and when is it appropriate?
- PDR is a technique that involves using tools to manipulate the metal from behind the panel, without the need for sanding, filling, or painting. It’s best suited for minor dents that have not stretched the metal or damaged the paint.
-
How can I find the correct touch-up paint for my car?
- The paint code is specified by the manufacturer. You can usually find this code on a sticker located on the driver’s side door jamb or in the glove compartment.
-
What is the best way to protect my car’s paint from future scratches and dents?
- Wash your car regularly, apply a coat of car wax every few months, avoid harsh chemicals, park strategically, and use a car cover when storing your car for extended periods.
-
Can I use a household hair dryer to warm up a plastic bumper before attempting to remove a dent?
- Yes, a household hair dryer can be used to gently warm up a plastic bumper, making it more pliable and easier to reshape.
-
What type of sandpaper should I use to remove scratches from my car’s paint?
- Start with 3000-grit sandpaper, wet-sanding the area with light pressure in a circular motion. Gradually increase the grit to 5000 if needed, until the scratch is less noticeable.
-
Is it necessary to apply clear coat after using touch-up paint?
- Yes, applying a clear coat is recommended to protect the touch-up paint and restore the original gloss.
-
What is the difference between rubbing compound and polishing compound?
- Rubbing compound is an abrasive compound used to remove scratches and oxidation from the paint surface, while polishing compound is a less abrasive compound used to refine the finish after using rubbing compound, restoring gloss and clarity.
-
Where can I purchase high-quality auto body repair tools and equipment?
- Visit CARDIAGTECH.NET or contact us at +1 (641) 206-8880 to explore our wide selection of auto body repair tools and equipment.
10. Conclusion
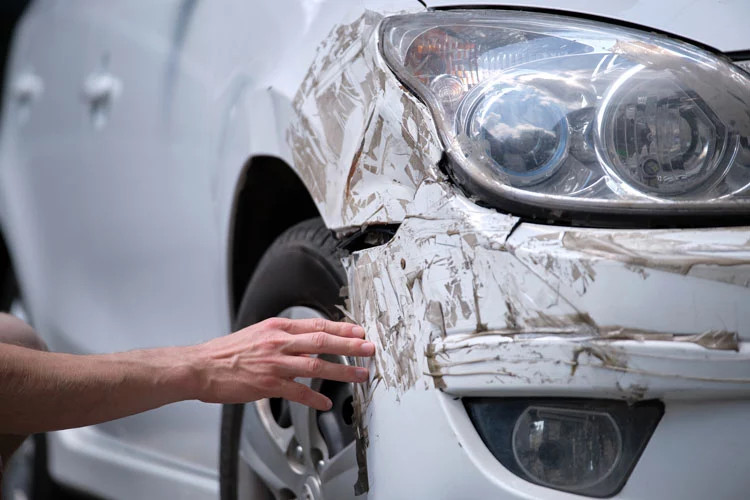 automobile scratch and dent repair
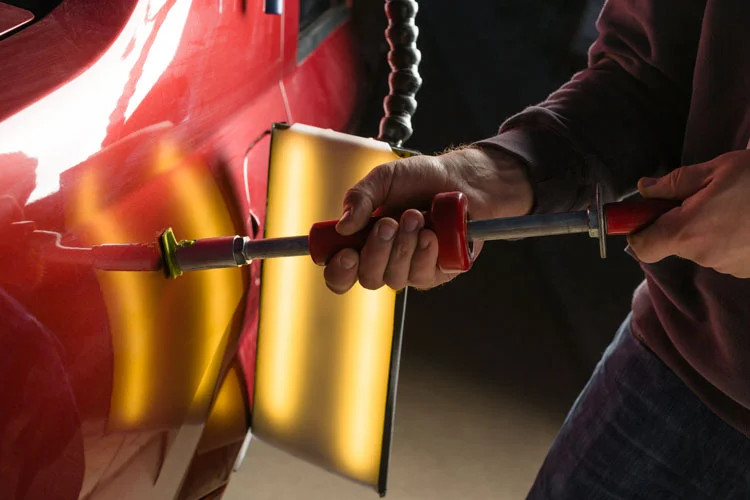
Alt text: A driver examining a dented car with a damaged fender, emphasizing the importance of timely dent and scratch repair.
Fixing minor dents and scratches on your car can be a manageable DIY project with the right tools, materials, and techniques. By understanding the layers of your car’s paint, assessing the damage, and following our step-by-step guides, you can achieve professional-level results at home. Remember to prioritize safety and seek professional help when necessary. Contact CARDIAGTECH.NET for all your auto body repair needs and let us help you keep your car looking its best.