How To Fix Little Scratches On Your Car Like A Pro
Fixing little scratches on your car doesn’t have to be a daunting task. With the right tools and techniques, you can restore your vehicle’s appearance and protect its value. At CARDIAGTECH.NET, we provide high-quality auto repair tools to help you achieve professional results at home. Learn effective scratch repair methods and keep your car looking its best, from simple surface blemishes to more significant paint imperfections, consider using auto detailing supplies.
1. Understanding Car Paint and Scratches
Before diving into the repair process, it’s essential to understand the layers of paint on your car and the different types of scratches that can occur. Knowing this will help you choose the right repair method and tools.
1.1. Layers of Car Paint
A modern car typically has four layers of paint:
- Primer: This is the first layer applied to the bare metal. It protects against corrosion and helps the subsequent layers adhere properly.
- Base Coat: This layer provides the color for your car.
- Clear Coat: This is a protective layer that adds gloss and protects the base coat from UV rays, chemicals, and minor abrasions.
- E-Coat: An electrostatically applied coat, the E-coat layer offers superior corrosion resistance and serves as a foundation for subsequent paint layers.
1.2. Types of Car Scratches
Identifying the type of scratch is the first step in determining the appropriate repair method. Here are the three main types:
- Clear Coat Scratches: These are shallow scratches that only affect the clear coat layer. They are usually caused by minor abrasions like car washes, branches, or clothing rubbing against the paint.
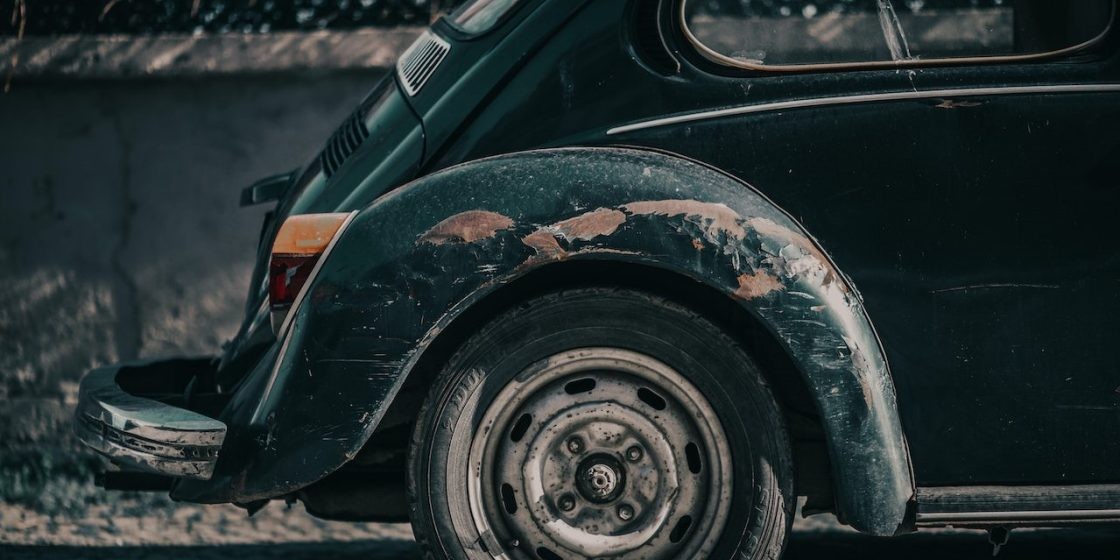
Clear coat scratch on a car door, showing a superficial blemish
- Base Coat Scratches: These scratches penetrate the clear coat and reach the base coat (the colored layer). They are more noticeable than clear coat scratches and require a more involved repair process.
- Primer Scratches: These are the deepest type of scratches, going through the clear coat, base coat, and into the primer layer. They are typically caused by more significant impacts and require professional repair for the best results.
1.3. How to Determine the Scratch Depth
A simple test can help you determine the depth of the scratch:
- Clean the area around the scratch with soap and water.
- Dry the area thoroughly.
- Run your fingernail gently across the scratch.
- If your fingernail doesn’t catch, the scratch is likely a clear coat scratch.
- If your fingernail catches slightly, it’s likely a base coat scratch.
- If your fingernail catches noticeably, the scratch has penetrated to the primer or even the metal.
2. Essential Tools and Materials for Scratch Repair
Having the right tools and materials is crucial for achieving professional-looking results when fixing scratches on your car. Here’s a comprehensive list of what you’ll need:
- Car Wash Soap: For cleaning the area around the scratch.
- Microfiber Cloths: Soft cloths for cleaning, polishing, and applying products.
- Scratch Remover Compound: A mild abrasive compound designed to remove clear coat scratches.
- Rubbing Compound: A more aggressive abrasive for deeper scratches.
- Car Polish: To restore shine and protect the paint after removing the scratch.
- Touch-Up Paint: Matching the exact color code of your car, for filling in base coat or primer scratches.
- Detail Paint Brushes: Fine-tipped brushes for applying touch-up paint precisely.
- 2000-Grit Sandpaper: For smoothing out touch-up paint.
- Sanding Block: To provide a flat, even surface for sanding.
- Masking Tape: To protect surrounding areas from accidental damage.
- Wax or Sealant: To protect the repaired area after polishing.
- Gloves: To protect your hands from chemicals.
- Safety Glasses: To protect your eyes from debris.
- Detailing Clay: To remove contaminants from the paint surface
- Buffing Pads: Foam pads for applying polish and compound with a machine polisher.
For a wide selection of high-quality auto repair tools, visit CARDIAGTECH.NET, where you can find everything you need to tackle any scratch repair job.
3. Step-by-Step Guide to Fixing Clear Coat Scratches
Clear coat scratches are the easiest to fix and often can be removed with just a few simple steps.
3.1. Cleaning the Area
The first step in any scratch repair is to thoroughly clean the area around the scratch. This removes any dirt, debris, or contaminants that could interfere with the repair process.
- Wash the area with car wash soap and water.
- Rinse thoroughly with clean water.
- Dry the area with a clean microfiber cloth.
3.2. Applying Scratch Remover
Scratch remover compounds contain mild abrasives that gently buff away the clear coat, removing the scratch and restoring the paint’s smoothness.
- Apply a small amount of scratch remover compound to a clean microfiber cloth.
- Rub the compound into the scratch using a circular motion, applying light pressure.
- Continue buffing for several minutes until the scratch appears to be diminishing.
- Wipe away any excess compound with a clean microfiber cloth.
3.3. Polishing the Area
After using the scratch remover, it’s essential to polish the area to restore the paint’s shine and remove any remaining swirl marks.
- Apply a small amount of car polish to a clean microfiber cloth.
- Buff the area using a circular motion, applying light pressure.
- Continue buffing until the paint looks glossy and smooth.
- Wipe away any excess polish with a clean microfiber cloth.
3.4. Waxing the Area
To protect the newly polished area and enhance its shine, apply a coat of wax or sealant.
- Apply a small amount of wax or sealant to a clean applicator pad.
- Apply the wax to the area using a circular motion, following the manufacturer’s instructions.
- Allow the wax to dry for the recommended time.
- Buff the area with a clean microfiber cloth to reveal a glossy finish.
4. Repairing Base Coat Scratches: A Detailed Approach
Base coat scratches require a more involved repair process, as they penetrate through the clear coat and into the colored layer of paint.
4.1. Cleaning the Area
As with clear coat scratches, start by thoroughly cleaning the area around the scratch.
- Wash the area with car wash soap and water.
- Rinse thoroughly with clean water.
- Dry the area with a clean microfiber cloth.
4.2. Applying Touch-Up Paint
Touch-up paint is essential for filling in the scratch and restoring the color to the affected area.
- Shake the touch-up paint bottle thoroughly to ensure the paint is mixed evenly.
- Using a fine-tipped detail brush, carefully apply a small amount of touch-up paint to the scratch.
- Apply thin, even coats, allowing each coat to dry completely before applying the next.
- Continue applying coats until the paint is level with the surrounding paint.
4.3. Sanding the Area
Once the touch-up paint is completely dry, it’s time to sand the area to smooth out any imperfections and blend the paint with the surrounding surface.
- Wrap a small piece of 2000-grit sandpaper around a sanding block.
- Wet the sandpaper with water.
- Gently sand the area using light, even strokes.
- Continue sanding until the touch-up paint is flush with the surrounding paint.
4.4. Rubbing Compound Application
After sanding, use rubbing compound to remove any sanding marks and further blend the touch-up paint with the surrounding paint.
- Apply a small amount of rubbing compound to a clean microfiber cloth.
- Rub the compound into the area using a circular motion, applying light pressure.
- Continue buffing until the sanding marks are gone and the paint looks smooth.
- Wipe away any excess compound with a clean microfiber cloth.
4.5. Polishing the Area
To restore the paint’s shine and remove any remaining swirl marks, polish the area.
- Apply a small amount of car polish to a clean microfiber cloth.
- Buff the area using a circular motion, applying light pressure.
- Continue buffing until the paint looks glossy and smooth.
- Wipe away any excess polish with a clean microfiber cloth.
4.6. Waxing the Area
Protect and enhance the repaired area by applying a coat of wax or sealant.
- Apply a small amount of wax or sealant to a clean applicator pad.
- Apply the wax to the area using a circular motion, following the manufacturer’s instructions.
- Allow the wax to dry for the recommended time.
- Buff the area with a clean microfiber cloth to reveal a glossy finish.
5. Addressing Primer Scratches: A Professional-Level Repair
Primer scratches are the deepest and most challenging to repair, as they penetrate through all the paint layers and expose the primer. For the best results, consider seeking professional help. However, if you’re confident in your abilities, here’s how to approach the repair:
5.1. Cleaning the Area
Start by thoroughly cleaning the area around the scratch to remove any dirt, debris, or contaminants.
- Wash the area with car wash soap and water.
- Rinse thoroughly with clean water.
- Dry the area with a clean microfiber cloth.
5.2. Sanding the Area
Sanding is necessary to remove any rough edges and prepare the surface for touch-up paint.
- Start with 400-grit sandpaper to remove any rust or corrosion.
- Follow with 800-grit sandpaper to smooth out the surface.
- Finish with 2000-grit sandpaper to create a smooth, even surface for the touch-up paint.
5.3. Applying Touch-Up Paint
Apply touch-up paint to fill in the scratch and restore the color to the affected area.
- Shake the touch-up paint bottle thoroughly to ensure the paint is mixed evenly.
- Using a fine-tipped detail brush, carefully apply a small amount of touch-up paint to the scratch.
- Apply thin, even coats, allowing each coat to dry completely before applying the next.
- Continue applying coats until the paint is level with the surrounding paint.
5.4. Sanding the Area
Once the touch-up paint is completely dry, sand the area to smooth out any imperfections and blend the paint with the surrounding surface.
- Wrap a small piece of 2000-grit sandpaper around a sanding block.
- Wet the sandpaper with water.
- Gently sand the area using light, even strokes.
- Continue sanding until the touch-up paint is flush with the surrounding paint.
5.5. Rubbing Compound Application
Use rubbing compound to remove any sanding marks and further blend the touch-up paint with the surrounding paint.
- Apply a small amount of rubbing compound to a clean microfiber cloth.
- Rub the compound into the area using a circular motion, applying light pressure.
- Continue buffing until the sanding marks are gone and the paint looks smooth.
- Wipe away any excess compound with a clean microfiber cloth.
5.6. Polishing the Area
To restore the paint’s shine and remove any remaining swirl marks, polish the area.
- Apply a small amount of car polish to a clean microfiber cloth.
- Buff the area using a circular motion, applying light pressure.
- Continue buffing until the paint looks glossy and smooth.
- Wipe away any excess polish with a clean microfiber cloth.
5.7. Waxing the Area
Protect and enhance the repaired area by applying a coat of wax or sealant.
- Apply a small amount of wax or sealant to a clean applicator pad.
- Apply the wax to the area using a circular motion, following the manufacturer’s instructions.
- Allow the wax to dry for the recommended time.
- Buff the area with a clean microfiber cloth to reveal a glossy finish.
6. Advanced Techniques: Wet Sanding and Machine Polishing
For more advanced scratch repair, consider using wet sanding and machine polishing techniques. These methods can provide even better results, especially for deeper scratches or larger areas.
6.1. Wet Sanding
Wet sanding involves using sandpaper with water as a lubricant to smooth out imperfections in the paint. It’s an effective way to level touch-up paint and remove orange peel texture.
- Gather your supplies: 2000-grit sandpaper, sanding block, spray bottle with water, and microfiber cloths.
- Clean the area thoroughly.
- Soak the sandpaper in water for several minutes.
- Wrap the sandpaper around the sanding block.
- Spray the area with water.
- Gently sand the area using light, even strokes.
- Continue sanding, keeping the area wet, until the surface is smooth.
- Rinse the area with clean water and dry with a microfiber cloth.
6.2. Machine Polishing
Machine polishing uses a power tool with a polishing pad to buff the paint and remove scratches, swirl marks, and other imperfections.
- Gather your supplies: Dual-action polisher, polishing pads (cutting, polishing, and finishing), rubbing compound, car polish, and microfiber cloths.
- Clean the area thoroughly.
- Apply a small amount of rubbing compound to the polishing pad.
- Set the polisher to a low speed.
- Buff the area using overlapping passes, applying light pressure.
- Switch to a polishing pad and apply car polish.
- Buff the area again using overlapping passes.
- Wipe away any excess polish with a clean microfiber cloth.
- Finish with a finishing pad and a fine polish for maximum gloss.
7. Preventive Measures: Keeping Your Car Scratch-Free
Preventing scratches is always better than having to repair them. Here are some tips to help keep your car’s paint looking its best:
- Wash Your Car Regularly: Regular washing removes dirt, dust, and other debris that can scratch the paint.
- Use a Microfiber Cloth: When washing and drying your car, use a soft microfiber cloth to avoid scratching the paint.
- Avoid Automatic Car Washes: The brushes in automatic car washes can be abrasive and cause scratches.
- Park Carefully: Avoid parking near trees, bushes, or other objects that could scratch the paint.
- Apply Wax Regularly: Wax provides a protective layer that helps prevent scratches.
- Use a Car Cover: If you park your car outside, use a car cover to protect it from the elements and accidental scratches.
8. CARDIAGTECH.NET: Your Partner in Auto Care
At CARDIAGTECH.NET, we understand the importance of maintaining your vehicle’s appearance and performance. That’s why we offer a wide range of high-quality auto repair tools and equipment to help you tackle any job, from fixing scratches to performing routine maintenance.
We are committed to providing our customers with the best products and service possible. Our knowledgeable staff is always available to answer your questions and help you find the right tools for your needs.
- Wide Selection: We offer a wide selection of tools, from scratch repair kits to detailing supplies.
- Quality Products: We only carry products from trusted brands.
- Expert Advice: Our knowledgeable staff can help you find the right tools for your needs.
- Competitive Prices: We offer competitive prices to fit your budget.
Contact us today at +1 (641) 206-8880 or visit our website at CARDIAGTECH.NET to learn more about our products and services. Our address is 276 Reock St, City of Orange, NJ 07050, United States.
9. Real-World Examples: Successful Scratch Repair Stories
Hearing about successful scratch repair stories can inspire confidence and provide valuable insights into the process. Here are a few examples:
- John’s Clear Coat Comeback: John, a car enthusiast, noticed several light scratches on his car’s clear coat after a recent road trip. Using a scratch repair kit from CARDIAGTECH.NET, he carefully followed the instructions and was amazed at how easily the scratches disappeared. His car now looks as good as new, and he’s proud of his DIY accomplishment.
- Sarah’s Base Coat Blending: Sarah accidentally scraped her car against a pole, resulting in a noticeable base coat scratch. After purchasing touch-up paint and rubbing compound from CARDIAGTECH.NET, she meticulously applied the paint, wet sanded the area, and polished it to perfection. The scratch is now virtually invisible, and she saved hundreds of dollars compared to a professional repair.
- Tom’s Primer Perseverance: Tom’s truck suffered a deep primer scratch from a fallen tree branch. With patience and the right tools from CARDIAGTECH.NET, he sanded the area, applied multiple coats of touch-up paint, and carefully blended the repair with the surrounding paint. While it took time and effort, Tom was thrilled with the results and the satisfaction of restoring his truck’s appearance.
10. Frequently Asked Questions (FAQs) About Car Scratch Repair
Here are some common questions about car scratch repair:
-
Q1: Can I fix a car scratch myself, or should I go to a professional?
- A: It depends on the depth and severity of the scratch. Clear coat scratches are usually easy to fix yourself with the right tools and products. Base coat and primer scratches may require more advanced techniques or professional help.
-
Q2: What is the best product for removing car scratches?
- A: The best product depends on the type of scratch. For clear coat scratches, a scratch remover compound is usually sufficient. For deeper scratches, you may need touch-up paint, rubbing compound, and car polish. CARDIAGTECH.NET offers a variety of high-quality products for all types of scratch repair.
-
Q3: How do I match the touch-up paint to my car’s color?
- A: Your car’s paint code is usually located on a sticker inside the driver’s side doorjamb or in the glove compartment. You can use this code to purchase touch-up paint that matches your car’s color.
-
Q4: Can I use toothpaste to remove car scratches?
- A: While toothpaste may work on very minor clear coat scratches due to its mild abrasive properties, it is not a substitute for professional scratch repair products. It’s best to use products specifically designed for car paint.
-
Q5: How long does it take to fix a car scratch?
- A: The time it takes to fix a car scratch depends on the type and severity of the scratch, as well as your experience and skill level. Clear coat scratches can often be fixed in under an hour, while deeper scratches may take several hours or even days to repair.
-
Q6: Is it possible to completely remove a deep scratch from my car?
- A: While it may not be possible to completely remove a deep scratch without professional help, you can often improve its appearance significantly with the right tools and techniques. The goal is to blend the repair with the surrounding paint as seamlessly as possible.
-
Q7: What is the difference between rubbing compound and car polish?
- A: Rubbing compound is a more aggressive abrasive used to remove sanding marks and other imperfections. Car polish is a finer abrasive used to restore shine and remove swirl marks.
-
Q8: How often should I wax my car?
- A: It’s generally recommended to wax your car every three to four months to protect the paint and keep it looking its best.
-
Q9: What are the benefits of using a car cover?
- A: A car cover protects your car from the elements, such as sun, rain, snow, and dust, as well as accidental scratches and dings.
-
Q10: Where can I buy high-quality auto repair tools and products?
A: CARDIAGTECH.NET offers a wide selection of high-quality auto repair tools and products at competitive prices. Visit our website or contact us at +1 (641) 206-8880 to learn more.
Remember, dealing with car scratches is part of vehicle ownership. Equip yourself with the right knowledge and tools from CARDIAGTECH.NET, and you’ll be well-prepared to keep your car looking its best. Don’t let minor blemishes detract from your vehicle’s appearance. With the detailed guidance provided and the quality products available at CARDIAGTECH.NET, you can confidently tackle those scratches and maintain your car’s pristine condition.
Ready to restore your car’s flawless finish? Contact CARDIAGTECH.NET today for expert advice and premium auto repair tools. Call us at +1 (641) 206-8880 or visit our website to explore our extensive product range. Let us help you achieve professional results at home! Our address is 276 Reock St, City of Orange, NJ 07050, United States.