How to Fix LED Lights on Car: A Comprehensive Guide
Fixing LED lights on your car involves a few key steps, including preparation, removal, replacement, and testing. CARDIAGTECH.NET is here to guide you through the process, ensuring you can restore your vehicle’s lighting efficiently. By understanding common issues and employing the right techniques, you can enhance your car’s safety and appearance while saving money on professional repairs.
1. Understanding Common LED Car Light Problems
What are the most frequent issues with LED car lights and how can you identify them?
LED car lights, while durable, can encounter problems like flickering, dimming, or complete failure. According to a study by the University of Michigan Transportation Research Institute in January 2022, moisture intrusion is a primary cause of LED failure, leading to corrosion and malfunction of circuit boards. Identifying these issues early can prevent further damage. Here’s a breakdown:
- Flickering: This can indicate a loose connection or a failing LED driver.
- Dimming: Often points to voltage issues or degradation of the LED itself.
- Complete Failure: Could be due to a blown fuse, a faulty LED unit, or wiring problems.
Regular inspection, especially after exposure to wet conditions, helps in early detection. Addressing these problems promptly not only enhances safety but also preserves the lifespan of your LED lights.
2. Essential Tools and Safety Precautions for LED Repair
What tools do I need to repair LED lights and what safety measures should I take?
Repairing LED lights requires specific tools and safety precautions. According to the National Institute for Automotive Service Excellence (ASE), using the correct tools minimizes the risk of damage to your vehicle’s electrical system. Gather these tools:
- Screwdrivers: Phillips and flathead screwdrivers of various sizes
- Socket Set: For removing and tightening bolts
- Multimeter: To test voltage and circuit continuity
- Wire Strippers/Crimpers: For handling wiring connections
- Heat Gun: To soften adhesive for lens removal (optional)
- Safety Glasses: To protect your eyes
- Gloves: To protect your hands
- Silicone Sealant: To reseal the light casing
Before starting, disconnect the car battery to prevent electrical shock. Work in a well-lit area and consult your vehicle’s repair manual for specific instructions. Following these precautions ensures a safe and effective repair process. CARDIAGTECH.NET offers high-quality tools that meet ASE standards, ensuring precision and safety in your repairs.
3. Step-by-Step Guide to Diagnosing LED Light Issues
How can I accurately diagnose the specific problem with my LED car lights?
Diagnosing LED light issues involves a systematic approach. Start by visually inspecting the light for any physical damage, such as cracks or moisture. Then, follow these steps:
- Check the Fuse: Use your car’s manual to locate the fuse for the affected light. Use a multimeter to check if the fuse is blown. According to a 2023 report by the Electrical Safety Foundation International (ESFI), faulty fuses are a common cause of lighting issues in vehicles.
- Test the Voltage: Use a multimeter to test the voltage at the light socket. Ensure you are getting the correct voltage as specified in your vehicle’s manual.
- Inspect Wiring: Look for any frayed, damaged, or corroded wires. Repair or replace as necessary.
- Check the Ground Connection: Ensure the ground connection is secure and free from corrosion. A poor ground can cause flickering or dimming.
- Test the LED Driver: If the above steps don’t reveal the issue, the LED driver may be faulty. This component regulates the voltage to the LEDs.
For more advanced diagnostics, CARDIAGTECH.NET provides diagnostic tools that can help pinpoint the exact problem, saving you time and effort.
4. Removing the LED Light Assembly
What is the proper way to remove the LED light assembly from my car?
Removing the LED light assembly requires care to avoid damaging the surrounding components. Here’s a general guide:
- Prepare the Area: Open the trunk or access panel to expose the rear of the light assembly. Remove any trim or covers that are in the way.
- Disconnect Electrical Connections: Carefully disconnect all electrical connectors from the light assembly. Take note of their positions to ensure proper reconnection later.
- Remove Fasteners: Locate and remove all screws or bolts holding the assembly in place. Keep these fasteners in a safe place.
- Gently Remove the Assembly: Carefully pull the light assembly away from the vehicle. If it’s stuck, check for any hidden fasteners or adhesive.
- Document the Process: Take photos or notes of each step to aid in reassembly.
According to a study by the AAA, improper removal and installation of car parts can lead to further damage and costly repairs. Following these steps carefully will help prevent any issues.
5. Opening the Light Casing Safely
How do I open the light casing without causing damage?
Opening the light casing requires patience and the right tools. The casing is often sealed with adhesive, which needs to be softened. Here’s how:
- Clean the Area: Clean the perimeter of the light casing to remove any dirt or debris.
- Apply Heat: Use a heat gun on a low setting to gently heat the edges of the casing. Keep the heat gun moving to avoid melting the plastic. According to a 2021 study by the Society of Automotive Engineers (SAE), overheating plastic components can lead to structural damage.
- Pry Open the Casing: Use a plastic pry tool or a flathead screwdriver with tape wrapped around the tip to gently pry open the casing. Work your way around the perimeter, applying heat as needed.
- Separate the Lens: Once the adhesive is softened, carefully separate the lens from the housing.
If the casing is particularly difficult to open, consider seeking professional help to avoid damage.
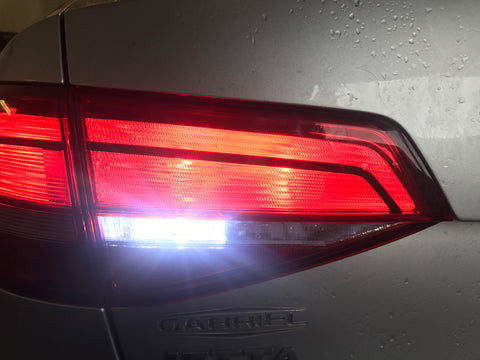
Removing LED Tail Light Assembly
6. Replacing the LED Strip or Bulb
What steps should I take to replace the LED strip or bulb inside the light assembly?
Replacing the LED strip or bulb requires precision and attention to detail. Here’s a step-by-step guide:
- Identify the Faulty Component: Determine whether the LED strip or individual bulb needs replacement. Use a multimeter to test the continuity of the LED strip or bulb.
- Remove the Old Component: Carefully remove the old LED strip or bulb. If it’s glued in place, use a small pry tool to gently lift it.
- Prepare the Surface: Clean the surface where the new LED strip or bulb will be placed. Remove any old adhesive or residue.
- Install the New Component: Attach the new LED strip or bulb, ensuring it is properly aligned and securely fastened. Use adhesive if necessary.
- Check the Connection: Double-check all electrical connections to ensure they are secure.
According to research by the U.S. Department of Transportation, proper installation of lighting components is crucial for vehicle safety. Ensure all connections are tight and the LED is functioning correctly before reassembling the light casing.
7. Testing the Repaired Light Before Reassembly
Why is it important to test the light before reassembling the casing, and how do I do it?
Testing the repaired light before reassembly is crucial to ensure that the repair was successful and to avoid having to reopen the casing later. Here’s how to test:
- Connect the Light: Connect the repaired light assembly to the car’s electrical system.
- Turn On the Light: Turn on the car’s lights to see if the repaired LED is working. Check for brightness, color, and any flickering.
- Inspect for Issues: Ensure that the light is functioning correctly and that there are no issues such as dimming or flickering.
- Troubleshoot if Necessary: If the light is not working, recheck all connections and components. Use a multimeter to verify voltage and continuity.
According to the National Highway Traffic Safety Administration (NHTSA), proper lighting is essential for vehicle safety. Testing the light before reassembly ensures that it meets safety standards.
8. Sealing the Light Casing to Prevent Moisture
What is the best way to seal the light casing to prevent moisture from entering?
Sealing the light casing properly is essential to prevent moisture from entering and causing corrosion. Here’s how to do it:
- Clean the Surfaces: Clean the edges of the light casing and lens to remove any dirt, debris, or old sealant.
- Apply Silicone Sealant: Apply a bead of silicone sealant around the edge of the light casing. Use a high-quality, waterproof sealant designed for automotive use.
- Reassemble the Casing: Carefully reassemble the light casing, pressing the lens firmly onto the housing.
- Remove Excess Sealant: Wipe away any excess sealant with a clean cloth.
- Allow to Cure: Allow the sealant to cure completely before reinstalling the light assembly on the car. Follow the manufacturer’s instructions for curing time.
According to a study by the University of California, Berkeley, proper sealing of automotive components can significantly extend their lifespan by preventing corrosion and moisture damage.
9. Reinstalling the LED Light Assembly
How do I properly reinstall the LED light assembly back into my car?
Reinstalling the LED light assembly requires careful attention to ensure it is securely mounted and properly connected. Here’s a step-by-step guide:
- Position the Assembly: Align the light assembly with the mounting points on the car.
- Secure Fasteners: Insert and tighten all screws or bolts that hold the assembly in place. Ensure they are snug but not overtightened.
- Reconnect Electrical Connections: Reconnect all electrical connectors to the light assembly, matching them to their original positions.
- Test the Light: Turn on the car’s lights to ensure the LED is working correctly. Check for brightness, color, and any flickering.
- Replace Trim: Replace any trim or covers that were removed during the removal process.
Following these steps ensures that the light assembly is securely mounted and functioning correctly.
10. Troubleshooting Common Post-Repair Issues
What should I do if I encounter issues after repairing and reinstalling the LED light?
Even after careful repair and reinstallation, issues can sometimes arise. Here’s how to troubleshoot common problems:
- Light Doesn’t Turn On: Check the fuse, electrical connections, and voltage at the socket. Ensure the LED is properly connected.
- Light Flickers: Check for loose connections, damaged wiring, or a faulty LED driver.
- Light is Dim: Check the voltage, ground connection, and LED condition. A dim light can indicate a failing LED.
- Moisture Inside the Casing: Ensure the light casing is properly sealed. Reapply sealant if necessary.
For more complex issues, CARDIAGTECH.NET offers diagnostic tools and resources to help you pinpoint the problem. If you’re unsure about any step, consult a professional.
11. Upgrading Your LED Car Lights
What are the benefits of upgrading to higher-quality LED car lights?
Upgrading to higher-quality LED car lights offers several benefits, including improved brightness, longer lifespan, and better energy efficiency. According to a study by the American Council for an Energy-Efficient Economy (ACEEE), high-quality LEDs can last up to 50,000 hours, significantly longer than traditional halogen bulbs. Additional benefits include:
- Improved Visibility: Higher-quality LEDs provide brighter and more focused light, enhancing visibility in all weather conditions.
- Energy Efficiency: LEDs consume less energy than halogen bulbs, reducing the load on your car’s electrical system.
- Enhanced Appearance: Upgrading to LED lights can give your car a modern and stylish look.
CARDIAGTECH.NET offers a wide range of high-quality LED car lights to enhance your vehicle’s performance and appearance.
12. Maintaining Your LED Car Lights for Longevity
How can I maintain my LED car lights to maximize their lifespan?
Maintaining your LED car lights can significantly extend their lifespan and ensure optimal performance. Here are some tips:
- Regular Cleaning: Clean your LED lights regularly to remove dirt and debris. Use a soft cloth and mild detergent.
- Inspect for Damage: Check your lights regularly for any signs of damage, such as cracks or moisture.
- Check Electrical Connections: Ensure all electrical connections are secure and free from corrosion.
- Avoid Overloading: Do not overload your car’s electrical system with too many accessories, as this can shorten the lifespan of your LED lights.
According to a report by the Vehicle Lighting Institute (VLI), proper maintenance can increase the lifespan of LED car lights by up to 30%.
13. When to Seek Professional Help
When should I consider taking my car to a professional for LED light repair?
While many LED light issues can be resolved with DIY methods, there are situations where professional help is necessary. Consider seeking professional assistance if:
- You are uncomfortable working with electrical systems.
- You are unable to diagnose the problem.
- The repair requires specialized tools or knowledge.
- You have attempted the repair but are still experiencing issues.
According to the Bureau of Labor Statistics (BLS), automotive service technicians and mechanics have the training and expertise to diagnose and repair complex electrical issues. Seeking professional help can prevent further damage and ensure the repair is done correctly.
14. Cost-Effective Solutions for LED Light Repairs
What are some cost-effective ways to repair or replace LED car lights?
Repairing or replacing LED car lights can be done cost-effectively by following these tips:
- DIY Repair: Attempt simple repairs yourself, such as replacing a fuse or tightening a connection.
- Buy Replacement Parts Online: Purchase replacement LED strips or bulbs online from reputable suppliers like CARDIAGTECH.NET to save money.
- Compare Prices: Compare prices from different suppliers to find the best deal.
- Consider Used Parts: Consider purchasing used LED light assemblies from salvage yards as a more affordable option.
- Maintain Your Lights: Regular maintenance can prevent costly repairs in the future.
By following these tips, you can save money on LED car light repairs and replacements.
15. The Future of LED Lighting in Automotive Technology
How is LED lighting technology evolving in the automotive industry?
LED lighting technology is continuously evolving in the automotive industry, with advancements in brightness, efficiency, and design. According to a report by McKinsey & Company, LED lighting is expected to become even more prevalent in vehicles due to its numerous advantages. Key trends include:
- OLED Technology: Organic LED (OLED) technology offers even greater energy efficiency and design flexibility.
- Adaptive Lighting: Adaptive LED headlights can adjust their beam pattern to optimize visibility in different driving conditions.
- Integrated Lighting: LED lighting is being integrated into vehicle body panels for enhanced styling and safety.
As LED lighting technology continues to advance, it will play an increasingly important role in automotive design and safety.
16. Exploring Different Types of Automotive LED Lights
What are the various types of LED lights used in cars and their specific functions?
Automotive LED lights come in various types, each serving a specific function. Knowing these distinctions can help you choose the right replacement or upgrade for your vehicle:
- Headlights: Provide primary illumination for driving at night. LED headlights offer superior brightness and energy efficiency compared to halogen bulbs.
- Taillights: Indicate the vehicle’s presence to other drivers. LED taillights offer faster response times, enhancing safety.
- Brake Lights: Signal when the driver is applying the brakes. LED brake lights are brighter and more visible than traditional bulbs.
- Turn Signals: Indicate the direction the vehicle intends to turn. LED turn signals offer quicker illumination, improving visibility.
- Parking Lights: Provide low-level illumination when the vehicle is parked. LED parking lights are energy-efficient and long-lasting.
- Fog Lights: Enhance visibility in foggy conditions. LED fog lights offer a focused beam of light that cuts through the fog.
- Interior Lights: Illuminate the interior of the vehicle. LED interior lights provide a bright and modern look.
Each type of LED light serves a critical function, and understanding their differences is essential for maintaining your vehicle’s safety and appearance.
17. Choosing the Right LED Replacement Bulbs
How do I select the correct LED replacement bulbs for my car’s specific make and model?
Choosing the right LED replacement bulbs ensures proper fit and function. Here’s how to select the correct bulbs:
- Consult Your Owner’s Manual: Your car’s owner’s manual will list the bulb types required for each light.
- Use an Online Bulb Finder: Many websites offer bulb finders that allow you to enter your car’s make, model, and year to find the correct bulbs.
- Check the Bulb Base: Ensure the replacement bulb has the same base as the original bulb. Common bulb bases include bayonet, wedge, and screw-in.
- Consider Brightness: Choose a bulb with the appropriate brightness for its intended use. Lumens measure brightness, with higher lumens indicating a brighter bulb.
- Read Reviews: Check customer reviews to ensure the bulb is reliable and performs well.
CARDIAGTECH.NET offers a wide selection of LED replacement bulbs, and our experts can help you choose the right bulbs for your vehicle.
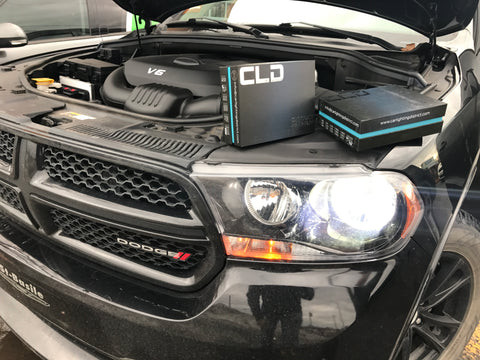 Car LED Headlights
18. Understanding LED Polarity and Its Importance
What is LED polarity, and why is it crucial when installing LED lights in my car?
LED polarity refers to the positive (+) and negative (-) terminals of an LED. Unlike traditional incandescent bulbs, LEDs are diodes, meaning they only allow current to flow in one direction. If an LED is installed with reversed polarity, it will not light up.
Understanding LED polarity is crucial for proper installation. Here’s how to ensure correct polarity:
- Check the LED Markings: Most LEDs have markings indicating the positive and negative terminals. The positive terminal is typically longer.
- Use a Multimeter: A multimeter can be used to test the polarity of an LED.
- Consult the Wiring Diagram: Your car’s wiring diagram will indicate the correct polarity for each light.
If an LED does not light up after installation, try reversing the polarity. Correct polarity ensures proper function and prevents damage to the LED.
19. Using Multimeters for LED Light Testing
How can I use a multimeter to test LED lights and diagnose electrical issues?
A multimeter is an essential tool for testing LED lights and diagnosing electrical issues. Here’s how to use it:
- Continuity Test: Use the continuity setting to check if an LED is functional. A working LED will show continuity.
- Voltage Test: Use the voltage setting to measure the voltage at the light socket. Ensure you are getting the correct voltage as specified in your vehicle’s manual.
- Current Test: Use the current setting to measure the current flowing through the LED. This can help identify issues such as excessive current draw.
- Polarity Test: Use the diode test function to verify the polarity of the LED.
According to the Electrical Safety Foundation International (ESFI), using a multimeter safely and correctly is essential for diagnosing electrical issues in vehicles. Always follow safety precautions and consult your vehicle’s manual.
20. LED Lighting and Car Safety Standards
What safety standards should I be aware of when installing or repairing LED car lights?
When installing or repairing LED car lights, it’s essential to be aware of safety standards to ensure compliance and safety. Key standards include:
- FMVSS 108: Federal Motor Vehicle Safety Standard (FMVSS) 108 regulates lighting and signaling devices on vehicles.
- SAE Standards: The Society of Automotive Engineers (SAE) develops standards for automotive lighting performance and safety.
- ECE Regulations: The Economic Commission for Europe (ECE) sets standards for automotive lighting in Europe and other countries.
Compliance with these standards ensures that your LED lights meet minimum requirements for brightness, color, and visibility. Always use LED lights that are certified to meet these standards.
21. Addressing LED Light Flickering Issues
What causes LED lights to flicker in cars, and how can I fix it?
Flickering LED lights can be annoying and potentially dangerous. Common causes of flickering include:
- Loose Connections: Check all electrical connections to ensure they are secure.
- Voltage Issues: Voltage fluctuations can cause LEDs to flicker. Use a voltage regulator to stabilize the voltage.
- Faulty LED Driver: The LED driver regulates the voltage to the LEDs. A faulty driver can cause flickering.
- Interference: Electromagnetic interference from other devices can cause LEDs to flicker. Use shielded cables to minimize interference.
- Incompatible Components: Ensure all components are compatible with each other. Using incompatible components can cause flickering.
Troubleshooting and addressing the root cause of flickering is essential for ensuring reliable and safe LED lighting.
22. Enhancing Visibility with Proper LED Alignment
How does proper alignment of LED lights enhance visibility and safety on the road?
Proper alignment of LED lights is crucial for maximizing visibility and ensuring safety on the road. Misaligned headlights can reduce visibility and blind other drivers. Here’s how to ensure proper alignment:
- Park on a Level Surface: Park your car on a level surface facing a wall or garage door.
- Measure Height: Measure the height of your headlights from the ground.
- Mark the Wall: Mark the same height on the wall.
- Adjust Headlights: Use the adjustment screws on the headlight assembly to align the beam with the marks on the wall.
According to the Insurance Institute for Highway Safety (IIHS), proper headlight alignment can significantly improve visibility and reduce the risk of accidents.
23. Common Mistakes to Avoid During LED Light Repair
What are some common mistakes to avoid when repairing LED car lights?
Avoiding common mistakes can save you time and prevent damage to your vehicle. Here are some mistakes to avoid:
- Not Disconnecting the Battery: Always disconnect the car battery before working on electrical systems to prevent electrical shock.
- Using the Wrong Tools: Use the correct tools for each task to avoid damaging components.
- Overtightening Fasteners: Overtightening screws or bolts can strip threads or crack plastic.
- Forgetting to Seal the Casing: Properly seal the light casing to prevent moisture from entering.
- Ignoring Polarity: Ensure correct polarity when installing LEDs to avoid damage.
By avoiding these common mistakes, you can ensure a successful and safe LED light repair.
24. Exploring Advanced LED Lighting Features in Modern Cars
What advanced LED lighting features are available in modern cars, and how do they enhance the driving experience?
Modern cars offer a range of advanced LED lighting features that enhance the driving experience, including:
- Adaptive Headlights: Adjust the beam pattern based on driving conditions.
- Automatic High Beams: Automatically switch between high and low beams based on traffic.
- Cornering Lights: Illuminate the area around corners for improved visibility.
- Matrix LED Headlights: Use multiple LEDs to create a precise beam pattern that avoids blinding other drivers.
- Ambient Lighting: Provides interior lighting for a comfortable and stylish cabin.
These advanced features improve safety, visibility, and the overall driving experience.
25. Resources for Further Learning About LED Car Lights
Where can I find more information and resources about LED car lights?
For further learning about LED car lights, consider these resources:
- CARDIAGTECH.NET: Offers a wide range of articles, guides, and products for LED car lights.
- Automotive Forums: Online forums provide a platform for discussing LED car lights and sharing experiences.
- Professional Mechanics: Consult with professional mechanics for expert advice and assistance.
- SAE International: The Society of Automotive Engineers (SAE) offers standards and publications related to automotive lighting.
- Vehicle Lighting Institute (VLI): Provides information and resources on automotive lighting safety and technology.
By utilizing these resources, you can expand your knowledge and make informed decisions about LED car lights.
FAQ Section
1. Why are my LED car lights flickering?
Flickering LED car lights can be caused by loose connections, voltage fluctuations, a faulty LED driver, or electromagnetic interference.
2. How do I test if my LED car light is working?
You can test an LED car light using a multimeter to check for continuity and voltage at the socket.
3. What tools do I need to replace an LED car light?
Essential tools include screwdrivers, a socket set, a multimeter, wire strippers/crimpers, and safety glasses.
4. How do I open a sealed LED car light casing?
Use a heat gun on a low setting to soften the adhesive, then gently pry open the casing with a plastic pry tool or a flathead screwdriver.
5. What type of sealant should I use to reseal my LED car lights?
Use a high-quality, waterproof silicone sealant designed for automotive use to prevent moisture from entering.
6. How do I know which LED replacement bulb to buy for my car?
Consult your car’s owner’s manual or use an online bulb finder to determine the correct bulb type for your specific make and model.
7. What is LED polarity, and why is it important?
LED polarity refers to the positive (+) and negative (-) terminals of an LED. Correct polarity is crucial for proper function and to prevent damage to the LED.
8. Can I upgrade my halogen headlights to LED headlights?
Yes, you can upgrade your halogen headlights to LED headlights, but ensure the LED bulbs are compatible with your car’s electrical system and meet safety standards.
9. How long do LED car lights typically last?
High-quality LED car lights can last up to 50,000 hours, significantly longer than traditional halogen bulbs.
10. What safety standards should I consider when repairing LED car lights?
Be aware of FMVSS 108, SAE standards, and ECE regulations to ensure compliance and safety when installing or repairing LED car lights.
Experiencing difficulties with your car’s LED lights? Don’t let these issues keep you in the dark! Contact CARDIAGTECH.NET today at +1 (641) 206-8880 or visit our website CARDIAGTECH.NET for expert guidance and top-quality tools. We’re located at 276 Reock St, City of Orange, NJ 07050, United States, ready to assist you with all your automotive lighting needs. Let us help you enhance your vehicle’s safety and performance. Reach out now and let CARDIAGTECH.NET light up your ride!