How to Fix Fuel Gauge on Car: A Comprehensive Guide
Fixing a car fuel gauge involves diagnosing the issue, which could stem from the gauge itself, the sending unit, or the wiring in between. CARDIAGTECH.NET provides expert insights and tools to tackle fuel gauge problems, ensuring accurate readings and preventing unexpected empty-tank situations. Learn how to troubleshoot and maintain your fuel gauge system with our guide, which will cover fuel level sensor issues, multimeter testing, and fuel gauge repair.
1. Understanding the Fuel Gauge System
What are the key components of a car’s fuel gauge system?
A car’s fuel gauge system consists of several key components working together to provide an accurate fuel level reading. These include the fuel gauge itself (located on the instrument cluster), the fuel sending unit (located inside the fuel tank), and the wiring connecting these components. According to a study by the National Highway Traffic Safety Administration (NHTSA), malfunctions in any of these components can lead to inaccurate fuel readings, potentially causing drivers to run out of gas unexpectedly. The fuel sending unit typically includes a float, which rises and falls with the fuel level, and a variable resistor (rheostat) that changes resistance based on the float’s position. This resistance is then translated into a fuel level reading on the gauge.
- Fuel Gauge: Displays the fuel level to the driver.
- Fuel Sending Unit: Measures the fuel level in the tank.
- Float: Rises and falls with the fuel level.
- Rheostat: Varies resistance based on fuel level.
- Wiring: Connects the sending unit to the gauge.
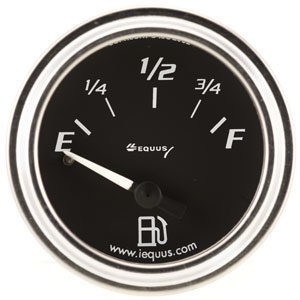
Fuel Gauge System
Alt: A car fuel gauge displaying half a tank of gas, part of the vehicle’s instrument cluster.
2. Diagnosing Fuel Gauge Problems
How do you diagnose a faulty fuel gauge?
Diagnosing a faulty fuel gauge involves a systematic approach to pinpoint the source of the problem. Start by performing a visual inspection of the fuel gauge itself. Check if the needle is stuck, moves erratically, or consistently displays an incorrect reading. Next, inspect the wiring connecting the fuel gauge to the sending unit. Look for any signs of damage, such as frayed wires, loose connections, or corrosion. According to the Automotive Research Association of India (ARAI), faulty wiring is a common cause of fuel gauge problems, especially in older vehicles. A multimeter can be used to test the continuity of the wiring and to check for voltage at the fuel gauge. If the wiring and gauge appear to be in good condition, the next step is to inspect the fuel sending unit inside the fuel tank. This may involve removing the fuel pump assembly to access the sending unit.
- Visual Inspection: Check the gauge needle and wiring for obvious damage.
- Wiring Test: Use a multimeter to check for continuity and voltage.
- Sending Unit Inspection: Access the sending unit inside the fuel tank.
3. Common Causes of Fuel Gauge Failure
What are the most common reasons a fuel gauge stops working?
Several factors can cause a fuel gauge to malfunction. One of the most common is a faulty fuel sending unit. Over time, the float in the sending unit can become damaged or the rheostat can wear out, leading to inaccurate readings. Another common cause is corroded or damaged wiring. The wiring connecting the fuel gauge to the sending unit is exposed to harsh conditions, such as moisture, heat, and vibration, which can cause the wires to corrode or break. According to a study by the University of Michigan Transportation Research Institute (UMTRI), corrosion is a leading cause of electrical failures in vehicles, including fuel gauge malfunctions. Additionally, a blown fuse can also cause the fuel gauge to stop working. The fuse that protects the instrument cluster, which includes the fuel gauge, can blow due to a short circuit or other electrical issue.
- Faulty Sending Unit: Damaged float or worn-out rheostat.
- Corroded Wiring: Exposure to moisture, heat, and vibration.
- Blown Fuse: Short circuit or electrical issue.
4. Step-by-Step Guide to Fixing a Fuel Gauge
What are the steps to fix a car fuel gauge that is not working?
Here’s a step-by-step guide to fixing a car fuel gauge:
- Check the Fuses: Locate the fuse box, usually under the dashboard or in the engine compartment. Consult your car’s owner’s manual to find the fuse for the instrument cluster or fuel gauge. If the fuse is blown, replace it with a new one of the same amperage.
- Inspect the Wiring: Check the wiring connecting the fuel gauge to the sending unit. Look for any signs of damage, such as frayed wires, loose connections, or corrosion. Use a multimeter to test the continuity of the wiring. If you find any damaged wires, repair or replace them.
- Test the Sending Unit: Access the fuel sending unit inside the fuel tank. Use a multimeter to test the resistance of the sending unit as you move the float up and down. The resistance should change smoothly and consistently. If the resistance is erratic or doesn’t change at all, the sending unit is likely faulty and needs to be replaced.
- Check the Ground Connection: Ensure that the ground connection for the fuel gauge and sending unit is clean and secure. A poor ground connection can cause inaccurate readings. Clean any corrosion from the ground connection and tighten the connection.
- Test the Fuel Gauge: If the fuses, wiring, and sending unit all appear to be in good condition, the fuel gauge itself may be faulty. In this case, you may need to replace the fuel gauge or the entire instrument cluster.
- Step 1: Check the Fuses
- Step 2: Inspect the Wiring
- Step 3: Test the Sending Unit
- Step 4: Check the Ground Connection
- Step 5: Test the Fuel Gauge
5. Testing the Fuel Sending Unit
How do you test a fuel sending unit with a multimeter?
Testing the fuel sending unit with a multimeter is a crucial step in diagnosing fuel gauge problems. Here’s how to do it:
- Access the Sending Unit: Locate and access the fuel sending unit inside the fuel tank. This usually involves removing the fuel pump assembly.
- Disconnect the Wiring: Disconnect the wiring harness from the sending unit.
- Set the Multimeter: Set your multimeter to the ohms (Ω) setting.
- Connect the Probes: Connect the multimeter probes to the sending unit terminals. One probe should be connected to the sending unit terminal, and the other probe should be connected to the ground terminal.
- Move the Float: Manually move the float arm up and down to simulate different fuel levels.
- Observe the Resistance: Observe the resistance reading on the multimeter as you move the float. The resistance should change smoothly and consistently as you move the float. If the resistance is erratic or doesn’t change at all, the sending unit is faulty and needs to be replaced.
- Step 1: Access the Sending Unit
- Step 2: Disconnect the Wiring
- Step 3: Set the Multimeter
- Step 4: Connect the Probes
- Step 5: Move the Float
- Step 6: Observe the Resistance
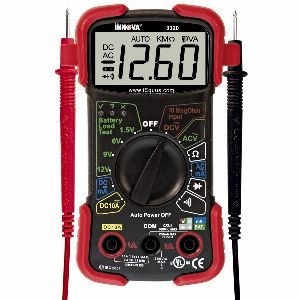 Multimeter
Alt: A digital multimeter being used to test electrical circuits, essential for diagnosing car fuel gauge issues.
6. Checking for Wiring Issues
How do you check the wiring for a fuel gauge?
Checking the wiring for a fuel gauge involves a thorough inspection of the wires and connections between the fuel gauge and the sending unit. Here’s how to do it:
- Visual Inspection: Start by visually inspecting the wiring for any signs of damage, such as frayed wires, cracks, or corrosion. Pay close attention to the areas where the wires are exposed to the elements, such as near the fuel tank.
- Continuity Test: Use a multimeter to test the continuity of the wires. Disconnect the wiring harness from both the fuel gauge and the sending unit. Set the multimeter to the continuity setting (usually indicated by a diode symbol). Connect the multimeter probes to each end of the wire. If the multimeter beeps or displays a low resistance reading, the wire has continuity and is good. If the multimeter doesn’t beep or displays a high resistance reading, the wire is broken or corroded and needs to be replaced.
- Voltage Test: Use a multimeter to check for voltage at the fuel gauge. With the ignition turned on, connect the multimeter probes to the power and ground terminals of the fuel gauge. The multimeter should display a voltage reading of around 12 volts. If there is no voltage, there may be a problem with the power supply to the fuel gauge.
- Ground Connection: Check the ground connection for the fuel gauge and sending unit. Ensure that the ground connection is clean and secure. A poor ground connection can cause inaccurate readings.
- Step 1: Visual Inspection
- Step 2: Continuity Test
- Step 3: Voltage Test
- Step 4: Ground Connection
7. Replacing a Faulty Fuel Sending Unit
What is involved in replacing a fuel sending unit?
Replacing a faulty fuel sending unit is a common repair for fuel gauge problems. Here’s what’s involved:
- Safety First: Before starting any work on the fuel system, disconnect the negative battery cable to prevent any electrical sparks. Work in a well-ventilated area to avoid inhaling fuel vapors.
- Access the Fuel Tank: The fuel sending unit is located inside the fuel tank, so you’ll need to access the tank. This may involve removing the fuel tank from the vehicle or accessing it through an access panel in the trunk or rear seat.
- Remove the Fuel Pump Assembly: The fuel sending unit is usually integrated with the fuel pump assembly. Carefully remove the fuel pump assembly from the fuel tank. Be careful not to damage any of the fuel lines or electrical connections.
- Replace the Sending Unit: Once the fuel pump assembly is removed, you can access the fuel sending unit. Disconnect the electrical connector and any retaining clips or screws. Remove the old sending unit and install the new one.
- Reassemble: Reinstall the fuel pump assembly into the fuel tank. Reconnect the fuel lines and electrical connections.
- Test: Reconnect the negative battery cable and turn on the ignition. Check the fuel gauge to ensure that it is working properly.
- Step 1: Safety First
- Step 2: Access the Fuel Tank
- Step 3: Remove the Fuel Pump Assembly
- Step 4: Replace the Sending Unit
- Step 5: Reassemble
- Step 6: Test
8. Dealing with Instrument Cluster Issues
What if the problem is with the instrument cluster itself?
If the fuel gauge problem persists after checking the fuses, wiring, and sending unit, the issue may be with the instrument cluster itself. The instrument cluster is a complex electronic component that contains the fuel gauge, speedometer, odometer, and other gauges and indicators. If the instrument cluster is faulty, it can cause various problems, including an inaccurate or non-functional fuel gauge. According to a report by J.D. Power, instrument cluster problems are a common source of dissatisfaction among vehicle owners. In some cases, the instrument cluster can be repaired by a qualified technician. However, in other cases, it may need to be replaced.
- Repair: Have a qualified technician repair the instrument cluster.
- Replace: Replace the instrument cluster with a new or refurbished unit.
9. Using Aftermarket Fuel Gauges
When might you consider using an aftermarket fuel gauge?
In some cases, using an aftermarket fuel gauge may be a viable solution for fuel gauge problems. Aftermarket fuel gauges are available in a variety of styles and configurations, and they can be used to replace a faulty fuel gauge in the instrument cluster or as a standalone gauge. You might consider using an aftermarket fuel gauge if:
- The original fuel gauge is no longer available or is too expensive to replace.
- You want to add a fuel gauge to a vehicle that doesn’t have one.
- You want a more accurate or customizable fuel gauge.
When choosing an aftermarket fuel gauge, be sure to select one that is compatible with your vehicle’s fuel sending unit and electrical system.
- Availability: Original fuel gauge is not available.
- Addition: Adding a fuel gauge to a vehicle that doesn’t have one.
- Accuracy: Seeking a more accurate fuel gauge.
10. Preventive Maintenance for Fuel Gauges
How can you prevent fuel gauge problems?
Preventive maintenance is key to keeping your fuel gauge working properly and avoiding unexpected empty-tank situations. Here are some tips:
- Regular Inspections: Inspect the fuel gauge and wiring regularly for any signs of damage or corrosion.
- Fuel System Cleaner: Use a fuel system cleaner periodically to help keep the fuel sending unit clean and free of deposits.
- Avoid Running Empty: Avoid running the fuel tank completely empty, as this can damage the fuel pump and sending unit.
- Address Issues Promptly: If you notice any problems with the fuel gauge, address them promptly to prevent them from getting worse.
By following these preventive maintenance tips, you can help keep your fuel gauge working properly and avoid the inconvenience and potential danger of running out of gas.
- Regular Inspections: Check for damage or corrosion.
- Fuel System Cleaner: Use periodically to keep the sending unit clean.
- Avoid Running Empty: Prevents damage to the fuel pump and sending unit.
- Promptly Address Issues: Fix problems before they worsen.
 Fuses
Fuses
Alt: An assortment of automotive fuses, vital for protecting the fuel gauge system from electrical overloads and shorts.
11. Understanding Fuel Level Sensor Issues
What are common issues with fuel level sensors?
Fuel level sensors, typically a part of the fuel sending unit, can suffer from various issues that lead to inaccurate fuel readings. One common problem is the buildup of deposits on the sensor, which can interfere with its ability to accurately measure the fuel level. According to research from the Society of Automotive Engineers (SAE), fuel additives and contaminants can contribute to these deposits. Another issue is the wear and tear of the sensor’s components, such as the float and the variable resistor. Over time, these components can degrade, leading to inaccurate or erratic readings. Additionally, corrosion can also affect the sensor’s performance, especially in vehicles that are exposed to harsh environments.
- Deposit Buildup: Accumulation of contaminants on the sensor.
- Wear and Tear: Degradation of the float and variable resistor.
- Corrosion: Affects sensor performance in harsh environments.
12. The Role of the Fuel Pump in Fuel Gauge Accuracy
How does the fuel pump affect fuel gauge accuracy?
While the fuel pump’s primary function is to deliver fuel from the tank to the engine, it can indirectly affect fuel gauge accuracy. The fuel pump assembly often includes the fuel sending unit, which is responsible for measuring the fuel level. If the fuel pump is failing or not functioning properly, it can affect the fuel level reading. For example, if the fuel pump is not providing enough fuel to the engine, the fuel level in the tank may appear to be lower than it actually is. Additionally, a faulty fuel pump can cause fluctuations in fuel pressure, which can also affect the accuracy of the fuel gauge.
- Fuel Delivery: Affects the fuel level reading.
- Fuel Pressure: Fluctuations can impact gauge accuracy.
13. Advanced Troubleshooting Techniques
What are some advanced techniques for troubleshooting fuel gauge problems?
For complex fuel gauge issues that are difficult to diagnose, advanced troubleshooting techniques may be necessary. These techniques may include using a scan tool to read fuel level sensor data, performing a voltage drop test to check for wiring problems, or using an oscilloscope to analyze the fuel gauge signal. According to the National Institute for Automotive Service Excellence (ASE), advanced diagnostic skills are essential for technicians to accurately diagnose and repair complex automotive problems, including fuel gauge malfunctions. Additionally, consulting a vehicle-specific repair manual or online database can provide valuable information about the fuel gauge system and troubleshooting procedures.
- Scan Tool: Read fuel level sensor data.
- Voltage Drop Test: Check for wiring problems.
- Oscilloscope: Analyze the fuel gauge signal.
14. Understanding Ohm Readings and Fuel Levels
How do ohm readings relate to fuel levels in the sending unit?
The fuel sending unit uses a variable resistor (rheostat) to measure the fuel level in the tank. The resistance of the rheostat changes as the float moves up and down with the fuel level. The fuel gauge then interprets this resistance as a fuel level reading. Typically, a low resistance reading indicates a low fuel level, while a high resistance reading indicates a high fuel level. The specific ohm readings for empty and full fuel levels vary depending on the vehicle make and model. According to a technical service bulletin from General Motors (GM), the typical resistance range for a GM fuel sending unit is 0-90 ohms, with 0 ohms indicating an empty tank and 90 ohms indicating a full tank.
- Low Resistance: Indicates a low fuel level.
- High Resistance: Indicates a high fuel level.
15. Fuel Gauge Calibration and Accuracy
How do you calibrate a fuel gauge for accuracy?
Calibrating a fuel gauge involves adjusting the fuel sending unit or the fuel gauge itself to ensure that the fuel level reading is accurate. In some cases, the fuel sending unit may have an adjustment screw or lever that can be used to calibrate the fuel level. However, in other cases, calibration may require specialized tools or equipment. According to a study by the California Air Resources Board (CARB), inaccurate fuel gauges can lead to overfilling or underfilling the fuel tank, which can have negative environmental consequences. Therefore, it’s important to ensure that the fuel gauge is properly calibrated for accuracy.
- Adjustment Screw: Adjust the fuel sending unit.
- Specialized Tools: May be required for calibration.
16. Utilizing CARDIAGTECH.NET for Your Fuel Gauge Needs
How can CARDIAGTECH.NET assist in fixing your fuel gauge?
CARDIAGTECH.NET is your go-to resource for diagnosing and repairing fuel gauge issues. We offer a wide range of diagnostic tools, including multimeters and scan tools, to help you pinpoint the source of the problem. Our expert technicians can provide guidance and support throughout the repair process, ensuring that you have the knowledge and tools you need to get the job done right. Additionally, we offer a variety of fuel sending units, fuel gauges, and other related components to help you restore your fuel gauge to proper working order.
- Diagnostic Tools: Multimeters and scan tools.
- Expert Guidance: Support from experienced technicians.
- Component Variety: Fuel sending units, gauges, and related parts.
17. The Importance of a Properly Functioning Fuel Gauge
Why is it important to have a fuel gauge that works correctly?
A properly functioning fuel gauge is essential for safe and efficient driving. It allows you to accurately monitor your fuel level and plan your refueling stops accordingly. A malfunctioning fuel gauge can lead to unexpected empty-tank situations, which can leave you stranded on the side of the road and potentially damage your vehicle. According to a survey by AAA, running out of gas is one of the most common reasons for roadside assistance calls. Additionally, an inaccurate fuel gauge can lead to overfilling the fuel tank, which can damage the fuel system and create a fire hazard.
- Safe Driving: Monitor fuel levels and plan refueling.
- Avoid Stranding: Prevent unexpected empty-tank situations.
- Prevent Damage: Avoid overfilling the fuel tank.
18. The Impact of Ethanol on Fuel Gauge Systems
How does ethanol in fuel affect fuel gauge systems?
Ethanol, a common additive in gasoline, can have several effects on fuel gauge systems. Ethanol is corrosive and can damage the fuel sending unit, fuel lines, and other components of the fuel system. According to a study by the Renewable Fuels Association (RFA), ethanol can cause the fuel sending unit to corrode or become coated with deposits, leading to inaccurate fuel readings. Additionally, ethanol can absorb water, which can also contribute to corrosion and fuel system problems. Therefore, it’s important to use fuel additives that are designed to protect the fuel system from the harmful effects of ethanol.
- Corrosion: Damages the fuel sending unit and fuel lines.
- Deposits: Coats the sending unit, leading to inaccurate readings.
- Water Absorption: Contributes to corrosion and fuel system issues.
19. What to Do If Your Fuel Gauge Reads Empty After Filling Up
What should you do if your fuel gauge still reads empty after filling up the tank?
If your fuel gauge reads empty even after filling up the tank, there may be a problem with the fuel sending unit, the wiring, or the fuel gauge itself. Here’s what you should do:
- Check the Fuel Cap: Ensure that the fuel cap is properly tightened. A loose fuel cap can cause the fuel gauge to read incorrectly.
- Check the Fuses: Check the fuse for the instrument cluster or fuel gauge. If the fuse is blown, replace it with a new one of the same amperage.
- Inspect the Wiring: Check the wiring connecting the fuel gauge to the sending unit. Look for any signs of damage or corrosion.
- Test the Sending Unit: Test the fuel sending unit with a multimeter to see if it is functioning properly.
- Consult a Professional: If you’ve checked the fuses, wiring, and sending unit and the fuel gauge still reads empty, consult a qualified mechanic for further diagnosis and repair.
- Step 1: Check the Fuel Cap
- Step 2: Check the Fuses
- Step 3: Inspect the Wiring
- Step 4: Test the Sending Unit
- Step 5: Consult a Professional
20. The Future of Fuel Gauge Technology
What are some advancements in fuel gauge technology?
Fuel gauge technology is constantly evolving, with new advancements aimed at improving accuracy, reliability, and functionality. One promising development is the use of solid-state fuel level sensors, which are more durable and less prone to wear and tear than traditional float-based sensors. According to a report by MarketsandMarkets, the global fuel level sensor market is expected to grow significantly in the coming years, driven by the increasing demand for more accurate and reliable fuel level measurement. Additionally, some vehicles are now equipped with fuel gauge systems that can communicate with the vehicle’s onboard computer to provide real-time fuel consumption data and range estimates.
- Solid-State Sensors: More durable and reliable.
- Market Growth: Increasing demand for accurate fuel level measurement.
- Real-Time Data: Communication with onboard computer for fuel consumption and range estimates.
Maintaining a properly functioning fuel gauge is crucial for preventing unexpected breakdowns and ensuring your vehicle operates safely and efficiently. At CARDIAGTECH.NET, we understand the challenges you face in keeping up with vehicle maintenance, which is why we offer top-quality tools and equipment to help you diagnose and repair fuel gauge issues.
We recognize the demands of your profession: the physical strain, constant exposure to grease and chemicals, and the need to stay updated with ever-evolving automotive technology. That’s why CARDIAGTECH.NET is committed to providing solutions that enhance your efficiency, precision, and safety. Our tools are designed to reduce repair times, improve accuracy, and ensure a safer working environment.
Ready to enhance your automotive repair capabilities? Contact CARDIAGTECH.NET today at +1 (641) 206-8880 or visit us at 276 Reock St, City of Orange, NJ 07050, United States, to learn more about our wide range of automotive diagnostic tools and equipment. Let us help you elevate your service quality and boost your business’s profitability. Reach out now and experience the CARDIAGTECH.NET advantage! Our website is CARDIAGTECH.NET.
FAQ: Troubleshooting Car Fuel Gauge Issues
1. Why is my fuel gauge stuck on full?
A fuel gauge stuck on full could be due to a faulty sending unit, wiring issues, or a problem with the gauge itself. Check the sending unit’s resistance, inspect the wiring for shorts, and test the gauge’s functionality.
2. What does it mean when my fuel gauge reads empty after filling up?
If your fuel gauge reads empty after filling up, it could indicate a faulty sending unit, a blown fuse, or wiring problems. Start by checking the fuse and then inspect the sending unit and wiring.
3. How do I test a fuel sending unit with a multimeter?
To test a fuel sending unit with a multimeter, set the multimeter to ohms, disconnect the wiring harness, and measure the resistance while moving the float arm. The resistance should change smoothly.
4. Can a bad ground cause fuel gauge problems?
Yes, a bad ground can cause inaccurate fuel gauge readings. Ensure the ground connection for the fuel gauge and sending unit is clean and secure.
5. How often should I replace my fuel sending unit?
The lifespan of a fuel sending unit varies, but it’s generally recommended to inspect it every 100,000 miles or when you notice fuel gauge inaccuracies.
6. What are the symptoms of a failing fuel pump?
Symptoms of a failing fuel pump include difficulty starting the engine, stalling, decreased fuel efficiency, and a noisy fuel pump.
7. Can ethanol in fuel damage my fuel gauge?
Yes, ethanol can corrode the fuel sending unit and other fuel system components, leading to inaccurate fuel readings.
8. Is it safe to drive with a faulty fuel gauge?
Driving with a faulty fuel gauge can be risky as it may lead to running out of gas unexpectedly. It’s best to get it repaired as soon as possible.
9. How do I find the fuse for my fuel gauge?
Consult your vehicle’s owner’s manual to locate the fuse for the instrument cluster or fuel gauge.
10. What are some common aftermarket fuel gauge options?
Common aftermarket fuel gauge options include digital gauges, LED gauges, and standalone gauges. Choose one that is compatible with your vehicle’s fuel sending unit.