How to Fix Flap Under Car: Expert Solutions
Fixing the flap under your car, also known as the splash shield, is crucial for protecting your engine and maintaining fuel efficiency. At CARDIAGTECH.NET, we provide expert guidance and the necessary tools to address this issue effectively. Discover how to diagnose, repair, or replace your vehicle’s undercarriage shield, ensuring optimal performance and protection. Secure your ride with our top-notch solutions, safeguarding against potential damage and enhancing your vehicle’s aerodynamics.
1. Understanding the Flap Under Car (Splash Shield)
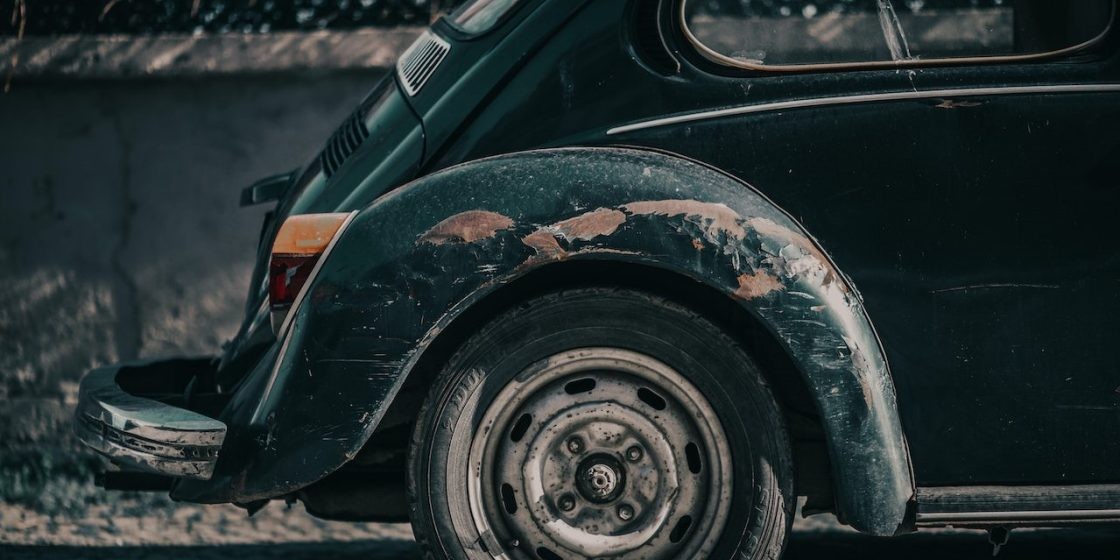
The flap under the car, commonly known as the splash shield or engine splash shield, is a protective panel typically made of plastic or metal. It’s located beneath the engine compartment and serves several critical functions.
1.1. What Does the Splash Shield Do?
- Protection from Debris: The primary function of the splash shield is to protect the engine compartment from water, dirt, salt, and road debris. These elements can cause significant damage to the engine, electrical components, and other vital parts.
- Aerodynamics: Modern vehicles often use splash shields to improve aerodynamics. By creating a smoother underbody surface, the shield helps to reduce drag, which can improve fuel efficiency.
- Noise Reduction: The splash shield can also help to reduce road noise, contributing to a quieter and more comfortable driving experience.
- Component Protection: Shields safeguard critical components like the alternator, starter, and air conditioning compressor from the elements, prolonging their lifespan.
1.2. Materials Used in Splash Shields
- Plastic: Most passenger vehicles use plastic splash shields due to their lightweight and cost-effectiveness. These shields are typically made from durable plastics that can withstand impacts and exposure to chemicals.
- Metal: Trucks and off-road vehicles often use metal splash shields for added protection. Metal shields are more resistant to damage from rocks and other debris encountered in off-road conditions.
- Composite Materials: Some high-end vehicles may use composite materials that offer a balance of weight, strength, and durability.
2. Identifying Problems with the Flap Under Car
Recognizing the signs of a damaged or failing splash shield is the first step in addressing the issue. Here are common symptoms to watch out for:
2.1. Common Symptoms of a Damaged Splash Shield
- Scraping Noises: One of the most common signs is a scraping noise coming from under the car while driving. This noise often indicates that the shield is loose and dragging on the road.
- Hanging or Sagging: Visually inspect the splash shield. If it is hanging down or sagging, it is likely damaged or has come loose from its mounting points.
- Visible Cracks or Holes: Check for visible cracks, holes, or missing pieces in the shield. These damages compromise its ability to protect the engine compartment.
- Increased Road Noise: A damaged or missing splash shield can lead to increased road noise inside the cabin.
- Reduced Fuel Efficiency: If the shield is damaged and affecting the vehicle’s aerodynamics, you may notice a decrease in fuel efficiency.
- Check Engine Light: In some cases, damage to the splash shield can indirectly trigger the check engine light if it leads to other component failures.
2.2. Diagnosing the Issue
To accurately diagnose the problem, follow these steps:
- Visual Inspection: Park the car on a level surface and visually inspect the splash shield. Look for any signs of damage, loose fasteners, or hanging sections.
- Physical Check: Gently push and pull on the shield to check for loose connections or weak points. Note any areas that move excessively or seem unstable.
- Listen for Noises: Start the car and listen for any unusual noises coming from the undercarriage. Try to pinpoint the source of the noise.
- Check Fasteners: Inspect the fasteners that hold the splash shield in place. Make sure they are all present and securely tightened.
- Professional Inspection: If you are unsure about the diagnosis, take the car to a professional mechanic for a thorough inspection.
3. Tools and Materials Needed for Repair
Before you begin the repair, gather the necessary tools and materials. Having everything on hand will make the process smoother and more efficient. CARDIAGTECH.NET offers a wide range of high-quality tools and equipment to help you with your automotive repairs.
3.1. Essential Tools
- Jack and Jack Stands: To safely lift and support the vehicle.
- Socket Set: For removing and installing fasteners.
- Wrench Set: For additional fastener removal and installation.
- Screwdrivers: Both flathead and Phillips head screwdrivers may be needed.
- Drill: For creating new mounting holes if necessary.
- Pliers: For removing or installing clips and fasteners.
- Wire Cutters/Strippers: For working with wire ties or electrical components.
- Safety Glasses: To protect your eyes from debris.
- Gloves: To protect your hands from dirt and chemicals.
- Flashlight or Work Light: For better visibility under the car.
3.2. Repair Materials
- Replacement Splash Shield: If the existing shield is too damaged to repair.
- Fasteners: Replacement bolts, screws, clips, and retainers.
- Wire Ties: For securing loose sections or patching cracks.
- Duct Tape: For temporary repairs or reinforcing weak areas.
- Metal or Plastic Patch: For patching holes or cracks.
- Adhesive: Automotive-grade adhesive for bonding patches.
- Rust Inhibitor: For protecting metal components from corrosion.
4. Step-by-Step Guide to Fixing the Flap Under Car
Follow these steps to repair or replace your car’s splash shield. Always prioritize safety and take your time to ensure the job is done correctly.
4.1. Preparation
- Safety First: Park the car on a level surface, engage the parking brake, and chock the wheels.
- Lift the Vehicle: Use a jack to lift the car and securely place it on jack stands. Never work under a car supported only by a jack.
- Locate the Splash Shield: Identify the splash shield that needs repair or replacement. It is typically located under the engine compartment.
- Inspect the Damage: Carefully examine the shield to determine the extent of the damage. Decide whether to repair or replace it.
4.2. Repairing a Damaged Splash Shield
If the damage is minor, you may be able to repair the splash shield. Here are a few common repair methods:
4.2.1. Patching Cracks with Wire Ties
- Clean the Area: Clean the area around the crack with a degreaser or soap and water. Dry thoroughly.
- Drill Holes: Drill small holes on either side of the crack, about an inch apart.
- Insert Wire Ties: Insert wire ties through the holes and tighten them to pull the crack together.
- Trim Excess: Trim the excess wire tie material.
- Reinforce (Optional): Apply duct tape over the repaired area for added strength.
4.2.2. Using Patches and Adhesive
- Cut a Patch: Cut a patch from a piece of plastic or metal that is slightly larger than the hole or crack.
- Clean the Area: Clean the area around the damage and the patch with a degreaser.
- Apply Adhesive: Apply automotive-grade adhesive to the patch and the damaged area.
- Attach the Patch: Press the patch firmly over the damaged area and hold it in place until the adhesive sets.
- Secure (Optional): Use wire ties or fasteners to further secure the patch.
4.3. Replacing the Splash Shield
If the splash shield is severely damaged, it is best to replace it.
- Remove Fasteners: Use a socket set or wrench to remove all the fasteners holding the splash shield in place.
- Support the Shield: As you remove the last fasteners, support the shield to prevent it from falling.
- Remove the Shield: Carefully remove the damaged splash shield from the vehicle.
- Install the New Shield: Position the new splash shield and align it with the mounting points.
- Attach Fasteners: Install the fasteners and tighten them securely.
- Double-Check: Make sure all fasteners are in place and the shield is securely mounted.
4.4. Final Steps
- Lower the Vehicle: Carefully lower the vehicle back to the ground.
- Test Drive: Take the car for a test drive to ensure the repair or replacement was successful and there are no unusual noises.
- Inspect Again: After the test drive, inspect the splash shield again to make sure everything is secure.
5. How to Choose the Right Replacement Splash Shield
Selecting the correct replacement splash shield is crucial for ensuring a proper fit and optimal protection. Here are factors to consider when choosing a replacement:
5.1. Vehicle Compatibility
- Make and Model: Ensure the splash shield is specifically designed for your vehicle’s make, model, and year.
- Trim Level: Some vehicles have different splash shields depending on the trim level. Check the part number to confirm compatibility.
5.2. Material Quality
- Durable Plastic: Look for splash shields made from high-quality, durable plastic that can withstand impacts and exposure to chemicals.
- Metal Shields: If you need extra protection, consider a metal splash shield, especially for trucks and off-road vehicles.
5.3. Fit and Installation
- Exact Fit: Choose a splash shield that is designed to be an exact fit for your vehicle. This will make installation easier and ensure proper protection.
- Hardware Included: Check if the replacement shield comes with new fasteners. If not, you may need to purchase them separately.
5.4. Brand Reputation
- Reputable Brands: Purchase splash shields from reputable brands known for quality and reliability.
- Customer Reviews: Read customer reviews to get an idea of the product’s performance and durability.
5.5. Where to Buy
- CARDIAGTECH.NET: Offers a wide selection of high-quality splash shields and other automotive parts.
- Auto Parts Stores: Local auto parts stores can provide expert advice and help you find the right part for your vehicle.
- Online Retailers: Online retailers offer a convenient way to shop for splash shields, but be sure to check the seller’s reputation and return policy.
6. Maintaining Your Splash Shield
Proper maintenance can extend the life of your splash shield and ensure it continues to protect your engine.
6.1. Regular Inspections
- Check Regularly: Inspect the splash shield regularly for signs of damage, especially after driving on rough roads or in adverse weather conditions.
- Look for Looseness: Check for loose fasteners and tighten them as needed.
6.2. Cleaning
- Wash Periodically: Wash the splash shield periodically to remove dirt, salt, and debris.
- Use a Degreaser: Use a degreaser to remove oil and grease buildup.
6.3. Avoid Harsh Conditions
- Drive Carefully: Avoid driving through deep puddles or over large debris that could damage the shield.
- Off-Roading: If you frequently drive off-road, consider upgrading to a metal splash shield for added protection.
7. The Importance of a Properly Functioning Splash Shield
A properly functioning splash shield is essential for protecting your engine and maintaining your vehicle’s performance.
7.1. Preventing Damage
- Protection from Debris: The splash shield prevents water, dirt, and debris from entering the engine compartment and damaging sensitive components.
- Corrosion Prevention: By keeping moisture away from metal parts, the shield helps to prevent corrosion.
- Electrical Protection: Shields protects the electrical components like wiring and sensors from being damaged by water and debris.
7.2. Maintaining Fuel Efficiency
- Aerodynamic Benefits: A properly installed splash shield helps to maintain the vehicle’s aerodynamic profile, which can improve fuel efficiency.
- Reducing Drag: By reducing drag, the shield helps the engine to run more efficiently.
7.3. Ensuring Safety
- Component Protection: Protecting critical components like the brakes and steering system helps to ensure the vehicle’s safety.
- Preventing Failures: By preventing damage to electrical components, the splash shield helps to prevent unexpected breakdowns.
8. Addressing Common Concerns and FAQs
Here are some common questions and concerns related to the flap under the car:
8.1. Can I Drive Without a Splash Shield?
Driving without a splash shield is not recommended. While it may not cause immediate problems, it increases the risk of damage to the engine and other components.
8.2. How Much Does It Cost to Replace a Splash Shield?
The cost to replace a splash shield can vary depending on the vehicle’s make and model, the material of the shield, and whether you have it replaced by a professional. Generally, you can expect to pay between $100 and $300 for a replacement, including parts and labor.
8.3. Can I Install a Splash Shield Myself?
Yes, you can install a splash shield yourself if you have basic mechanical skills and the right tools. Follow the steps outlined in this guide and take your time to ensure the job is done correctly.
8.4. How Often Should I Replace My Splash Shield?
You should replace your splash shield whenever it becomes damaged or worn out. Regular inspections can help you identify potential problems early on.
8.5. Are Metal Splash Shields Better Than Plastic Ones?
Metal splash shields offer better protection against impact and debris, making them a good choice for trucks and off-road vehicles. However, they are heavier and more expensive than plastic shields.
8.6. What Are the Signs of a Failing Splash Shield?
The signs of a failing splash shield include scraping noises, hanging or sagging sections, visible cracks or holes, increased road noise, and reduced fuel efficiency.
8.7. Can a Damaged Splash Shield Affect My Car’s Performance?
Yes, a damaged splash shield can affect your car’s performance by reducing fuel efficiency, increasing road noise, and increasing the risk of damage to the engine and other components.
8.8. Where Can I Buy a Replacement Splash Shield?
You can buy a replacement splash shield from CARDIAGTECH.NET, auto parts stores, and online retailers.
8.9. Is It Necessary to Replace Missing Fasteners?
Yes, it is essential to replace missing fasteners to ensure the splash shield is securely mounted and provides adequate protection.
8.10. Can I Use Duct Tape to Repair a Splash Shield?
Duct tape can be used for temporary repairs, but it is not a long-term solution. For a more permanent fix, use wire ties, patches, or replace the shield altogether.
9. Why Choose CARDIAGTECH.NET for Your Automotive Needs
CARDIAGTECH.NET is your trusted partner for all your automotive repair needs. We offer a wide selection of high-quality tools, parts, and equipment at competitive prices.
9.1. High-Quality Products
We source our products from reputable manufacturers to ensure they meet the highest standards of quality and durability.
9.2. Expert Advice
Our team of experienced technicians is available to provide expert advice and support to help you with your repairs.
9.3. Competitive Prices
We offer competitive prices on all our products, so you can save money without sacrificing quality.
9.4. Convenient Shopping
Our online store makes it easy to shop for the parts and tools you need from the comfort of your own home.
9.5. Fast Shipping
We offer fast and reliable shipping to get your order to you as quickly as possible.
10. Real-World Examples and Case Studies
10.1. Case Study 1: The Scraping Noise Solution
Problem: A customer reported a persistent scraping noise from under their car while driving.
Diagnosis: Upon inspection, it was found that the splash shield was cracked and dragging on the road.
Solution: The customer purchased a replacement splash shield from CARDIAGTECH.NET and installed it themselves using our step-by-step guide.
Result: The scraping noise was eliminated, and the customer’s car was once again running smoothly.
10.2. Case Study 2: Preventing Engine Damage
Problem: A customer noticed their engine was running rough and the check engine light was on.
Diagnosis: A mechanic determined that water and debris had entered the engine compartment due to a missing splash shield, causing damage to the electrical components.
Solution: The customer replaced the missing splash shield and had the damaged electrical components repaired.
Result: The engine was running smoothly again, and the check engine light was off. The customer avoided costly engine repairs by addressing the issue promptly.
10.3. Case Study 3: Improving Fuel Efficiency
Problem: A customer noticed a decrease in fuel efficiency.
Diagnosis: An inspection revealed that the splash shield was damaged, affecting the car’s aerodynamics.
Solution: The customer replaced the damaged splash shield.
Result: Fuel efficiency improved.
11. Tips for Saving Money on Splash Shield Repairs
Repairing or replacing a splash shield doesn’t have to break the bank. Here are some tips for saving money:
11.1. DIY Repairs
- Do It Yourself: Save on labor costs by repairing or replacing the splash shield yourself.
- Use Our Guide: Follow our step-by-step guide for instructions and tips.
11.2. Shop Around
- Compare Prices: Compare prices from different retailers to find the best deal on a replacement splash shield.
- Check for Sales: Look for sales and discounts on automotive parts.
11.3. Repair Instead of Replace
- Assess the Damage: If the damage is minor, consider repairing the splash shield instead of replacing it.
- Use Patches: Use patches and adhesive to repair holes and cracks.
11.4. Buy Quality Parts
- Invest in Quality: Invest in a high-quality replacement splash shield that will last longer and provide better protection.
- Check Reviews: Read customer reviews to ensure you are buying a reliable product.
12. Stay Updated with CARDIAGTECH.NET
Stay informed about the latest automotive repair tips, product releases, and special offers by following CARDIAGTECH.NET.
12.1. Subscribe to Our Newsletter
Subscribe to our newsletter to receive updates and exclusive deals directly to your inbox.
12.2. Follow Us on Social Media
Follow us on social media for the latest news, tips, and promotions.
12.3. Visit Our Website
Visit our website regularly to browse our selection of high-quality automotive parts and tools.
13. Contact CARDIAGTECH.NET for Expert Assistance
If you have any questions or need assistance with your splash shield repair, don’t hesitate to contact us.
13.1. Contact Information
- Address: 276 Reock St, City of Orange, NJ 07050, United States
- WhatsApp: +1 (641) 206-8880
- Website: CARDIAGTECH.NET
13.2. Get in Touch
Our team of experts is ready to help you find the right solutions for your automotive needs. Contact us today for personalized assistance and support.
14. What are the Five Search Intentions for the Keyword: How to Fix Flap Under Car?
Understanding the search intent behind the keyword “How To Fix Flap Under Car” helps tailor content to meet user needs effectively. Here are five likely search intentions:
- Informational: Users want to understand what the “flap” is, its purpose, and why it might need fixing.
- DIY Repair Guide: Users are looking for step-by-step instructions on how to fix the flap themselves, including tools and materials needed.
- Troubleshooting: Users want to diagnose the problem causing the flap to be loose or damaged.
- Cost Analysis: Users are interested in knowing the cost of repairing or replacing the flap, either DIY or professionally.
- Product Recommendation: Users want recommendations on specific products, like replacement flaps or repair kits, and where to buy them.
15. Call to Action
Is your car making a disturbing scraping noise, or have you noticed a loose flap hanging beneath your vehicle? Don’t wait until it causes further damage. Contact CARDIAGTECH.NET today for expert guidance and premium tools to resolve this issue swiftly. Our team is ready to assist you with diagnostics, repairs, and top-quality replacement parts. Reach out now via WhatsApp at +1 (641) 206-8880, or visit our website at CARDIAGTECH.NET for immediate assistance. Let us help you restore your vehicle’s safety and performance with our reliable solutions.
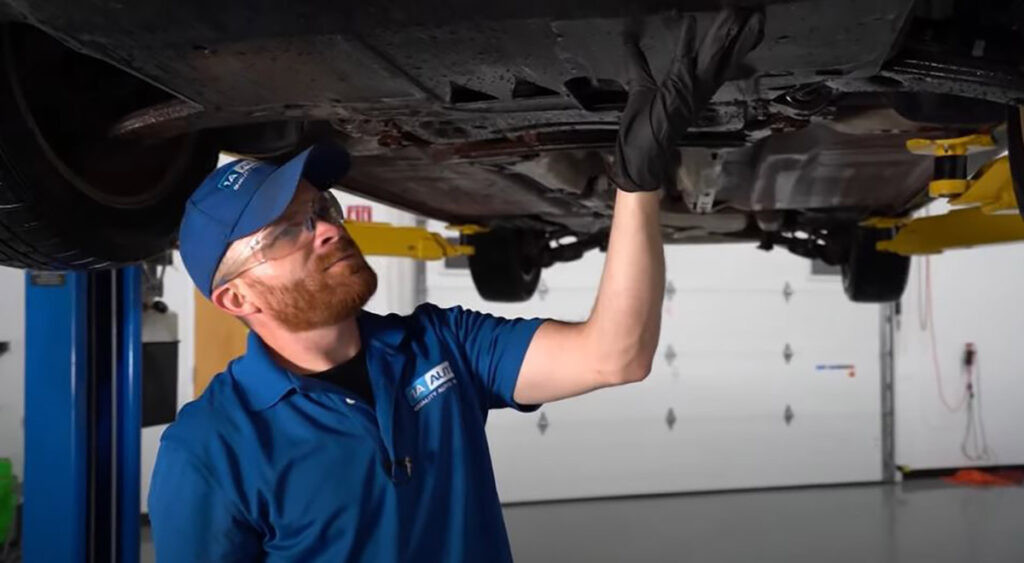
Mechanic showing what could cause a scraping noise while driving
FAQ: How to Fix Flap Under Car
Q1: What is the “flap” under my car called, and what does it do?
A: The “flap” is usually the splash shield or undercarriage cover. It protects the engine and undercarriage from debris, water, and road hazards, and it also improves aerodynamics.
Q2: How do I know if the flap under my car needs fixing?
A: Common signs include scraping noises while driving, the flap hanging loose, visible damage (cracks, holes), and reduced fuel efficiency.
Q3: Can I drive my car if the flap is dragging or damaged?
A: It’s not recommended. A damaged flap can cause further damage to your car’s undercarriage and reduce fuel efficiency. It’s best to fix it as soon as possible.
Q4: What tools and materials do I need to fix the flap under my car?
A: You’ll typically need a jack and jack stands, socket set, wrench set, screwdrivers, drill, pliers, wire cutters, safety glasses, gloves, replacement fasteners, wire ties, and potentially a new splash shield.
Q5: How much does it cost to replace the flap under my car?
A: The cost can range from $100 to $300, depending on the car model, the type of replacement part, and whether you hire a professional mechanic.
Q6: Can I fix the flap myself, or should I take it to a mechanic?
A: If you have basic mechanical skills and the right tools, you can fix it yourself. However, if you’re not comfortable, it’s best to consult a professional mechanic.
Q7: What are the steps to fix a dragging flap under my car?
A: First, safely lift your car with a jack and jack stands. Then, inspect the damage and decide whether to repair or replace the flap. If repairing, use wire ties, patches, or adhesive. If replacing, remove the old flap and install the new one with the appropriate fasteners.
Q8: Where can I buy a replacement splash shield or undercarriage cover?
A: You can purchase a replacement at CARDIAGTECH.NET, auto parts stores, or online retailers.
Q9: How can I prevent the flap under my car from getting damaged in the future?
A: Avoid driving through deep puddles or over large debris, and regularly inspect the flap for any signs of damage. Consider upgrading to a sturdier material like metal if you often drive on rough roads.
Q10: What should I do if I am not sure how to fix the flap under my car?
A: If you’re unsure or uncomfortable with the repair process, contact CARDIAGTECH.NET for expert assistance or consult with a professional mechanic to ensure the job is done correctly and safely.