How to Fix Dim Car Headlights: A Comprehensive Guide
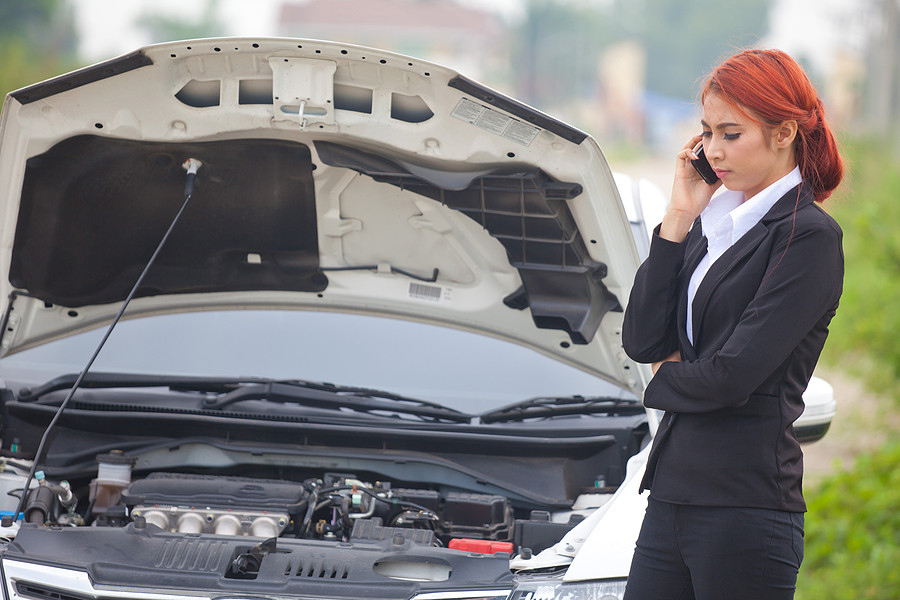
Is driving with inadequate illumination a concern? Dim car headlights pose a significant safety risk, but CARDIAGTECH.NET offers expert solutions to restore your visibility and confidence on the road. Discover the common causes of headlight dimness and learn how to brighten your headlights for safer driving, ensuring optimal headlight performance.
1. Identifying the Root Cause of Dim Headlights
Dim headlights can stem from various issues, each requiring a specific solution. Here’s a breakdown of the most common culprits:
- Burned-Out Bulbs: Like any light source, headlight bulbs have a lifespan. Over time, they can burn out, leading to reduced brightness or complete failure.
- Lens Oxidation: The plastic lenses covering your headlights can become cloudy or yellowed due to exposure to sunlight and environmental factors. This oxidation reduces the amount of light that passes through, resulting in dimmer headlights.
- Wiring Problems: The electrical system powering your headlights can experience issues such as corrosion, loose connections, or damaged wires, leading to insufficient power supply and dim lights.
- Voltage Drop: A drop in voltage can occur due to a weak battery, faulty alternator, or corroded connections, resulting in reduced power reaching the headlights and causing them to dim.
- Grounding Issues: Poor grounding can create resistance in the electrical circuit, hindering the flow of electricity to the headlights and causing them to appear dim.
- LED vs. Halogen/Incandescent Bulbs: If you’ve switched to LED headlights, they might appear dimmer compared to traditional bulbs if they’re not of sufficient quality or brightness.
- Setting Configuration: Modern vehicles often have adjustable headlight settings. Incorrect settings can lead to reduced brightness or improper beam alignment.
Understanding the cause of dim headlights is the first step toward fixing the problem and restoring optimal visibility.
2. Essential Tools and Equipment for Headlight Repair
Before diving into the repair process, gather the necessary tools and equipment. Having everything on hand will streamline the process and ensure a successful outcome. Here’s a comprehensive list:
- New Headlight Bulbs: Purchase replacement bulbs that match your vehicle’s specifications. Consider upgrading to LED bulbs for improved brightness and longevity.
- Headlight Restoration Kit: If your lenses are oxidized, a headlight restoration kit will help remove the cloudiness and restore clarity.
- Socket Set: A set of sockets and wrenches will be needed to remove and install headlight components.
- Screwdrivers: Both Phillips-head and flat-head screwdrivers may be required to access the headlights.
- Multimeter: A multimeter is essential for testing electrical circuits and identifying voltage drops or grounding issues.
- Wire Strippers/Crimpers: These tools are necessary for repairing or replacing damaged wiring.
- Electrical Tape: Use electrical tape to insulate and protect wire connections.
- Cleaning Supplies: Cleaners and microfiber cloths will help remove dirt and debris from the headlight lenses and surrounding areas.
- Gloves: Wear gloves to protect your hands from dirt, grease, and chemicals.
- Safety Glasses: Safety glasses will shield your eyes from debris and potential hazards.
- Work Light: A work light will provide ample illumination while you’re working on your headlights.
- Vehicle Repair Manual: Consult your vehicle’s repair manual for specific instructions and diagrams related to headlight repair.
Equipped with these tools and resources, you’ll be well-prepared to tackle headlight repair tasks efficiently and safely.
3. Step-by-Step Guide: Replacing Burned-Out Headlight Bulbs
Replacing a burned-out headlight bulb is a relatively straightforward task that most vehicle owners can handle themselves. Follow these steps for a successful bulb replacement:
- Gather Your Supplies: Obtain the correct replacement bulb for your vehicle. Consult your owner’s manual or a parts store to ensure you get the right type.
- Access the Headlight Housing: Depending on your vehicle’s design, you may need to remove screws, clips, or panels to access the headlight housing.
- Disconnect the Electrical Connector: Carefully disconnect the electrical connector from the back of the bulb.
- Remove the Old Bulb: Depending on the bulb type, you may need to twist, unclip, or unscrew it from the housing.
- Install the New Bulb: Align the new bulb with the housing and secure it in place. Avoid touching the glass portion of the bulb with your bare hands, as oils from your skin can shorten its lifespan.
- Reconnect the Electrical Connector: Reattach the electrical connector to the back of the bulb.
- Test the New Bulb: Turn on your headlights to ensure the new bulb is working properly.
- Reassemble the Headlight Housing: Replace any screws, clips, or panels that were removed to access the headlight housing.
- Repeat for the Other Side: If both headlights use the same type of bulb, consider replacing both at the same time to ensure consistent brightness and performance.
By following these steps, you can quickly and easily replace burned-out headlight bulbs and restore optimal visibility on the road.
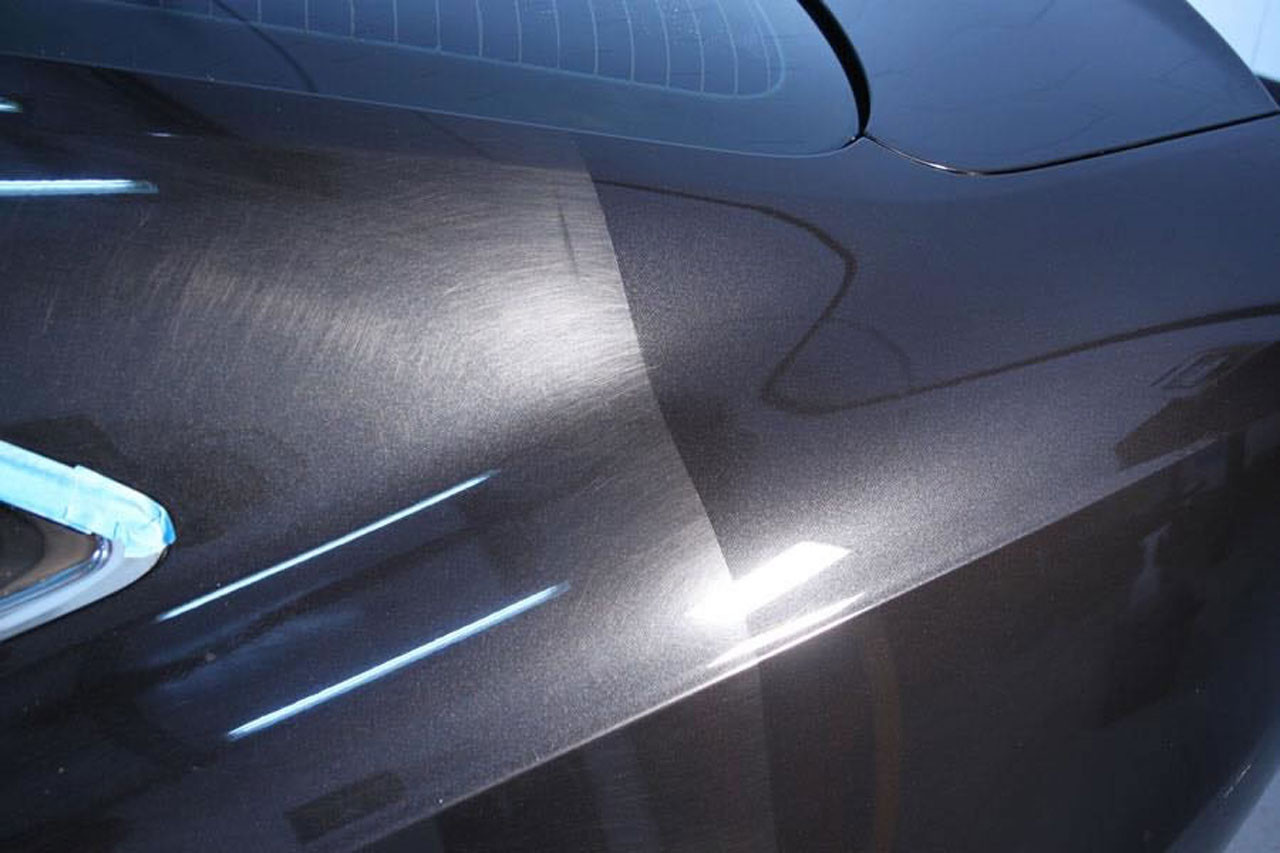
4. Restoring Clarity: Headlight Lens Oxidation Removal
Cloudy or yellowed headlight lenses can significantly reduce headlight brightness. Fortunately, restoring clarity to oxidized lenses is a manageable task with the right tools and techniques. Here’s how to remove headlight lens oxidation:
- Clean the Lenses: Start by thoroughly cleaning the headlight lenses with soap and water to remove dirt and debris.
- Apply Sandpaper: Use progressively finer grits of sandpaper (typically starting with 400-grit and finishing with 2000-grit) to sand away the oxidized layer. Wet-sand the lenses to prevent clogging and ensure a smooth finish.
- Polish the Lenses: After sanding, use a polishing compound and a polishing pad attached to a drill to polish the lenses to a clear finish.
- Apply UV Protectant: To prevent future oxidation, apply a UV protectant sealant to the lenses.
- Buff the Lenses: Use a clean microfiber cloth to buff the lenses to a sparkling shine.
- Repeat as Necessary: Depending on the severity of the oxidation, you may need to repeat the sanding and polishing steps for optimal results.
By following these steps, you can effectively remove headlight lens oxidation and restore clarity to your headlights, improving visibility and safety on the road.
5. Diagnosing and Repairing Headlight Wiring Problems
Electrical issues can also cause dim headlights. Troubleshooting and repairing wiring problems requires careful inspection and testing. Here’s how to diagnose and address headlight wiring issues:
- Inspect the Wiring: Visually inspect the headlight wiring for any signs of damage, corrosion, or loose connections.
- Test the Voltage: Use a multimeter to test the voltage at the headlight connector. Compare the reading to the specified voltage in your vehicle’s repair manual.
- Check the Grounding: Ensure that the headlights are properly grounded. Use a multimeter to test the continuity between the headlight ground wire and the vehicle’s chassis.
- Inspect the Fuses and Relays: Check the headlight fuses and relays to ensure they are in good condition and properly functioning.
- Repair or Replace Damaged Wiring: If you find any damaged or corroded wires, repair or replace them using wire strippers, crimpers, and electrical tape.
- Clean Connections: Clean any corroded or loose connections with a wire brush or electrical contact cleaner.
- Test the Headlights: After making repairs, test the headlights to ensure they are working properly.
By carefully inspecting and testing the headlight wiring, you can identify and resolve electrical issues that may be causing dim headlights.
6. Addressing Voltage Drop for Brighter Headlights
Voltage drop can significantly impact headlight brightness. Here’s how to address voltage drop and ensure sufficient power reaches your headlights:
- Check the Battery: Ensure that your vehicle’s battery is in good condition and fully charged.
- Inspect the Alternator: The alternator is responsible for charging the battery and providing power to the electrical system. Have the alternator tested to ensure it’s functioning properly.
- Clean Battery Terminals: Corroded battery terminals can cause voltage drop. Clean the terminals with a wire brush and apply a corrosion protectant.
- Upgrade Wiring: Consider upgrading the headlight wiring with thicker gauge wires to reduce resistance and voltage drop.
- Install a Headlight Relay Kit: A headlight relay kit can provide a direct power source to the headlights, bypassing the factory wiring and reducing voltage drop.
- Test the Voltage at the Headlights: After making these improvements, test the voltage at the headlights to ensure it has increased.
By addressing voltage drop, you can improve the power supply to your headlights and restore optimal brightness.
7. Ensuring Proper Grounding for Optimal Headlight Performance
Proper grounding is essential for the efficient operation of your headlights. Here’s how to ensure proper grounding and prevent dim headlights:
- Locate Grounding Points: Identify the grounding points for the headlights. These are typically located on the vehicle’s chassis near the headlights.
- Inspect Grounding Connections: Inspect the grounding connections for any signs of corrosion, rust, or loose connections.
- Clean Grounding Surfaces: Clean the grounding surfaces with a wire brush or sandpaper to remove any corrosion or rust.
- Tighten Grounding Connections: Ensure that the grounding connections are tight and secure.
- Add Additional Grounding Wires: Consider adding additional grounding wires to improve the grounding of the headlights.
- Test Grounding Continuity: Use a multimeter to test the continuity between the headlight ground wire and the vehicle’s chassis.
By ensuring proper grounding, you can eliminate resistance in the electrical circuit and ensure that your headlights receive the necessary power for optimal performance.
8. LED vs. Halogen/Incandescent: Choosing the Right Bulbs
When replacing headlight bulbs, you have the option of choosing between LED, halogen, and incandescent bulbs. Each type has its pros and cons. Here’s a comparison to help you make the right choice:
| Bulb Type | Brightness | Lifespan | Energy Efficiency | Cost |
|---|---|---|---|---|
| LED | High | Very Long | High | Higher |
| Halogen | Moderate | Moderate | Moderate | Moderate |
| Incandescent | Low | Short | Low | Lower |
- LED Bulbs: LED bulbs offer superior brightness, longer lifespan, and higher energy efficiency compared to halogen and incandescent bulbs. However, they tend to be more expensive.
- Halogen Bulbs: Halogen bulbs provide a good balance of brightness, lifespan, and cost. They are a popular choice for many vehicles.
- Incandescent Bulbs: Incandescent bulbs are the least expensive option, but they are also the dimmest and have the shortest lifespan.
Consider your priorities and budget when choosing the right bulbs for your vehicle.
9. Adjusting Headlight Settings for Optimal Beam Alignment
Proper beam alignment is crucial for optimal headlight performance. Here’s how to adjust your headlight settings for optimal beam alignment:
- Park on a Level Surface: Park your vehicle on a level surface facing a wall or garage door.
- Measure Headlight Height: Measure the height from the ground to the center of your headlights.
- Mark the Wall: On the wall, mark the same height as your headlights.
- Adjust Vertical Alignment: Use the vertical adjustment screws on your headlights to raise or lower the beam until it aligns with the mark on the wall.
- Adjust Horizontal Alignment: Use the horizontal adjustment screws to adjust the beam left or right until it is centered.
- Test on the Road: After making adjustments, test your headlights on the road to ensure they provide adequate visibility without blinding other drivers.
Properly aligned headlights will provide optimal visibility and safety on the road.
10. Professional Headlight Services at CARDIAGTECH.NET
While many headlight repairs can be performed DIY, some issues require professional attention. CARDIAGTECH.NET offers a range of professional headlight services to address complex problems and ensure optimal performance. Here are some benefits of choosing CARDIAGTECH.NET for your headlight needs:
- Expert Diagnostics: Our experienced technicians can accurately diagnose the cause of your dim headlights and recommend the appropriate solutions.
- Quality Repairs: We use high-quality parts and advanced techniques to ensure reliable and long-lasting repairs.
- Professional Restoration: Our headlight restoration services can restore clarity to oxidized lenses and improve visibility.
- Electrical Troubleshooting: We have the expertise to diagnose and repair complex electrical issues that may be affecting your headlights.
- Bulb Upgrades: We offer a variety of bulb upgrades, including LED options, to improve brightness and performance.
- Alignment Services: Our headlight alignment services ensure that your headlights are properly adjusted for optimal visibility.
- Convenient Service: With our commitment to customer satisfaction, we make it easy to get your headlights repaired and back on the road safely.
For professional headlight services you can trust, choose CARDIAGTECH.NET.
11. The Importance of Regular Headlight Maintenance
Maintaining your headlights is crucial for ensuring optimal visibility and safety on the road. Here are some tips for regular headlight maintenance:
- Clean Headlight Lenses Regularly: Clean your headlight lenses regularly to remove dirt, debris, and oxidation.
- Replace Bulbs as Needed: Replace headlight bulbs as soon as they start to dim or burn out.
- Check Headlight Alignment: Check your headlight alignment periodically to ensure proper beam direction.
- Inspect Wiring and Connections: Inspect the headlight wiring and connections for any signs of damage or corrosion.
- Protect Headlights from UV Exposure: Park your vehicle in shaded areas or use headlight covers to protect the lenses from UV exposure.
- Consider Professional Restoration: If your headlight lenses are heavily oxidized, consider professional restoration services to restore clarity.
By following these maintenance tips, you can keep your headlights in top condition and ensure optimal visibility on the road.
12. Safety Tips for Working on Your Car’s Headlights
When working on your car’s headlights, safety should always be your top priority. Here are some essential safety tips to keep in mind:
- Disconnect the Battery: Before starting any electrical work, disconnect the negative terminal of your car’s battery to prevent electrical shock.
- Wear Safety Glasses: Wear safety glasses to protect your eyes from debris and potential hazards.
- Use Gloves: Wear gloves to protect your hands from dirt, grease, and chemicals.
- Work in a Well-Ventilated Area: Work in a well-ventilated area to avoid inhaling fumes from cleaning products or chemicals.
- Use Proper Tools: Use the correct tools for the job to prevent damage to your car or injury to yourself.
- Consult Your Vehicle’s Repair Manual: Consult your vehicle’s repair manual for specific instructions and diagrams related to headlight repair.
- Seek Professional Help if Needed: If you’re not comfortable performing headlight repairs yourself, seek professional help from a qualified mechanic.
By following these safety tips, you can minimize the risk of injury and ensure a safe and successful headlight repair.
13. Common Mistakes to Avoid When Fixing Dim Headlights
When fixing dim headlights, it’s essential to avoid common mistakes that can lead to further problems or safety hazards. Here are some pitfalls to watch out for:
- Using the Wrong Bulbs: Always use the correct type of bulb for your vehicle. Using the wrong bulb can damage the headlight housing or electrical system.
- Touching the Bulb with Bare Hands: Avoid touching the glass portion of the bulb with your bare hands, as oils from your skin can shorten its lifespan.
- Over-Tightening Screws: Be careful not to over-tighten screws when reassembling the headlight housing, as this can damage the plastic components.
- Forgetting to Disconnect the Battery: Always disconnect the battery before working on the electrical system to prevent electrical shock.
- Ignoring Wiring Issues: If you suspect wiring problems, don’t ignore them. Address them promptly to prevent further damage or safety hazards.
- Neglecting Lens Oxidation: If your headlight lenses are oxidized, don’t neglect to restore them. Clear lenses are essential for optimal visibility.
- Improper Alignment: Ensure that your headlights are properly aligned after making any repairs or adjustments.
By avoiding these common mistakes, you can ensure a successful and safe headlight repair.
14. Upgrading Your Headlights for Enhanced Visibility
If you’re looking to improve your vehicle’s visibility, consider upgrading your headlights. Here are some popular headlight upgrade options:
- LED Headlight Bulbs: Upgrade to LED headlight bulbs for brighter, more efficient lighting.
- HID Headlight Conversion Kits: HID (High-Intensity Discharge) headlight conversion kits provide significantly brighter light output than halogen bulbs.
- Projector Headlights: Projector headlights offer a focused beam pattern and improved visibility compared to traditional reflector headlights.
- Aftermarket Headlight Housings: Aftermarket headlight housings can improve the appearance and performance of your headlights.
- Fog Lights: Add fog lights to your vehicle for improved visibility in foggy or adverse weather conditions.
When choosing headlight upgrades, be sure to select products that are compatible with your vehicle and meet all safety regulations.
15. Understanding Headlight Laws and Regulations
Headlight laws and regulations vary by state, so it’s essential to understand the rules in your area. Here are some general guidelines to keep in mind:
- Headlight Use: Headlights are typically required to be used from sunset to sunrise and during periods of reduced visibility, such as rain, snow, or fog.
- Headlight Brightness: Headlight brightness is regulated to prevent glare and ensure safety for other drivers.
- Headlight Color: Headlight color is typically restricted to white or amber.
- Headlight Alignment: Headlights must be properly aligned to ensure optimal visibility without blinding other drivers.
- Headlight Modifications: Some headlight modifications may be illegal, so it’s essential to check your local laws before making any changes.
Familiarize yourself with the headlight laws and regulations in your area to ensure that your vehicle is in compliance.
16. Estimating the Cost of Headlight Repairs
The cost of headlight repairs can vary depending on the type of repair needed and the parts required. Here’s a general estimate of the costs involved:
- Bulb Replacement: $10 – $50 per bulb (depending on the type of bulb)
- Headlight Restoration: $20 – $100 per headlight (depending on the severity of the oxidation)
- Wiring Repair: $50 – $200 (depending on the complexity of the repair)
- Voltage Drop Repair: $50 – $300 (depending on the cause of the voltage drop)
- Grounding Repair: $20 – $100 (depending on the location and complexity of the repair)
- Professional Labor: $75 – $150 per hour
These are just estimates, and the actual cost of your headlight repairs may vary. Contact CARDIAGTECH.NET at +1 (641) 206-8880 for a detailed estimate and expert service.
17. Why Choose CARDIAGTECH.NET for Your Auto Repair Needs?
At CARDIAGTECH.NET, we’re committed to providing top-quality auto repair services with a focus on customer satisfaction. Here are just a few reasons to choose us for your auto repair needs:
- Experienced Technicians: Our team of experienced technicians has the knowledge and expertise to handle all types of auto repairs.
- State-of-the-Art Equipment: We use state-of-the-art equipment to diagnose and repair your vehicle quickly and accurately.
- Quality Parts: We use only high-quality parts to ensure reliable and long-lasting repairs.
- Competitive Prices: We offer competitive prices on all of our services.
- Convenient Service: We offer convenient service options to make it easy to get your vehicle repaired and back on the road.
- Customer Satisfaction: We’re committed to providing exceptional customer service and ensuring your satisfaction.
When you need auto repairs you can trust, choose CARDIAGTECH.NET.
18. How to Find a Reputable Mechanic for Headlight Repairs
Finding a reputable mechanic for headlight repairs is essential for ensuring quality workmanship and customer satisfaction. Here are some tips for finding a trustworthy mechanic:
- Ask for Recommendations: Ask friends, family, and coworkers for recommendations.
- Check Online Reviews: Check online reviews on websites like Yelp, Google, and Facebook.
- Look for Certifications: Look for mechanics who are certified by organizations like ASE (Automotive Service Excellence).
- Get Multiple Estimates: Get estimates from multiple mechanics to compare prices and services.
- Ask About Warranties: Ask about warranties on parts and labor.
- Trust Your Gut: Choose a mechanic who makes you feel comfortable and confident in their abilities.
By following these tips, you can find a reputable mechanic for headlight repairs and ensure that your vehicle is in good hands.
19. The Future of Headlight Technology
Headlight technology is constantly evolving, with new innovations being introduced all the time. Here are some exciting trends to watch for in the future of headlight technology:
- Laser Headlights: Laser headlights offer even brighter and more focused light output than LED headlights.
- Adaptive Headlights: Adaptive headlights automatically adjust their beam pattern based on driving conditions, such as speed, steering angle, and traffic.
- Digital Light: Digital Light technology uses micro-mirrors to project complex patterns onto the road, improving visibility and safety.
- OLED Headlights: OLED (Organic Light-Emitting Diode) headlights offer a more uniform and energy-efficient light source.
- Augmented Reality Headlights: Augmented Reality headlights project information onto the road, such as navigation directions and hazard warnings.
These advancements promise to revolutionize headlight technology and improve safety and visibility on the road.
20. Contact CARDIAGTECH.NET for Expert Headlight Solutions
Ready to brighten your drive? Contact CARDIAGTECH.NET today for expert headlight solutions and unparalleled customer service. Our skilled technicians are equipped to diagnose and repair any headlight issue, ensuring your safety and confidence on the road.
Don’t let dim headlights compromise your visibility. Reach out to CARDIAGTECH.NET for:
- Comprehensive headlight inspections
- Precise bulb replacements with high-quality LEDs
- Professional lens restoration services
- Expert electrical system diagnostics and repairs
- Customized headlight upgrades for enhanced performance
Contact Information:
- Address: 276 Reock St, City of Orange, NJ 07050, United States
- WhatsApp: +1 (641) 206-8880
- Website: CARDIAGTECH.NET
Let CARDIAGTECH.NET illuminate your path and provide the reliable headlight solutions you deserve. Call us now to schedule your appointment and experience the difference!
FAQ: Addressing Your Questions About Dim Car Headlights
Here are some frequently asked questions about dim car headlights, along with informative answers:
- What causes car headlights to dim?
- Dim headlights can be caused by burned-out bulbs, lens oxidation, wiring problems, voltage drop, grounding issues, or incorrect headlight settings.
- How can I tell if my headlight bulbs are burned out?
- If your headlights are dimmer than usual or not working at all, the bulbs may be burned out. You can also visually inspect the bulbs for signs of damage or wear.
- Can I replace headlight bulbs myself?
- Yes, in many cases, you can replace headlight bulbs yourself with the right tools and instructions. However, some vehicles may require professional assistance.
- How can I restore clarity to oxidized headlight lenses?
- You can restore clarity to oxidized headlight lenses by using a headlight restoration kit or by sanding and polishing the lenses.
- What are the benefits of upgrading to LED headlight bulbs?
- LED headlight bulbs offer superior brightness, longer lifespan, and higher energy efficiency compared to halogen and incandescent bulbs.
- How often should I replace my headlight bulbs?
- You should replace your headlight bulbs as soon as they start to dim or burn out. The lifespan of headlight bulbs varies depending on the type of bulb and usage.
- What is headlight alignment, and why is it important?
- Headlight alignment refers to the direction of the headlight beams. Proper alignment is essential for optimal visibility and safety on the road.
- What should I do if my headlights are flickering?
- Flickering headlights may indicate a wiring problem or a faulty bulb. Have the wiring and bulbs inspected by a qualified mechanic.
- Are there any laws regarding headlight brightness?
- Yes, there are laws regulating headlight brightness to prevent glare and ensure safety for other drivers.
- How much does it cost to have headlights professionally repaired?
- The cost of professional headlight repairs varies depending on the type of repair needed and the parts required. Contact CARDIAGTECH.NET for a detailed estimate.
We hope these FAQs have addressed your questions about dim car headlights. If you have any other concerns, please don’t hesitate to contact us.