How to Fix Deep Scratches on Car Bumper
Fixing deep scratches on your car bumper can restore its appearance and prevent further damage. At CARDIAGTECH.NET, we provide the tools and knowledge you need to achieve professional results at home, saving you time and money. With the right techniques and quality equipment, you can tackle these imperfections and keep your vehicle looking its best.
1. Understanding the Depth of the Scratch
Before you start, it’s crucial to determine how deep the scratch is. This will dictate the repair method and the materials you’ll need. Scratches typically fall into three categories:
- Clear Coat Scratches: These are superficial and only affect the clear coat layer. They often appear as light swirls or haziness.
- Base Coat Scratches: These penetrate the clear coat and reach the colored base coat. You’ll notice the color of your car is missing in the scratch.
- Primer Scratches: These are the deepest, going through the clear coat, base coat, and into the primer layer. You might even see bare plastic if the bumper is plastic.
Knowing the depth helps you select the right products and techniques for an effective repair.
2. Gathering the Necessary Supplies
Having the right tools and materials is essential for a successful scratch repair. Here’s a comprehensive list:
- Cleaning Supplies:
- Car wash soap (e.g., Meguiar’s Gold Class Car Wash Shampoo & Conditioner)
- Microfiber towels (e.g., Chemical Guys Microfiber Towels)
- Grease and wax remover (e.g., Stoner Tarminator Tar, Sap, and Grease Remover)
- Sanding Materials:
- Wet/dry sandpaper (various grits: 400, 600, 800, 1000, 1500, 2000, 2500, 3000) (e.g., 3M Wetordry Sandpaper)
- Sanding block (e.g., Norton Sanding Block)
- Repair Materials:
- Body filler (for deep scratches) (e.g., Bondo Body Filler)
- Primer (e.g., Dupli-Color Automotive Primer)
- Touch-up paint (matching your car’s color code) (e.g., AutomotiveTouchup Paint)
- Clear coat (e.g., Spraymax 2K Clear Coat)
- Application Tools:
- Microbrushes (e.g., Microbrush Applicators)
- Paint applicators (e.g., Bondo Spreader)
- Detail brushes (e.g., Princeton Detail Brush)
- Polishing and Buffing:
- Rubbing compound (e.g., Meguiar’s Ultimate Compound)
- Polishing compound (e.g., Meguiar’s Ultimate Polish)
- Wax or sealant (e.g., Meguiar’s Gold Class Carnauba Plus Premium Paste Wax)
- Polishing pads (e.g., Chemical Guys Polishing Pads)
- Buffing pads (e.g., Lake Country Buffing Pads)
- Dual-action polisher (optional, but recommended) (e.g., Griot’s Garage Dual-Action Polisher)
- Safety Gear:
- Gloves (e.g., Nitrile gloves)
- Mask (e.g., 3M Paint Project Respirator)
- Eye protection (e.g., Safety glasses)
Investing in quality supplies from CARDIAGTECH.NET ensures a professional finish and long-lasting results.
3. Preparing the Area
Proper preparation is critical for a seamless repair. Follow these steps to prepare the scratched area:
- Wash the Bumper: Use car wash soap and water to remove dirt and grime. Rinse thoroughly and dry with a microfiber towel.
- Remove Wax and Grease: Apply a grease and wax remover to the area to ensure the paint adheres properly.
- Assess the Damage: Identify the depth and extent of the scratch.
- Mask the Surrounding Area: Use painter’s tape and masking paper to protect the surrounding paint from accidental sanding or product application.
A clean and well-masked surface sets the stage for a flawless repair.
4. Sanding the Scratch
Sanding is a crucial step to smooth the edges of the scratch and create a surface that the repair materials can bond to. Here’s how to do it properly:
- Wet Sanding: Soak your sandpaper in water for at least 10 minutes before starting. This prevents the sandpaper from clogging and provides a smoother finish.
- Start with Coarse Grit: If the scratch is deep, begin with 400-grit sandpaper to level the area. Use a sanding block to ensure even pressure.
- Progress to Finer Grits: Gradually move to finer grits like 600, 800, and 1000 to refine the surface.
- Feather the Edges: Blend the edges of the sanded area into the surrounding paint to create a smooth transition.
- Clean the Area: Wipe the area with a clean, damp microfiber towel to remove sanding residue.
Example Sanding Progression:
| Grit | Purpose |
|---|---|
| 400 | Leveling deep scratches |
| 600 | Refining the surface |
| 800 | Further smoothing |
| 1000 | Preparing for primer |
| 1500 | Smoothing primer |
| 2000 | Preparing for clear coat |
| 2500 | Final smoothing before polishing |
| 3000 | Ultra-fine smoothing for a perfect finish |
Proper sanding ensures the repair blends seamlessly with the surrounding paint.
5. Applying Body Filler (For Deep Scratches)
If the scratch is deep enough to reach the primer or bare plastic, you’ll need to use body filler to level the surface.
- Mix the Body Filler: Follow the manufacturer’s instructions to mix the body filler and hardener.
- Apply the Filler: Use a plastic spreader to apply a thin layer of body filler over the scratch. Overfill slightly to allow for sanding.
- Allow to Dry: Let the body filler dry completely according to the manufacturer’s instructions.
- Sand the Filler: Start with 400-grit sandpaper to remove excess filler and shape the repair. Progress to finer grits like 600 and 800 to smooth the surface.
- Clean the Area: Wipe the area with a clean, damp microfiber towel to remove sanding residue.
Using body filler correctly ensures a smooth, even surface for painting.
6. Priming the Area
Primer is essential to create a uniform surface for the base coat to adhere to.
- Apply Primer: Spray a thin, even coat of automotive primer over the repaired area. Hold the can about 8-10 inches away from the surface and use smooth, overlapping strokes.
- Allow to Dry: Let the primer dry completely according to the manufacturer’s instructions.
- Sand the Primer: Use 1500-grit sandpaper to smooth the primer. Be careful not to sand through the primer.
- Clean the Area: Wipe the area with a tack cloth to remove any remaining dust.
A properly primed surface ensures the base coat adheres evenly and provides a smooth finish.
7. Applying the Base Coat
The base coat is the colored paint that matches your car’s original color.
- Apply the Base Coat: Spray a thin, even coat of touch-up paint over the primed area. Use smooth, overlapping strokes. Apply multiple thin coats rather than one thick coat to avoid runs.
- Allow to Dry: Let each coat dry completely before applying the next.
- Blend the Edges: Use a blending solvent to gently blend the edges of the new paint with the surrounding paint.
- Clean the Area: Wipe the area with a tack cloth to remove any remaining dust.
Matching the base coat to your car’s color code is crucial for a seamless repair. You can find high-quality touch-up paint at CARDIAGTECH.NET that matches your vehicle’s exact color.
8. Applying the Clear Coat
The clear coat protects the base coat and provides a glossy finish.
- Apply the Clear Coat: Spray a thin, even coat of clear coat over the painted area. Use smooth, overlapping strokes.
- Allow to Dry: Let the clear coat dry completely according to the manufacturer’s instructions.
- Apply Additional Coats: Apply two to three coats of clear coat, allowing each coat to dry before applying the next.
- Wet Sand (Optional): If there are any imperfections in the clear coat, you can wet sand it with 2000-grit sandpaper to smooth the surface.
A quality clear coat provides a durable and glossy finish, protecting your repair from the elements.
9. Polishing and Buffing
Polishing and buffing are the final steps to blend the repair with the surrounding paint and restore the shine.
- Apply Rubbing Compound: Apply a small amount of rubbing compound to a polishing pad. Use a dual-action polisher to work the compound into the paint.
- Apply Polishing Compound: Apply a small amount of polishing compound to a clean polishing pad. Use the dual-action polisher to refine the finish.
- Buff the Area: Use a clean buffing pad to buff the area and remove any remaining swirl marks.
- Apply Wax or Sealant: Apply a coat of wax or sealant to protect the paint and enhance the shine.
Polishing and buffing bring out the true shine of the paint and create a seamless repair.
10. Addressing Common Problems
Even with careful preparation and execution, you might encounter some common problems during the repair process. Here’s how to address them:
- Paint Runs: If you apply too much paint at once, it can run. Let the paint dry completely, then sand the run with fine-grit sandpaper and reapply the paint.
- Orange Peel: This refers to a textured finish that resembles the surface of an orange. It’s usually caused by applying too much paint or using the wrong spray technique. Wet sand the area with fine-grit sandpaper and polish to smooth the surface.
- Color Mismatch: If the touch-up paint doesn’t match your car’s color, you may need to have the paint custom mixed. CARDIAGTECH.NET can help you find the perfect match for your vehicle.
- Bubbles: Bubbles in the paint can be caused by moisture or contaminants on the surface. Ensure the surface is clean and dry before applying paint.
Addressing these issues promptly can save time and ensure a flawless repair.
11. Maintenance Tips to Prevent Future Scratches
Preventing scratches is always better than repairing them. Here are some tips to keep your car’s bumper looking its best:
- Wash Your Car Regularly: Regular washing removes dirt and grime that can cause scratches.
- Wax Your Car: Waxing protects the paint and provides a barrier against scratches.
- Avoid Automatic Car Washes: Automatic car washes can cause swirl marks and scratches. Opt for hand washing instead.
- Park Carefully: Be mindful of parking spaces and avoid tight spots where your bumper could get scratched.
- Use Bumper Protectors: Consider installing bumper protectors to shield your bumper from minor impacts.
Alt: Assortment of car bumper scratch repair supplies including sandpaper, polish, and microfiber cloths.
12. The Importance of Quality Products
Using high-quality products is essential for a professional-looking repair. Inferior products can lead to poor adhesion, color mismatch, and a less durable finish. CARDIAGTECH.NET offers a wide range of top-quality automotive repair products to ensure your repair lasts.
Comparison of Products:
| Feature | High-Quality Products | Low-Quality Products |
|---|---|---|
| Adhesion | Excellent, long-lasting bond | Poor, prone to chipping and peeling |
| Color Match | Precise match to the original paint color | Inaccurate, noticeable color difference |
| Durability | Resistant to weathering and wear | Susceptible to fading and damage |
| Ease of Use | Easy to apply and blend | Difficult to apply, prone to runs and imperfections |
| Cost | Higher initial cost, but better long-term value | Lower initial cost, but requires more frequent repairs |
Investing in quality products from CARDIAGTECH.NET ensures a durable and professional finish.
13. Understanding Paint Codes
Finding the correct paint code for your vehicle is crucial for a seamless repair. The paint code is a unique identifier that ensures the touch-up paint matches your car’s original color.
Where to Find Your Paint Code:
- Driver’s Side Door Jamb: Look for a sticker on the driver’s side door jamb.
- Glove Compartment: Some vehicles have the paint code listed in the glove compartment.
- Engine Compartment: Check under the hood, often on the strut tower or firewall.
- Vehicle Manual: The paint code may be listed in your vehicle’s owner’s manual.
Once you find the paint code, you can use it to order the correct touch-up paint from CARDIAGTECH.NET.
14. Safety Precautions
When working with automotive repair products, it’s important to take safety precautions to protect yourself from harmful chemicals and fumes.
- Wear Gloves: Wear nitrile gloves to protect your hands from chemicals.
- Wear a Mask: Use a respirator to avoid inhaling paint fumes.
- Wear Eye Protection: Wear safety glasses to protect your eyes from splashes and debris.
- Work in a Well-Ventilated Area: Ensure adequate ventilation to prevent the buildup of fumes.
- Follow Manufacturer’s Instructions: Always follow the manufacturer’s instructions for safe handling and disposal of products.
Taking these precautions ensures a safe and healthy repair process.
15. The Advantages of DIY Repair
Repairing scratches on your car bumper yourself can save you money and give you a sense of accomplishment. Here are some advantages of DIY repair:
- Cost Savings: DIY repair is typically much cheaper than hiring a professional.
- Convenience: You can repair the scratch on your own schedule.
- Learning Experience: DIY repair is a great way to learn about car care and maintenance.
- Customization: You have complete control over the repair process and can customize the finish to your liking.
With the right tools and knowledge from CARDIAGTECH.NET, you can achieve professional results at home.
16. When to Seek Professional Help
While DIY repair is a great option for minor scratches, some damage may require professional attention. Consider seeking professional help if:
- The Damage is Extensive: If the scratch is very deep or covers a large area, it may be beyond the scope of DIY repair.
- You’re Not Comfortable Doing the Repair: If you’re not confident in your ability to do the repair, it’s best to leave it to the professionals.
- You Want a Perfect Finish: Professional repair shops have the tools and expertise to achieve a flawless finish.
- The Bumper is Damaged: If the bumper is cracked or broken, it may need to be replaced by a professional.
Knowing when to seek professional help can prevent further damage and ensure a quality repair.
17. Tools Available at CARDIAGTECH.NET
CARDIAGTECH.NET offers a wide range of tools and equipment to help you repair scratches on your car bumper. Here are some of the products we offer:
- Sanding Blocks: Ensure even pressure and a smooth finish.
- Microbrushes: Ideal for applying touch-up paint to small scratches.
- Dual-Action Polishers: Make polishing and buffing easier and more effective.
- Paint Mixing Systems: Ensure a perfect color match for your touch-up paint.
- Spray Guns: Provide a professional-quality finish when applying primer, base coat, and clear coat.
Our tools are designed to make the repair process easier and more efficient, helping you achieve professional results.
18. Choosing the Right Sandpaper
Selecting the right sandpaper is crucial for achieving a smooth and even finish. Here’s a guide to choosing the right sandpaper for each step of the repair process:
| Grit | Purpose |
|---|---|
| 400 | Removing deep scratches and leveling body filler |
| 600 | Smoothing body filler and feathering edges |
| 800 | Refining the surface and preparing for primer |
| 1000 | Smoothing primer and preparing for base coat |
| 1500 | Smoothing base coat and preparing for clear coat |
| 2000 | Wet sanding clear coat to remove imperfections |
| 2500 | Final wet sanding before polishing |
| 3000 | Ultra-fine wet sanding for a show-quality finish |
Using the correct sandpaper ensures a smooth, even surface for each step of the repair process.
19. Blending Techniques
Blending the new paint with the surrounding paint is essential for a seamless repair. Here are some tips for blending:
- Use a Blending Solvent: Apply a blending solvent to the edges of the new paint to soften the transition.
- Feather the Edges: Use fine-grit sandpaper to feather the edges of the new paint into the surrounding paint.
- Apply Multiple Thin Coats: Apply multiple thin coats of paint rather than one thick coat to avoid a hard edge.
- Polish and Buff: Polishing and buffing will help blend the new paint with the surrounding paint.
Mastering blending techniques ensures a flawless repair that is virtually invisible.
20. Understanding the Types of Car Paint
Understanding the different types of car paint can help you choose the right products and techniques for your repair. Here are the most common types of car paint:
- Single-Stage Paint: This type of paint combines the color and clear coat into one layer. It is less durable than two-stage paint and is typically found on older vehicles.
- Two-Stage Paint: This type of paint consists of a base coat (the color) and a clear coat (a protective layer). It is more durable and provides a glossier finish than single-stage paint.
- Metallic Paint: This type of paint contains metallic flakes that reflect light and create a shimmering effect. It is more difficult to repair than solid paint because the metallic flakes can be hard to match.
- Pearl Paint: This type of paint contains ceramic crystals that create a pearlescent effect. It is even more difficult to repair than metallic paint because the pearl crystals can be hard to blend.
Knowing the type of paint on your car can help you choose the right products and techniques for your repair.
21. Choosing the Right Polish and Compound
Choosing the right polish and compound is essential for achieving a flawless finish. Here’s a guide to choosing the right products for each step of the polishing process:
- Rubbing Compound: This is the most aggressive type of polish and is used to remove heavy scratches and imperfections.
- Polishing Compound: This is a medium-aggressive type of polish and is used to remove swirl marks and light scratches.
- Finishing Polish: This is the least aggressive type of polish and is used to refine the finish and enhance the shine.
Using the correct polish and compound ensures a smooth, glossy finish that is free of imperfections.
22. The Importance of Proper Lighting
Proper lighting is essential for inspecting your work and identifying any imperfections. Here are some tips for using proper lighting:
- Use a Bright Light: Use a bright light to illuminate the area you are working on.
- Use a Directional Light: Use a directional light to highlight any imperfections in the paint.
- Move the Light Around: Move the light around to inspect the surface from different angles.
- Use a Swirl Finder Light: Use a swirl finder light to identify swirl marks and other imperfections.
Using proper lighting ensures you can identify and correct any imperfections in your repair.
23. Techniques for Applying Touch-Up Paint
Applying touch-up paint can be tricky, but with the right techniques, you can achieve a seamless repair. Here are some tips for applying touch-up paint:
- Clean the Area: Clean the area thoroughly with soap and water before applying touch-up paint.
- Apply Thin Coats: Apply multiple thin coats of touch-up paint rather than one thick coat.
- Use a Microbrush: Use a microbrush to apply touch-up paint to small scratches.
- Let Each Coat Dry: Let each coat of touch-up paint dry completely before applying the next coat.
- Wet Sand: Wet sand the touch-up paint with fine-grit sandpaper to blend it with the surrounding paint.
- Polish and Buff: Polish and buff the area to restore the shine.
Following these techniques ensures a seamless touch-up paint repair.
24. Benefits of Using CARDIAGTECH.NET Tools
CARDIAGTECH.NET tools offer numerous benefits that streamline the repair process and improve the quality of results:
- Precision and Accuracy: Our tools are designed for precise application, ensuring that materials are applied evenly and accurately.
- Durability: Made from high-quality materials, our tools withstand rigorous use, providing long-term reliability.
- Efficiency: Ergonomic designs and advanced features reduce repair time and effort.
- Cost-Effectiveness: By enabling DIY repairs, our tools help you save on professional service costs.
- Professional Results: Achieve a finish that rivals professional services, enhancing your vehicle’s appearance and value.
Alt: Detailed view of car scratch repair process showing application of touch-up paint on a car bumper.
25. Understanding the Importance of Flexibility
Flexibility in car bumpers is essential for absorbing impacts and protecting the vehicle’s structure. Here’s why it matters:
- Impact Absorption: Flexible bumpers can deform upon impact, absorbing energy and reducing damage to the car’s frame.
- Pedestrian Safety: Flexible materials can minimize injuries to pedestrians in the event of a collision.
- Durability: Bumpers made of flexible materials are less likely to crack or break under stress.
- Repairability: Minor dents and scratches on flexible bumpers are often easier to repair than those on rigid bumpers.
- Compliance with Safety Standards: Many modern safety regulations require bumpers to have specific flexibility characteristics.
Understanding the importance of flexibility can help you choose the right bumper for your car and ensure its safety and longevity.
26. New Technologies in Bumper Repair
Advancements in technology have revolutionized bumper repair, offering new methods that are more efficient and effective:
- Paintless Dent Repair (PDR): This technique uses specialized tools to gently massage dents out of the bumper without damaging the paint.
- Plastic Welding: This method uses heat to fuse broken plastic pieces together, creating a strong and durable repair.
- Computer-Aided Color Matching: This technology uses sensors and software to precisely match the paint color, ensuring a seamless repair.
- UV Curing: This process uses ultraviolet light to quickly cure paint and clear coat, reducing repair time.
- Advanced Fillers: New fillers offer improved adhesion, flexibility, and sandability, making repairs easier and more durable.
Staying updated on these technologies can help you choose the best repair method for your bumper.
27. Common Car Bumper Materials
Car bumpers are made from a variety of materials, each with its own advantages and disadvantages:
- Plastic: Lightweight, flexible, and relatively inexpensive.
- Steel: Strong and durable, but heavier and more prone to rust.
- Aluminum: Lightweight and corrosion-resistant, but more expensive than steel.
- Fiberglass: Lightweight and strong, but brittle and prone to cracking.
- Carbon Fiber: Extremely lightweight and strong, but very expensive.
Knowing the material of your car’s bumper can help you choose the right repair methods and products.
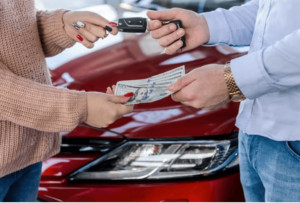
28. Tips for Preparing Your Car for Resale
Repairing scratches on your car bumper can significantly increase its resale value. Here are some tips for preparing your car for sale:
- Repair Scratches and Dents: Fixing scratches and dents makes your car look newer and more appealing to buyers.
- Clean and Detail: A clean and well-detailed car shows that you have taken good care of it.
- Address Mechanical Issues: Repair any mechanical issues to ensure the car is in good working order.
- Gather Maintenance Records: Provide maintenance records to show that you have regularly serviced the car.
- Price Competitively: Research the market value of your car and price it competitively to attract buyers.
Taking these steps can help you get the best possible price for your car.
29. The Role of Sealants and Waxes
Sealants and waxes play a vital role in protecting your car’s bumper from the elements and maintaining its appearance.
- Protection from UV Rays: Sealants and waxes block harmful UV rays that can fade and damage the paint.
- Protection from Contaminants: They create a barrier against dirt, grime, and other contaminants that can scratch the paint.
- Water Repellency: They repel water, preventing water spots and corrosion.
- Enhanced Shine: They enhance the shine and gloss of the paint, making your car look its best.
- Ease of Cleaning: They make it easier to clean your car by preventing dirt and grime from sticking to the paint.
Regularly applying sealants and waxes can help keep your car’s bumper looking new for years to come.
30. Advanced Techniques for Metallic Paint
Repairing metallic paint requires special techniques to ensure the metallic flakes are properly aligned and the color is consistent.
- Use a Blending Solvent: Use a blending solvent to help blend the new paint with the surrounding paint.
- Apply Multiple Thin Coats: Apply multiple thin coats of paint rather than one thick coat to ensure the metallic flakes are evenly distributed.
- Use a Spray Gun: Use a spray gun to apply the paint in a consistent and even pattern.
- Adjust the Spray Pattern: Adjust the spray pattern to ensure the metallic flakes are properly aligned.
- Test the Color Match: Test the color match in different lighting conditions to ensure it is consistent.
Mastering these techniques ensures a flawless metallic paint repair.
Don’t let deep scratches ruin the appearance of your car bumper. With the right tools and techniques, you can achieve professional results at home. Visit CARDIAGTECH.NET at 276 Reock St, City of Orange, NJ 07050, United States, or contact us via Whatsapp at +1 (641) 206-8880 to get the best equipment and advice for your car repair needs. We’re here to help you keep your vehicle looking its best!
FAQ: How to Fix Deep Scratches on Car Bumper
- What are the different types of scratches on a car bumper?
- Clear coat scratches, base coat scratches, and primer scratches, each requiring different repair approaches.
- What tools do I need to fix a deep scratch on my car bumper?
- You’ll need car wash soap, microfiber towels, sandpaper (various grits), body filler (if needed), primer, touch-up paint, clear coat, polishing compound, and application tools like microbrushes and spreaders.
- How do I prepare the area before fixing a scratch?
- Wash the bumper, remove wax and grease, assess the damage, and mask the surrounding area to protect it.
- What is wet sanding and why is it important?
- Wet sanding involves using sandpaper soaked in water to prevent clogging and create a smoother finish. It’s essential for leveling and refining the scratched area.
- When should I use body filler?
- Use body filler for deep scratches that reach the primer or bare plastic to level the surface before painting.
- How do I ensure the touch-up paint matches my car’s color?
- Find your car’s paint code (usually on the driver’s side door jamb or in the glove compartment) and use it to order matching touch-up paint from CARDIAGTECH.NET.
- What is the purpose of clear coat?
- Clear coat protects the base coat and provides a glossy, durable finish, shielding your repair from the elements.
- What safety precautions should I take when repairing car scratches?
- Wear gloves, a mask, and eye protection, and work in a well-ventilated area to avoid inhaling harmful chemicals.
- Can I fix a deep scratch myself, or should I seek professional help?
- DIY repair is suitable for minor scratches, but for extensive damage or if you’re uncomfortable doing the repair, it’s best to consult a professional.
- How can CARDIAGTECH.NET help me with my car bumper scratch repair?
- CARDIAGTECH.NET offers a wide range of high-quality tools, equipment, and advice to help you achieve professional results with your DIY car repair projects.