How To Fix Cloth On Roof Of Car: Expert Guide

Fixing the cloth on your car’s roof, often called the headliner, can seem daunting. This guide from CARDIAGTECH.NET provides simple yet effective methods to restore your car’s headliner without complete removal, saving you time and money. Discover how to address this common issue with professional techniques and maintain your vehicle’s interior. Let’s explore solutions that keep your car looking its best and maintaining its value with proper fabric repair and auto upholstery care.
1. Understanding the Car Headliner
A headliner is the fabric attached to the inside roof of your vehicle. It provides a smooth, finished look, absorbs noise, and helps insulate the interior. Typically, a headliner consists of several layers, including a foam backing—often made of polyurethane—that is glued to a headliner board. This board then attaches to the roof’s interior.
The headliner is more than just a cosmetic feature; it significantly impacts the comfort inside your car. Without it, the interior can become much hotter when parked in the sun, and you’ll notice increased wind noise, especially at higher speeds. It also optimizes acoustics for your car’s audio system.
Car headliner is a fabric that is secured to the roof framing
1.1 Components of a Typical Headliner
Understanding the layers helps in effective repair:
- Fabric Layer: This is the visible material, often cloth or suede.
- Foam Backing: Usually polyurethane, it provides cushioning and adhesion.
- Headliner Board: A rigid board made of fiberglass or cardboard that supports the fabric and foam.
1.2 Functionality Beyond Aesthetics
The headliner serves several critical functions:
- Insulation: Helps maintain a consistent temperature inside the car.
- Noise Reduction: Absorbs and dampens outside noises for a quieter ride.
- Aesthetics: Completes the interior look and feel of the vehicle.
2. Common Causes of Headliner Sagging
Sagging occurs when the adhesive between the fabric and foam backing deteriorates. Several factors contribute to this breakdown, turning your car interior from appealing to unkempt.
2.1 Heat and Sunlight
Exposure to extreme heat, especially direct sunlight, is a primary cause. The heat melts the adhesive, causing the fabric to separate from the backing board. If you live in areas like California, Texas, or Florida, this is a common issue.
2.2 Moisture
Humidity and leaks can seep into the headliner, causing the foam to absorb moisture. This weakens the foam and adhesive, leading to warping and sagging.
2.3 Poor Installation
If the headliner was not correctly installed initially, using insufficient glue or improper techniques, it’s likely to sag sooner.
2.4 Physical Damage
Kids and pets can unintentionally damage the headliner by pulling or scratching at it, putting physical strain on the material.
2.5 Vehicle Age
Over time, the materials degrade naturally. Adhesives lose their bonding strength, and foam becomes brittle.
3. Preliminary Steps Before Repairing Your Car’s Roof Cloth
Before attempting any repairs, preparation is essential. Gather the necessary materials and tools, and protect your car’s interior.
3.1 Gathering Necessary Materials
- Headliner Adhesive: Specifically designed for automotive headliners.
- Spray Bottle: For applying adhesive evenly.
- Lint Roller: To clean the fabric surface.
- Plastic Sheeting: To protect surrounding areas.
- Masking Tape: To secure plastic sheeting.
- Scissors or Utility Knife: For trimming excess fabric.
- Gloves: To protect your hands from the adhesive.
- Safety Glasses: To protect your eyes.
- Soft Cloths: For wiping surfaces.
- Sequin Pins or Headliner Retainers: For temporary support.
- Steam Cleaner (optional): To help reactivate old adhesive.
- Paint Roller (optional): To smooth the fabric
3.2 Tools Recommended By CARDIAGTECH.NET
| Tool | Description | Benefit |
|---|---|---|
| Headliner Adhesive | High-strength adhesive designed for automotive interiors | Ensures a durable bond that withstands temperature fluctuations |
| Sequin Pins | Small, fine pins to hold fabric in place | Provides temporary support while the adhesive cures, preventing further sagging |
| Steam Cleaner | Gently heats and loosens old adhesive | Helps reactivate existing glue for better adhesion, reduces the need for excessive new adhesive |
| Paint Roller | Soft roller to smooth fabric onto the headliner board | Ensures even application and prevents wrinkles or creases, resulting in a professional-looking finish |
| Masking Tape | Protects trim and edges from adhesive | Prevents overspray and keeps your car’s interior clean during the repair process |
| CARDIAGTECH.NET Kit | Comprehensive kit with all essential tools and materials | Provides convenience and ensures you have everything needed for a successful headliner repair in one package |
Consider purchasing the CARDIAGTECH.NET Headliner Repair Kit for a complete solution. Contact us on Whatsapp at +1 (641) 206-8880 or visit our website CARDIAGTECH.NET for more information.
3.3 Protecting Your Car Interior
- Cover Seats and Carpets: Use plastic sheeting and masking tape to protect these areas from adhesive overspray.
- Ventilate the Area: Open windows or work in a well-ventilated space to avoid inhaling fumes from the adhesive.
- Remove or Cover Trim: Take off any trim pieces that might get in the way or cover them securely.
4. Detailed Steps on How to Fix Cloth on Roof of Car
With the preparations complete, follow these methods to repair your sagging headliner. These techniques focus on fixing the headliner without removing it from the car, making it a more accessible DIY project.
4.1 Method 1: The Glue-and-Pin Technique
This method is effective for smaller areas of sagging, such as corners or edges.
4.1.1 Applying Adhesive
- Clean the Sagging Area: Use a lint roller to remove any loose material or debris from both the fabric and the headliner board.
- Spray Adhesive: Apply a thin, even layer of headliner adhesive to both the back of the fabric and the corresponding area on the headliner board. Follow the adhesive manufacturer’s instructions for drying time.
- Reattach Fabric: Carefully press the fabric back onto the headliner board. Smooth out any wrinkles or bubbles with a soft cloth.
4.1.2 Securing with Pins
- Insert Pins: Use sequin pins to hold the fabric in place while the adhesive cures. Push the pins through the fabric and into the headliner board, spacing them about an inch apart.
- Arrange Pins Neatly: You can arrange the pins in a pattern to make the repair look more visually appealing.
- Allow to Cure: Let the adhesive cure for the time specified by the manufacturer, usually 24-48 hours.
- Remove Pins: Once the adhesive is fully cured, carefully remove the pins.
4.2 Method 2: Using Clear-Headed Twist Pins (Saggy Stoppers)
These pins are designed specifically for headliner repair and are effective for more extensive sagging.
4.2.1 Inserting Saggy Stoppers
- Identify Sagging Areas: Locate all areas where the headliner is sagging significantly.
- Insert Pins: Push the saggy stoppers through the fabric and into the headliner board. Twist the head of the pin to lock it in place.
- Space Evenly: Distribute the pins evenly across the sagging area, typically about 2-3 inches apart.
4.2.2 Advantages of Saggy Stoppers
- No Damage: These pins are designed not to damage the headliner board.
- Easy to Use: Simple to insert and twist into place.
- Inexpensive: A cost-effective solution for extensive sagging.
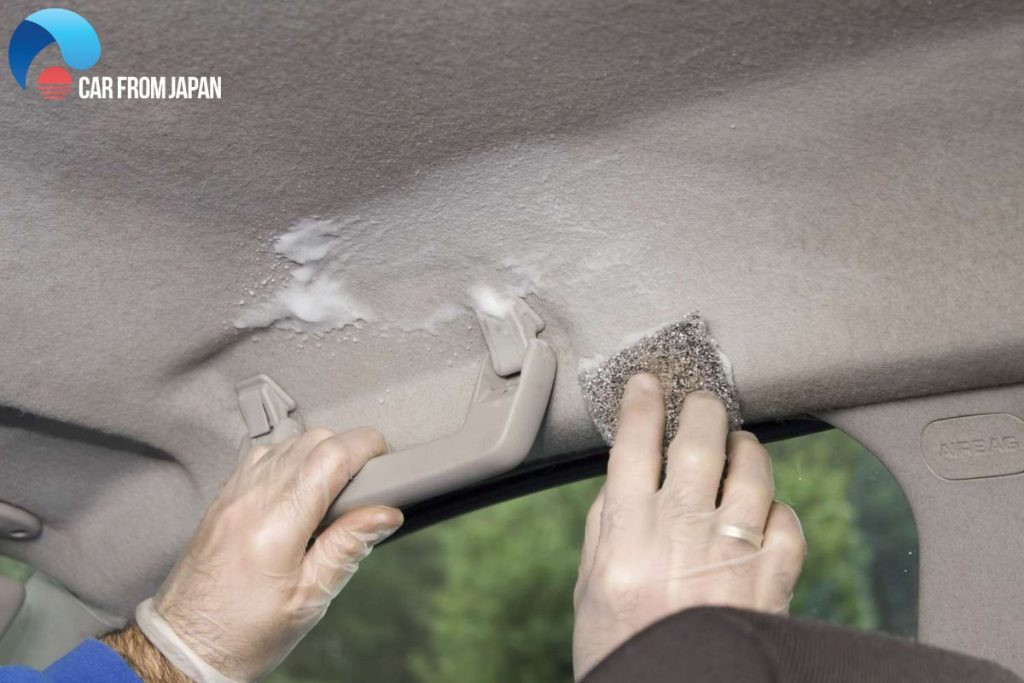
4.3 Method 3: Steam Cleaner and Paint Roller
This method can reactivate old adhesive and smooth the fabric back into place.
4.3.1 Applying Steam
- Steam the Fabric: Use a steam cleaner to gently heat the sagging fabric. Hold the steam cleaner a few inches away from the headliner to avoid overheating the material.
- Soften Adhesive: The steam will help soften the old adhesive, making it more pliable.
4.3.2 Smoothing with a Paint Roller
- Roll the Fabric: Immediately after steaming, use a clean paint roller to smooth the fabric back onto the headliner board. Apply gentle pressure to ensure the fabric adheres evenly.
- Work in Sections: Work in small sections, steaming and rolling, until the entire sagging area is addressed.
4.3.3 Additional Tips
- Avoid Over-Steaming: Too much steam can damage the fabric or headliner board.
- Use a Soft Roller: A soft roller will prevent damage to the fabric.
 How to fix sagging headliner
4.4 Method 4: Complete Reglue
This method is suited for when large portions of the headliner are sagging.
4.4.1 Loosening Fabric
- Carefully Peel Back the Fabric: Start at one edge and gently peel the fabric away from the headliner board. Work slowly to avoid tearing the fabric.
- Clean the Board: Use a scraper or brush to remove any old adhesive or foam from the headliner board. A smooth surface is essential for the new adhesive to bond properly.
4.4.2 Applying New Adhesive
- Apply Adhesive to Both Surfaces: Spray an even layer of headliner adhesive to both the back of the fabric and the headliner board.
- Allow to Tack: Let the adhesive sit for a few minutes to become tacky, as per the manufacturer’s instructions.
4.4.3 Reattaching Fabric
- Align and Press: Carefully align the fabric with the headliner board and press it into place.
- Smooth Out Bubbles: Use a soft cloth or roller to smooth out any bubbles or wrinkles, working from the center outwards.
- Secure with Pins: Use sequin pins or clamps to hold the fabric in place while the adhesive cures.
5. Proactive Measures to Prevent Future Sagging
Prevention is always better than cure. Here are some steps to minimize the risk of your headliner sagging again.
5.1 Parking in Shade
Always try to park your vehicle in the shade or use a car cover to protect it from direct sunlight. This reduces the heat inside the car and prevents the adhesive from melting.
5.2 Regular Cleaning
Keep your car interior clean and dry. Regularly vacuum the headliner to remove dust and debris that can trap moisture.
5.3 Avoid Harsh Chemicals
When cleaning your car interior, avoid using harsh chemicals that can damage the headliner fabric or adhesive.
5.4 Check for Leaks
Regularly inspect your car for leaks, especially around the sunroof or windows. Address any leaks promptly to prevent moisture from damaging the headliner.
5.5 Mindful Use of Steam Cleaners
If you use a steam cleaner to clean the headliners, avoid using too much pressure or steam, which can weaken the adhesive.
5.6 Protect from Physical Damage
Ensure that children and pets are kept secure in their seats to prevent them from pulling or scratching at the headliner.
6. Cost Considerations: Repair vs. Replacement
Understanding the costs involved in headliner repair and replacement can help you make an informed decision.
6.1 Repair Costs
- DIY Repair: The cost of materials for a DIY repair, such as adhesive, pins, and cleaning supplies, typically ranges from $20 to $50.
- Professional Repair: Professional repairs can vary depending on the extent of the damage and the labor costs in your area. Expect to pay between $100 and $300 for a professional repair.
6.2 Replacement Costs
Replacing the headliner can be significantly more expensive, especially for luxury vehicles or those with complex designs.
- Average Replacement Cost: The average cost to replace a car’s headliner ranges from $500 to $1,000 or more, depending on the car model and the quality of the replacement material.
6.3 Cost-Summary Table
| Type of Vehicle | Replacement Cost Range |
|---|---|
| Simple-designed Sedan/Hatchback/Coupe (e.g., Accord) | $300 – $750 |
| Typical SUV/Crossover with Sunroof (e.g., RAV4) | $500 – $900 |
| Luxury Vehicle (e.g., BMW) | $1,000 – $6,000 |
6.4 Considerations
- Vehicle Age and Value: If you have an older car, a full replacement might not be worth the investment.
- DIY Skills: If you are comfortable with DIY projects, repairing the headliner yourself can save a significant amount of money.
7. Why Choose CARDIAGTECH.NET for Your Auto Repair Needs?
At CARDIAGTECH.NET, we understand the challenges you face as auto repair professionals. Our mission is to provide you with the highest quality tools and equipment to enhance your efficiency, accuracy, and profitability.
7.1 Addressing Customer Challenges
- Physical Demands: Our ergonomic tools reduce strain and fatigue, making your job easier on your body.
- Exposure to Chemicals: We offer safety gear and tools designed to minimize contact with harmful substances.
- Keeping Up with Technology: CARDIAGTECH.NET provides the latest diagnostic and repair equipment to keep you ahead of the curve.
- Time Constraints: Our tools are designed to speed up the repair process without compromising quality.
- Competition: With our advanced tools and equipment, you can offer superior service and stand out from the competition.
- Finding Quality Tools: We source our tools from trusted manufacturers, ensuring durability and reliability.
7.2 How We Help
CARDIAGTECH.NET offers solutions to help you:
- Enhance Efficiency: Our tools streamline the repair process, reducing the time required for each job.
- Improve Accuracy: Precision tools ensure that repairs are done right the first time, minimizing errors and comebacks.
- Save Costs: By reducing repair times and minimizing errors, our tools help you save on labor and material costs.
- Increase Revenue: Efficient and accurate repairs lead to higher customer satisfaction and increased business.
- Elevate Reputation: Providing top-notch service with high-quality tools enhances your reputation and builds customer loyalty.
7.3 Call to Action
Ready to take your auto repair business to the next level? Contact CARDIAGTECH.NET today for expert advice and top-quality tools.
- Address: 276 Reock St, City of Orange, NJ 07050, United States
- WhatsApp: +1 (641) 206-8880
- Website: CARDIAGTECH.NET
Let us help you overcome your challenges and achieve your business goals with our comprehensive range of auto repair solutions.
8. Frequently Asked Questions (FAQs)
8.1 How do you know if your ceiling is sagging?
Signs of a sagging car ceiling include:
- A cracking sound when the car shakes or when slamming doors.
- Drooping plasterboard sheeting or cornice.
- Visible cracking.
- Tiny circles or blisters forming as lines produced by nails or screws.
8.2 Is it OK to fix the headliner sagging myself?
Yes, you can fix minor sagging issues yourself. Headliner repair kits are readily available online and at auto parts stores. These kits typically include the necessary tools to secure the headliner to the foam backing.
8.3 Can I paint a headliner?
While it might seem appealing, painting a headliner is not recommended. It requires extensive preparation to avoid getting paint on the trim and glass. Additionally, the paint may not adhere well due to temperature fluctuations inside the car.
8.4 Does car insurance cover the cost of car headliner replacement?
Most car insurance policies do not cover interior upholstery, trim, or headliners unless the damage is caused by a covered event, such as a collision or natural disaster.
8.5 What causes a car headliner to sag?
The most common causes are heat, humidity, and age, which degrade the adhesive holding the fabric to the headliner board.
8.6 How long does it take to fix a sagging headliner?
DIY repairs can take anywhere from 2 to 6 hours, depending on the extent of the damage and your skill level. Professional repairs typically take a few hours to a full day.
8.7 Can I use regular glue to fix my headliner?
No, regular glue is not suitable for headliner repair. You need to use a specialized headliner adhesive that is designed to withstand high temperatures and provide a strong bond.
8.8 Are saggy stoppers a permanent fix?
Saggy stoppers are a good temporary solution, but they may not be a permanent fix for extensive sagging. They can help hold the fabric in place while you consider other repair options.
8.9 How can I prevent my headliner from sagging in the future?
To prevent future sagging, park your car in the shade, keep the interior clean and dry, avoid harsh chemicals, and address any leaks promptly.
8.10 What are the benefits of repairing the headliner instead of replacing it?
Repairing the headliner is typically more cost-effective than replacing it, especially for older vehicles. It also allows you to maintain the original look of your car’s interior.
9. Conclusion
Fixing a sagging headliner doesn’t have to be a major headache. With the right tools and techniques, you can restore your car’s interior to its former glory without breaking the bank. Whether you choose to tackle the job yourself or seek professional help, remember that regular maintenance and preventative measures are key to keeping your headliner looking its best. Remember, for all your automotive tool and equipment needs, CARDIAGTECH.NET is here to support you every step of the way.
Contact CARDIAGTECH.NET today for expert advice and top-quality tools.
- Address: 276 Reock St, City of Orange, NJ 07050, United States
- WhatsApp: +1 (641) 206-8880
- Website: CARDIAGTECH.NET