How to Fix Car Central Locking System: A Comprehensive Guide
Central Locking System Repair: Here’s a detailed guide on how to diagnose and fix your car’s central locking system, ensuring convenience and security. Looking to repair your car’s central locking system? CARDIAGTECH.NET offers expert guidance and top-quality tools to get the job done right. From diagnosing common issues to step-by-step repair solutions, we’ll help you restore your car’s central locking functionality, ensuring your vehicle is secure and convenient to use. Explore effective solutions for remote locking issues and central locking malfunctions with our assistance.
1. Understanding the Basics of Car Central Locking Systems
What is a car central locking system and how does it work?
A car central locking system allows you to lock and unlock all car doors and the trunk simultaneously with the touch of a button, either inside the car or remotely with a key fob. These systems enhance convenience and security. According to a study by the National Highway Traffic Safety Administration (NHTSA), central locking systems significantly reduce the risk of theft and unauthorized access to vehicles, as reported in their 2022 Vehicle Theft Prevention Report.
The central locking system operates through a network of electrical and mechanical components, including:
- Actuators: These are small electric motors located inside each door that physically lock and unlock the door.
- Control Unit: The central control unit receives signals from the key fob or interior switch and sends commands to the actuators.
- Wiring: Electrical wiring connects all the components, transmitting power and signals.
- Key Fob: The remote key fob transmits a radio frequency signal to the control unit.
When you press the lock or unlock button on your key fob or the interior switch, the following steps occur:
- The key fob sends a coded radio signal to the car’s control unit.
- The control unit verifies the signal.
- If the signal is valid, the control unit sends an electrical signal to the door lock actuators.
- The actuators then move the locking mechanisms in each door to lock or unlock them.
What are the different types of central locking systems available in cars today?
There are two primary types of central locking systems used in cars:
-
Infrared (IR) Systems: These older systems use infrared light to transmit signals between the key fob and the car. They require a direct line of sight and have a limited range.
-
Radio Frequency (RF) Systems: The most common type today, RF systems use radio waves to communicate, offering a longer range and not requiring a direct line of sight.
Radio Frequency (RF) systems are most often used today. The key, as a transmitter, sends a coded signal to the receivers in your car via radio waves. This coded signal is compared to its own code to ensure a match, which will unlock or lock the vehicles central locking system.
2. Common Problems with Car Central Locking Systems
What are the most common issues that can cause a central locking system to fail?
Several common issues can cause a car’s central locking system to fail. Identifying these problems early can save time and money on repairs. These can include a dead key fob battery, faulty actuators, blown fuses, wiring issues, and a malfunctioning control unit.
-
Dead Key Fob Battery: The most frequent cause. A dead battery prevents the key fob from sending a signal to the car.
-
Faulty Actuators: Actuators can wear out or fail over time, preventing the doors from locking or unlocking.
-
Blown Fuses: A blown fuse in the central locking circuit can cut off power to the system.
-
Wiring Issues: Damaged or corroded wires can disrupt the electrical signals.
-
Malfunctioning Control Unit: A faulty control unit can fail to send the correct signals to the actuators.
According to a 2023 report by AAA, electrical system failures, including central locking issues, are among the top reasons for roadside assistance calls. Addressing these problems promptly can prevent further damage and inconvenience.
How to diagnose common central locking problems: a step-by-step guide?
Diagnosing central locking problems involves a systematic approach to identify the root cause. Here’s a step-by-step guide to help you troubleshoot:
-
Check the Key Fob Battery:
- Replace the battery with a new one.
- Test the key fob again to see if the system works.
-
Inspect the Fuses:
- Locate the fuse box (usually under the dashboard or in the engine compartment).
- Check the fuse for the central locking system.
- Replace any blown fuses with the correct amperage.
-
Test the Door Lock Actuators:
- Listen for the sound of the actuators when you try to lock or unlock the doors.
- If one door doesn’t respond, the actuator in that door might be faulty.
-
Check the Wiring:
- Inspect the wiring in the door jambs for any signs of damage or corrosion.
- Use a multimeter to check for continuity in the wires.
-
Scan for Error Codes:
- Use an OBD-II scanner to check for any error codes related to the central locking system.
- Consult the car’s service manual for interpretation and troubleshooting.
-
Inspect the Control Unit:
- If all else fails, the control unit may be the issue.
- This typically requires professional diagnosis and repair.
Checking the fuses for the car’s central locking system to diagnose the problem.
What tools and equipment are needed for diagnosing and repairing a central locking system?
To diagnose and repair a car’s central locking system effectively, you’ll need a variety of tools and equipment. Here’s a comprehensive list:
| Tool/Equipment | Description | Use |
|---|---|---|
| Multimeter | A device used to measure voltage, current, and resistance in electrical circuits. | To check for continuity and voltage in the wiring and actuators. |
| OBD-II Scanner | A diagnostic tool that reads error codes from the car’s computer. | To identify specific issues related to the central locking system. |
| Fuse Tester | A simple tool to quickly check if a fuse is blown. | To verify the condition of fuses. |
| Wire Strippers/Crimpers | Tools used to strip insulation from wires and crimp connectors. | For repairing or replacing damaged wiring. |
| Socket Set | A set of sockets and wrenches for removing and installing bolts and screws. | To access the door lock actuators and control unit. |
| Screwdriver Set | A set of various screwdrivers (Phillips, flathead) for removing and installing screws. | For removing door panels and accessing components. |
| Pliers | Used for gripping, cutting, and bending wires. | For general wiring tasks. |
| Test Light | A tool used to check for the presence of voltage in a circuit. | To verify power supply to the actuators and control unit. |
| Replacement Fuses | A selection of fuses of different amperages. | To replace blown fuses. |
| Replacement Actuators | New door lock actuators. | To replace faulty actuators. |
| Wiring Diagram | A diagram showing the electrical layout of the central locking system. | To help trace wires and understand the system’s configuration. |
| Protective Gear (Gloves, Glasses) | Safety equipment to protect hands and eyes. | To ensure safety while working with electrical components. |
Having these tools on hand will enable you to efficiently diagnose and repair most central locking system issues. For high-quality tools, visit CARDIAGTECH.NET, where you can find everything you need to tackle these repairs effectively. Contact us at +1 (641) 206-8880 for expert advice and assistance in selecting the right tools. Our address is 276 Reock St, City of Orange, NJ 07050, United States.
What are the costs associated with repairing or replacing a central locking system?
The cost of repairing or replacing a central locking system can vary widely depending on the specific problem, the car’s make and model, and whether you choose to do the work yourself or hire a professional. Here’s a breakdown of potential costs:
-
Key Fob Battery Replacement:
- DIY: $5 – $15 (cost of the battery)
- This is the cheapest and easiest fix if the battery is the problem.
-
Fuse Replacement:
- DIY: Less than $5
- Fuses are inexpensive and easy to replace.
-
Door Lock Actuator Replacement:
- DIY: $30 – $150 per actuator (depending on the car model and brand)
- Professional: $150 – $400 per actuator (including labor)
- Actuators can be costly, especially for luxury vehicles. Labor costs can add significantly to the total expense.
-
Wiring Repair:
- DIY: $10 – $50 (cost of wiring and connectors)
- Professional: $100 – $300 (including labor)
- Wiring repairs can be time-consuming, which can increase labor costs.
-
Control Unit Replacement:
- DIY: $100 – $500 (depending on the car model and brand)
- Professional: $300 – $800 (including labor)
- The control unit is the most expensive component to replace.
-
Diagnostic Fee:
- Professional: $50 – $150
- Many mechanics charge a diagnostic fee to identify the problem.
Cost Table for Central Locking System Repair:
| Repair Type | DIY Cost | Professional Cost |
|---|---|---|
| Key Fob Battery | $5 – $15 | $20 – $40 |
| Fuse Replacement | Less than $5 | $20 – $30 |
| Door Lock Actuator | $30 – $150 | $150 – $400 |
| Wiring Repair | $10 – $50 | $100 – $300 |
| Control Unit Replacement | $100 – $500 | $300 – $800 |
| Diagnostic Fee | N/A | $50 – $150 |
According to data from RepairPal, the average cost for central locking system repair ranges from $150 to $500, but it can exceed $800 for complex issues or luxury vehicles.
3. Step-by-Step Guide to Fixing a Car Central Locking System
How to replace a faulty door lock actuator: a detailed tutorial
Replacing a faulty door lock actuator is a common repair for central locking systems. Here’s a detailed tutorial:
Step 1: Gather Your Tools and Materials
- New door lock actuator
- Socket set
- Screwdriver set
- Pliers
- Wire strippers/crimpers
- Multimeter
- Panel removal tool
- Protective gloves and glasses
Step 2: Disconnect the Battery
- Disconnect the negative terminal of the car battery to prevent electrical shock.
Step 3: Remove the Door Panel
- Use a panel removal tool to carefully pry off the door panel.
- Remove any screws holding the panel in place.
- Disconnect any electrical connectors attached to the panel (e.g., window switch, speaker wires).
Step 4: Access the Door Lock Actuator
- Peel back the plastic moisture barrier to access the inside of the door.
- Locate the door lock actuator.
Step 5: Disconnect the Actuator
- Disconnect the electrical connector from the actuator.
- Remove any screws or clips holding the actuator in place.
Step 6: Remove the Old Actuator
- Carefully remove the old actuator from the door.
Step 7: Install the New Actuator
- Install the new actuator in the reverse order of removal.
- Secure it with screws or clips.
- Connect the electrical connector.
Step 8: Test the New Actuator
- Temporarily reconnect the battery.
- Test the new actuator by locking and unlocking the door using the key fob or interior switch.
Step 9: Reassemble the Door
- Reattach the plastic moisture barrier.
- Reconnect all electrical connectors to the door panel.
- Reinstall the door panel and secure it with screws.
Step 10: Final Test
- Reconnect the battery.
- Test the central locking system to ensure all doors lock and unlock properly.
Step-by-step guide to replacing the door lock actuator.
How to fix common wiring issues in a central locking system?
Wiring issues can often cause problems with central locking systems. Here’s how to address them:
Step 1: Identify the Wiring Issue
- Use a multimeter to check for continuity and voltage in the wires.
- Look for any signs of damage, corrosion, or breaks in the wires.
Step 2: Gather Your Tools and Materials
- Wire strippers/crimpers
- New wiring (same gauge as the original)
- Connectors (butt connectors, spade connectors)
- Electrical tape
- Heat shrink tubing
- Heat gun
- Multimeter
- Wiring diagram
Step 3: Disconnect the Battery
- Disconnect the negative terminal of the car battery.
Step 4: Repair or Replace Damaged Wires
- If the wire is simply broken, strip the ends of the wire and use a butt connector to reconnect them.
- Crimp the connector securely and cover it with heat shrink tubing. Use a heat gun to shrink the tubing for a secure seal.
- If the wire is corroded, replace the entire section of wire.
Step 5: Secure the Wires
- Use electrical tape to wrap any exposed wires or connectors.
- Ensure the wires are routed properly and secured to prevent future damage.
Step 6: Test the Repair
- Reconnect the battery.
- Test the central locking system to ensure it is working properly.
Tips for Wiring Repairs:
- Always use the same gauge wire as the original.
- Ensure all connections are secure and properly insulated.
- Use a wiring diagram to help trace the wires and ensure correct connections.
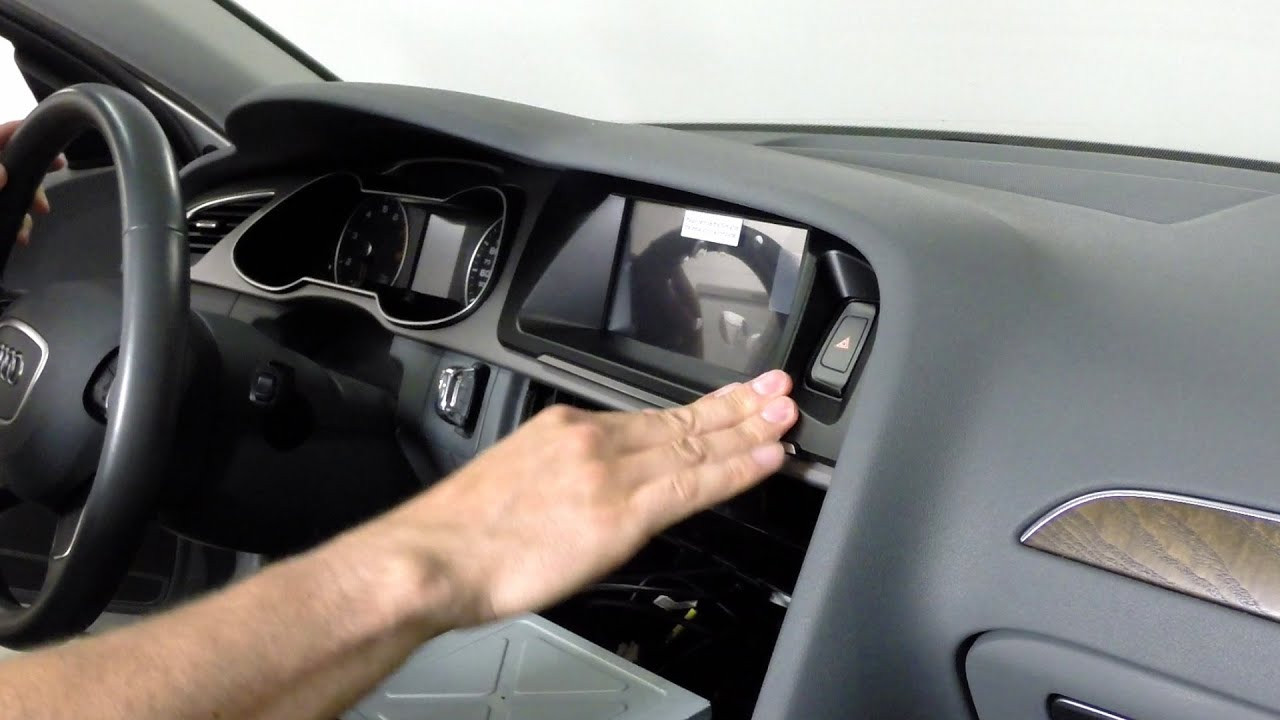
How to troubleshoot and replace a malfunctioning central locking control unit?
A malfunctioning central locking control unit can cause widespread issues with the system. Here’s how to troubleshoot and replace it:
Step 1: Diagnose the Control Unit
- Use an OBD-II scanner to check for any error codes related to the control unit.
- Check the power supply to the control unit using a multimeter.
- If the control unit is not receiving power or is sending incorrect signals, it may need to be replaced.
Step 2: Gather Your Tools and Materials
- New central locking control unit
- Socket set
- Screwdriver set
- Multimeter
- Wiring diagram
Step 3: Disconnect the Battery
- Disconnect the negative terminal of the car battery.
Step 4: Locate the Control Unit
- The control unit is typically located under the dashboard, in the center console, or behind the glove box.
- Consult your car’s service manual for the exact location.
Step 5: Disconnect the Control Unit
- Disconnect the electrical connectors from the control unit.
- Remove any screws or clips holding the control unit in place.
Step 6: Remove the Old Control Unit
- Carefully remove the old control unit.
Step 7: Install the New Control Unit
- Install the new control unit in the reverse order of removal.
- Secure it with screws or clips.
- Connect the electrical connectors.
Step 8: Test the New Control Unit
- Reconnect the battery.
- Test the central locking system to ensure all doors lock and unlock properly.
Step 9: Program the New Control Unit (if necessary)
- Some control units may require programming to match the car’s key fobs.
- Consult your car’s service manual or a professional mechanic for programming instructions.
The location of a malfunctioning central locking control unit.
4. Advanced Troubleshooting Techniques
How to use a multimeter to diagnose electrical problems in the central locking system?
A multimeter is an essential tool for diagnosing electrical problems in the central locking system. Here’s how to use it effectively:
1. Measuring Voltage:
- Purpose: To check if voltage is reaching the components (e.g., actuators, control unit).
- Steps:
- Set the multimeter to the DC voltage setting (usually marked as “VDC” or with a straight line and dashed line).
- Connect the black lead to a good ground (bare metal part of the car’s chassis).
- Connect the red lead to the point you want to test (e.g., the power wire of an actuator).
- Read the voltage on the multimeter. A reading close to the car’s battery voltage (around 12V-14V) indicates proper voltage.
2. Checking Continuity:
- Purpose: To check if a wire is broken or if a circuit is complete.
- Steps:
- Set the multimeter to the continuity setting (usually marked with a diode symbol or a sound wave symbol).
- Disconnect the power source to the circuit you are testing.
- Connect one lead to one end of the wire or circuit and the other lead to the other end.
- If the multimeter beeps or shows a low resistance (close to 0 ohms), the circuit is complete. If it shows infinite resistance or no beep, the circuit is broken.
3. Measuring Resistance:
- Purpose: To check the resistance of components like actuators.
- Steps:
- Set the multimeter to the resistance setting (usually marked with an omega symbol – Ω).
- Disconnect the power source to the component you are testing.
- Connect the leads to the terminals of the component.
- Read the resistance on the multimeter. Compare the reading to the specifications in the car’s service manual.
Example Scenario:
Let’s say a door lock actuator is not working. Here’s how to use a multimeter to diagnose the problem:
- Check Voltage: Use the multimeter to check if the actuator is receiving voltage when you try to lock or unlock the door. If there is no voltage, the problem may be in the wiring or the control unit.
- Check Continuity: Disconnect the actuator and use the multimeter to check the continuity of the wires leading to the actuator. If there is no continuity, the wire is broken.
- Measure Resistance: Use the multimeter to measure the resistance of the actuator. If the resistance is significantly different from the specified value, the actuator may be faulty.
According to Fluke Corporation, a leading manufacturer of multimeters, proper use of a multimeter can significantly reduce diagnostic time and improve the accuracy of electrical repairs.
How to use an OBD-II scanner to diagnose central locking system faults?
An OBD-II scanner can provide valuable information about central locking system faults. Here’s how to use it:
Step 1: Connect the OBD-II Scanner
- Locate the OBD-II port in your car (usually under the dashboard).
- Plug the scanner into the port.
Step 2: Turn On the Ignition
- Turn the ignition to the “ON” position, but don’t start the engine.
Step 3: Read the Error Codes
- Follow the scanner’s instructions to read the error codes.
- The scanner will display any stored error codes related to the central locking system.
Step 4: Interpret the Error Codes
- Consult your car’s service manual or a reliable online database to interpret the error codes.
- Common error codes related to central locking systems include:
- B1073: Central Locking Motor Circuit Open
- B1074: Central Locking Motor Circuit Short to Ground
- B1078: Central Locking System Malfunction
Step 5: Clear the Error Codes (if necessary)
- After repairing the problem, use the scanner to clear the error codes.
- This will reset the system and turn off the check engine light (if it was on).
Example Scenario:
If the OBD-II scanner shows the error code “B1073: Central Locking Motor Circuit Open,” it indicates that there is an open circuit in the central locking motor. This could be due to a broken wire, a faulty connector, or a malfunctioning actuator.
What are the best practices for maintaining a car’s central locking system to prevent future problems?
Maintaining your car’s central locking system can prevent future problems and extend its lifespan. Here are some best practices:
-
Regularly Replace Key Fob Batteries:
- Replace the key fob batteries every 1-2 years, or as soon as you notice the range decreasing.
- Use high-quality batteries for best performance.
-
Protect Key Fobs from Damage:
- Avoid dropping or exposing key fobs to water or extreme temperatures.
- Consider using a protective case for your key fob.
-
Keep Door Lock Mechanisms Clean:
- Regularly clean the door lock mechanisms with a silicone-based lubricant.
- This will prevent dirt and debris from accumulating and causing problems.
-
Inspect Wiring Regularly:
- Check the wiring in the door jambs for any signs of damage or corrosion.
- Repair any damaged wires promptly.
-
Avoid Slamming Doors:
- Slamming doors can damage the door lock actuators and other components.
- Close doors gently but firmly.
-
Address Problems Promptly:
- If you notice any problems with the central locking system (e.g., slow response, intermittent operation), address them promptly.
- Ignoring small problems can lead to bigger, more expensive repairs down the road.
-
Professional Inspection:
- Have your car’s central locking system inspected by a professional mechanic during routine maintenance.
- They can identify and address any potential problems before they become serious.
According to a study by J.D. Power, regular maintenance can significantly improve the reliability and longevity of car electrical systems, including central locking systems.
5. Advanced Repairs and Modifications
How to install an aftermarket remote start system with central locking integration?
Installing an aftermarket remote start system with central locking integration can add convenience and security to your car. Here’s a general guide:
Step 1: Research and Purchase a Remote Start System
- Choose a remote start system that is compatible with your car’s make and model.
- Ensure the system includes central locking integration.
- Read reviews and compare features to find the best system for your needs.
Step 2: Gather Your Tools and Materials
- Remote start system
- Wiring harness
- Wire strippers/crimpers
- Multimeter
- Socket set
- Screwdriver set
- Electrical tape
- Zip ties
- Installation manual
Step 3: Disconnect the Battery
- Disconnect the negative terminal of the car battery.
Step 4: Locate the Necessary Wiring Connections
- Consult the installation manual to identify the wiring connections needed for the remote start system.
- This may include:
- Ignition wire
- Starter wire
- Accessory wire
- Ground wire
- Central locking wires
Step 5: Make the Wiring Connections
- Use wire strippers and crimpers to make the necessary wiring connections.
- Connect the wires from the remote start system to the corresponding wires in your car’s electrical system.
- Use butt connectors or solder and heat shrink tubing for secure connections.
Step 6: Connect the Central Locking Wires
- Identify the central locking wires in your car’s wiring harness.
- Connect the central locking wires from the remote start system to the corresponding wires in your car.
- This will allow you to lock and unlock the doors using the remote start system’s key fob.
Step 7: Mount the Remote Start Module
- Choose a secure location to mount the remote start module.
- Ensure the module is protected from moisture and extreme temperatures.
Step 8: Test the System
- Reconnect the battery.
- Test the remote start system to ensure it is working properly.
- Test the central locking integration to ensure the doors lock and unlock with the remote start system’s key fob.
Step 9: Secure the Wiring
- Use electrical tape and zip ties to secure the wiring and prevent it from interfering with other components.
Note: Installing a remote start system can be complex and may require professional installation. If you are not comfortable working with your car’s electrical system, it is best to hire a professional.
How to upgrade a basic central locking system to include remote control functionality?
Upgrading a basic central locking system to include remote control functionality can add convenience and security to your car. Here’s how to do it:
Step 1: Purchase a Remote Control Kit
- Choose a remote control kit that is compatible with your car’s make and model.
- Ensure the kit includes a remote control module, key fobs, and wiring harness.
Step 2: Gather Your Tools and Materials
- Remote control kit
- Wire strippers/crimpers
- Multimeter
- Socket set
- Screwdriver set
- Electrical tape
- Zip ties
- Installation manual
Step 3: Disconnect the Battery
- Disconnect the negative terminal of the car battery.
Step 4: Locate the Central Locking Wires
- Locate the central locking wires in your car’s wiring harness.
- These wires are typically located near the central locking control unit or in the door jambs.
Step 5: Connect the Remote Control Module
- Connect the wires from the remote control module to the corresponding wires in your car’s central locking system.
- Use butt connectors or solder and heat shrink tubing for secure connections.
Step 6: Mount the Remote Control Module
- Choose a secure location to mount the remote control module.
- Ensure the module is protected from moisture and extreme temperatures.
Step 7: Test the System
- Reconnect the battery.
- Test the remote control system to ensure it is working properly.
- Test the key fobs to ensure they lock and unlock the doors.
Step 8: Secure the Wiring
- Use electrical tape and zip ties to secure the wiring and prevent it from interfering with other components.
What are some advanced diagnostic techniques for intermittent central locking problems?
Intermittent central locking problems can be challenging to diagnose. Here are some advanced diagnostic techniques:
-
Monitor Voltage Drops:
- Use a multimeter to monitor voltage drops in the central locking circuit while the system is operating.
- A sudden voltage drop can indicate a loose connection or a failing component.
-
Check for Grounding Issues:
- Use a multimeter to check for grounding issues in the central locking system.
- A poor ground connection can cause intermittent problems.
-
Use a Scan Tool with Live Data:
- Use a scan tool that can display live data from the central locking system.
- This can help you identify any unusual patterns or anomalies in the system’s operation.
-
Test with a Load Tester:
- Use a load tester to test the door lock actuators.
- A load tester can simulate the load on the actuator and help you identify any weaknesses or failures.
-
Check for Interference:
- Check for any sources of interference that could be affecting the central locking system.
- This may include aftermarket electronic devices or nearby radio transmitters.
-
Inspect Wiring Thoroughly:
- Inspect the wiring for any signs of damage, corrosion, or wear.
- Pay close attention to areas where the wiring is exposed to movement or vibration.
-
Use a Thermal Camera:
- Use a thermal camera to check for hot spots in the central locking system.
- A hot spot can indicate a failing component or a short circuit.
6. Safety Precautions and Best Practices
What safety precautions should be taken when working on a car’s electrical system?
Working on a car’s electrical system can be dangerous if proper safety precautions are not taken. Here are some essential safety measures:
-
Disconnect the Battery: Always disconnect the negative terminal of the car battery before working on the electrical system. This will prevent electrical shock and damage to the car’s components.
-
Wear Safety Gear: Wear safety glasses and gloves to protect your eyes and hands from electrical shock and hazardous materials.
-
Use Insulated Tools: Use tools with insulated handles to prevent electrical shock.
-
Work in a Well-Ventilated Area: Work in a well-ventilated area to avoid inhaling harmful fumes from electrical components.
-
Avoid Water: Never work on the electrical system in wet conditions. Water can conduct electricity and increase the risk of electrical shock.
-
Follow the Service Manual: Always follow the instructions in the car’s service manual when working on the electrical system. This will ensure that you are performing the repairs correctly and safely.
-
Double-Check Your Work: Before reconnecting the battery, double-check your work to ensure that all connections are secure and properly insulated.
-
Seek Professional Help: If you are not comfortable working on the electrical system, seek professional help from a qualified mechanic.
What are some common mistakes to avoid when repairing a central locking system?
Repairing a central locking system can be challenging, and it’s easy to make mistakes if you’re not careful. Here are some common mistakes to avoid:
-
Not Disconnecting the Battery: Failing to disconnect the battery can lead to electrical shock and damage to the car’s components.
-
Using the Wrong Tools: Using the wrong tools can damage the components and make the repair more difficult.
-
Not Following the Service Manual: Failing to follow the service manual can lead to incorrect repairs and further damage to the system.
-
Forcing Components: Forcing components can break them and make the repair more expensive.
-
Not Testing the System: Failing to test the system after the repair can lead to further problems and frustration.
-
Ignoring Safety Precautions: Ignoring safety precautions can lead to electrical shock and injury.
-
Not Seeking Professional Help: Not seeking professional help when needed can lead to more extensive and expensive repairs.
How to ensure a long-lasting and reliable repair of a car’s central locking system?
Ensuring a long-lasting and reliable repair of a car’s central locking system requires attention to detail and the use of quality parts. Here are some tips:
-
Use High-Quality Parts: Use high-quality replacement parts that are designed for your car’s make and model.
-
Follow the Service Manual: Follow the instructions in the car’s service manual when performing the repair.
-
Clean Connections: Clean all electrical connections thoroughly before reassembling the system.
-
Secure Wiring: Secure the wiring properly to prevent it from rubbing or chafing.
-
Test the System Thoroughly: Test the system thoroughly after the repair to ensure that it is working correctly.
-
Apply Protective Coatings: Apply protective coatings to exposed metal parts to prevent corrosion.
-
Perform Regular Maintenance: Perform regular maintenance on the central locking system to prevent future problems.
7. Frequently Asked Questions (FAQ) About Car Central Locking Systems
Why is my car’s central locking not working with the key fob?
Several reasons can cause this, including a dead key fob battery, a faulty key fob, or issues with the car’s receiver. Try replacing the key fob battery first. If that doesn’t work, the key fob may need reprogramming or the car’s receiver may need inspection.
How do I reset my car’s central locking system?
Resetting the system typically involves disconnecting the car battery for a short period (around 10-15 minutes) to reset the electronic control unit (ECU). However, this method might vary depending on the car’s make and model, so consult your car’s manual for specific instructions.
Can I fix a central locking system myself, or do I need a professional?
Simple issues like a dead key fob battery or a blown fuse can often be fixed DIY. However, more complex problems, such as a faulty actuator or control unit, may require professional diagnosis and repair due to the intricate electrical components involved.
What does it mean when only one door doesn’t lock with the central locking system?
This usually indicates a problem with the door lock actuator in the affected door. The actuator may be faulty and need replacement. Check the wiring to the actuator as well to ensure there are no breaks or shorts.
How much does it cost to replace a central locking actuator?
The cost can range from $30 to $150 for the part itself, depending on the car’s make and model. Labor costs for professional installation can add an additional $100 to $300 per actuator.
What are the symptoms of a failing central locking control unit?
Symptoms include the central locking system not working at all, working intermittently, or only working on some doors. Other symptoms may include the car’s alarm system malfunctioning or the interior lights not working properly.
How can I test if my car’s central locking fuse is blown?
Locate the fuse box, usually under the dashboard or in the engine compartment, and identify the fuse for the central locking system. Use a fuse tester or a multimeter to check continuity. If the fuse is blown, replace it with one of the same amperage.
Can cold weather affect my car’s central locking system?
Yes, cold weather can affect the system. Cold temperatures can cause the door lock actuators to become stiff or slow to respond. Additionally, the key fob battery can lose power more quickly in cold conditions.
What should I do if my key fob stops working suddenly?
First, try replacing the battery in the key fob. If that doesn’t work, try reprogramming the key fob following the instructions in your car’s manual. If the key fob still doesn’t work, it may be faulty and need replacement.
Is it possible to upgrade my car’s central locking system to include keyless entry?
Yes, it is possible. Aftermarket keyless entry systems can be installed to add remote locking and unlocking functionality. These systems typically include a remote control module, key fobs, and a wiring harness. Professional installation is recommended for best results.
8. CARDIAGTECH.NET: Your Partner in Automotive Repair Solutions
At CARDIAGTECH.NET, we understand the challenges you face as automotive technicians and shop owners. From the physical demands of the job to the constant need to update your skills and equipment, we’re here to provide solutions that enhance your efficiency, accuracy, and profitability.
Are you struggling with:
- Spending too much time on repairs? Our high-quality tools and equipment