How to Fix Car Ceiling Coming Down: Your Expert Guide

Is your car’s headliner starting to sag? CARDIAGTECH.NET offers expert advice and solutions to restore your car’s interior. Discover simple and effective methods to fix a sagging headliner and explore how to prevent future issues. Learn about headliner repair, ceiling upholstery, and auto interior restoration while considering the best tools and techniques for your car repair needs.
1. Understanding the Car Headliner
A car headliner, also known as headlining, is the fabric material affixed to the interior roof of a vehicle. Its primary functions include providing a smooth and aesthetically pleasing finish to the car’s interior, absorbing noise to enhance cabin comfort, and insulating the interior against temperature variations from outside weather conditions.
Think of the headliner as more than just a pretty face. Without this insulation, a car parked in the sun becomes extremely hot, and wind noise at high speeds is significantly louder. The headliner also improves acoustics for your car’s audio system, providing a better listening experience.
Car Headliner Fabric and Functionality
This image illustrates a typical car headliner, emphasizing its fabric construction and integration with the car’s interior.
2. Common Reasons for a Sagging Car Headliner
A sagging headliner not only detracts from your car’s interior appearance but can also indicate underlying problems. Over time, the adhesive securing the headliner fabric to its backing board can deteriorate, leading to the fabric separating and drooping. Several factors can contribute to this condition:
2.1 Heat and Sunlight Exposure
Intense heat, especially direct sunlight, is a major culprit in headliner sagging. The heat causes the adhesive to soften and lose its bonding strength, leading the fabric to detach.
2.2 Moisture and Humidity
High humidity levels or water leaks can seep into the headliner, causing the foam backing to absorb moisture. This moisture weakens the adhesive and causes the foam to lose its shape, leading to warping and sagging.
2.3 Improper Installation Techniques
If the headliner was not correctly installed initially, with insufficient adhesive or improper application, it is more likely to sag prematurely. Some vehicles may also have inadequate waterproofing, allowing water to enter and degrade the adhesive.
2.4 Physical Wear and Tear
Drivers with children or pets may experience sagging headliners due to physical strain. Playing, scratching, or pulling on the headliner can accelerate the failing process.
3. Budget-Friendly Fixes: How to Repair a Sagging Headliner Without Removing It
Replacing the entire headliner can be costly, especially for older vehicles, potentially equaling a significant portion of the car’s value. Here are several cost-effective methods to fix a sagging headliner without the need for complete removal.
3.1 Re-Gluing the Sagging Fabric
If the headliner is only sagging in certain areas, such as corners or edges, re-gluing can be a simple solution. A specialized headliner adhesive is essential, as regular glue is unlikely to withstand the high temperatures inside a car. Spray-on adhesives provide even coverage and are easy to apply.
Steps for Re-Gluing:
- Prepare the Area: Clean the sagging area with a soft brush to remove any loose particles.
- Apply Adhesive: Spray the adhesive evenly on both the fabric and the backing board.
- Reattach Fabric: Gently press the fabric back onto the board, ensuring a smooth, wrinkle-free surface.
- Secure with Clamps: Use clamps or tape to hold the fabric in place while the adhesive dries.
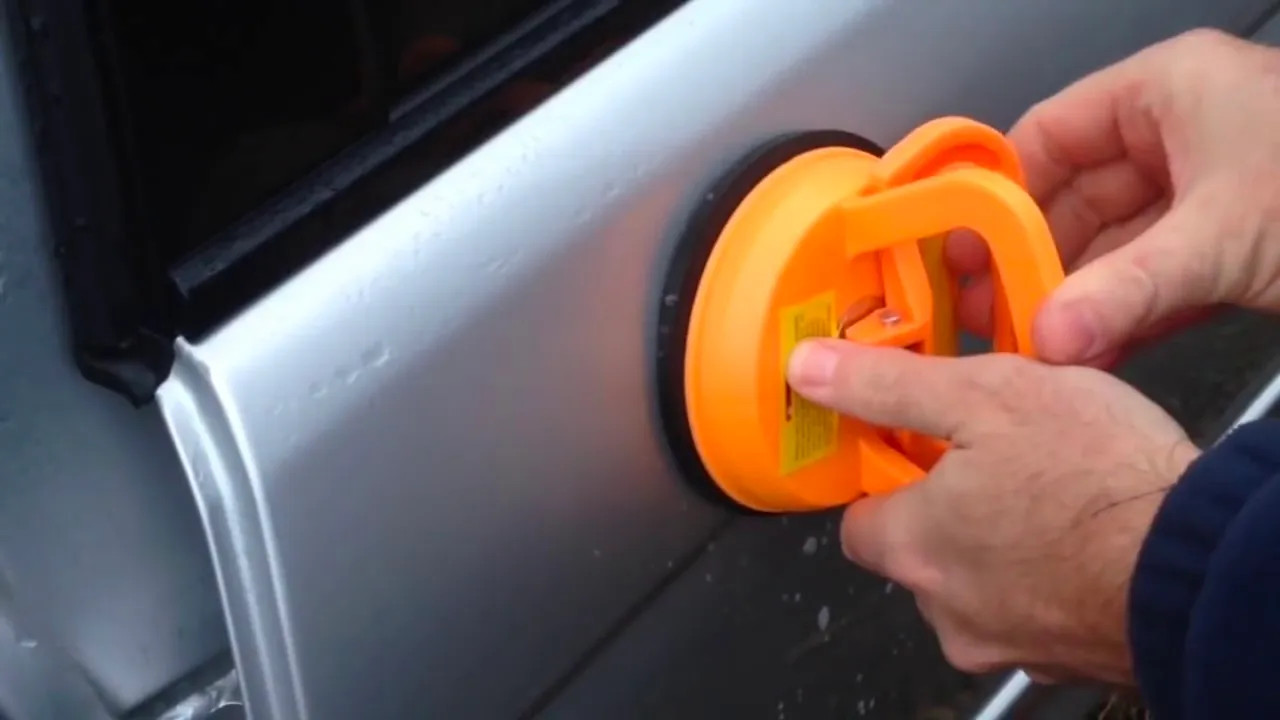
This image illustrates the process of applying adhesive to re-glue a sagging headliner, showing the necessary tools and techniques.
3.2 Using Sequin Pins
For a quick and inexpensive fix, sequin pins can hold the headliner in place. This method is particularly effective if a significant portion of the headliner is detached.
Steps for Using Sequin Pins:
- Gather Materials: Purchase sequin pins from a craft store.
- Position Fabric: Push the headliner fabric back into its original position.
- Insert Pins: Insert the pins through the fabric and into the foam backing board, spacing them evenly.
- Create a Pattern: Arrange the pins in a visually appealing pattern for a more aesthetic look.
3.3 Installing Clear-Headed Twist Pins
Clear-headed twist pins, also known as saggy stoppers, are an excellent solution for a completely sagging headliner. These pins are designed to hold the fabric without causing damage to the headlining board.
Steps for Using Twist Pins:
- Purchase Twist Pins: Obtain clear-headed twist pins designed for headliners.
- Position Fabric: Align the sagging fabric with the headlining board.
- Insert Pins: Twist the pins through the fabric and into the board, ensuring they are securely fastened.
- Space Evenly: Distribute the pins evenly across the headliner for uniform support.
3.4 Steam Cleaner and Paint Roller Combination
Using a steam cleaner in conjunction with a paint roller can effectively reattach the headliner fabric, especially around the edges. The steam melts the old adhesive, allowing the fabric to be smoothed back into place.
Steps for Using Steam and a Paint Roller:
- Steam the Area: Use a car steam cleaner to gently steam the sagging fabric, softening the old adhesive.
- Smooth Fabric: Use a paint roller to smooth the fabric back onto the headlining board, working from the center outwards.
- Remove Wrinkles: Ensure there are no creases or wrinkles in the fabric.
- Allow to Dry: Let the area dry completely, allowing the adhesive to re-bond.
Here’s a breakdown of each method:
| Method | Description | Pros | Cons |
|---|---|---|---|
| Re-Gluing | Applying specialized adhesive to reattach sagging fabric. | Effective for small areas, provides a strong bond. | Requires precise application, may not work for large areas. |
| Sequin Pins | Using sequin pins to hold fabric in place. | Quick, inexpensive, easy to apply. | Primarily a temporary fix, may not be aesthetically pleasing. |
| Clear-Headed Twist Pins | Installing clear-headed twist pins to secure fabric. | Effective for large areas, durable, minimizes damage. | May be visible, requires careful installation to avoid damaging the headliner board. |
| Steam Cleaner & Paint Roller | Using steam to soften adhesive and a paint roller to smooth fabric. | Effective for edges, helps remove wrinkles, can refresh fabric. | Requires specialized equipment, potential for over-saturation, not suitable for severely damaged headliners. |
For high-quality car steam cleaners and headliner adhesives, visit CARDIAGTECH.NET. Contact us at +1 (641) 206-8880 for expert advice and product recommendations, or visit our location at 276 Reock St, City of Orange, NJ 07050, United States.
4. Preventing Headliner Sagging
Preventing headliner sagging starts with proactive care and maintenance. Understanding the causes of sagging and taking preventive measures can significantly extend the life of your car’s headliner.
4.1 Tips to Protect Your Car Headliner
- Park in the Shade: Whenever possible, park your vehicle in shaded areas to avoid direct sunlight, which can cause the adhesive to break down.
- Use Window Shades: When parking in direct sunlight is unavoidable, use window shades to minimize heat buildup inside the car.
- Regular Cleaning: Periodically clean your car’s interior to remove dust and debris, which can contribute to moisture retention and adhesive degradation.
4.2 Avoid Harsh Treatments
- No Hairspray: Avoid using hairspray or other aerosol products in your car, as they can leave a residue that attracts dirt and moisture.
- No Staples or Pins: Do not use staples or pins as a temporary fix, as they can damage the headliner fabric and backing board.
- Gentle Steam Cleaning: When using a steam cleaner, use low pressure and avoid over-saturating the fabric.
4.3 Maintain Interior Conditions
- Check Rubber Seals: Regularly inspect rubber seals around windows and doors to ensure no water leaks into the vehicle.
- Control Humidity: Use a dehumidifier in your car during humid months to reduce moisture levels.
- Supervise Passengers: Ensure children and pets are kept secure in their seats to prevent them from touching or pulling on the headliner.
5. Factors Influencing Headliner Replacement Costs
The cost of replacing a sagging headliner varies depending on several factors, including the car model, the type of headliner material, and whether the replacement is done by a professional or as a DIY project.
Factors Affecting the Cost:
- Car Model: Luxury vehicles or those with complex interior designs typically have higher replacement costs.
- Headliner Material: The choice of material, whether aftermarket or factory-original, affects the price.
- Labor Costs: Professional installation can significantly increase the overall cost due to labor charges.
- Additional Features: Cars with sunroofs, moonroofs, or integrated electronic components may require more complex and expensive replacements.
Cost-Summary Table:
| Vehicle Type | Estimated Cost | Additional Notes |
|---|---|---|
| Simple Sedan/Hatchback/Coupe (e.g., Accord, Corolla) | $300 – $750 | Basic design with minimal ceiling accessories. |
| Typical SUV/Crossover (e.g., RAV4, X-Trail) with Sunroof | $500 – $900 | Includes sunroof and moonroof features. |
| Luxury Vehicle (e.g., BMW) | $1,000 – $6,000 | High-quality ceiling materials and complex design, potential for integrated electronic components. |
These figures are approximate and can vary based on location, shop rates, and specific vehicle conditions. For the best car interior restoration tools, visit CARDIAGTECH.NET.
6. Step-by-Step Guide: Replacing a Car Headliner (Advanced)
While fixing a sagging headliner without removal can be effective for minor issues, a full replacement might be necessary for extensive damage. Here’s a comprehensive guide to replacing your car’s headliner.
6.1 Tools and Materials Needed
Before starting, gather the necessary tools and materials to ensure a smooth and efficient replacement process.
Essential Tools and Materials:
- New Headliner Fabric: Choose a fabric that matches your car’s interior or opt for a custom design.
- Headliner Adhesive: Use a high-temperature-resistant spray adhesive specifically designed for headliners.
- Headliner Board: Purchase a new or refurbished headliner board if the old one is damaged.
- Trim Removal Tools: Plastic trim removal tools to avoid damaging interior components.
- Screwdrivers and Sockets: Various sizes for removing interior fixtures.
- Cutting Tools: Sharp utility knife or scissors for trimming fabric.
- Gloves and Mask: Protect your hands and respiratory system from adhesive fumes.
- Cleaning Supplies: Vacuum cleaner, soft brush, and cleaning solution for preparing the surface.
6.2 Removing the Old Headliner
- Disconnect Battery: Disconnect the car battery to prevent electrical issues.
- Remove Interior Fixtures: Remove dome lights, sun visors, grab handles, and any other fixtures attached to the headliner.
- Detach Trim: Carefully detach the trim pieces around the edges of the headliner.
- Remove Headliner Board: Gently lower the headliner board, being careful not to bend or break it.
- Prepare the Area: Take the headliner board out of the car through the door.
6.3 Preparing the Headliner Board
- Remove Old Fabric: Peel off the old headliner fabric from the board.
- Clean the Board: Use a soft brush and vacuum cleaner to remove any remaining foam or adhesive residue.
- Repair Damage: Repair any cracks or damage to the headliner board using fiberglass or epoxy resin.
6.4 Installing the New Headliner Fabric
- Measure and Cut Fabric: Measure the headliner board and cut the new fabric, leaving extra material around the edges.
- Apply Adhesive: Spray adhesive evenly on both the headliner board and the fabric.
- Attach Fabric: Carefully lay the fabric onto the board, smoothing out any wrinkles or bubbles.
- Trim Excess Fabric: Trim the excess fabric around the edges, leaving enough to wrap around the back of the board.
- Secure Edges: Apply adhesive to the back of the board and wrap the fabric around, securing it in place.
6.5 Reinstalling the Headliner
- Carefully Position: Carefully bring the headliner board back into the car, aligning it with the roof.
- Reattach Fixtures: Reattach all the interior fixtures, such as dome lights, sun visors, and grab handles.
- Secure Trim Pieces: Secure the trim pieces around the edges of the headliner.
- Reconnect Battery: Reconnect the car battery.
Here’s a detailed table to guide you through the replacement process:
| Step | Action | Tools/Materials | Tips |
|---|---|---|---|
| 1. Disconnect Battery | Disconnect the car battery to prevent electrical issues. | Screwdriver | Always disconnect the negative terminal first. |
| 2. Remove Interior Fixtures | Remove dome lights, sun visors, grab handles, etc. | Screwdrivers, Sockets, Trim Removal Tools | Store all removed parts in a labeled container to keep them organized. |
| 3. Detach Trim | Carefully detach the trim pieces around the edges of the headliner. | Trim Removal Tools | Use plastic trim removal tools to avoid damaging the trim. |
| 4. Remove Headliner Board | Gently lower the headliner board, being careful not to bend or break it. | Gloves | Have a helper to assist in lowering the board, especially in larger vehicles. |
| 5. Prepare the Area | Take the headliner board out of the car through the door. | Cleaning Supplies, Vacuum Cleaner | Vacuum the car interior to remove any loose debris. |
| 6. Remove Old Fabric | Peel off the old headliner fabric from the board. | Gloves | Take your time to avoid tearing the board. |
| 7. Clean the Board | Use a soft brush and vacuum cleaner to remove any remaining foam or adhesive residue. | Soft Brush, Vacuum Cleaner, Cleaning Solution | Ensure the board is clean and smooth for the new fabric. |
| 8. Repair Damage | Repair any cracks or damage to the headliner board using fiberglass or epoxy resin. | Fiberglass or Epoxy Resin, Sandpaper | Allow the repair to fully cure before proceeding. |
| 9. Measure and Cut Fabric | Measure the headliner board and cut the new fabric, leaving extra material around the edges. | Measuring Tape, Cutting Tools (Utility Knife or Scissors) | Ensure the fabric is large enough to cover the entire board with extra material for wrapping around the edges. |
| 10. Apply Adhesive | Spray adhesive evenly on both the headliner board and the fabric. | Headliner Adhesive, Gloves, Mask | Work in a well-ventilated area and wear a mask to protect from fumes. |
| 11. Attach Fabric | Carefully lay the fabric onto the board, smoothing out any wrinkles or bubbles. | Gloves, Paint Roller (optional) | Start from the center and work your way outwards to avoid trapping air. |
| 12. Trim Excess Fabric | Trim the excess fabric around the edges, leaving enough to wrap around the back of the board. | Cutting Tools (Utility Knife or Scissors) | Leave about 2-3 inches of extra fabric to wrap around the edges. |
| 13. Secure Edges | Apply adhesive to the back of the board and wrap the fabric around, securing it in place. | Headliner Adhesive, Gloves | Ensure the fabric is tightly secured to the back of the board for a clean finish. |
| 14. Carefully Position | Carefully bring the headliner board back into the car, aligning it with the roof. | Helper (optional) | Have a helper to assist in lifting and positioning the board, especially in larger vehicles. |
| 15. Reattach Fixtures | Reattach all the interior fixtures, such as dome lights, sun visors, and grab handles. | Screwdrivers, Sockets | Ensure all fixtures are properly tightened and aligned. |
| 16. Secure Trim Pieces | Secure the trim pieces around the edges of the headliner. | Trim Removal Tools | Press firmly to ensure the trim pieces are securely attached. |
| 17. Reconnect Battery | Reconnect the car battery. | Screwdriver | Ensure the connection is secure. |
For all your car interior repair and maintenance needs, visit CARDIAGTECH.NET. Contact us at +1 (641) 206-8880 for personalized assistance and expert advice, or visit our store at 276 Reock St, City of Orange, NJ 07050, United States.
7. Why Choose CARDIAGTECH.NET for Your Car Repair Needs?
At CARDIAGTECH.NET, we understand the challenges faced by auto repair professionals and DIY enthusiasts. We offer a wide range of high-quality tools and equipment to enhance your efficiency, accuracy, and safety. Here’s why you should choose us:
- Quality Products: We provide top-of-the-line tools and equipment designed for durability and performance.
- Expert Advice: Our team of experienced technicians offers expert advice and support to help you find the right solutions for your needs.
- Competitive Pricing: We offer competitive pricing to ensure you get the best value for your investment.
- Customer Satisfaction: We are committed to providing exceptional customer service and ensuring your complete satisfaction.
7.1 Benefits of Choosing CARDIAGTECH.NET
- Enhanced Efficiency: Our tools are designed to help you complete repairs quickly and efficiently, saving you time and money.
- Increased Accuracy: Our equipment ensures precise and accurate repairs, reducing the risk of errors and rework.
- Improved Safety: We prioritize safety by offering tools and equipment that meet the highest safety standards.
- Cost Savings: By using our high-quality tools, you can reduce the need for frequent replacements and repairs, saving you money in the long run.
- Increased Revenue: For garage owners, our tools can help you increase your revenue by improving your service quality and customer satisfaction.
7.2 Addressing Customer Challenges
We understand the challenges you face in the auto repair industry:
- Physical Demands: Our ergonomic tools help reduce physical strain and fatigue, making your job easier and more comfortable.
- Exposure to Chemicals: We offer protective gear and equipment to minimize your exposure to harmful chemicals and substances.
- Keeping Up with Technology: We provide the latest tools and equipment to help you stay ahead of the curve and handle the newest automotive technologies.
- Time Constraints: Our efficient tools and equipment help you complete repairs quickly, allowing you to meet deadlines and increase your productivity.
7.3 How CARDIAGTECH.NET Can Help You
- Expert Consultation: Contact us for personalized advice on the best tools and equipment for your specific needs.
- Product Demonstrations: Schedule a product demonstration to see our tools in action and learn about their features and benefits.
- Training and Support: Access our training resources and support services to enhance your skills and knowledge.
Visit CARDIAGTECH.NET or contact us at +1 (641) 206-8880 to learn more about our products and services. Our location at 276 Reock St, City of Orange, NJ 07050, United States, is always open for you.
8. Act Now: Contact CARDIAGTECH.NET for Expert Assistance
Don’t let a sagging headliner diminish your car’s appearance and value. Contact CARDIAGTECH.NET today to explore our range of high-quality tools and equipment designed to tackle any auto repair challenge. Whether you’re dealing with headliner issues or any other auto repair task, we have the solutions you need to enhance your efficiency, accuracy, and safety.
Call to Action:
- Contact Us: Reach out to our expert team at +1 (641) 206-8880 for personalized advice and product recommendations.
- Visit Our Store: Stop by our location at 276 Reock St, City of Orange, NJ 07050, United States, to see our products firsthand.
- Explore Our Website: Visit CARDIAGTECH.NET to browse our extensive catalog and discover the perfect tools for your needs.
We are committed to providing exceptional customer service and ensuring your complete satisfaction. Let CARDIAGTECH.NET be your trusted partner in auto repair, helping you achieve the best results every time. Act now and experience the difference that quality tools and expert support can make.
9. Conclusion
Fixing a sagging car headliner doesn’t have to be a daunting task. With the right knowledge and tools, you can restore your car’s interior to its former glory without breaking the bank. From simple re-gluing techniques to full headliner replacements, there are solutions to fit every budget and skill level.
Remember, proactive maintenance and care can significantly extend the life of your car’s headliner, preventing sagging and other issues. By following the tips and guidelines outlined in this article, you can keep your car looking its best for years to come.
For all your car repair and maintenance needs, trust CARDIAGTECH.NET. We are dedicated to providing high-quality tools, expert advice, and exceptional customer service. Contact us today and let us help you keep your car in top condition.
10. Frequently Asked Questions (FAQs)
10.1 How do you know if your ceiling is sagging?
Signs of a sagging car ceiling include cracking sounds when the car shakes or when slamming doors, drooping plasterboard sheeting or cornice, visible cracking, and tiny circles or blisters forming as lines produced by nails or screws.
10.2 Is it OK to fix the headliner sagging myself?
Yes, you can fix minor headliner issues yourself. Replacement kits are easily available online and at auto parts retailers. These kits typically include small tools for securing the inner layer of a sinking headliner.
10.3 Can I paint a headliner?
While it may seem appealing, painting a headliner is not recommended. It requires extensive preparation to avoid getting paint on the trim and glass. Additionally, paint is unlikely to withstand the temperature-related expansion and contraction inside a car.
10.4 Does car insurance cover the cost of car headliner replacement?
Unfortunately, most car insurance policies do not cover the cost of headliner replacement, as it is typically considered interior upholstery.
10.5 What causes a car headliner to sag?
Common causes include heat and sunlight exposure, moisture and humidity, improper installation, and physical wear and tear.
10.6 How can I prevent my car headliner from sagging?
Park in the shade, use window shades, regularly clean the interior, avoid harsh treatments, maintain interior conditions, and check rubber seals regularly.
10.7 What is the average cost to replace a car headliner?
The average cost to replace a car headliner ranges from $300 to $1,000 or more, depending on the car model and the type of material used.
10.8 Can I use regular glue to fix a sagging headliner?
No, you should use a specialized headliner adhesive designed to withstand high temperatures.
10.9 Are clear-headed twist pins a permanent solution for a sagging headliner?
While they are a durable and effective solution, they are not considered a permanent fix. They are an excellent option for holding the fabric in place and minimizing damage.
10.10 How often should I clean my car headliner?
You should clean your car headliner every few months to remove dust and debris and prevent moisture buildup. Use a soft brush and vacuum cleaner for best results.