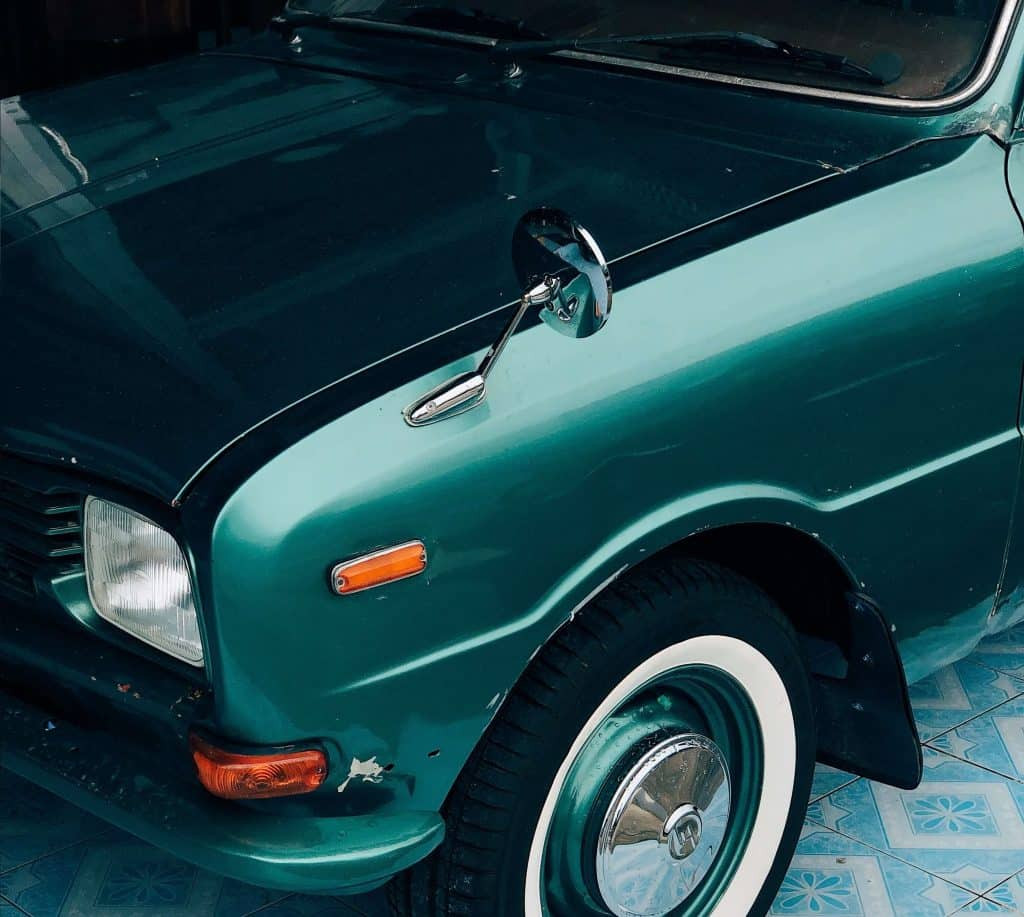
How To Fix Bad Touch Up Paint On Car
Is your car marred by unsightly blobs and mismatched colors from a less-than-perfect touch-up job? At CARDIAGTECH.NET, we understand the frustration of seeing your vehicle’s flawless finish ruined. We provide expert advice and solutions on how to fix bad touch up paint on your car, restoring its original beauty and value. Discover effective techniques and the right tools to remove old, poorly applied paint, seamlessly repair chips and scratches, and achieve a professional-looking finish.
1. Understanding the Problem of Bad Touch Up Paint
Bad touch up paint jobs can significantly detract from your car’s appearance and value. Identifying the reasons behind these imperfections is the first step toward finding effective solutions.
1.1. Common Causes of Poor Touch Up Paint Application
Several factors contribute to the failure of touch up paint to blend seamlessly with the original finish.
-
Incorrect Color Matching: Using the wrong color code results in a noticeable difference between the touch up paint and the surrounding area.
-
Improper Surface Preparation: Failing to properly clean and prepare the surface can prevent the touch up paint from adhering correctly.
-
Uneven Application: Applying too much or too little paint, or using the wrong technique, can lead to blobs, streaks, or uneven texture.
-
Contamination: Dust, dirt, or other contaminants can get trapped in the paint, causing imperfections and affecting adhesion.
-
Incompatible Products: Using touch up paint or clear coat that is not compatible with the original finish can lead to reactions and discoloration.
-
Environmental Factors: Applying touch up paint in extreme temperatures or high humidity can affect the drying process and result in poor adhesion or finish.
-
Lack of Experience: Inexperience in applying touch up paint can lead to mistakes in technique, resulting in an unprofessional appearance.
1.2. Identifying Types of Touch Up Paint Issues
Recognizing the specific problems with your touch up paint is essential for choosing the appropriate repair methods.
-
Color Mismatch: The touch up paint is noticeably different in color from the original paint.
-
Blobbing: Excess paint accumulates in the repaired area, creating a raised, uneven surface.
-
Peeling: The touch up paint is not adhering correctly and starts to peel away from the surface.
-
Fading or Discoloration: The touch up paint changes color over time, becoming lighter or darker than the original paint.
-
Rough Texture: The repaired area has a rough or uneven texture compared to the smooth finish of the surrounding paint.
-
Visible Brush Strokes: Brush strokes are visible in the touch up paint, indicating improper application.
-
Halo Effect: A visible ring or halo appears around the repaired area, often due to improper blending.
1.3. Assessing the Damage and Determining the Best Course of Action
Before starting any repair work, carefully assess the extent of the damage and decide on the most effective approach.
- Evaluate the Severity: Determine if the paint issue is minor (e.g., small chips) or more extensive (e.g., large scratches or mismatched areas).
- Consider the Location: Assess whether the damage is in a high-visibility area or a less noticeable spot.
- Check Paint Condition: Inspect the touch up paint for proper adhesion, color match, and texture.
- Assess Your Skill Level: Honestly evaluate your experience and comfort level with auto paint repair.
- Choose the Right Method: Based on your assessment, select the appropriate repair technique, whether it’s removing the old paint and starting over or blending the existing paint.
- Gather Necessary Materials: Make sure you have all the required tools and materials before starting the repair process.
2. Essential Tools and Materials
Having the right tools and materials is crucial for successfully fixing bad touch up paint on your car.
2.1. Required Tools for Removing Old Touch Up Paint
- Rubbing Alcohol or Acetone: Effective for softening and removing small amounts of touch up paint without damaging the original finish.
- Microfiber Cloths: Soft, lint-free cloths for applying solvents and wiping away residue.
- Plastic Razor Blades: Safe for removing paint without scratching the surrounding area.
- Heat Gun or Hair Dryer: Gentle heat can soften the paint, making it easier to remove.
- Sanding Block: For controlled sanding to level the touch up paint with the original finish.
- Wet/Dry Sandpaper (2000-3000 Grit): Fine sandpaper for smoothing the surface without causing deep scratches.
- Detailing Clay Bar: Removes contaminants from the paint surface, preparing it for further treatment.
- Clay Bar Lubricant: Allows the clay bar to glide smoothly without scratching the paint.
2.2. Materials for Repairing Paint Chips and Scratches
- Touch Up Paint (Matching Color Code): Ensure the paint matches your car’s original color code for a seamless repair.
- Clear Coat: Protects the touch up paint and provides a glossy finish that matches the surrounding area.
- Primer: Improves adhesion of the touch up paint to bare metal or plastic surfaces.
- Applicators (Fine-Tipped Brushes, Toothpicks): For precise application of touch up paint into small chips and scratches.
- Blending Solution: Helps to blend the edges of the touch up paint with the original finish.
- Polishing Compound: Removes fine scratches and imperfections, restoring the paint’s shine.
- Wax or Sealant: Protects the repaired area and enhances the gloss of the finish.
- Masking Tape: Protects surrounding areas from accidental damage during sanding and painting.
2.3. Safety Equipment
- Gloves: Protect your hands from solvents and chemicals.
- Safety Glasses: Protect your eyes from splashes and debris.
- Respirator or Mask: Avoid inhaling harmful fumes from solvents and paints.
- Ventilation: Ensure adequate ventilation in your workspace to prevent buildup of fumes.
3. Step-by-Step Guide to Removing Bad Touch Up Paint
Removing old, poorly applied touch up paint requires patience and precision. Here’s a detailed guide to help you through the process.
3.1. Preparing the Area
- Wash the Car: Thoroughly wash and dry the area around the bad touch up paint to remove any dirt, wax, or contaminants.
- Mask the Surrounding Area: Use masking tape to protect the adjacent paint from accidental damage during the removal process.
- Inspect the Paint: Examine the touch up paint to determine its thickness and adhesion. This will help you choose the appropriate removal method.
3.2. Methods for Removing Touch Up Paint
3.2.1. Using Rubbing Alcohol or Acetone
- Apply Solvent: Dip a microfiber cloth in rubbing alcohol or acetone.
- Gently Wipe: Gently wipe the touch up paint with the damp cloth, using light pressure.
- Soak if Necessary: If the paint is stubborn, let the solvent soak on the paint for a few minutes before wiping.
- Repeat: Repeat the process until the touch up paint is removed. Be careful not to rub too hard, as this can damage the original finish.
- Clean the Area: Once the touch up paint is removed, clean the area with a fresh microfiber cloth and inspect for any remaining residue.
3.2.2. Using Plastic Razor Blades
- Prepare the Blade: Ensure the plastic razor blade is clean and free of any nicks or imperfections.
- Softening Paint: Use a heat gun or hair dryer to gently heat the touch up paint, making it more pliable.
- Carefully Scrape: Hold the plastic razor blade at a shallow angle to the surface and carefully scrape away the touch up paint.
- Apply Pressure: Apply steady, even pressure to avoid gouging the original finish.
- Clean Residue: After removing the bulk of the paint, use a solvent like rubbing alcohol to remove any remaining residue.
- Inspect and Repeat: Inspect the area and repeat the process if necessary, until all the touch up paint is removed.
3.2.3. Sanding Method
- Wet Sanding: Soak a piece of 2000-3000 grit wet/dry sandpaper in water with a drop of dish soap.
- Wrap Sandpaper: Wrap the sandpaper around a sanding block for even pressure distribution.
- Gently Sand: Lightly sand the touch up paint using a circular motion, keeping the surface wet at all times.
- Check Progress: Periodically check your progress by wiping the area dry and inspecting the surface.
- Leveling the Paint: Continue sanding until the touch up paint is level with the surrounding paint.
- Rinse and Dry: Rinse the area thoroughly with clean water and dry with a microfiber cloth.
3.3. Cleaning and Preparing the Surface for New Touch Up Paint
- Clay Bar Treatment: Use a detailing clay bar with lubricant to remove any remaining contaminants from the paint surface.
- Clean the Area: Wipe the area with a clean microfiber cloth and a wax and grease remover to ensure a clean surface.
- Inspect for Imperfections: Carefully inspect the area for any remaining imperfections, such as scratches or swirl marks.
- Polish if Necessary: If necessary, use a polishing compound to remove any fine scratches and restore the paint’s shine.
- Final Wipe Down: Perform a final wipe down with a clean microfiber cloth to remove any polishing residue.
4. Applying New Touch Up Paint
After successfully removing the old, flawed touch up paint, the next step is to apply new paint for a seamless finish.
4.1. Selecting the Right Touch Up Paint
- Locate the Paint Code: Find your car’s paint code. This is typically located on a sticker in the driver’s side door jamb, glove compartment, or under the hood.
- Order Matching Paint: Order touch up paint that matches your car’s paint code. You can purchase touch up paint from automotive supply stores or online retailers.
- Consider Quality: Invest in high-quality touch up paint for better color match, durability, and finish.
4.2. Preparing the Area for Painting
- Clean the Area: Ensure the area is clean and free of any dirt, wax, or contaminants.
- Mask Surrounding Areas: Use masking tape to protect the surrounding paint from overspray.
- Apply Primer (If Necessary): If the area has bare metal or plastic, apply a thin coat of automotive primer to promote adhesion. Allow the primer to dry completely according to the manufacturer’s instructions.
4.3. Touch Up Paint Application Techniques
4.3.1. Applying Thin Coats
- Shake the Paint: Shake the touch up paint thoroughly to ensure proper mixing of the pigments.
- Apply Thin Coats: Use a fine-tipped brush or applicator to apply a very thin coat of touch up paint to the chip or scratch.
- Allow to Dry: Allow the paint to dry completely between coats, typically 15-30 minutes, depending on the paint type and environmental conditions.
- Repeat as Necessary: Apply additional thin coats until the paint is level with the surrounding surface.
4.3.2. Using the “Blob Eliminator” Technique
- Apply a Small Blob: Apply a small blob of touch up paint to the chip or scratch, slightly overfilling the area.
- Allow to Dry: Allow the paint to dry completely, typically overnight.
- Level with Sandpaper: Use 2000-3000 grit wet/dry sandpaper wrapped around a sanding block to gently level the touch up paint with the surrounding surface.
- Polish: Use a polishing compound to remove any fine scratches and restore the paint’s shine.
4.3.3. Blending the Edges
- Apply Blending Solution: Use a blending solution to soften the edges of the touch up paint and blend it seamlessly with the surrounding paint.
- Dampen a Cloth: Dampen a clean microfiber cloth with blending solution.
- Gently Wipe: Gently wipe the edges of the touch up paint with the damp cloth, using light pressure.
- Blend Smoothly: Blend the edges smoothly into the surrounding paint, avoiding any harsh lines or edges.
4.4. Applying Clear Coat
- Apply Thin Coats: Apply a thin, even coat of clear coat over the touch up paint to protect it and provide a glossy finish.
- Allow to Dry: Allow the clear coat to dry completely between coats, typically 30-60 minutes.
- Apply Additional Coats: Apply 2-3 coats of clear coat for optimal protection and shine.
- Allow to Cure: Allow the clear coat to cure completely for at least 24-48 hours before polishing or waxing.
4.5. Polishing and Waxing
- Polish the Area: Use a polishing compound to remove any imperfections, such as orange peel or swirl marks, from the clear coat.
- Apply Polish: Apply a small amount of polishing compound to a polishing pad.
- Polish the Surface: Polish the surface using a circular motion with a polishing machine or by hand.
- Remove Residue: Remove any polishing residue with a clean microfiber cloth.
- Wax or Sealant: Apply a coat of wax or sealant to protect the repaired area and enhance the gloss of the finish.
- Apply Wax: Apply a small amount of wax or sealant to a clean applicator pad.
- Buff the Surface: Buff the surface using a circular motion, then remove any excess wax with a clean microfiber cloth.
5. Advanced Techniques for Difficult Repairs
For more challenging touch up paint issues, consider these advanced techniques.
5.1. Dealing with Large Areas of Mismatched Paint
- Assess the Area: Evaluate the size and location of the mismatched paint.
- Sand Down the Area: Use 400-grit sandpaper to sand down the mismatched paint, feathering the edges into the surrounding area.
- Apply Primer: Apply a coat of automotive primer to the sanded area.
- Apply Base Coat: Apply several thin coats of base coat (matching your car’s paint code) to the primed area.
- Blend the Edges: Use a blending solution to blend the edges of the base coat with the surrounding paint.
- Apply Clear Coat: Apply several thin coats of clear coat over the repaired area.
- Wet Sand and Polish: Wet sand the clear coat with 2000-grit sandpaper, then polish to restore the shine.
5.2. Repairing Deep Scratches and Gouges
- Clean the Area: Clean the scratch or gouge thoroughly to remove any dirt or debris.
- Apply Filler: Use an automotive body filler to fill the scratch or gouge.
- Sand the Filler: Sand the filler smooth with 400-grit sandpaper, then 800-grit sandpaper.
- Apply Primer: Apply a coat of automotive primer to the filled area.
- Apply Base Coat: Apply several thin coats of base coat (matching your car’s paint code) to the primed area.
- Blend the Edges: Use a blending solution to blend the edges of the base coat with the surrounding paint.
- Apply Clear Coat: Apply several thin coats of clear coat over the repaired area.
- Wet Sand and Polish: Wet sand the clear coat with 2000-grit sandpaper, then polish to restore the shine.
5.3. Color Sanding and Buffing for a Flawless Finish
- Wet Sanding: Use 2000-grit or 3000-grit wet/dry sandpaper to gently sand the clear coat, removing any imperfections or orange peel.
- Buffing: Use a polishing compound and a buffing machine to restore the shine to the clear coat.
- Polishing: Use a polishing compound and a polishing pad to remove any swirl marks or fine scratches.
- Finishing Polish: Use a finishing polish to enhance the gloss and clarity of the finish.
- Waxing: Apply a coat of wax or sealant to protect the repaired area and enhance the gloss of the finish.
6. Maintaining Your Car’s Paint
Proper maintenance is essential to keep your car’s paint looking its best and prevent future touch up paint issues.
6.1. Regular Washing and Waxing
- Wash Regularly: Wash your car regularly to remove dirt, road salt, and other contaminants that can damage the paint.
- Use Quality Soap: Use a high-quality automotive soap that is designed to be gentle on the paint.
- Wax Regularly: Wax your car every 3-6 months to protect the paint from UV rays, oxidation, and other environmental factors.
- Apply Wax Evenly: Apply a thin, even coat of wax to the paint, then buff it off with a clean microfiber cloth.
6.2. Protecting Your Car from the Elements
- Park in the Shade: Park your car in the shade whenever possible to protect it from the sun’s harmful UV rays.
- Use a Car Cover: Use a car cover to protect your car from the elements, especially if it is stored outdoors.
- Avoid Harsh Chemicals: Avoid using harsh chemicals or abrasive cleaners on your car’s paint.
- Repair Chips Promptly: Repair any paint chips or scratches promptly to prevent rust and further damage.
6.3. Professional Detailing Services
- Consider Detailing: Consider having your car professionally detailed every year or two to keep the paint looking its best.
- Paint Correction: Professional detailers can perform paint correction services to remove swirl marks, scratches, and other imperfections.
- Ceramic Coating: Consider applying a ceramic coating to your car’s paint for long-lasting protection and shine.
7. Cost Considerations
The cost of fixing bad touch up paint on your car can vary widely depending on the severity of the damage and whether you choose to do it yourself or hire a professional.
7.1. DIY vs. Professional Repair Costs
| Expense | DIY Cost | Professional Cost |
|---|---|---|
| Tools and Materials | $50 – $200 | Included |
| Touch Up Paint | $20 – $50 | Included |
| Time | Several Hours | 1-2 Days |
| Skill Level | Intermediate | Expert |
| Overall Cost | $70 – $250 | $200 – $1000+ |
| Potential Savings | Yes | No |
| Quality Assurance | Dependent on Skill | High |
7.2. Factors Affecting Professional Repair Costs
- Severity of Damage: Minor chips and scratches will cost less to repair than large areas of mismatched paint or deep gouges.
- Type of Paint: Some types of paint, such as metallic or pearl finishes, are more difficult to match and repair, which can increase the cost.
- Location: Labor rates vary depending on your location, with larger cities typically having higher rates.
- Shop Reputation: More reputable shops with experienced technicians may charge higher prices.
7.3. Getting an Accurate Estimate
- Get Multiple Quotes: Get quotes from several different auto body shops or detailing services.
- Provide Detailed Information: Provide detailed information about the damage, including photos, to help the shops provide accurate estimates.
- Ask About Warranty: Ask about the shop’s warranty policy to ensure you are covered if the repair is not satisfactory.
- Read Reviews: Read online reviews to get an idea of the shop’s reputation and quality of work.
8. Common Mistakes to Avoid
Avoiding common mistakes can save you time, money, and frustration when fixing bad touch up paint on your car.
8.1. Neglecting Surface Preparation
- Clean Thoroughly: Always clean the area thoroughly before applying touch up paint.
- Remove Contaminants: Remove any wax, grease, or contaminants that can interfere with adhesion.
- Use a Clay Bar: Use a detailing clay bar to remove any embedded contaminants from the paint surface.
8.2. Using the Wrong Products
- Match Paint Code: Always use touch up paint that matches your car’s paint code.
- Quality Products: Use high-quality products that are designed for automotive use.
- Avoid Incompatible Products: Avoid using products that are not compatible with your car’s paint or clear coat.
8.3. Applying Too Much Paint
- Thin Coats: Apply thin, even coats of touch up paint to avoid blobs and runs.
- Allow to Dry: Allow the paint to dry completely between coats.
- Avoid Overfilling: Avoid overfilling the chip or scratch with paint.
8.4. Rushing the Process
- Take Your Time: Take your time and be patient when fixing touch up paint.
- Proper Drying Time: Allow the paint to dry and cure properly before polishing or waxing.
- Avoid Shortcuts: Avoid taking shortcuts that can compromise the quality of the repair.
8.5. Ignoring Safety Precautions
- Wear Gloves: Wear gloves to protect your hands from chemicals and solvents.
- Safety Glasses: Wear safety glasses to protect your eyes from splashes and debris.
- Ventilation: Ensure adequate ventilation when working with paints and solvents.
9. Success Stories
Real-life examples of successful touch up paint repairs can inspire confidence and provide valuable insights.
9.1. Case Study 1: Restoring a Classic Car’s Finish
- The Challenge: A classic car with faded and chipped paint needed restoration to its original glory.
- The Solution: The owner meticulously removed the old paint, applied matching touch up paint, and used advanced blending techniques.
- The Result: The car’s finish was restored to its original beauty, enhancing its value and appeal.
9.2. Case Study 2: Repairing a Daily Driver’s Scratches
- The Challenge: A daily driver had numerous scratches and chips from road debris.
- The Solution: The owner used a touch up paint kit, carefully filled the scratches, and polished the surface to a flawless finish.
- The Result: The car’s appearance was significantly improved, making it look newer and more well-maintained.
9.3. Case Study 3: Correcting a Mismatched Touch Up Job
- The Challenge: A previous touch up job had resulted in a noticeable color mismatch.
- The Solution: The owner removed the mismatched paint, reapplied the correct color, and used blending techniques to seamlessly integrate the repair.
- The Result: The color mismatch was completely corrected, restoring the car’s uniform appearance.
10. CARDIAGTECH.NET: Your Partner in Auto Repair Solutions
At CARDIAGTECH.NET, we understand the challenges of auto repair and maintenance. We offer a wide range of high-quality tools and equipment to help you achieve professional results.
10.1. High-Quality Tools and Equipment Available at CARDIAGTECH.NET
- Detailing Clay Bars: Our detailing clay bars effectively remove contaminants from your car’s paint surface, preparing it for touch up paint application.
- Microfiber Cloths: We offer a variety of soft, lint-free microfiber cloths for applying solvents, wiping away residue, and polishing surfaces.
- Sanding Blocks: Our sanding blocks provide even pressure distribution for controlled sanding, ensuring a smooth and level finish.
- Wet/Dry Sandpaper: We stock a range of wet/dry sandpaper in various grits for smoothing surfaces and blending touch up paint.
- Polishing Compounds: Our polishing compounds remove fine scratches and imperfections, restoring the paint’s shine.
- Wax and Sealants: We offer a selection of waxes and sealants to protect your car’s paint and enhance its gloss.
10.2. Expert Advice and Support
Our team of experienced professionals is available to provide expert advice and support to help you with your auto repair projects. Contact us at +1 (641) 206-8880 or visit our website at CARDIAGTECH.NET for more information. Our address is 276 Reock St, City of Orange, NJ 07050, United States.
10.3. Special Offers and Promotions
Check our website regularly for special offers and promotions on our wide range of auto repair tools and equipment.
Are you facing challenges with your auto repair projects? Contact CARDIAGTECH.NET today for expert advice and high-quality tools to enhance your work efficiency, precision, and safety. Let us help you elevate your garage’s performance and boost customer satisfaction. Reach out now for a consultation and discover how our tools can revolutionize your repair process.
FAQ
1. What is the best way to remove bad touch up paint from my car?
The best method depends on the type and thickness of the touch up paint. Options include using rubbing alcohol or acetone, plastic razor blades, or fine-grit sandpaper.
2. How can I ensure the new touch up paint matches my car’s original color?
Locate your car’s paint code (usually found on a sticker in the door jamb or glove compartment) and purchase touch up paint that matches this code.
3. What safety precautions should I take when removing and applying touch up paint?
Wear gloves, safety glasses, and a respirator, and ensure adequate ventilation to avoid inhaling harmful fumes.
4. Can I fix bad touch up paint myself, or should I hire a professional?
If the issue is minor and you have some experience with auto paint repair, you may be able to fix it yourself. However, for more extensive damage or if you lack experience, hiring a professional is recommended.
5. How do I prepare the surface before applying new touch up paint?
Thoroughly clean the area, remove any wax or contaminants, and use a detailing clay bar to remove embedded debris. Apply primer if there is bare metal or plastic.
6. What is the “blob eliminator” technique, and how does it work?
The “blob eliminator” technique involves applying a small blob of touch up paint, allowing it to dry completely, and then leveling it with fine-grit sandpaper and polishing compound.
7. How do I blend the edges of the touch up paint with the surrounding paint?
Use a blending solution to soften the edges of the touch up paint and gently wipe the area with a clean microfiber cloth to blend the edges smoothly.
8. Why is clear coat important after applying touch up paint?
Clear coat protects the touch up paint and provides a glossy finish that matches the surrounding area, ensuring a seamless repair.
9. How often should I wash and wax my car to maintain the paint?
Wash your car regularly (every 1-2 weeks) and wax it every 3-6 months to protect the paint from UV rays, oxidation, and other environmental factors.
10. What are some common mistakes to avoid when fixing bad touch up paint?
Avoid neglecting surface preparation, using the wrong products, applying too much paint, rushing the process, and ignoring safety precautions.