How To Fix Antifreeze Leaking Under Car Passenger Side
Antifreeze leaking under the car passenger side is a common automotive concern, but understanding the causes and solutions can empower you to address it effectively, especially with the right tools from CARDIAGTECH.NET. This guide explores the common causes, diagnostic steps, and repair solutions for antifreeze leaks, ensuring your vehicle remains in optimal condition. Rely on CARDIAGTECH for all your vehicle repair needs, offering top-notch coolant leak detection kits, block testers, and pressure testers.
1. Identifying Antifreeze Leaks: A Comprehensive Guide
Identifying the source of an antifreeze leak is the first step towards fixing it. Antifreeze, also known as coolant, is crucial for regulating engine temperature. When you notice antifreeze leaking under your car, particularly on the passenger side, it’s essential to address it promptly to prevent engine damage.
1.1. Common Indicators of Antifreeze Leaks
Recognizing the signs of an antifreeze leak can save you from more significant problems down the road. Here are some typical indicators:
- Puddles Under the Car: The most obvious sign is a bright green, orange, pink, or blue puddle under the passenger side of your vehicle.
- Sweet, Distinct Smell: Antifreeze has a sweet smell that is quite distinctive. If you notice this smell, it’s a good indicator of a leak.
- Overheating Engine: If your engine overheats frequently, it may be due to low coolant levels caused by a leak.
- Low Coolant Warning Light: Many modern cars have a coolant level sensor that will trigger a warning light on the dashboard.
- Visible Steam: Steam coming from under the hood, especially after the engine has warmed up, can indicate a coolant leak.
- Wetness Around Hoses and Connections: Check around hoses, clamps, and connections for any signs of wetness or residue.
1.2. Potential Health Hazards
Antifreeze is highly toxic, especially ethylene glycol-based coolants. According to the Agency for Toxic Substances and Disease Registry (ATSDR), ingestion of even small amounts can cause serious health issues, including kidney damage and even death. Always clean up spills immediately and keep antifreeze out of reach of children and pets.
2. Common Causes of Antifreeze Leaking Under Car Passenger Side
Understanding the common causes of antifreeze leaks is critical for accurate diagnosis and effective repair. Several components in your vehicle’s cooling system can fail, leading to leaks under the car’s passenger side.
2.1. Radiator Damage
The radiator is a primary component of the cooling system, responsible for dissipating heat.
- Cracks and Corrosion: Over time, the radiator can develop cracks or corrode, especially at the seams or near the tanks.
- Impact Damage: Road debris or minor accidents can cause physical damage to the radiator, leading to leaks.
2.2. Hose Deterioration
Hoses carry coolant throughout the engine.
- Cracking and Swelling: Hoses can crack, swell, or become brittle due to age and exposure to heat and chemicals.
- Loose Clamps: Clamps that secure the hoses can loosen or corrode, causing leaks at the connection points.
2.3. Water Pump Failure
The water pump circulates coolant through the engine.
- Seal Failure: The water pump seal can fail, causing coolant to leak from the pump’s weep hole.
- Bearing Wear: Worn bearings can cause the pump to wobble, leading to leaks and eventual failure.
2.4. Thermostat Housing Issues
The thermostat housing regulates engine temperature.
- Corrosion: The housing can corrode, especially if made of aluminum, leading to leaks.
- Gasket Failure: The gasket between the thermostat housing and the engine can fail, causing coolant to leak.
2.5. Heater Core Leak
The heater core provides heat to the vehicle’s interior.
- Corrosion: The heater core can corrode over time, resulting in a leak inside the cabin. This often manifests as a sweet smell inside the car and wetness on the passenger side floor.
2.6. Head Gasket Failure
Although less common, a failing head gasket can cause coolant leaks.
- Internal Leaks: A head gasket can fail internally, allowing coolant to leak into the cylinders or oil passages. This can lead to overheating and engine damage.
- External Leaks: Sometimes, a head gasket can leak externally, causing coolant to drip down the side of the engine.
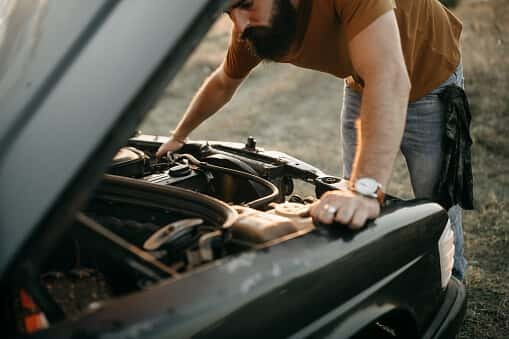
3. Step-by-Step Diagnostic Process
Diagnosing an antifreeze leak requires a systematic approach. Here’s a detailed step-by-step process to help you pinpoint the source of the leak.
3.1. Safety Precautions
Before starting any work on your vehicle, it’s essential to take the necessary safety precautions:
- Wear Safety Glasses: Protect your eyes from splashing coolant.
- Wear Gloves: Protect your hands from chemical exposure.
- Work in a Well-Ventilated Area: Avoid inhaling coolant fumes.
- Ensure the Engine is Cool: Never work on a hot engine. Allow it to cool down completely to avoid burns.
3.2. Visual Inspection
Start with a thorough visual inspection of the cooling system:
- Check the Coolant Level: Open the radiator cap (when the engine is cool) and check the coolant level. Also, check the coolant overflow tank. Low coolant levels indicate a leak.
- Inspect the Radiator: Look for signs of corrosion, cracks, or damage, especially at the seams and connections.
- Examine Hoses and Clamps: Check all hoses for cracks, swelling, or leaks at the clamps. Squeeze the hoses to check for soft spots or brittleness.
- Inspect the Water Pump: Look for signs of coolant leaking from the weep hole or around the pump housing.
- Check the Thermostat Housing: Inspect the housing for corrosion or leaks around the gasket.
- Look for Puddles and Residue: Check under the car, particularly on the passenger side, for puddles of coolant. Also, look for dried coolant residue around any of the cooling system components.
- Check the Interior: Look for wetness or a sweet smell inside the car, which could indicate a heater core leak.
3.3. Pressure Testing the Cooling System
A pressure tester can help you find leaks that are not visible during a visual inspection. CARDIAGTECH.NET offers high-quality pressure testers that are easy to use and provide accurate results.
- Attach the Pressure Tester: Remove the radiator cap and attach the pressure tester to the radiator neck.
- Pump Up the Pressure: Pump the tester to the specified pressure (usually around 15-20 PSI), as indicated on the radiator cap or in your vehicle’s service manual.
- Observe the Gauge: Watch the pressure gauge for any drop in pressure. A drop indicates a leak in the system.
- Inspect for Leaks: With the system pressurized, carefully inspect all cooling system components for leaks. Pay close attention to hoses, clamps, the radiator, water pump, thermostat housing, and heater core.
3.4. Using a Coolant Dye
Coolant dye can help you find hard-to-detect leaks. CARDIAGTECH.NET provides coolant dye kits that include a UV light for easy leak detection.
- Add the Dye: Pour the coolant dye into the radiator or coolant overflow tank.
- Run the Engine: Run the engine for about 15-20 minutes to allow the dye to circulate through the cooling system.
- Use a UV Light: Turn off the engine and use a UV light to inspect the cooling system components. The dye will glow under the UV light, making it easier to spot leaks.
3.5. Block Testing for Head Gasket Leaks
A block tester can help you determine if a head gasket is leaking combustion gases into the coolant. CARDIAGTECH.NET offers reliable block testers for accurate diagnosis.
- Remove the Radiator Cap: Remove the radiator cap (when the engine is cool).
- Attach the Block Tester: Attach the block tester to the radiator neck.
- Add Testing Fluid: Fill the block tester with the testing fluid.
- Run the Engine: Start the engine and let it run for a few minutes.
- Observe the Fluid: Watch the testing fluid for any color change. If the fluid changes color (usually from blue to yellow or green), it indicates the presence of combustion gases in the coolant, which means a head gasket leak.
4. Step-by-Step Repair Solutions
Once you’ve identified the source of the leak, you can proceed with the repair. Here are step-by-step instructions for addressing common antifreeze leaks.
4.1. Replacing a Damaged Radiator
- Drain the Coolant: Place a drain pan under the radiator draincock (usually located at the bottom corner of the radiator). Open the draincock to drain the coolant. You can also remove the lower radiator hose to drain the coolant more quickly.
- Disconnect Hoses: Disconnect the upper and lower radiator hoses from the radiator.
- Disconnect Transmission Cooler Lines: If your vehicle has an automatic transmission, disconnect the transmission cooler lines from the radiator. Use a line wrench to avoid damaging the fittings.
- Remove Fan Shroud: Remove the fan shroud to gain access to the radiator.
- Remove the Radiator: Remove the bolts or brackets holding the radiator in place and carefully lift the radiator out of the vehicle.
- Install the New Radiator: Place the new radiator into position and secure it with the bolts or brackets.
- Reconnect Transmission Cooler Lines: Reconnect the transmission cooler lines, if applicable.
- Reconnect Hoses: Reconnect the upper and lower radiator hoses.
- Reinstall Fan Shroud: Reinstall the fan shroud.
- Fill with Coolant: Fill the radiator and coolant overflow tank with the correct type and amount of coolant.
- Bleed the System: Start the engine and let it run for a few minutes to allow air to escape from the cooling system. Add more coolant as needed.
- Check for Leaks: Check for any leaks around the radiator and hose connections.
4.2. Replacing a Deteriorated Hose
- Drain Some Coolant: Drain some coolant from the radiator to lower the coolant level below the hose you are replacing.
- Loosen the Clamps: Use a screwdriver or pliers to loosen the clamps on the hose.
- Remove the Old Hose: Twist and pull the hose to remove it from the connections. If the hose is stuck, you can use a hose removal tool or carefully cut it off with a utility knife.
- Install the New Hose: Slide the new hose onto the connections.
- Secure the Clamps: Position the clamps over the hose connections and tighten them securely.
- Refill with Coolant: Refill the radiator with coolant.
- Check for Leaks: Start the engine and check for any leaks around the hose connections.
4.3. Replacing a Faulty Water Pump
- Drain the Coolant: Drain the coolant from the radiator.
- Remove the Serpentine Belt: Use a wrench to relieve the tension on the serpentine belt tensioner and remove the belt from the water pump pulley.
- Remove the Water Pump Pulley: Remove the bolts holding the water pump pulley in place and remove the pulley.
- Disconnect Hoses: Disconnect the hoses from the water pump.
- Remove the Water Pump: Remove the bolts holding the water pump to the engine and carefully remove the water pump.
- Clean the Mounting Surface: Clean the mounting surface on the engine block to remove any old gasket material.
- Install the New Water Pump: Install the new water pump with a new gasket.
- Reconnect Hoses: Reconnect the hoses to the water pump.
- Reinstall the Water Pump Pulley: Reinstall the water pump pulley.
- Reinstall the Serpentine Belt: Reinstall the serpentine belt.
- Refill with Coolant: Refill the radiator with coolant.
- Bleed the System: Start the engine and let it run for a few minutes to allow air to escape from the cooling system. Add more coolant as needed.
- Check for Leaks: Check for any leaks around the water pump and hose connections.
4.4. Repairing a Thermostat Housing Leak
- Drain Some Coolant: Drain some coolant from the radiator to lower the coolant level below the thermostat housing.
- Disconnect Hoses: Disconnect the hoses from the thermostat housing.
- Remove the Thermostat Housing: Remove the bolts holding the thermostat housing to the engine and remove the housing.
- Remove the Thermostat: Remove the thermostat from the housing.
- Clean the Mounting Surface: Clean the mounting surface on the engine block and the thermostat housing to remove any old gasket material.
- Install the New Thermostat: Install the new thermostat into the housing.
- Install the New Gasket: Install a new gasket on the thermostat housing.
- Reinstall the Thermostat Housing: Reinstall the thermostat housing and secure it with the bolts.
- Reconnect Hoses: Reconnect the hoses to the thermostat housing.
- Refill with Coolant: Refill the radiator with coolant.
- Bleed the System: Start the engine and let it run for a few minutes to allow air to escape from the cooling system. Add more coolant as needed.
- Check for Leaks: Check for any leaks around the thermostat housing and hose connections.
4.5. Addressing a Heater Core Leak
Replacing a heater core can be a complex job, often requiring the removal of the dashboard. If you’re not comfortable with this level of repair, it’s best to take your vehicle to a professional mechanic. However, if you decide to tackle it yourself, here are the general steps:
- Disconnect the Battery: Disconnect the negative battery cable to prevent electrical shorts.
- Drain the Coolant: Drain the coolant from the radiator.
- Remove Interior Components: Remove any interior components that are in the way, such as the glove box, center console, and trim panels.
- Remove the Dashboard: Remove the bolts and screws holding the dashboard in place and carefully remove the dashboard.
- Disconnect Heater Hoses: Disconnect the heater hoses from the heater core.
- Remove the Heater Core: Remove the heater core from its housing.
- Install the New Heater Core: Install the new heater core into the housing.
- Reconnect Heater Hoses: Reconnect the heater hoses to the heater core.
- Reinstall the Dashboard: Reinstall the dashboard and secure it with the bolts and screws.
- Reinstall Interior Components: Reinstall any interior components that were removed.
- Refill with Coolant: Refill the radiator with coolant.
- Bleed the System: Start the engine and let it run for a few minutes to allow air to escape from the cooling system. Add more coolant as needed.
- Reconnect the Battery: Reconnect the negative battery cable.
- Check for Leaks: Check for any leaks around the heater core connections and inside the car.
4.6. Fixing a Head Gasket Leak
A head gasket replacement is a complex and time-consuming repair that requires specialized tools and expertise. It’s generally best left to a professional mechanic. However, here are the general steps involved:
- Drain Coolant and Oil: Drain the coolant and oil from the engine.
- Remove Intake and Exhaust Manifolds: Remove the intake and exhaust manifolds.
- Disconnect Wiring and Hoses: Disconnect any wiring and hoses that are in the way.
- Remove the Cylinder Head: Remove the bolts holding the cylinder head to the engine block and carefully remove the cylinder head.
- Clean the Mounting Surfaces: Clean the mounting surfaces on the cylinder head and engine block to remove any old gasket material.
- Inspect the Cylinder Head: Inspect the cylinder head for any cracks or damage.
- Install the New Head Gasket: Install the new head gasket onto the engine block.
- Reinstall the Cylinder Head: Reinstall the cylinder head and torque the bolts to the manufacturer’s specifications.
- Reconnect Wiring and Hoses: Reconnect any wiring and hoses that were disconnected.
- Reinstall Intake and Exhaust Manifolds: Reinstall the intake and exhaust manifolds.
- Refill with Coolant and Oil: Refill the engine with coolant and oil.
- Bleed the System: Start the engine and let it run for a few minutes to allow air to escape from the cooling system. Add more coolant as needed.
- Check for Leaks: Check for any leaks around the cylinder head.
5. Preventive Maintenance Tips
Preventive maintenance can help you avoid antifreeze leaks and other cooling system problems.
5.1. Regular Inspections
Regularly inspect your cooling system components for signs of wear and tear. Check hoses, clamps, the radiator, water pump, and thermostat housing for leaks or damage.
5.2. Flush and Fill Coolant
Follow the manufacturer’s recommended maintenance schedule for flushing and refilling the coolant. This helps remove contaminants and prevents corrosion.
5.3. Use the Correct Coolant Type
Use the correct type of coolant for your vehicle. Using the wrong coolant can lead to corrosion and other problems.
5.4. Check Hose Clamps
Periodically check the hose clamps to ensure they are tight and in good condition. Replace any clamps that are corroded or damaged.
5.5. Pressure Test the Cooling System
Consider having your cooling system pressure tested periodically to identify any potential leaks before they become major problems.
6. Tools and Equipment Recommended by CARDIAGTECH.NET
Having the right tools and equipment can make diagnosing and repairing antifreeze leaks much easier. CARDIAGTECH.NET offers a wide range of high-quality tools and equipment for automotive repair.
6.1. Coolant Leak Detection Kit
A coolant leak detection kit includes a UV light and coolant dye, making it easier to find leaks that are not visible to the naked eye.
6.2. Block Tester
A block tester helps you determine if a head gasket is leaking combustion gases into the coolant.
6.3. Pressure Tester
A pressure tester allows you to pressurize the cooling system and check for leaks.
6.4. Hose Clamp Pliers
Hose clamp pliers make it easier to remove and install hose clamps.
6.5. Radiator Fin Straightener
A radiator fin straightener helps you straighten bent radiator fins, improving airflow and cooling efficiency.
6.6. Multimeter
A multimeter can be used to check the electrical components of the cooling system, such as the coolant temperature sensor.
7. Cost Analysis for Repairs
The cost of repairing an antifreeze leak can vary depending on the source of the leak and the extent of the damage. Here’s a general cost analysis for common repairs.
7.1. Radiator Replacement
The cost of replacing a radiator can range from $300 to $800, including parts and labor.
| Component | Estimated Cost |
|---|---|
| Radiator | $150 – $400 |
| Labor | $150 – $400 |
| Total | $300 – $800 |
7.2. Hose Replacement
The cost of replacing a hose can range from $50 to $200, including parts and labor.
| Component | Estimated Cost |
|---|---|
| Hose | $20 – $50 |
| Labor | $30 – $150 |
| Total | $50 – $200 |
7.3. Water Pump Replacement
The cost of replacing a water pump can range from $250 to $700, including parts and labor.
| Component | Estimated Cost |
|---|---|
| Water Pump | $100 – $300 |
| Labor | $150 – $400 |
| Total | $250 – $700 |
7.4. Thermostat Housing Repair
The cost of repairing a thermostat housing leak can range from $80 to $300, including parts and labor.
| Component | Estimated Cost |
|---|---|
| Thermostat Housing | $30 – $80 |
| Labor | $50 – $220 |
| Total | $80 – $300 |
7.5. Heater Core Replacement
The cost of replacing a heater core can range from $500 to $1500, including parts and labor, due to the complexity of the job.
| Component | Estimated Cost |
|---|---|
| Heater Core | $100 – $300 |
| Labor | $400 – $1200 |
| Total | $500 – $1500 |
7.6. Head Gasket Replacement
The cost of replacing a head gasket can range from $1000 to $3000, including parts and labor, due to the extensive work involved.
| Component | Estimated Cost |
|---|---|
| Head Gasket | $50 – $200 |
| Labor | $950 – $2800 |
| Total | $1000 – $3000 |
8. Understanding Coolant Types
Using the correct type of coolant is essential for maintaining your vehicle’s cooling system and preventing corrosion. Different vehicles require different types of coolant, so it’s important to know which one is right for your car.
8.1. Types of Coolant
There are several types of coolant available, each with its own specific formulation and properties:
- Green Coolant (IAT – Inorganic Additive Technology): This is the traditional type of coolant and is typically green in color. It uses inorganic additives like silicates and phosphates to protect the cooling system from corrosion. Green coolant has a shorter lifespan and needs to be replaced every 2 years or 24,000 miles.
- Orange Coolant (OAT – Organic Additive Technology): This type of coolant uses organic acids like carboxylates to protect the cooling system. OAT coolant is typically orange in color and has a longer lifespan than green coolant, lasting up to 5 years or 150,000 miles.
- Yellow Coolant (HOAT – Hybrid Organic Additive Technology): HOAT coolant combines the benefits of both IAT and OAT coolants. It uses a combination of organic acids and inorganic additives to provide excellent corrosion protection. HOAT coolant is typically yellow in color and has a lifespan of up to 5 years or 150,000 miles.
- Blue Coolant (Silicate-Free HOAT): This type of coolant is similar to HOAT coolant but does not contain silicates. It is often used in European vehicles and has a lifespan of up to 5 years or 150,000 miles.
- Universal Coolant: Universal coolants are designed to be compatible with a wide range of vehicles and cooling systems. However, it’s always best to check your vehicle’s owner’s manual to ensure compatibility.
8.2. Why Use the Correct Coolant?
Using the correct type of coolant is crucial for several reasons:
- Corrosion Protection: Different coolants are formulated with specific additives to protect different types of metals and materials used in cooling systems. Using the wrong coolant can lead to corrosion and damage to the radiator, water pump, and other components.
- Compatibility: Mixing different types of coolant can cause chemical reactions that lead to the formation of sludge and deposits in the cooling system. This can reduce cooling efficiency and cause overheating.
- Warranty: Using the wrong type of coolant can void your vehicle’s warranty.
8.3. How to Choose the Right Coolant
To choose the right coolant for your vehicle, follow these steps:
- Check Your Owner’s Manual: Your vehicle’s owner’s manual will specify the correct type of coolant to use.
- Consult a Mechanic: If you’re not sure which coolant to use, consult a professional mechanic.
- Look for the Correct Specification: When purchasing coolant, look for the specification recommended by your vehicle’s manufacturer.
9. The Role of Pressure Testing in Coolant Leak Detection
Pressure testing is a critical step in diagnosing coolant leaks, providing valuable insights into the integrity of your vehicle’s cooling system. By applying controlled pressure, you can identify leaks that may not be visible under normal operating conditions.
9.1. How Pressure Testing Works
Pressure testing involves using a specialized tool to pressurize the cooling system to a specific level, typically around 15-20 PSI. This pressure simulates the conditions the system experiences when the engine is running. Any drop in pressure indicates a leak.
9.2. Benefits of Pressure Testing
Pressure testing offers several benefits:
- Early Leak Detection: It can identify leaks early on, before they cause significant damage.
- Accurate Diagnosis: It helps pinpoint the exact location of the leak, saving time and effort.
- Comprehensive Testing: It tests the entire cooling system, including the radiator, hoses, water pump, and thermostat housing.
- Preventive Maintenance: It can be used as part of a preventive maintenance program to identify potential issues before they become major problems.
9.3. Performing a Pressure Test
To perform a pressure test, follow these steps:
- Ensure the Engine is Cool: Never perform a pressure test on a hot engine. Allow it to cool down completely to avoid burns.
- Remove the Radiator Cap: Carefully remove the radiator cap.
- Attach the Pressure Tester: Attach the pressure tester to the radiator neck.
- Pump Up the Pressure: Pump the tester to the specified pressure, as indicated on the radiator cap or in your vehicle’s service manual.
- Observe the Gauge: Watch the pressure gauge for any drop in pressure. A drop indicates a leak in the system.
- Inspect for Leaks: With the system pressurized, carefully inspect all cooling system components for leaks.
9.4. Common Leak Locations Identified by Pressure Testing
Pressure testing can help identify leaks in various locations:
- Radiator: Leaks can occur at the seams, core, or connections.
- Hoses: Leaks can occur due to cracks, swelling, or loose clamps.
- Water Pump: Leaks can occur at the weep hole or around the pump housing.
- Thermostat Housing: Leaks can occur due to corrosion or gasket failure.
- Heater Core: Leaks can occur inside the cabin, often indicated by a sweet smell and wetness on the passenger side floor.
10. The Importance of a Block Tester in Diagnosing Head Gasket Issues
A block tester is an essential tool for diagnosing head gasket issues, allowing you to detect combustion gases in the coolant.
10.1. How a Block Tester Works
A block tester works by drawing air from the radiator through a testing fluid. If combustion gases are present in the coolant due to a head gasket leak, the testing fluid will change color.
10.2. Benefits of Using a Block Tester
Using a block tester offers several benefits:
- Accurate Diagnosis: It provides an accurate diagnosis of head gasket leaks.
- Early Detection: It can detect head gasket leaks early on, before they cause significant engine damage.
- Cost Savings: It can save you money by avoiding unnecessary repairs.
- Preventive Maintenance: It can be used as part of a preventive maintenance program to identify potential head gasket issues before they become major problems.
10.3. Performing a Block Test
To perform a block test, follow these steps:
- Ensure the Engine is Cool: Never perform a block test on a hot engine. Allow it to cool down completely to avoid burns.
- Remove the Radiator Cap: Carefully remove the radiator cap.
- Attach the Block Tester: Attach the block tester to the radiator neck.
- Add Testing Fluid: Fill the block tester with the testing fluid.
- Run the Engine: Start the engine and let it run for a few minutes.
- Observe the Fluid: Watch the testing fluid for any color change. If the fluid changes color, it indicates the presence of combustion gases in the coolant, which means a head gasket leak.
10.4. Interpreting Block Tester Results
Interpreting the results of a block test is straightforward:
- No Color Change: If the testing fluid does not change color, it indicates that there are no combustion gases in the coolant, and the head gasket is likely intact.
- Color Change: If the testing fluid changes color, it indicates the presence of combustion gases in the coolant, which means a head gasket leak.
11. The Significance of Hose Inspection and Replacement
Hoses are a critical component of your vehicle’s cooling system, responsible for carrying coolant between the engine, radiator, and other components. Regular inspection and timely replacement of hoses are essential for preventing leaks and maintaining the cooling system’s efficiency.
11.1. Common Hose Problems
Hoses can deteriorate over time due to heat, pressure, and exposure to chemicals. Common hose problems include:
- Cracking: Cracks can develop on the surface of the hose, leading to leaks.
- Swelling: Hoses can swell due to chemical degradation, reducing their ability to withstand pressure.
- Soft Spots: Soft spots indicate that the hose material has broken down and is no longer able to maintain its structural integrity.
- Brittleness: Hoses can become brittle and prone to cracking due to age and exposure to heat.
11.2. How to Inspect Hoses
To inspect hoses, follow these steps:
- Visual Inspection: Look for cracks, swelling, soft spots, or brittleness.
- Squeeze Test: Squeeze the hoses to check for soft spots or brittleness.
- Clamp Check: Check the hose clamps to ensure they are tight and in good condition.
11.3. When to Replace Hoses
Replace hoses if you notice any of the following:
- Cracks: Any visible cracks on the surface of the hose.
- Swelling: Swelling indicates that the hose material has degraded and is no longer able to withstand pressure.
- Soft Spots: Soft spots indicate that the hose material has broken down.
- Brittleness: Brittleness indicates that the hose has aged and is prone to cracking.
- Leaks: Any signs of coolant leaks around the hose connections.
- Recommended Interval: Replace hoses at the manufacturer’s recommended interval, typically every 4 years or 60,000 miles.
11.4. Replacing Hoses
To replace hoses, follow these steps:
- Drain Some Coolant: Drain some coolant from the radiator to lower the coolant level below the hose you are replacing.
- Loosen the Clamps: Use a screwdriver or pliers to loosen the clamps on the hose.
- Remove the Old Hose: Twist and pull the hose to remove it from the connections. If the hose is stuck, you can use a hose removal tool or carefully cut it off with a utility knife.
- Install the New Hose: Slide the new hose onto the connections.
- Secure the Clamps: Position the clamps over the hose connections and tighten them securely.
- Refill with Coolant: Refill the radiator with coolant.
- Check for Leaks: Start the engine and check for any leaks around the hose connections.
12. Coolant Leak Detection Dye: A Detailed Look
Coolant leak detection dye is a valuable tool for identifying hard-to-find coolant leaks. It works by adding a fluorescent dye to the coolant, which then glows under a UV light, making it easier to spot leaks.
12.1. How Coolant Leak Detection Dye Works
Coolant leak detection dye contains a fluorescent dye that glows under a UV light. When added to the coolant, the dye circulates through the cooling system. If there is a leak, the dye will seep out and accumulate at the leak location. When you shine a UV light on the area, the dye will glow brightly, making it easy to spot the leak.
12.2. Benefits of Using Coolant Leak Detection Dye
Using coolant leak detection dye offers several benefits:
- Finds Hard-to-Reach Leaks: It can find leaks in hard-to-reach areas, such as behind the engine or inside the dashboard.
- Accurate Leak Detection: It provides accurate leak detection, saving time and effort.
- Cost Savings: It can save you money by avoiding unnecessary repairs.
- Easy to Use: It is easy to use and requires no special tools.
12.3. How to Use Coolant Leak Detection Dye
To use coolant leak detection dye, follow these steps:
- Add the Dye: Pour the coolant dye into the radiator or coolant overflow tank.
- Run the Engine: Run the engine for about 15-20 minutes to allow the dye to circulate through the cooling system.
- Use a UV Light: Turn off the engine and use a UV light to inspect the cooling system components. The dye will glow under the UV light, making it easier to spot leaks.
12.4. Safety Precautions When Using Coolant Leak Detection Dye
When using coolant leak detection dye, take the following safety precautions:
- Wear Safety Glasses: Protect your eyes from the UV light.
- Wear Gloves: Protect your hands from contact with the dye.
- Work in a Well-Ventilated Area: Avoid inhaling the dye fumes.
- Follow the Manufacturer’s Instructions: Follow the manufacturer’s instructions for proper use and disposal of the dye.
13. Frequently Asked Questions (FAQs)
-
Why is antifreeze leaking under the car passenger side?
- Antifreeze can leak from various components like the radiator, hoses, water pump, or heater core. The passenger side location often indicates a leak in the heater core or nearby hoses.
-
Is antifreeze toxic?
- Yes, antifreeze is highly toxic and can cause serious health issues if ingested. Clean up spills immediately and keep it away from children and pets.
-
How can I tell if my head gasket is leaking?
- Use a block tester to check for combustion gases in the coolant. A color change in the testing fluid indicates a head gasket leak.
-
What tools do I need to find an antifreeze leak?
- Essential tools include safety glasses, gloves, a pressure tester, a coolant dye kit with a UV light, and a block tester. CARDIAGTECH.NET offers all these tools.
-
Can I mix different types of antifreeze?
- No, mixing different types of