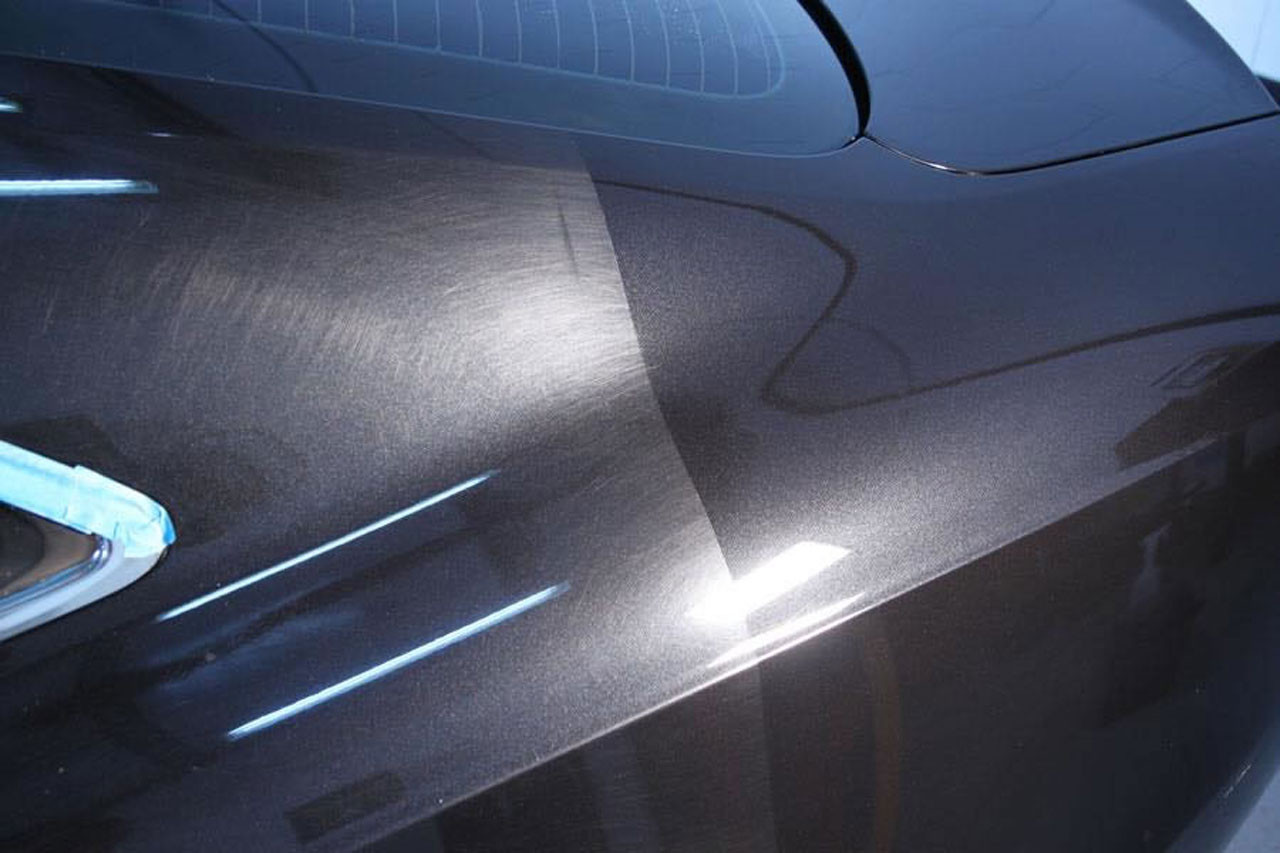
How To Fix An Oil Leak On Your Car Effectively
Is your car leaving unwelcome puddles wherever it goes? Let’s explore How To Fix An Oil Leak On Your Car. Recognizing and addressing oil leaks promptly is crucial for maintaining your vehicle’s health and performance. CARDIAGTECH.NET offers cutting-edge tools and equipment that enhance precision, reduce repair times, and ensure top-notch service quality, potentially saving you from costly engine repairs. Let’s look at the common causes of oil leaks and effective repair strategies, focusing on using the best diagnostic and repair tools available.
1. Spotting the Signs of an Oil Leak
Identifying an oil leak early can prevent significant engine damage. Here’s what to look for:
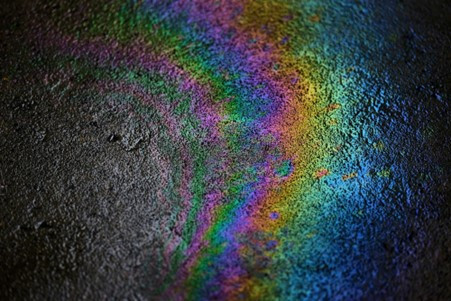
- Puddles Under Your Car: The most obvious sign is a dark, oily puddle beneath your vehicle after it’s been parked. The color can range from light brown to black.
- Oily Engine: Open the hood and visually inspect the engine. Look for greasy or oily residue on the engine block, especially around gaskets and seals.
- Burning Oil Smell: A distinct burning smell when the engine is running often indicates that oil is leaking onto hot engine parts.
- Low Oil Level: Regularly check your oil level using the dipstick. Consistently low levels despite regular oil changes suggest a leak.
2. Common Causes of Car Oil Leaks
Several factors can contribute to oil leaks, each requiring a specific approach to diagnose and repair. Understanding these causes is the first step in fixing the problem:
2.1. Worn or Damaged Engine Gaskets
Gaskets seal the spaces between engine components, preventing oil from escaping. Over time, these gaskets can degrade due to heat, age, and exposure to chemicals.
- Valve Cover Gasket: The valve cover gasket seals the valve cover to the cylinder head. When it fails, oil can leak onto the exhaust manifold, causing a burning smell and potential fire hazard.
- Oil Pan Gasket: Located at the bottom of the engine, the oil pan gasket seals the oil pan to the engine block. This gasket is prone to leaks due to its location, which exposes it to road debris and temperature fluctuations.
- Head Gasket: While primarily sealing the combustion chamber, a failing head gasket can also cause oil leaks between the cylinder head and engine block.
2.2. Deteriorated Oil Seals
Oil seals prevent oil from leaking around moving parts such as the crankshaft and camshaft.
- Front and Rear Crankshaft Seals: These seals prevent oil from leaking at the front and rear of the crankshaft. They can dry out and crack over time, leading to significant leaks.
- Camshaft Seals: Similar to crankshaft seals, camshaft seals prevent oil from leaking around the camshaft.
2.3. Damaged Oil Pan
The oil pan is located at the bottom of the engine and serves as a reservoir for the engine oil. It is susceptible to damage from road debris, which can cause cracks or punctures leading to leaks.
2.4. Loose or Damaged Oil Drain Plug
The oil drain plug is removed during oil changes to drain the old oil. If it is not properly tightened or if the sealing washer is damaged, it can leak.
2.5. Faulty Oil Filter
A loose, improperly installed, or damaged oil filter can leak. Also, using the wrong type of oil filter or failing to replace it during oil changes can cause leaks.
2.6. Leaking Oil Filler Cap
The oil filler cap seals the opening where oil is added to the engine. If the cap is loose, cracked, or missing its seal, oil can leak out.
2.7. PCV Valve Issues
A clogged or malfunctioning PCV (Positive Crankcase Ventilation) valve can cause pressure to build up in the engine, leading to oil leaks from various seals and gaskets.
2.8. Timing Cover Leak
The timing cover seals the front of the engine where the timing chain or belt is located. Leaks from this area can be difficult to diagnose but are often due to a failing gasket or seal.
3. Essential Tools for Diagnosing Oil Leaks from CARDIAGTECH.NET
To accurately diagnose an oil leak, you need the right tools. CARDIAGTECH.NET offers a range of diagnostic equipment designed to pinpoint leaks quickly and efficiently:
3.1. UV Dye and Leak Detection Kit
This kit includes a UV dye that you add to the engine oil. The dye circulates through the engine, and when you shine a UV light on the engine, the dye glows at the location of the leak.
- Benefits: Precisely identifies the source of the leak, even in hard-to-reach areas.
- CARDIAGTECH.NET Advantage: Our UV leak detection kits feature high-intensity UV lights and concentrated dye for maximum visibility and accuracy.
3.2. Borescope/Endoscope
A borescope is a flexible camera that can be inserted into tight spaces to visually inspect areas that are otherwise inaccessible.
- Benefits: Allows you to inspect the backside of the engine, around hoses, and other difficult-to-see areas for signs of oil leaks.
- CARDIAGTECH.NET Advantage: Our borescopes offer high-resolution imaging, adjustable LED lighting, and durable construction for reliable performance.
3.3. Pressure Tester
A pressure tester can help identify leaks by pressurizing the engine’s oil system and highlighting where oil is seeping out.
- Benefits: Simulates engine operating conditions to reveal leaks that might not be visible when the engine is off.
- CARDIAGTECH.NET Advantage: Our pressure testers are equipped with precision gauges and adapters for various engine types, ensuring accurate and safe testing.
3.4. Diagnostic Scanner
While not directly used for finding physical leaks, a diagnostic scanner can help identify issues that might be contributing to oil leaks, such as PCV valve problems or excessive engine pressure.
- Benefits: Provides valuable insights into the engine’s overall health and identifies potential underlying issues.
- CARDIAGTECH.NET Advantage: Our diagnostic scanners are compatible with a wide range of vehicle makes and models, offering advanced diagnostic capabilities and real-time data.
4. Step-by-Step Guide to Fixing Common Oil Leaks
Once you’ve identified the source of the leak, you can proceed with the repair. Here are step-by-step guides for fixing some of the most common oil leaks:
4.1. Replacing the Valve Cover Gasket
- Gather Your Tools and Materials:
- New valve cover gasket
- Socket set
- Torque wrench
- Screwdrivers
- Rags or shop towels
- Cleaning solvent
- Prepare the Vehicle:
- Allow the engine to cool completely.
- Disconnect the negative battery cable.
- Remove any components that obstruct access to the valve cover, such as air intake ducts or wiring harnesses.
- Remove the Valve Cover:
- Carefully disconnect any hoses or wires attached to the valve cover.
- Remove the bolts or nuts holding the valve cover in place.
- Gently pry the valve cover off the engine. Be careful not to damage the mating surface.
- Clean the Mating Surfaces:
- Use a scraper or cleaning solvent to remove any old gasket material from the valve cover and cylinder head.
- Ensure the surfaces are clean and dry.
- Install the New Gasket:
- Place the new valve cover gasket onto the valve cover. Ensure it is properly seated in the groove.
- Apply a small amount of silicone sealant to the corners of the gasket, if recommended by the manufacturer.
- Reinstall the Valve Cover:
- Carefully position the valve cover back onto the engine.
- Tighten the bolts or nuts in a crisscross pattern to the manufacturer’s specified torque.
- Reassemble and Test:
- Reconnect any hoses or wires that were removed.
- Reconnect the negative battery cable.
- Start the engine and check for leaks around the valve cover.
4.2. Replacing the Oil Pan Gasket
- Gather Your Tools and Materials:
- New oil pan gasket
- Socket set
- Torque wrench
- Screwdrivers
- Rags or shop towels
- Cleaning solvent
- Oil drain pan
- New engine oil
- Prepare the Vehicle:
- Raise the vehicle using a jack and secure it with jack stands.
- Drain the engine oil into the oil drain pan.
- Remove any components that obstruct access to the oil pan, such as the exhaust system or crossmember.
- Remove the Oil Pan:
- Remove the bolts holding the oil pan in place.
- Gently pry the oil pan off the engine. Be careful not to damage the mating surface.
- Clean the Mating Surfaces:
- Use a scraper or cleaning solvent to remove any old gasket material from the oil pan and engine block.
- Ensure the surfaces are clean and dry.
- Install the New Gasket:
- Place the new oil pan gasket onto the oil pan. Ensure it is properly seated in the groove.
- Apply a small amount of silicone sealant to the corners of the gasket, if recommended by the manufacturer.
- Reinstall the Oil Pan:
- Carefully position the oil pan back onto the engine.
- Tighten the bolts in a crisscross pattern to the manufacturer’s specified torque.
- Reassemble and Test:
- Reinstall any components that were removed, such as the exhaust system or crossmember.
- Lower the vehicle.
- Install the oil drain plug with a new sealing washer.
- Fill the engine with new oil to the proper level.
- Start the engine and check for leaks around the oil pan.
4.3. Replacing the Oil Drain Plug
- Gather Your Tools and Materials:
- New oil drain plug with sealing washer
- Socket or wrench
- Torque wrench
- Oil drain pan
- Prepare the Vehicle:
- Raise the vehicle using a jack and secure it with jack stands.
- Drain the engine oil into the oil drain pan.
- Remove the Old Drain Plug:
- Use a socket or wrench to remove the old drain plug.
- Inspect the drain plug and sealing washer for damage.
- Install the New Drain Plug:
- Install the new drain plug with the new sealing washer.
- Tighten the drain plug to the manufacturer’s specified torque.
- Reassemble and Test:
- Lower the vehicle.
- Fill the engine with new oil to the proper level.
- Start the engine and check for leaks around the drain plug.
4.4. Replacing the Oil Filter
- Gather Your Tools and Materials:
- New oil filter
- Oil filter wrench
- Oil drain pan
- New engine oil
- Rags or shop towels
- Prepare the Vehicle:
- Allow the engine to cool completely.
- Locate the oil filter.
- Place the oil drain pan beneath the oil filter.
- Remove the Old Oil Filter:
- Use the oil filter wrench to loosen the old oil filter.
- Unscrew the oil filter by hand, allowing the oil to drain into the oil drain pan.
- Prepare the New Oil Filter:
- Lightly lubricate the rubber gasket on the new oil filter with fresh engine oil.
- This helps create a good seal.
- Install the New Oil Filter:
- Screw the new oil filter onto the engine by hand until the gasket contacts the engine.
- Tighten the oil filter an additional 1/2 to 3/4 turn, as specified by the filter manufacturer.
- Reassemble and Test:
- Fill the engine with new oil to the proper level.
- Start the engine and check for leaks around the oil filter.
4.5. Replacing the Oil Filler Cap
- Gather Your Tools and Materials:
- New oil filler cap
- Prepare the Vehicle:
- Locate the oil filler cap on the engine.
- Remove the Old Oil Filler Cap:
- Unscrew the old oil filler cap.
- Inspect the cap and seal for damage.
- Install the New Oil Filler Cap:
- Screw the new oil filler cap onto the engine.
- Ensure it is tightened securely.
- Test:
- Start the engine and check for leaks around the oil filler cap.
5. Advanced Repair Techniques
For more complex oil leaks, such as those from crankshaft seals or timing covers, more advanced techniques and tools may be required. These repairs often involve disassembling engine components and require a higher level of mechanical skill.
5.1. Replacing Crankshaft Seals
Replacing crankshaft seals requires removing the timing belt or chain, pulleys, and other components to access the seal. It’s essential to use specialized tools to properly install the new seal without damaging it.
5.2. Repairing Timing Cover Leaks
Repairing timing cover leaks involves removing the timing cover, cleaning the mating surfaces, and installing a new gasket or sealant. This repair can be time-consuming and requires careful attention to detail to ensure a proper seal.
6. Preventative Maintenance to Minimize Oil Leaks
Preventing oil leaks is often easier and more cost-effective than fixing them. Here are some preventative maintenance tips:
- Regular Oil Changes: Follow the manufacturer’s recommended oil change intervals. Regular oil changes help keep the engine clean and prevent the buildup of sludge, which can damage seals and gaskets.
- Use High-Quality Oil and Filters: Use high-quality engine oil and oil filters that meet the manufacturer’s specifications. High-quality oil contains additives that help protect seals and gaskets.
- Inspect Seals and Gaskets Regularly: Regularly inspect seals and gaskets for signs of wear or damage. Replace them as needed to prevent leaks.
- Check the PCV Valve: Check the PCV valve regularly and replace it if it is clogged or malfunctioning. A properly functioning PCV valve helps maintain proper engine pressure and prevents oil leaks.
- Avoid Harsh Chemicals: Avoid using harsh chemicals or additives in the engine that can damage seals and gaskets.
- Drive Carefully: Avoid driving over rough roads or debris that can damage the oil pan or other engine components.
7. Benefits of Using CARDIAGTECH.NET Equipment
Investing in quality diagnostic and repair tools from CARDIAGTECH.NET can significantly improve the efficiency and effectiveness of your oil leak repairs. Here are some of the key benefits:
- Accurate Diagnostics: Our tools provide accurate and reliable diagnostic information, helping you pinpoint the source of the leak quickly and efficiently.
- Reduced Repair Time: With the right tools, you can complete repairs faster, reducing downtime and increasing productivity.
- Improved Repair Quality: Our tools help you perform repairs to the highest standards, ensuring long-lasting results and customer satisfaction.
- Cost Savings: By accurately diagnosing and repairing oil leaks, you can prevent costly engine damage and save money on future repairs.
- Enhanced Customer Service: Using advanced diagnostic and repair tools demonstrates your commitment to quality and professionalism, enhancing customer trust and loyalty.
8. The Impact of Untreated Oil Leaks
Ignoring an oil leak can lead to severe engine problems and costly repairs. Here’s what can happen if you neglect an oil leak:
- Engine Damage: Low oil levels can cause increased friction and wear on engine components, leading to overheating, reduced performance, and eventual engine failure.
- Environmental Damage: Oil leaks can contaminate soil and water, causing environmental damage and potential fines.
- Fire Hazard: Oil leaking onto hot engine parts can ignite, posing a fire hazard.
- Reduced Fuel Efficiency: A poorly lubricated engine has to work harder, which can reduce fuel efficiency.
- Failed Emissions Test: Oil leaks can cause increased emissions, leading to a failed emissions test.
9. Addressing Customer Concerns and Questions
Customers often have questions and concerns about oil leaks and repairs. Here are some common questions and answers:
Q: How much does it cost to fix an oil leak?
A: The cost to fix an oil leak can vary depending on the source of the leak and the extent of the damage. Simple repairs, such as replacing an oil drain plug or oil filter, may cost less than $100. More complex repairs, such as replacing a valve cover gasket or oil pan gasket, can cost several hundred dollars.
Q: Can I drive my car with an oil leak?
A: It is generally not recommended to drive your car with an oil leak, as it can cause engine damage and pose a safety hazard. If you must drive your car, check the oil level regularly and top it off as needed.
Q: Can I use an oil stop leak additive?
A: Oil stop leak additives may temporarily reduce oil leaks, but they are not a permanent solution. These additives can also damage engine seals and gaskets over time. It is best to repair the leak properly by replacing the damaged components.
Q: How often should I check my oil level?
A: You should check your oil level at least once a month, or more frequently if you suspect an oil leak.
Q: What are the signs of a serious oil leak?
A: Signs of a serious oil leak include a large puddle of oil under your car, a burning smell, low oil pressure, and engine overheating.
10. Integrating SEO Keywords for Optimal Online Visibility
To ensure this article reaches the widest possible audience, it’s essential to integrate relevant SEO keywords naturally throughout the content. Here are some of the keywords we’ve focused on:
- How To Fix An Oil Leak On Your Car
- Car oil leak repair
- Oil leak diagnosis
- Engine oil leak
- Valve cover gasket replacement
- Oil pan gasket replacement
- Oil drain plug leak
- Oil filter leak
- Automotive repair tools
- CARDIAGTECH.NET
By strategically incorporating these keywords, we can improve the article’s search engine ranking and attract more readers who are looking for information on how to fix an oil leak on their car.
FAQ Section
Here are 10 frequently asked questions (FAQs) related to fixing oil leaks on cars, designed to address common concerns and provide helpful information:
Q1: What are the first signs that my car is leaking oil?
The most common signs include visible oil puddles under your car, a burning oil smell while driving, and a consistently low oil level when you check the dipstick. An oily residue on the engine block is also a telltale sign.
Q2: How critical is it to fix an oil leak immediately?
It’s quite critical. Ignoring an oil leak can lead to significant engine damage due to insufficient lubrication, potentially resulting in costly repairs or even engine failure.
Q3: Can I use a temporary “stop leak” product instead of a physical repair?
While stop-leak products might offer a temporary fix, they’re not a long-term solution and can sometimes cause more harm than good by clogging oil passages. A proper repair is always recommended.
Q4: What are the most common sources of oil leaks in a car engine?
Common sources include the valve cover gasket, oil pan gasket, crankshaft seals, oil filter housing, and the oil drain plug.
Q5: Is fixing an oil leak a DIY job, or should I always see a professional mechanic?
Simple leaks like a loose oil drain plug or a faulty oil filter can be DIY fixes. However, more complex leaks like those from gaskets or seals often require professional tools and expertise.
Q6: How much can I expect to pay for a typical oil leak repair?
The cost varies widely depending on the leak’s location and complexity. Minor repairs might range from $100 to $300, while more involved fixes can cost upwards of $1000.
Q7: What tools from CARDIAGTECH.NET are most useful for diagnosing oil leaks?
A UV dye leak detection kit is excellent for pinpointing the exact location of a leak. Additionally, a borescope can help inspect hard-to-reach areas for signs of leakage.
Q8: How often should I check my car’s oil level to prevent oil leak-related damage?
It’s a good practice to check your oil level at least once a month, or more frequently if you suspect any issues.
Q9: Can weather conditions affect the severity of an oil leak?
Yes, extreme temperatures can affect seals and gaskets. Cold weather can cause them to shrink and crack, while heat can degrade them over time, both potentially worsening leaks.
Q10: What kind of maintenance can help prevent oil leaks?
Regular maintenance includes timely oil changes, using high-quality oil and filters, and periodically inspecting gaskets and seals for wear and tear. Ensuring the PCV valve is functioning correctly also helps maintain proper engine pressure and prevent leaks.
Final Thoughts
Fixing an oil leak promptly and effectively is crucial for maintaining your vehicle’s health and performance. By understanding the common causes of oil leaks, using the right diagnostic tools, and following the proper repair procedures, you can prevent costly engine damage and ensure your car runs smoothly for years to come. Remember, CARDIAGTECH.NET offers a wide range of high-quality diagnostic and repair tools to help you tackle any oil leak with confidence and precision.
Don’t let oil leaks drain your wallet and damage your engine. Contact CARDIAGTECH.NET at 276 Reock St, City of Orange, NJ 07050, United States or call us on Whatsapp at +1 (641) 206-8880 to get expert advice and the best tools for fixing oil leaks. Visit our website CARDIAGTECH.NET today.