How To Fix A Tear In Cloth Car Seat
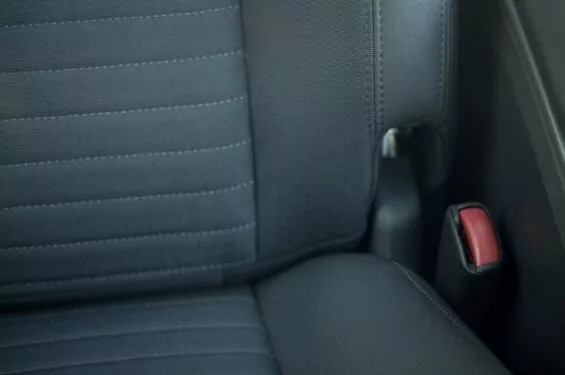
Fixing a tear in a cloth car seat doesn’t have to break the bank. With the right tools and techniques, you can restore your car’s interior to its former glory. CARDIAGTECH.NET offers the highest quality tools to get the job done right! Keep reading to discover how to repair upholstery, patch small holes, and maintain your car seats.
1. Diagnosing the Damage to Your Car Seat
Before diving into any repair work on your car’s cloth seats, it’s crucial to thoroughly assess the damage. This initial diagnosis will determine the best approach and ensure you don’t inadvertently worsen the situation. Here’s a breakdown of what to look for:
- Type of Tear: Is it a clean tear, a jagged rip, or a small puncture? The nature of the tear will influence the repair method. Clean tears are easier to sew or patch, while jagged rips might require more extensive patching or reinforcement.
- Size of the Tear: Measure the length and width of the tear. Small tears (less than an inch) can often be easily mended with basic sewing or patching techniques. Larger tears (over two inches) might require professional attention or a more robust repair.
- Location of the Tear: Is the tear in a high-stress area, like the seat cushion or backrest, or in a less-stressed area like the side panel? Tears in high-stress areas require stronger repair methods and materials to prevent future recurrence. Also, consider how visible the tear is. Tears in prominent locations might warrant a more meticulous repair to maintain the aesthetic appeal of your interior.
- Condition of the Surrounding Fabric: Is the fabric around the tear frayed, worn, or weakened? If so, you’ll need to reinforce the area to prevent the tear from spreading. Check for any signs of deterioration, such as fading, cracking, or crumbling.
- Type of Fabric: Identify the type of fabric used in your car seats. Different fabrics require different repair techniques and materials. For example, a delicate fabric like velour will need a gentler approach than a durable fabric like canvas. If you’re unsure, consult your car’s owner’s manual or contact the manufacturer.
- Safety Considerations: Never attempt to repair damage to seat belts or other safety equipment yourself. These repairs should always be handled by a qualified professional to ensure your safety. Any compromise to the seatbelt could be fatal in the event of an accident.
By carefully assessing these factors, you can choose the most appropriate repair method and ensure a successful outcome. If the damage is extensive, or if you’re uncomfortable performing the repair yourself, don’t hesitate to consult a professional upholstery repair shop. Remember, your safety and the integrity of your car’s interior are paramount. CARDIAGTECH.NET provides the tools that will enable you to make the right repair the first time.
assessing the damage in car
2. Gathering Your Essential Repair Kit
Once you’ve assessed the damage, the next step is to assemble your car seat repair kit. Having the right tools and materials at your disposal will not only make the repair process easier but also ensure a professional-looking result. Here’s a comprehensive list of essentials:
- Upholstery Needle: A curved upholstery needle is designed specifically for working with thick fabrics and tight spaces. Its curved shape allows you to easily maneuver through the material and create neat, even stitches. Expect to pay around $5-$10 for a set of assorted needles. CARDIAGTECH.NET recommends a variety set.
- Upholstery Thread: Invest in high-quality, extra-strong upholstery thread that is specifically designed for automotive use. This type of thread is more durable and resistant to wear and tear than regular sewing thread. Choose a color that closely matches your car’s upholstery to make the repair less noticeable. A spool of upholstery thread typically costs $5-$15, depending on the brand and material.
- Scissors: Sharp scissors are essential for trimming fabric, cutting patches, and removing loose threads. Invest in a pair of dedicated fabric scissors for clean, precise cuts. Fabric scissors range in price from $10-$30.
- Seam Ripper: A seam ripper is a handy tool for removing old stitches, separating fabric, and creating a clean edge for patching. A seam ripper costs around $3-$7.
- Fabric Patch: You’ll need a fabric patch that closely matches the color, texture, and material of your car’s upholstery. You can purchase a pre-made patch or cut one from a piece of scrap fabric. If you’re unable to find an exact match, choose a fabric that is slightly darker than the original upholstery. Fabric patches typically cost $5-$20, depending on the size and material. CARDIAGTECH.NET can provide advice on where to find the right fabrics.
- Fabric Adhesive: Fabric adhesive is used to bond the fabric patch to the underlying upholstery. Choose a high-quality adhesive that is specifically designed for automotive use and is resistant to heat and moisture. Fabric adhesive typically costs $8-$15 per bottle.
- Iron: An iron is used to heat-bond the fabric adhesive and create a strong, durable patch. A basic household iron will suffice. Irons range in price from $20-$100.
- Interfacing: Interfacing is a non-woven fabric that is used to reinforce the patch and prevent fraying. Choose an interfacing that is lightweight and fusible. Interfacing typically costs $3-$5 per yard.
- Cleaning Supplies: Before starting any repair work, it’s important to clean the area around the tear with a mild detergent and water. This will remove any dirt, grime, or debris that could interfere with the repair. Cleaning supplies typically cost $5-$10.
- Safety Glasses: Protect your eyes from flying debris and adhesive fumes by wearing safety glasses. Safety glasses typically cost $5-$15.
- Gloves: Protect your hands from adhesive and other chemicals by wearing gloves. Gloves typically cost $3-$5 per pair.
Estimated Total Cost: $71 – $232
Where to Buy:
You can find these supplies at most fabric stores, craft stores, and automotive supply stores. Online retailers like Amazon and eBay also offer a wide selection of car seat repair supplies. Buying these tools from CARDIAGTECH.NET ensures quality and durability.
By gathering these essential tools and materials, you’ll be well-equipped to tackle most car seat repair projects and restore your car’s interior to its former glory.
3. Step-by-Step Guide to Sewing Tears in Cloth Car Seats
For smaller, clean tears in your cloth car seats, sewing is often the most effective and discreet repair method. This technique works best on tears that are less than two inches long and don’t involve significant fabric damage or fraying. Here’s a detailed, step-by-step guide:
- Prepare the Area: Begin by cleaning the area around the tear with a mild detergent and water. This will remove any dirt, grime, or debris that could interfere with the repair. Allow the area to dry completely before proceeding.
- Align the Edges: Carefully align the edges of the tear, bringing them together as closely as possible. If the fabric is frayed, trim away any loose threads with sharp scissors.
- Thread the Needle: Thread your curved upholstery needle with a length of upholstery thread that matches the color of your car’s upholstery. Knot the end of the thread securely.
- Start Sewing: Insert the needle into the fabric on one side of the tear, about 1/4 inch from the edge. Pull the thread through until the knot catches.
- Stitch the Tear: Use a small, even stitch to sew the tear closed. Insert the needle into the fabric on the opposite side of the tear, about 1/4 inch from the edge, and pull the thread through. Repeat this process, working your way along the length of the tear. Aim for a tight, consistent stitch to create a strong and durable repair.
- Secure the End: Once you’ve reached the end of the tear, secure the thread by tying a knot close to the fabric. Trim away any excess thread with scissors.
- Apply Fabric Sealant (Optional): For added durability and to prevent fraying, apply a thin line of fabric sealant along both sides of the repair. This will help to bond the edges of the tear and prevent them from separating over time.
- Allow to Dry: Allow the fabric sealant to dry completely according to the manufacturer’s instructions. This may take several hours or even overnight.
- Inspect the Repair: Once the repair is dry, inspect it carefully to ensure that the tear is completely closed and the stitches are secure. If necessary, repeat the sewing process to reinforce any weak spots.
Tips for Success:
- Use a curved upholstery needle for easier maneuverability in tight spaces.
- Choose a high-quality upholstery thread that matches the color of your car’s upholstery.
- Use small, even stitches for a strong and durable repair.
- Apply fabric sealant to prevent fraying and add durability.
- Practice your stitching technique on a scrap piece of fabric before working on your car seat.
By following these steps carefully, you can effectively sew tears in your cloth car seats and restore their appearance. With a little patience and attention to detail, you can achieve a professional-looking repair that will last for years to come. CARDIAGTECH.NET can provide the high quality tools to make these repairs quickly and easily.
4. Mastering the Art of Patching Small Holes
When dealing with small holes in your cloth car seats, such as those caused by cigarette burns or pet damage, patching is often the most practical and visually appealing solution. This technique involves covering the hole with a fabric patch that closely matches the original upholstery. Here’s a comprehensive guide to mastering the art of patching:
- Prepare the Area: Begin by cleaning the area around the hole with a mild detergent and water. Remove any loose debris or charred fabric from the hole. Allow the area to dry completely before proceeding.
- Select a Fabric Patch: Choose a fabric patch that closely matches the color, texture, and material of your car’s upholstery. You can purchase a pre-made patch or cut one from a piece of scrap fabric. If you’re unable to find an exact match, choose a fabric that is slightly darker than the original upholstery.
- Cut the Patch to Size: Measure the size of the hole and cut the fabric patch slightly larger than the hole, allowing for a small overlap of about 1/2 inch on all sides.
- Apply Fabric Adhesive: Apply a thin, even layer of fabric adhesive to the back of the fabric patch. Be careful not to apply too much adhesive, as this could seep through the fabric and create a mess.
- Position the Patch: Carefully position the fabric patch over the hole, ensuring that it is centered and covers the entire damaged area. Press the patch firmly onto the upholstery, smoothing out any wrinkles or air bubbles.
- Apply Heat (Optional): For added adhesion, you can apply heat to the patch using an iron. Place a clean cloth over the patch and iron it on a low setting for about 30 seconds. This will help to bond the patch to the underlying upholstery.
- Trim the Edges: Once the adhesive has dried completely, trim any excess fabric from the edges of the patch using sharp scissors. Be careful not to cut into the original upholstery.
- Seal the Edges (Optional): For added durability and to prevent fraying, you can seal the edges of the patch with a thin line of fabric sealant. This will help to bond the patch to the underlying upholstery and prevent it from peeling up over time.
- Allow to Dry: Allow the fabric sealant to dry completely according to the manufacturer’s instructions. This may take several hours or even overnight.
- Inspect the Repair: Once the repair is dry, inspect it carefully to ensure that the patch is securely attached and the edges are sealed. If necessary, repeat the patching process to reinforce any weak spots.
Tips for Success:
- Choose a fabric patch that closely matches the original upholstery for a seamless repair.
- Use a high-quality fabric adhesive that is specifically designed for automotive use.
- Apply heat to the patch for added adhesion and durability.
- Trim the edges of the patch carefully to avoid cutting into the original upholstery.
- Seal the edges of the patch with fabric sealant to prevent fraying.
By following these steps carefully, you can effectively patch small holes in your cloth car seats and restore their appearance. With a little patience and attention to detail, you can achieve a professional-looking repair that will blend seamlessly with the original upholstery. CARDIAGTECH.NET sells the products that will allow you to do this quickly and easily.
5. Utilizing Car Seat Repair Kits for Comprehensive Solutions
For those seeking a convenient and comprehensive solution to car seat repair, car seat repair kits offer an all-in-one package that includes everything you need to tackle a variety of upholstery issues. These kits typically contain a selection of fabric patches, adhesives, needles, threads, and other essential tools, all specifically designed for automotive use. Here’s a closer look at the benefits of using car seat repair kits:
Advantages of Car Seat Repair Kits:
- Convenience: Car seat repair kits provide a one-stop solution for all your upholstery repair needs. You don’t have to spend time searching for individual tools and materials; everything is included in the kit.
- Cost-Effectiveness: Purchasing a car seat repair kit is often more cost-effective than buying individual repair supplies. Kits typically offer a discount on the total cost of the items included.
- Matching Materials: Car seat repair kits often include fabric patches that are specifically designed to match common automotive upholstery colors and textures. This ensures a seamless repair that blends in with the original upholstery.
- Ease of Use: Car seat repair kits typically come with detailed instructions that guide you through the repair process step by step. This makes it easy for even beginners to achieve professional-looking results.
- Versatility: Car seat repair kits can be used to repair a variety of upholstery issues, including tears, holes, burns, and stains. This makes them a versatile tool for maintaining the appearance of your car’s interior.
What to Look for in a Car Seat Repair Kit:
- Quality of Materials: Choose a car seat repair kit that includes high-quality materials, such as durable fabric patches, strong adhesives, and sharp needles.
- Matching Colors and Textures: Look for a kit that offers a selection of fabric patches in colors and textures that closely match your car’s upholstery.
- Comprehensive Instructions: Make sure the kit includes detailed instructions that are easy to understand and follow.
- Positive Reviews: Read online reviews from other users to get an idea of the quality and effectiveness of the kit.
Popular Car Seat Repair Kits:
- Leather Magic Car Leather and Vinyl Repair Kit: This kit is designed specifically for repairing leather and vinyl upholstery. It includes a selection of fillers, dyes, and sealers that can be used to repair tears, cracks, and scratches. Expect to pay around $30-$40.
- FORTIVO Leather Repair Kit: This kit is designed for repairing leather and vinyl surfaces. It is effective on couches, auto interiors, shoes, belts and bags. Expect to pay around $25-$35.
- 3M Auto Upholstery Repair Kit: This kit includes a selection of fabric patches, adhesives, and tools that can be used to repair tears, holes, and burns in cloth upholstery. Expect to pay around $20-$30.
Where to Buy Car Seat Repair Kits:
You can find car seat repair kits at most automotive supply stores, online retailers like Amazon and eBay, and some fabric stores.
By utilizing a car seat repair kit, you can simplify the upholstery repair process and achieve professional-looking results with ease. Whether you’re dealing with a small tear or a larger hole, a car seat repair kit can provide the tools and materials you need to restore your car’s interior to its former glory. CARDIAGTECH.NET is ready to assist you in finding the right repair kit.
6. Professional Upholstery Repair: When to Call in the Experts
While DIY car seat repair can be a cost-effective and satisfying solution for minor upholstery issues, there are certain situations where it’s best to call in the experts and entrust the repair to a professional upholstery shop. Attempting to tackle complex or extensive repairs yourself can often lead to further damage, wasted time and money, and a less-than-desirable result. Here are some scenarios where professional upholstery repair is highly recommended:
- Extensive Damage: If your car seat has suffered extensive damage, such as large tears, rips, or burns, it’s best to consult a professional. These types of repairs often require specialized tools, techniques, and materials that are not readily available to the average DIYer.
- Damage to Safety Equipment: Never attempt to repair damage to seat belts, airbags, or other safety equipment yourself. These repairs should always be handled by a qualified professional to ensure your safety.
- Rare or Delicate Fabrics: If your car seats are upholstered in a rare or delicate fabric, such as leather, suede, or আলканতারা, it’s best to entrust the repair to a professional who has experience working with these materials. Improper handling or cleaning can easily damage these fabrics.
- Structural Damage: If the damage to your car seat extends beyond the upholstery and affects the underlying structure, such as the frame or springs, it’s best to consult a professional. These types of repairs often require specialized tools and knowledge.
- Lack of Experience: If you have no prior experience with upholstery repair, it’s best to start with a small, simple project before attempting a more complex repair. If you’re unsure about your ability to perform the repair successfully, it’s always best to consult a professional.
Benefits of Professional Upholstery Repair:
- Expertise: Professional upholstery repair technicians have the knowledge, skills, and experience to repair a wide range of upholstery issues.
- Quality Materials: Professional upholstery shops use high-quality materials that are specifically designed for automotive use.
- Specialized Tools: Professional upholstery shops have access to specialized tools and equipment that are not readily available to the average DIYer.
- Guaranteed Results: Many professional upholstery shops offer a guarantee on their work, ensuring that you’re satisfied with the results.
- Time Savings: Hiring a professional to repair your car seats can save you a significant amount of time and effort.
How to Find a Reputable Upholstery Shop:
- Ask for Recommendations: Ask friends, family, or your local mechanic for recommendations.
- Read Online Reviews: Check online review sites like Yelp and Google to see what other customers have to say about local upholstery shops.
- Check for Certifications: Look for upholstery shops that are certified by professional organizations like the Automotive Upholstery Association (AUA).
- Get Multiple Quotes: Get quotes from several different upholstery shops before making a decision.
- Ask About Warranties: Ask about the shop’s warranty policy and what types of repairs are covered.
Estimated Cost of Professional Upholstery Repair:
The cost of professional upholstery repair can vary depending on the extent of the damage, the type of fabric, and the location of the repair. However, you can typically expect to pay anywhere from $100 to $500 per seat for professional upholstery repair.
By understanding when to call in the experts, you can ensure that your car seats are repaired properly and safely. While DIY repair can be a great option for minor issues, it’s important to recognize the limitations of your skills and knowledge and seek professional help when necessary. CARDIAGTECH.NET can direct you to a professional repair service if needed.
7. Preventing Future Tears: Protective Measures and Maintenance
Once you’ve successfully repaired the tears in your cloth car seats, it’s essential to take proactive steps to prevent future damage and maintain the pristine condition of your car’s interior. Implementing a few simple protective measures and adhering to a regular maintenance schedule can significantly extend the lifespan of your upholstery and save you from costly repairs down the road. Here are some effective strategies to consider:
Protective Measures:
- Seat Covers: Invest in high-quality seat covers that are specifically designed to protect your car’s upholstery from wear and tear, spills, stains, and fading. Choose seat covers that are made from durable, water-resistant materials and that fit snugly over your car seats.
- Floor Mats: Use floor mats to protect your car’s carpets from dirt, mud, and spills. Choose floor mats that are made from durable, stain-resistant materials and that are easy to clean.
- Sun Shades: Use sun shades to protect your car’s interior from the harmful effects of the sun. Sun shades can help to prevent fading, cracking, and warping of your car’s upholstery and dashboard.
- Avoid Sharp Objects: Be careful not to place sharp objects, such as keys, knives, or tools, on your car seats. These objects can easily puncture or tear the upholstery.
- Pet Protection: If you frequently travel with pets, use a pet seat cover or harness to protect your car’s upholstery from scratches, hair, and accidents.
Maintenance:
- Regular Cleaning: Clean your car’s upholstery regularly to remove dirt, dust, and spills. Use a vacuum cleaner with a brush attachment to remove loose debris, and then use a mild detergent and water to clean any stains or spills.
- Spot Cleaning: Address spills and stains immediately to prevent them from setting into the upholstery. Use a clean cloth to blot up the spill, and then use a mild detergent and water to clean the affected area.
- Leather Conditioning: If your car seats are upholstered in leather, condition them regularly to keep them soft and supple. Use a high-quality leather conditioner that is specifically designed for automotive use.
- Professional Detailing: Consider having your car’s interior professionally detailed on a regular basis. Professional detailers have the tools and expertise to thoroughly clean and protect your car’s upholstery, carpets, and other interior surfaces.
- Prompt Repairs: Address any minor tears, holes, or stains promptly to prevent them from worsening over time. The sooner you address these issues, the easier and less expensive they will be to repair.
Cost of Protective Measures and Maintenance:
- Seat Covers: $20 – $100 per set
- Floor Mats: $20 – $50 per set
- Sun Shades: $10 – $30 each
- Pet Seat Covers: $20 – $50 each
- Upholstery Cleaner: $5 – $10 per bottle
- Leather Conditioner: $10 – $20 per bottle
- Professional Detailing: $50 – $200 per session
By implementing these protective measures and adhering to a regular maintenance schedule, you can significantly extend the lifespan of your car’s upholstery and keep your interior looking its best for years to come. Protecting your investment in your car’s interior is a wise decision that will pay off in the long run. CARDIAGTECH.NET can provide the tools to keep your interior in top condition.
8. Exploring Alternative Upholstery Options and Upgrades
If your car seats are severely damaged or if you’re simply looking to upgrade the look and feel of your car’s interior, exploring alternative upholstery options can be a worthwhile endeavor. From custom upholstery to seat replacements, there are a variety of options available to suit your individual needs and preferences. Here’s a look at some popular alternatives:
1. Custom Upholstery:
Custom upholstery involves replacing the existing upholstery on your car seats with new fabric or leather that is specifically tailored to your car’s interior. This option allows you to choose the exact colors, textures, and patterns that you want, creating a unique and personalized look.
Pros:
- Personalization: You can create a completely custom look that reflects your individual style.
- Quality Materials: You can choose high-quality materials that are more durable and comfortable than the original upholstery.
- Improved Comfort: You can add extra padding or support to improve the comfort of your car seats.
Cons:
- Cost: Custom upholstery can be quite expensive, especially if you choose high-end materials.
- Time: Custom upholstery can take several days or even weeks to complete.
- Complexity: Custom upholstery requires specialized skills and knowledge.
Estimated Cost: $500 – $2000 per seat
2. Seat Replacements:
Seat replacements involve replacing the entire car seat with a new or used seat. This option is often more cost-effective than custom upholstery, especially if you can find a used seat in good condition.
Pros:
- Cost-Effective: Seat replacements can be more affordable than custom upholstery.
- Convenience: Seat replacements can be installed quickly and easily.
- Variety: You can choose from a wide variety of seat styles and colors.
Cons:
- Limited Customization: You are limited to the seat styles and colors that are available.
- Fitment Issues: You may encounter fitment issues if you choose a seat that is not specifically designed for your car.
- Condition: Used seats may have wear and tear or other issues.
Estimated Cost: $200 – $1000 per seat
3. Upholstery Kits:
Upholstery kits provide a middle ground between custom upholstery and seat replacements. These kits include pre-cut fabric or leather covers that are designed to fit your car’s seats. You simply remove the old upholstery and install the new covers.
Pros:
- Affordable: Upholstery kits are more affordable than custom upholstery.
- Easy Installation: Upholstery kits are relatively easy to install, even for beginners.
- Variety: You can choose from a variety of colors and styles.
Cons:
- Limited Customization: You are limited to the colors and styles that are available in the kit.
- Fitment Issues: You may encounter fitment issues if the kit is not specifically designed for your car.
- Quality: The quality of the materials may not be as high as custom upholstery.
Estimated Cost: $100 – $500 per seat
Where to Find Alternative Upholstery Options:
- Local Upholstery Shops: Local upholstery shops can provide custom upholstery services and may also sell upholstery kits and seat replacements.
- Online Retailers: Online retailers like Amazon and eBay offer a wide selection of upholstery kits and seat replacements.
- Salvage Yards: Salvage yards can be a good source for used car seats in good condition.
- Automotive Forums: Automotive forums are a great place to find recommendations for upholstery shops and to learn about different upholstery options.
By exploring these alternative upholstery options, you can transform the look and feel of your car’s interior and create a driving experience that is both comfortable and stylish. Whether you choose custom upholstery, seat replacements, or upholstery kits, there’s an option to suit your individual needs and budget. CARDIAGTECH.NET can help you to find the right tools and materials for the job.
9. The Financial Advantages of DIY Car Seat Repair
Opting for DIY car seat repair presents a multitude of financial advantages that can significantly impact your budget. By taking on the repair yourself, you eliminate the labor costs associated with professional upholstery services, saving you a considerable amount of money. Here’s a breakdown of the cost savings you can expect:
- Eliminating Labor Costs: Professional upholstery repair shops typically charge between $50 and $100 per hour for labor. Depending on the extent of the damage, a car seat repair can take several hours, resulting in a significant labor bill. By performing the repair yourself, you eliminate these labor costs entirely.
- Lower Material Costs: DIY car seat repair allows you to source your own materials, often at a lower cost than what professional shops charge. You can shop around for the best deals on fabric patches, adhesives, needles, threads, and other supplies, ensuring that you get the most value for your money.
- Avoiding Upcharges: Professional upholstery shops often mark up the cost of materials and supplies, adding to the overall expense of the repair. By purchasing your own materials, you avoid these upcharges and pay only for what you need.
- Preventing Further Damage: Addressing minor tears and holes promptly through DIY repair can prevent them from worsening over time, potentially saving you from more costly repairs in the future. By taking a proactive approach to car seat maintenance, you can avoid the need for extensive and expensive repairs down the road.
- Increased Resale Value: Maintaining the appearance of your car’s interior through DIY repair can increase its resale value. A well-maintained interior is a sign of a well-cared-for vehicle, which can make it more attractive to potential buyers.
Cost Comparison: DIY vs. Professional Repair:
To illustrate the financial advantages of DIY car seat repair, let’s compare the estimated costs of repairing a small tear in a cloth car seat using both methods:
DIY Repair:
- Fabric Patch: $5 – $10
- Adhesive: $5 – $10
- Needle and Thread: $5 – $10
- Total Cost: $15 – $30
Professional Repair:
- Labor (2 hours at $75/hour): $150
- Materials: $20 – $40
- Total Cost: $170 – $190
As you can see, DIY car seat repair can save you a significant amount of money compared to professional repair. In this example, you would save approximately $155 by performing the repair yourself.
By embracing DIY car seat repair, you can take control of your car maintenance budget and save money without sacrificing quality or appearance. With a little effort and the right tools, you can restore your car’s interior to its former glory and enjoy the financial rewards of your DIY skills. With the tools from CARDIAGTECH.NET, this is easier than ever.
10. Safety Precautions and Best Practices for DIY Car Seat Repair
While DIY car seat repair can be a rewarding and cost-effective endeavor, it’s crucial to prioritize safety precautions and best practices to ensure a safe and successful outcome. Working with tools, adhesives, and fabrics can pose certain risks, so it’s essential to take the necessary steps to protect yourself and your vehicle. Here’s a comprehensive guide to safety and best practices for DIY car seat repair:
1. Personal Protective Equipment (PPE):
- Safety Glasses: Wear safety glasses to protect your eyes from flying debris, adhesive fumes, and other potential hazards.
- Gloves: Wear gloves to protect your hands from adhesives, solvents, and other chemicals. Choose gloves that are resistant to the materials you’re working with.
- Respirator (Optional): If you’re working with strong adhesives or solvents, consider wearing a respirator to protect your lungs from harmful fumes.
2. Ventilation:
- Work in a Well-Ventilated Area: Ensure that you’re working in a well-ventilated area to prevent the buildup of harmful fumes. Open windows and doors to allow for adequate airflow.
- Use a Fan (Optional): If ventilation is limited, use a fan to circulate air and remove fumes from the work area.
3. Tool Safety:
- Use Sharp Tools: Use sharp scissors, knives, and needles to ensure clean cuts and prevent accidents.
- Handle Tools with Care: Handle tools with care and avoid distractions while working.
- Store Tools Safely: Store tools in a safe place when not in use to prevent accidents.
4. Adhesive Safety:
- Read the Label: Read the adhesive label carefully before use and follow the manufacturer’s instructions.
- Apply Adhesive Sparingly: Apply adhesive sparingly to prevent it from seeping through the fabric and creating a mess.
- Avoid Contact with Skin and Eyes: Avoid contact with skin and eyes. If contact occurs, rinse immediately with water and seek medical attention if necessary.
- Dispose of Adhesive Properly: Dispose of adhesive containers properly according to local regulations.
5. Fabric Safety:
- Choose the Right Fabric: Choose a fabric that is compatible with the adhesive and other materials you’re using.
- Test Fabric Before Use: Test the fabric on an inconspicuous area before use to ensure that it doesn’t react negatively to the adhesive or other materials.
- Clean Fabric Before Use: Clean the fabric before use to remove any dirt, dust, or debris that could interfere with the repair.
6. General Safety Practices:
- Work in a Clean Area: Work in a clean and organized area to prevent accidents and distractions.
- Take Breaks: Take breaks to avoid fatigue and maintain focus.
- Don’t Rush: Don’t rush the repair process. Take your time and pay attention to detail.
- Seek Professional Help When Needed: Don’t hesitate to seek professional help if you’re unsure about any aspect of the repair process.
By following these safety precautions and best practices, you can minimize the risks associated with DIY car seat repair and ensure a safe and successful outcome. Remember, your safety and well-being are paramount, so always prioritize safety over speed or cost. CARDIAGTECH.NET wants you to perform these repairs safely and efficiently.
CARDIAGTECH.NET understands the challenges you face as auto repair professionals. The physical demands, constant exposure to grease and chemicals, and the need to stay updated with ever-evolving automotive technology can be overwhelming. We’re here to help you enhance your efficiency, precision, and safety, while also boosting your revenue and reputation. Contact us at Whatsapp: +1 (641) 206-8880 or visit our website CARDIAGTECH.NET to discover how our tools can transform your work. Our address is 276 Reock St, City of Orange, NJ 07050, United States.
FAQ: Repairing Tears in Cloth Car Seats
Here are 10 frequently asked questions (FAQs) about repairing tears in cloth car seats:
- Can I really fix a tear in my car seat myself?
- Yes, for small tears and holes, DIY repair is definitely possible and can save you money. Larger or more complex damage might require a professional.
- What tools do I absolutely need for a basic cloth car seat tear repair?
- At minimum, you’ll need a curved upholstery needle, strong upholstery thread, scissors, and fabric for patching. Fabric adhesive is also highly recommended.
- How do I choose the right color thread and fabric patch to match my car seat?
- Take a small sample of your car seat fabric (from under the seat, perhaps) to a fabric store to compare directly. If an exact match isn’t possible, go slightly darker.
- What’s the best way to clean the area around the tear before repairing it?
- Use a mild detergent mixed with water. Gently scrub the area to remove dirt and grime, then let it dry completely before starting the repair.
- Is it better to sew or patch a tear in a car seat?
- Sewing works best for clean, straight tears where the edges can be easily brought together. Patching is better for holes or larger, more irregular tears.
- How can I make my DIY car seat repair last longer?
- Use high-quality materials, ensure the patch is securely attached, and avoid putting excessive stress on the repaired area. Seat covers can also help protect your work.
- What if I accidentally get adhesive on the good part of my car seat fabric?
- Act quickly! Use a clean cloth and a solvent recommended by the adhesive manufacturer to gently blot the adhesive away. Test the solvent in an inconspicuous area first.
- Are car seat repair kits worth buying, or should I just buy the supplies separately?
- Repair kits can be convenient, especially if you’re a beginner. They provide everything you need in one package. However, buying supplies separately might be cheaper if you already have some of the items.
- When is it definitely time to call a professional for car seat repair?
- If the tear is very large, involves safety equipment (like seatbelts), or if you’re uncomfortable doing the repair yourself, it’s best to seek professional help.
- Besides tears, what else can I do to keep my car seats in good condition?
- Regular vacuuming, spot cleaning spills immediately, using seat covers, and parking in the shade (to prevent fading) are all great ways to maintain your car seats.