How to Fix an Oil Leak on Your Car: A Comprehensive Guide
Dealing with an oil leak in your car can be frustrating, but understanding the causes and knowing how to address them can save you money and prevent potential engine damage. This comprehensive guide from CARDIAGTECH.NET provides you with detailed steps on how to identify and fix oil leaks, ensuring your vehicle stays in top condition. Let’s dive into the world of auto repair, providing solutions and insights to keep your engine running smoothly with practical tips.
1. Identifying the Root Causes of Oil Leaks
Understanding what causes oil leaks is the first step toward fixing them. Various factors can contribute to these leaks, each requiring a specific approach to resolve. Recognizing the source can save you time and effort in the long run. Here are some of the most common culprits:
1.1. Degraded Engine Gaskets
Engine gaskets are crucial for sealing the gaps between engine components, preventing oil and other fluids from escaping. According to a study by the National Institute for Automotive Service Excellence (ASE), degraded engine gaskets are the most frequent cause of oil leaks, accounting for approximately 40% of all cases. Over time, exposure to high temperatures and constant wear can cause these gaskets to crack, shrink, or harden, leading to leaks.
1.2. Oil Pan Leaks
The oil pan, located at the bottom of the engine, holds the oil supply. It is sealed with a gasket to prevent leaks, but the pan itself can be damaged by impacts from road debris, or the gasket can deteriorate over time. A damaged oil pan or a worn gasket can result in oil dripping directly from beneath the engine. According to a report by the Bureau of Automotive Repair, oil pan leaks account for about 25% of oil leak incidents.
1.3. Deteriorating Oil Seals
Oil seals are designed to keep oil contained within the engine’s rotating components, such as the crankshaft and camshaft. These seals can harden, crack, or become dislodged due to age and wear, leading to leaks. Oil seals are responsible for approximately 20% of oil leaks, often manifesting near the front or rear of the engine, or around the timing cover.
1.4. Faulty Connections
Poor connections between hoses and fittings that carry oil throughout the engine can also cause leaks. These connections can loosen or degrade due to heat and pressure. Compromised connections often result in leaks near the oil filter, oil cooler lines, or valve covers. According to a survey by the Automotive Maintenance and Repair Association (AMRA), about 15% of oil leaks are attributable to bad connections.
2. Detailed Inspection of Your Vehicle
To accurately diagnose the source of an oil leak, a thorough inspection is essential. Follow these detailed steps to check various components that can degrade or loosen over time. This systematic approach will help you identify potential leak sources efficiently.
2.1. Examining Oil Pan Seals
Begin by inspecting the seals around the oil pan at the bottom of the engine. Look for any signs of oil accumulation or dripping around the edges of the pan. Worn seals are a common source of leaks. According to CARDIAGTECH.NET experts, using a degreaser to clean the area before inspection can make leaks easier to spot.
2.2. Checking the Oil Pan Plug
The oil pan plug, or drain plug, is another frequent source of leaks if it’s not properly tightened or if it has a worn washer. Ensure the plug is securely fastened and check for any oil seepage around it. Replace the washer each time you change the oil to prevent future leaks.
2.3. Inspecting Valve Cover Gaskets
Valve cover gaskets, located at the top of the engine, can degrade due to heat and pressure, causing oil to leak. Look for oil around the edges of the valve cover and inspect for any cracks or damage to the gasket itself. CARDIAGTECH.NET recommends replacing valve cover gaskets in pairs to ensure even sealing.
2.4. Inspecting the Timing Cover Seal
The timing cover seal protects the timing chain or belt and keeps oil contained. A worn seal can result in oil leaking from the front of the engine. Inspect the timing cover area for signs of oil buildup.
2.5. Checking the Oil Filter
A loose or improperly installed oil filter can cause significant oil leaks. After an oil change, it’s crucial to ensure the filter is properly tightened. Check for oil dripping around the filter housing. A study by J.D. Power found that improper oil filter installation is a common issue leading to oil leaks, particularly after routine maintenance.
2.6. Examining the Oil Pressure Sensor
The oil pressure sensor monitors the engine’s oil pressure, but over time, this sensor can develop leaks. Inspect the area around the sensor, typically located near the engine block, for oil stains or active dripping.
2.7. Checking the Oil Cap
A damaged or improperly seated oil cap can allow oil to escape, especially when the engine is running. Look for oil around the cap and ensure it’s securely fastened and free of cracks. A loose or damaged oil cap can lead to significant oil loss over time.
2.8. Inspecting the Front and Rear Main Seals
The front and rear main seals are located at the front and rear of the engine, where the crankshaft exits the engine block. These seals are prone to wear and can lead to leaks if damaged. Check for oil buildup at the front and rear of the engine. According to a survey by RepairPal, main seal leaks often require professional repair due to their complexity.
2.9. Looking at the Camshaft Seals
In engines with overhead camshafts, the camshaft seals can become worn and cause oil to leak around the top of the engine. Look for oil buildup or residue near the timing cover.
2.10. Checking the PCV Valve and System
The Positive Crankcase Ventilation (PCV) valve regulates pressure in the engine. A clogged or faulty PCV valve can cause pressure buildup, leading to oil leaks. Inspect the valve and surrounding hoses for leaks. Replace the PCV valve regularly as part of your vehicle’s maintenance schedule to prevent pressure-related oil leaks.
2.11. Inspecting Oil Cooler Lines
In some vehicles, the engine is equipped with an oil cooler that uses lines to transfer oil to and from the cooler. Check the oil cooler lines for cracks, wear, or leaks at the connection points. Oil cooler line leaks can lead to significant oil loss and should be addressed promptly.
2.12. Special Note for Older Vehicles
In older vehicles, multiple leaks may occur simultaneously due to worn-out gaskets, seals, and connections. Conduct a thorough inspection to catch all potential leak points, as minor issues can accumulate and cause significant oil loss. CARDIAGTECH.NET advises using a UV dye kit to help locate hard-to-find leaks in older vehicles.
3. Deciding on a Fix: Additive vs. Manual Repair
Once you’ve identified the source of the oil leak, the next step is to determine the best course of action. There are two primary approaches: using an additive to stop the leak or performing a manual repair. Each method has its advantages and is suitable for different types of leaks.
3.1. Using an Additive to Stop the Leak
For minor leaks originating from worn rubber seals or gaskets, a stop-leak additive or high-mileage oil blend can be a simple solution. These products are formulated to soften and condition rubber seals, helping to prevent and stop minor leaks.
Advantages of Using Additives:
- Ease of Use: Additives are easy to apply and require no mechanical skills.
- Cost-Effective: They are generally less expensive than replacing parts.
- Temporary Fix: Ideal for older cars or leaks that don’t require immediate mechanical intervention.
Considerations:
- Temporary Solution: Additives provide a temporary fix and may not address the root cause of the leak.
- Effectiveness: They are most effective for minor leaks and may not work for larger, more severe leaks.
- Time to Work: It can take a few hundred miles of driving for the additive to fully seal the leak.
Instructions for Using Additives:
- Ensure the engine is cool.
- Pour the recommended amount of additive into the oil fill cap.
- Check the oil level to ensure it is within the recommended range.
- Start the engine and let it run for a few minutes to circulate the additive.
- Drive the vehicle as usual and monitor the oil level and leak.
CARDIAGTECH.NET recommends using additives as a temporary solution. If you’re dealing with a significant leak or worn-out components, replacing the parts is a more reliable long-term fix.
3.2. Fixing the Problem with Tools
For larger leaks caused by a damaged oil pan, loose bolts, or worn gaskets, a manual repair is necessary. This approach involves physically addressing the source of the leak by tightening bolts, replacing gaskets, or repairing damaged components.
Tools You’ll Need:
- Car jack
- Jack stands or ramps
- Torque wrench
- Ratchet and sockets
- Replacement parts (gaskets, oil pan, etc.)
Step-by-Step Approach for Manual Repairs:
- Safety First: Ensure the car is securely jacked up using a jack and jack stands or ramps. The vehicle should be on a level surface and stable before you crawl underneath it. Always wear gloves and safety goggles when working under the car.
- Check and Tighten Bolts: Begin by checking for loose bolts around the oil pan, valve covers, and timing cover. Use a torque wrench to tighten them to the recommended specifications in your vehicle’s service manual. Over time, bolts can loosen due to vibrations and temperature changes.
- Replace Damaged Parts: If tightening the bolts doesn’t fix the issue, you may need to replace worn-out gaskets, seals, or even the oil pan itself. Consult your vehicle’s manual or a repair guide for instructions specific to your car model.
- Clean the Area: Before installing new parts, thoroughly clean the surrounding area to remove any oil residue or debris. This will help ensure a proper seal and prevent future leaks.
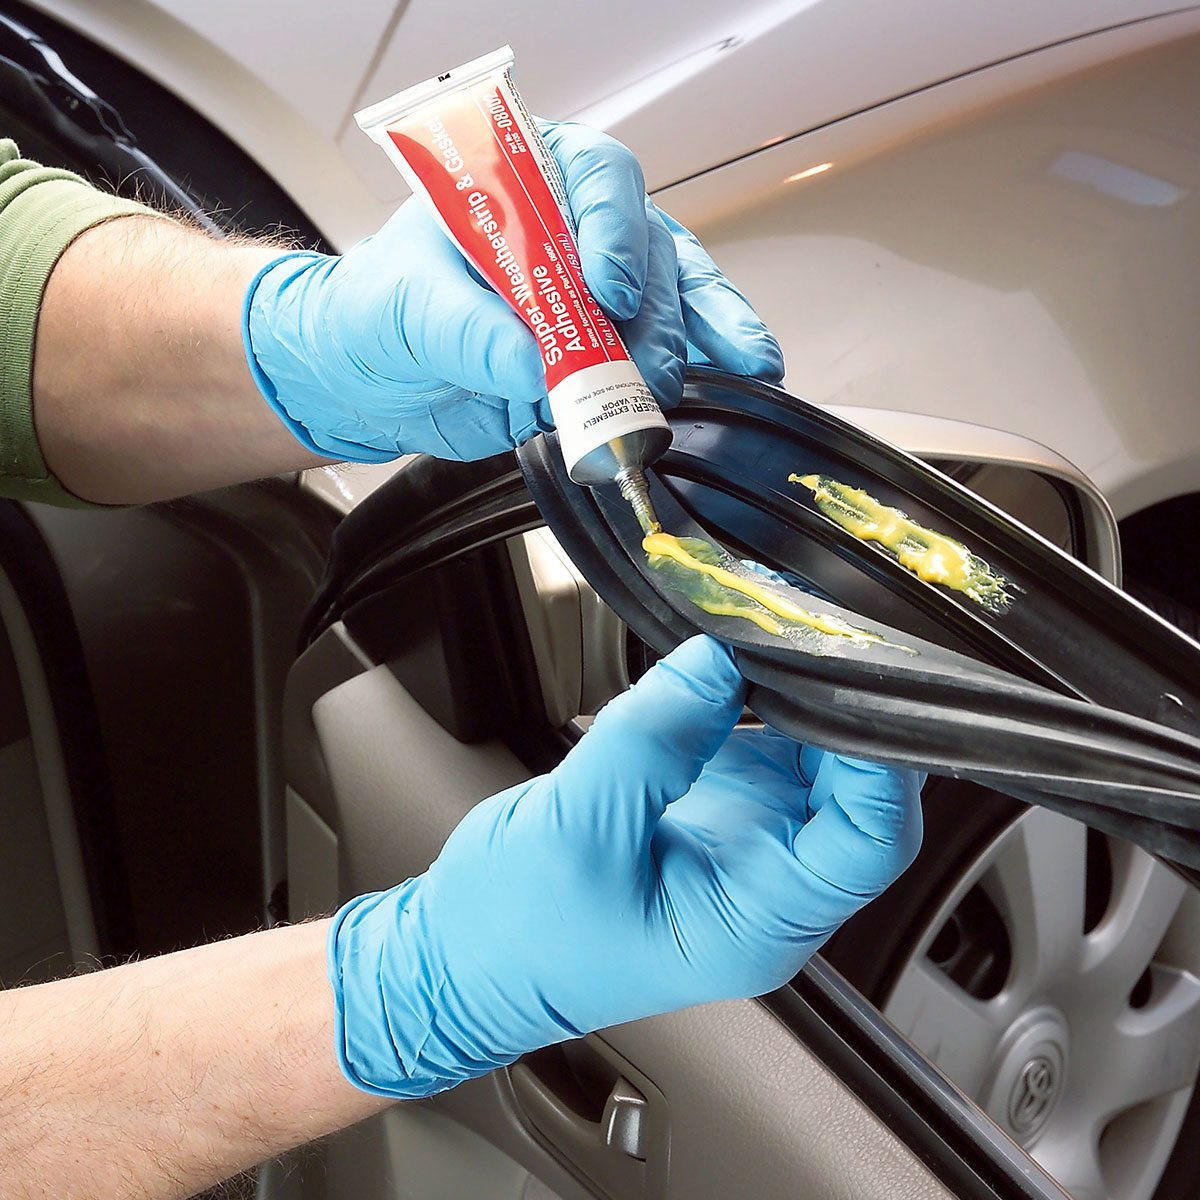
- Install New Gaskets or Seals: Carefully install the new gaskets or seals, following the manufacturer’s instructions. Use a gasket sealant if recommended to ensure a tight seal.
- Reassemble Components: Reassemble the components, making sure all bolts are properly tightened to the correct torque specifications.
- Lower the Vehicle: Once the repair is complete, carefully lower the vehicle and remove the jack stands or ramps.
Advantages of Manual Repairs:
- Addresses the Root Cause: Manual repairs fix the underlying problem, providing a long-term solution.
- Improved Reliability: Replacing worn parts improves the overall reliability of the engine.
- Prevents Further Damage: Addressing leaks promptly prevents potential engine damage from oil loss.
Considerations:
- Requires Mechanical Skills: Manual repairs require a certain level of mechanical skill and knowledge.
- More Time-Consuming: They can be more time-consuming than using additives.
- Higher Cost: Replacing parts can be more expensive than using additives.
4. Step-by-Step Guide to Fixing Common Oil Leaks
Now, let’s delve into specific steps for addressing some of the most common oil leaks. Whether it’s a leaky oil pan, valve cover gasket, or oil filter, these detailed instructions will guide you through the repair process.
4.1. How to Fix an Oil Pan Leak
An oil pan leak can be caused by a damaged pan or a worn gasket. Here’s how to address it:
Tools Needed:
- New oil pan gasket
- Socket set
- Torque wrench
- Drain pan
- Jack and jack stands
- Scraper
- Cleaning solvent
Steps:
- Drain the Oil: Place a drain pan under the oil pan and remove the drain plug to drain the oil.
- Remove the Oil Pan: Use a socket set to remove the bolts holding the oil pan in place. You may need to maneuver the pan around exhaust components or other obstructions.
- Clean the Surfaces: Use a scraper to remove any old gasket material from the oil pan and engine block. Clean the surfaces with a cleaning solvent to ensure a proper seal.
- Install the New Gasket: Place the new gasket onto the oil pan, aligning it with the bolt holes.
- Reinstall the Oil Pan: Carefully reinstall the oil pan, tightening the bolts to the torque specifications in your vehicle’s service manual.
- Replace the Drain Plug: Install the drain plug with a new washer and tighten it to the recommended torque.
- Refill the Oil: Refill the engine with the correct amount of oil, as specified in your vehicle’s manual.
4.2. How to Replace a Valve Cover Gasket
A leaky valve cover gasket can cause oil to seep onto the engine, leading to a burning smell and potential damage. Here’s how to replace it:
Tools Needed:
- New valve cover gasket
- Socket set
- Torque wrench
- Screwdriver
- Cleaning solvent
- Rags
Steps:
- Disconnect Components: Disconnect any components that are attached to the valve cover, such as hoses, wires, or cables.
- Remove the Valve Cover: Use a socket set to remove the bolts holding the valve cover in place. Carefully lift off the valve cover.
- Clean the Surfaces: Remove the old gasket and clean the valve cover and engine block surfaces with a cleaning solvent.
- Install the New Gasket: Place the new gasket onto the valve cover, making sure it is properly seated.
- Reinstall the Valve Cover: Carefully reinstall the valve cover, tightening the bolts to the torque specifications in your vehicle’s service manual.
- Reconnect Components: Reconnect any components that were disconnected in Step 1.
4.3. How to Fix an Oil Filter Leak
An oil filter leak is often caused by improper installation or a damaged filter. Here’s how to fix it:
Tools Needed:
- New oil filter
- Oil filter wrench
- Drain pan
- Rag
- New oil
Steps:
- Position the Drain Pan: Place a drain pan under the oil filter.
- Loosen the Old Filter: Use an oil filter wrench to loosen the old oil filter.
- Remove the Old Filter: Unscrew the old oil filter by hand, allowing any remaining oil to drain into the pan.
- Prepare the New Filter: Lightly lubricate the rubber gasket on the new oil filter with fresh oil.
- Install the New Filter: Screw the new oil filter onto the engine by hand until the gasket makes contact. Then, tighten it an additional ¾ turn, as specified by the manufacturer.
- Check for Leaks: Start the engine and check for leaks around the oil filter.
- Top Off Oil: Top off the engine oil level as needed.
5. Essential Safety Precautions
When performing any automotive repair, safety should always be your top priority. Here are some essential safety precautions to keep in mind:
- Wear Safety Gear: Always wear gloves and safety goggles to protect your hands and eyes from oil and other fluids.
- Secure the Vehicle: Ensure the vehicle is securely jacked up before getting underneath it. Use jack stands or ramps to support the vehicle’s weight.
- Use Proper Tools: Use the correct tools for the job to avoid injury or damage to the vehicle.
- Follow Instructions: Follow proper bolt-tightening patterns and torque specifications to avoid overtightening, which could cause more damage.
- Work in a Well-Ventilated Area: Work in a well-ventilated area to avoid inhaling harmful fumes.
- Dispose of Waste Properly: Dispose of used oil and other fluids properly, according to local regulations.
CARDIAGTECH.NET emphasizes that prioritizing safety can prevent accidents and ensure a successful repair.
6. Testing and Verification of Repairs
After completing the repair, it’s crucial to thoroughly test everything to ensure the leak has been fixed. Here’s how to check for any lingering issues:
6.1. Check for Leaks Immediately
After completing the repair, start the engine and let it run for a few minutes. Check for any visible leaks around the repaired area. If you see any leaks, turn off the engine and re-inspect the components.
6.2. Run the Engine Again for Confirmation
If no leaks appear after the initial test, run the engine again for a longer period, about 15-20 minutes, and check underneath the vehicle afterward. This provides a more thorough confirmation that the leak has been fully repaired.
6.3. Monitor the Oil Level
Keep an eye on the oil level over the next few days or weeks. If the oil level drops significantly, it could indicate a remaining leak or another issue.
6.4. Inspect the Ground
Park the vehicle on a clean surface and inspect the ground for any fresh oil spots or puddles. This can help you identify any small leaks that may not be immediately apparent.
6.5. Professional Inspection
If you’re unsure about the repair or if the leak persists, consider taking the vehicle to a professional mechanic for inspection. They can use specialized tools and techniques to diagnose and repair any remaining issues.
7. The Role of High-Quality Tools and Equipment
Using high-quality tools and equipment is paramount for effective and safe oil leak repairs. CARDIAGTECH.NET offers a range of professional-grade tools designed to meet the demands of both seasoned mechanics and DIY enthusiasts. Investing in reliable tools not only makes the job easier but also ensures precision and longevity in your repairs.
7.1. Essential Tools for Oil Leak Repairs
- Torque Wrenches: Ensure bolts are tightened to the manufacturer’s specifications, preventing over-tightening and potential damage.
- Socket Sets: Provide versatility in handling various bolt sizes and types.
- Oil Filter Wrenches: Designed for easy removal and installation of oil filters without causing damage.
- Jack and Jack Stands: Offer safe and stable elevation of the vehicle for undercarriage access.
- Inspection Mirrors and Flashlights: Aid in locating hard-to-reach leak sources.
7.2. Advantages of Using CARDIAGTECH.NET Tools
- Durability: Constructed from high-quality materials to withstand rigorous use.
- Precision: Engineered for accurate measurements and torque settings.
- Ergonomics: Designed for comfortable handling, reducing fatigue during prolonged use.
- Reliability: Trusted by professionals for consistent performance.
7.3. How to Choose the Right Tools
Consider the following factors when selecting tools for oil leak repairs:
- Quality of Materials: Opt for tools made from chrome vanadium steel or similar durable materials.
- Ergonomic Design: Look for tools with comfortable grips and balanced weight distribution.
- Warranty: Choose tools with a warranty to protect against defects and ensure long-term satisfaction.
- Reviews and Ratings: Read customer reviews and ratings to gauge the performance and reliability of the tools.
By investing in high-quality tools from CARDIAGTECH.NET, you’re equipping yourself with the resources needed to tackle oil leak repairs with confidence and efficiency.
8. Understanding the Importance of Regular Maintenance
Preventing oil leaks is as important as fixing them. Regular maintenance can significantly reduce the likelihood of leaks and extend the life of your engine. Here are some key maintenance tasks to keep in mind:
8.1. Regular Oil Changes
Changing your oil and filter according to the manufacturer’s recommendations is crucial. Fresh oil lubricates engine components, reducing wear and tear on gaskets and seals.
8.2. Inspecting Hoses and Connections
Regularly inspect hoses and connections for signs of wear, cracks, or leaks. Replace any damaged components promptly to prevent oil loss and potential engine damage.
8.3. Checking Fluid Levels
Monitor your vehicle’s fluid levels, including oil, coolant, and transmission fluid. Low fluid levels can indicate a leak or other issue that needs to be addressed.
8.4. Maintaining the Cooling System
A well-maintained cooling system prevents overheating, which can cause gaskets and seals to degrade prematurely.
8.5. Monitoring Engine Performance
Pay attention to any changes in engine performance, such as decreased power, unusual noises, or a burning smell. These symptoms can indicate an oil leak or other mechanical problem.
9. How CARDIAGTECH.NET Can Help
At CARDIAGTECH.NET, we understand the challenges of automotive maintenance and repair. That’s why we offer a wide range of high-quality tools and equipment to help you tackle any job with confidence.
9.1. Wide Range of Tools and Equipment
We offer everything you need for oil leak repairs, from torque wrenches and socket sets to oil filter wrenches and inspection mirrors. Our tools are designed for durability, precision, and ease of use, ensuring you get the job done right.
9.2. Expert Advice and Support
Our team of experienced professionals is here to provide expert advice and support. Whether you have questions about diagnosing an oil leak or need help choosing the right tools, we’re here to assist you every step of the way.
9.3. High-Quality Parts and Supplies
We also offer a wide selection of high-quality parts and supplies, including gaskets, seals, oil filters, and additives. Our parts are sourced from trusted manufacturers, ensuring reliability and performance.
9.4. Convenient Online Ordering
Our user-friendly website makes it easy to find and order the tools and parts you need. With fast shipping and secure payment options, you can get your repairs done quickly and efficiently.
10. Addressing Customer Challenges and Needs
CARDIAGTECH.NET is committed to providing solutions that address the specific challenges and needs of our customers. We understand the demands of the automotive repair industry and strive to offer products and services that enhance efficiency, accuracy, and safety.
10.1. Enhancing Work Efficiency
Our tools and equipment are designed to streamline the repair process, reducing the time and effort required to complete the job. With ergonomic designs and intuitive features, our products help you work smarter, not harder.
10.2. Improving Accuracy and Safety
Precision is crucial in automotive repair. Our tools are engineered for accurate measurements and torque settings, ensuring that every component is properly installed. This enhances the safety and reliability of your repairs.
10.3. Cost Savings
By providing high-quality tools and parts at competitive prices, CARDIAGTECH.NET helps you save money on repairs. Our products are designed for long-term durability, reducing the need for frequent replacements.
10.4. Elevating Garage Reputation
Using reliable tools and providing quality service enhances your garage’s reputation. Satisfied customers are more likely to recommend your services to others, leading to increased business and profitability.
10.5. Addressing Customer Pain Points
- Physical Strain: Our ergonomic tools reduce physical strain and fatigue, making it easier to handle demanding jobs.
- Chemical Exposure: We offer gloves and safety gear to protect you from harmful chemicals and fluids.
- Keeping Up with Technology: We provide tools that are compatible with the latest automotive technologies, ensuring you stay ahead of the curve.
- Competition: Our products help you enhance your efficiency and quality, giving you a competitive edge in the market.
Ready to elevate your automotive repair capabilities? Contact CARDIAGTECH.NET today for expert advice and solutions tailored to your needs. Call us at +1 (641) 206-8880 or visit our website CARDIAGTECH.NET for a comprehensive range of tools and equipment. Our address is 276 Reock St, City of Orange, NJ 07050, United States. Let us help you achieve greater success in your automotive repair endeavors.
11. FAQs About Oil Leaks
11.1. How do I know if my car is leaking oil or another fluid?
Check the color and consistency of the fluid. Oil is typically brown or black and has a slick texture. Coolant is usually green, pink, or orange, while transmission fluid is red or brown.
11.2. Can I drive my car if it’s leaking oil?
It’s not recommended to drive your car if it’s leaking oil, as it can lead to engine damage or failure if the oil level gets too low. Monitor the oil level and add oil as needed, but address the leak as soon as possible.
11.3. How long does it take for stop-leak additives to work?
Stop-leak additives can take up to a few hundred miles of driving to fully seal minor leaks. Follow the instructions on the product label for best results.
11.4. Can I fix an oil leak without special tools?
Minor oil leaks can sometimes be fixed without special tools, such as by tightening bolts or replacing the oil drain plug. However, more complex repairs may require specific tools like torque wrenches, socket sets, and oil filter wrenches.
11.5. What should I do if my car still leaks oil after repairs?
Recheck the bolts, seals, or gaskets, and ensure they are properly installed and tightened. If the issue persists, consider consulting a professional mechanic for further diagnosis.
11.6. How often should I check my car for oil leaks?
Check your car for oil leaks at least once a month, or more frequently if you notice any signs of a leak. Regular inspections can help you catch minor issues before they become major problems.
11.7. What are the long-term consequences of ignoring an oil leak?
Ignoring an oil leak can lead to serious engine damage, including overheating, decreased performance, and even engine failure. Additionally, oil leaks can cause environmental damage and create a fire hazard.
11.8. How can I prevent oil leaks in my car?
Follow a regular maintenance schedule, including oil changes, fluid level checks, and hose and connection inspections. Address any issues promptly and use high-quality parts and supplies.
11.9. Are synthetic oils more prone to leaks than conventional oils?
Synthetic oils are not necessarily more prone to leaks than conventional oils. However, they can sometimes expose existing leaks due to their superior cleaning properties. If your car is prone to leaks, consider using a high-mileage oil or an oil with leak-stop additives.
11.10. Can a clogged air filter cause an oil leak?
A clogged air filter can cause pressure to build up in the engine, potentially leading to oil leaks. Replace your air filter regularly to ensure proper engine ventilation and prevent pressure-related issues.
12. Bottom Line
Oil leaks are common but manageable car problems. By understanding the causes, conducting thorough inspections, and taking appropriate action, you can keep your engine running smoothly and prevent costly damage. CARDIAGTECH.NET is here to support you with high-quality tools, expert advice, and reliable parts. With a bit of know-how and the right resources, you can handle any oil leak problem on your vehicle.
For all your automotive repair needs, remember CARDIAGTECH.NET. Contact us today to explore our wide range of products and services. Call us at +1 (641) 206-8880 or visit our website CARDIAGTECH.NET. We’re here to help you keep your vehicle in top condition!