How To Fix A Cigarette Burn In Leather Car Seat
Is your leather car seat marred by an unsightly cigarette burn? CARDIAGTECH.NET provides you the ultimate guide on How To Fix A Cigarette Burn In Leather Car Seat and restore your car’s interior. Follow our expert steps for leather repair, and achieve a flawless finish. We’ll cover everything from leather restoration to seamless repair techniques, and even leather recoloring to ensure a perfect match.
1. Understanding Leather Damage from Cigarette Burns
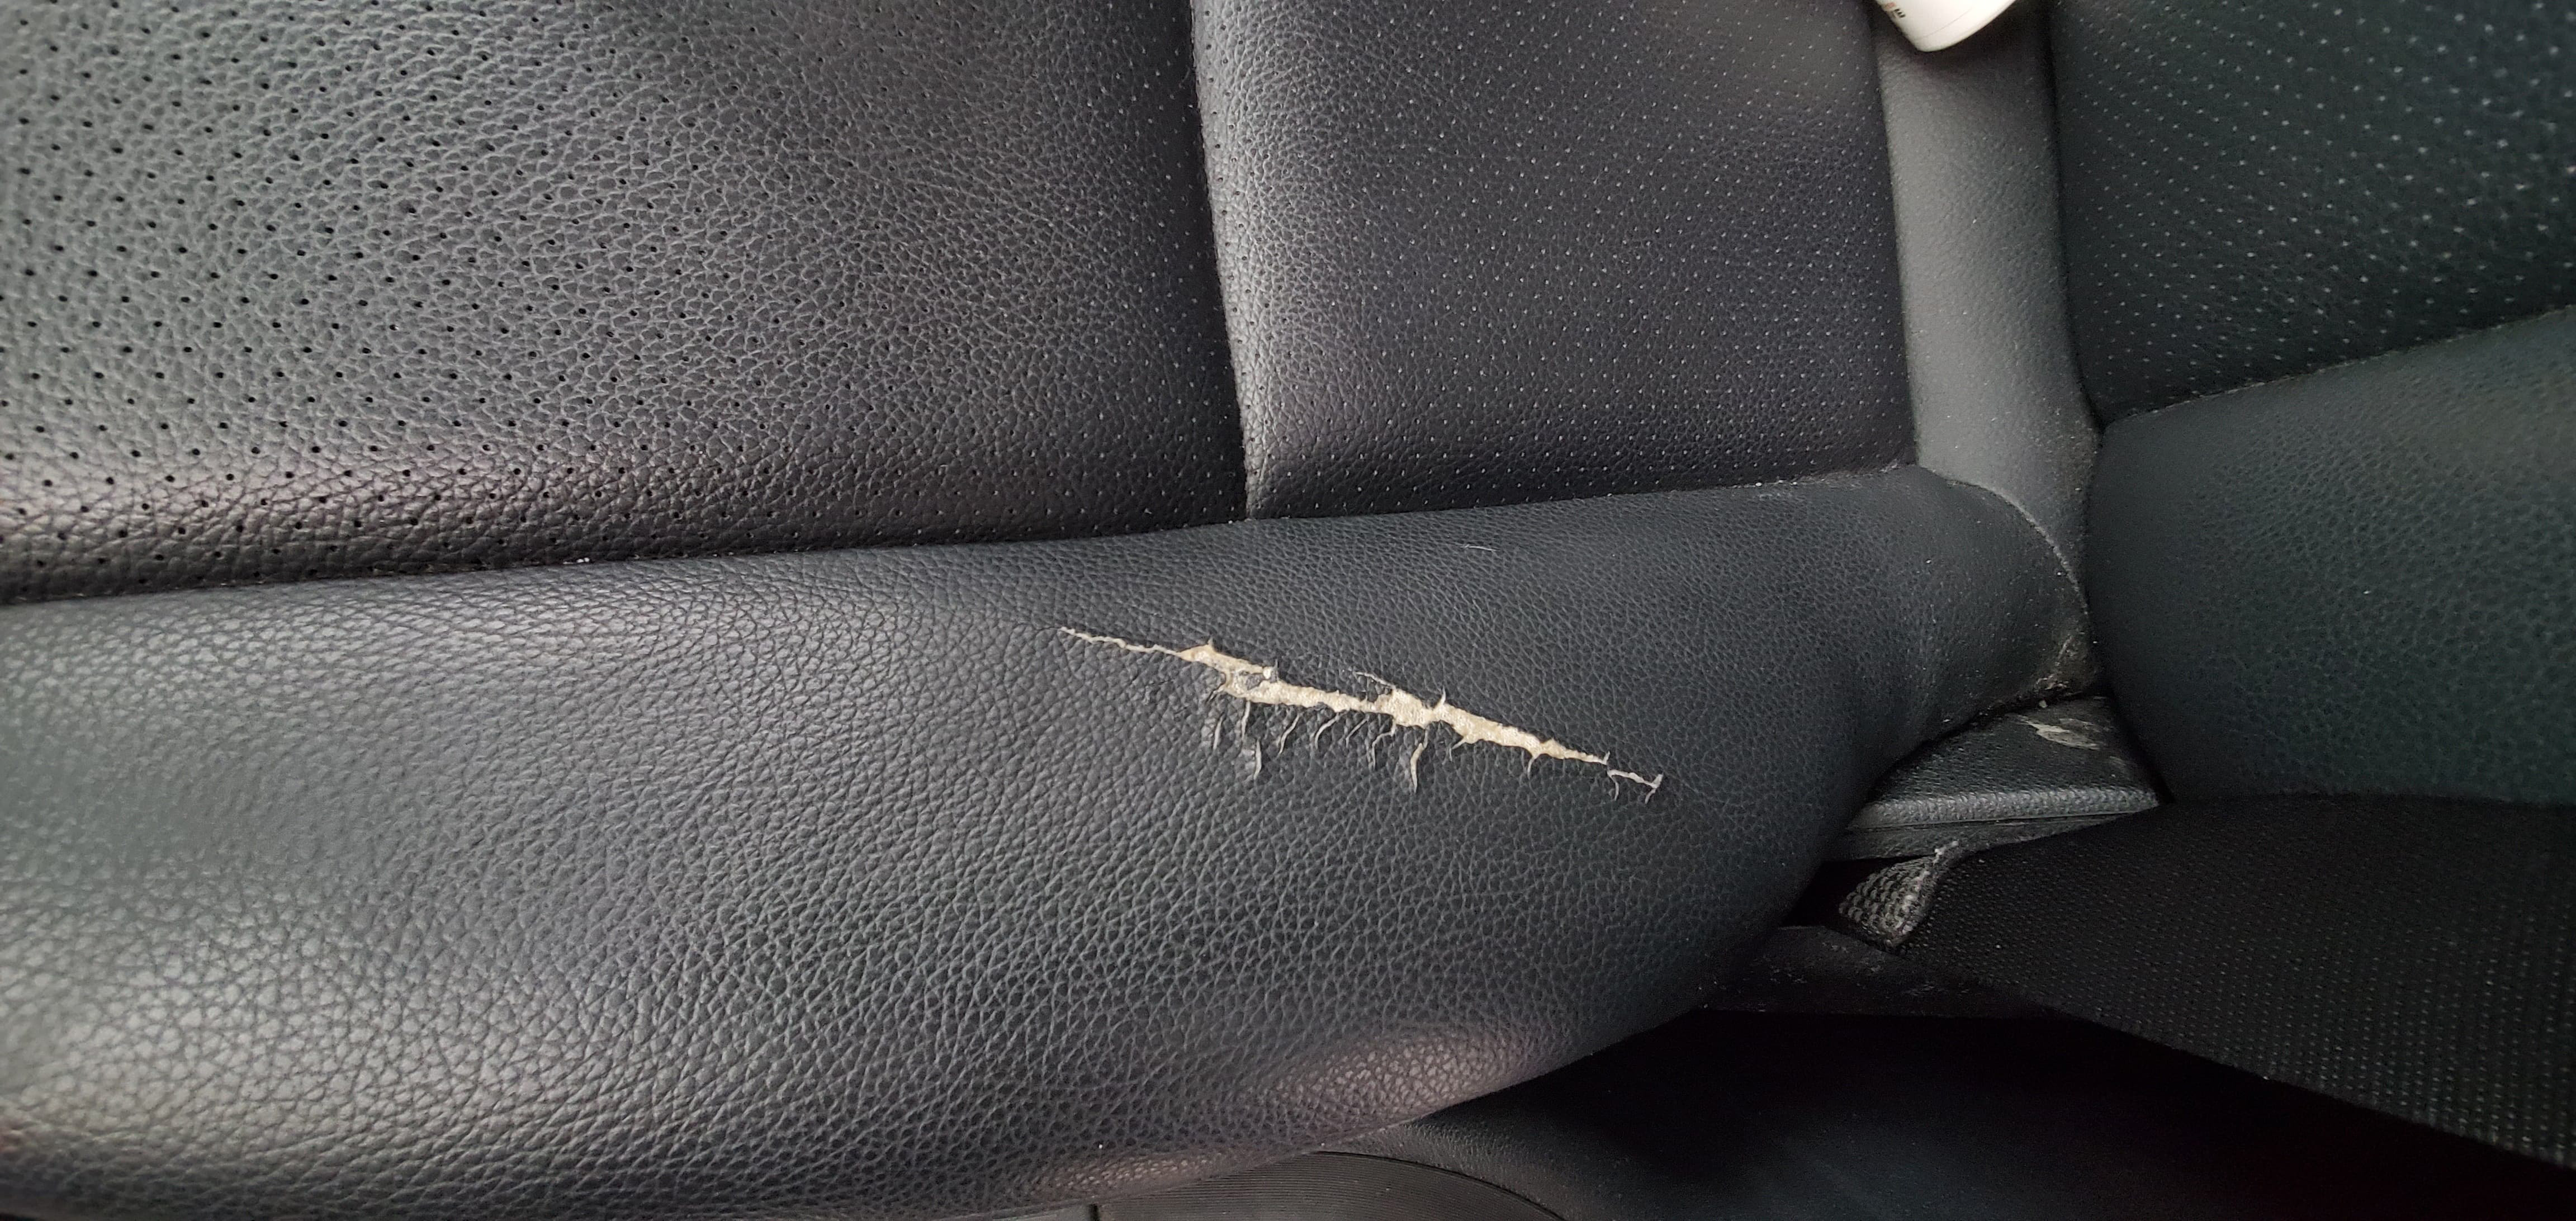
Cigarette burns on leather car seats are a common problem that can significantly detract from the vehicle’s interior appearance. These burns not only create unsightly marks but can also compromise the integrity of the leather.
1.1. Types of Leather Used in Car Seats
Car seats are typically made from several types of leather, each with unique characteristics:
- Aniline Leather: This is the most natural and expensive type, retaining the hide’s original surface. It’s soft and supple but also more prone to damage.
- Semi-Aniline Leather: Offers a balance between natural appearance and durability, with a light surface coating for added protection.
- Protected Leather (Pigmented Leather): The most common type in cars, it has a polymer surface coating that makes it highly resistant to stains and wear.
1.2. How Cigarette Burns Affect Leather
Cigarette burns damage leather in several ways:
- Shrinking and Hardening: The heat causes the leather to shrink inwards, creating a wrinkled effect and hardening the material.
- Discoloration: The burned area becomes discolored, often turning black or dark brown, contrasting sharply with the surrounding leather.
- Structural Damage: In severe cases, the burn can penetrate through the leather, creating a hole that requires more extensive repair.
1.3. Why Repairing Leather Burns is Important
Repairing cigarette burns is crucial for several reasons:
- Aesthetics: Restores the car’s interior to its original appearance, enhancing overall aesthetics and resale value.
- Preventing Further Damage: Burned leather can crack and deteriorate over time, leading to more extensive and costly repairs.
- Maintaining Value: Repairing damage helps maintain the car’s value, as potential buyers often scrutinize interior conditions.
- Hygiene: Burned areas can harbor dirt and bacteria, posing potential hygiene issues for vehicle occupants.
2. Essential Tools and Materials
Before starting the repair process, gather all the necessary tools and materials. Using the right tools will ensure a professional-looking result and make the job easier. CARDIAGTECH.NET, located at 276 Reock St, City of Orange, NJ 07050, United States, and reachable via Whatsapp at +1 (641) 206-8880, offers comprehensive leather repair kits that provide everything you need.
2.1. Leather Repair Kit Components
A comprehensive leather repair kit typically includes:
| Component | Description |
|---|---|
| Leather Cleaner | Used to clean the area around the burn, removing dirt and grime. |
| Leather Degreaser | Removes oils and contaminants from the leather surface, ensuring better adhesion of repair compounds. |
| Scalpel or Razor Blade | For carefully cutting away the damaged leather. |
| Tweezers | To handle small repair materials and position the sub-patch. |
| Sub-Patch Material | A piece of canvas or leather to provide a backing for the filler. |
| Leather Glue | Strong adhesive to secure the sub-patch to the underside of the leather. |
| Heavy Leather Filler | Fills the hole or indentation left by the burn, providing a smooth base for color restoration. |
| Palette Knife | Used to apply the filler evenly and remove excess. |
| Grain Pad (Optional) | Embosses a texture into the filler, mimicking the natural grain of the leather. |
| Leather Colorant | Matches the color of the leather, disguising the repair. |
| Cotton Swabs | Applies the colorant in thin layers for a seamless blend. |
| Leather Finish | Seals and protects the repaired area, matching the sheen of the surrounding leather. |
| Hair Dryer | Dries the filler and colorant quickly, speeding up the repair process. |
| Sandpaper (Fine Grit) | Smooths the filler after drying, ensuring a level surface. |
2.2. Additional Recommended Items
- Leather Conditioner: To moisturize the leather after the repair and maintain its suppleness.
- Protective Gloves: Keeps hands clean and protected from chemicals.
- Mask: Prevents inhalation of dust and fumes.
- Work Light: Provides adequate lighting for detailed work.
2.3. Sourcing High-Quality Materials from CARDIAGTECH.NET
Purchasing a complete leather repair kit from CARDIAGTECH.NET ensures that you have all the necessary high-quality materials for a successful repair. CARDIAGTECH.NET provides expert advice and support, guiding you through the repair process.
3. Step-by-Step Guide to Repairing a Cigarette Burn
Follow these detailed steps to repair a cigarette burn in your leather car seat. Each step is designed to help you achieve a professional-looking repair.
3.1. Preparation and Cleaning
- Clean the Area: Use a leather cleaner to thoroughly clean the area around the burn. This removes dirt and grime that could interfere with the repair.
- Degrease the Leather: Apply a leather degreaser to remove any oils or contaminants from the surface. This ensures better adhesion of the repair compounds.
- Allow to Dry: Let the area dry completely before proceeding to the next step.
3.2. Cutting Out the Burned Leather
- Assess the Damage: Determine the extent of the burn. If the burn has penetrated completely through the leather, proceed to create a hole for repair. If the burn is only superficial, carefully cut out the damaged leather.
- Make a Cross Cut: For superficial burns, make a cross cut into the burn, about half the depth of the leather. This helps to relieve tension and makes it easier to remove the damaged area.
- Cut Around the Edge: Use a scalpel or razor blade to carefully cut around the edge of the burn, removing the hardened and discolored leather. Aim for about 50% depth into the leather.
- Remove the Burned Leather: Gently peel away the burned leather. If the burn has created a hole, cut the burn completely out of the leather to create a clean, round or oval-shaped hole.
3.3. Inserting the Sub-Patch
- Prepare the Sub-Patch: Cut a piece of canvas or leather slightly larger than the hole. This will serve as a backing for the filler.
- Insert the Patch: Use tweezers to insert the sub-patch flat behind the leather, ensuring at least a 1 cm overlap surrounding all edges of the hole.
- Position the Patch: Make sure the patch is smooth and covers the entire hole from the underside.
3.4. Applying Glue to Fix Sub-Patch
- Apply Leather Glue: Use a thin object like a scalpel or paint stirrer to apply the leather glue.
- Glue the Edges: Push one side of the hole down to raise the other side, then wipe the glue onto the underside edges of the hole. Stick the edge down onto the sub-patch.
- Repeat: Repeat this process around all edges of the hole, ensuring sufficient glue is applied to firmly stick the patch to the underside.
- Wait for the Glue to Set: Allow the glue to set for about 20 minutes. This provides a strong backing for the repair.
3.5. Filling the Hole
- Apply the First Layer: Use a palette knife to apply a small amount of heavy leather filler into the hole.
- Spread Evenly: Wipe the excess filler from the side of the hole, ensuring the filler is level with the surrounding leather.
- Dry the Filler: Use a hair dryer to dry the filler thoroughly for about 3 minutes. Then, leave it for an additional 3 minutes to cool and set.
- Press Down Gently: Gently press the filler down with your finger to ensure it adheres well to the sub-patch and the edges of the leather.
- Repeat Layers: Repeat the process of applying thin layers, drying, and pressing down until the filler is just below the surface of the leather. Typically, about 4 thin layers are needed when filling a hole. If you only slightly cut out a burn, two thin layers may suffice.
- Final Layer: For the last layer, wipe the filler over the hole so that it stays level with the leather surface. Ensure it’s as smooth as possible.
3.6. Recreating Grain Pattern (Optional)
- Obtain a Grain Pad: You can purchase a ready-made grain pad or use a grain copier set from CARDIAGTECH.NET to take a custom grain pattern from your leather. Alternatively, use a grain repair product to replace the grain by hand.
- Press the Grain Pad: With the heavy filler level with the leather surface, place the grain pad onto the filler and press it down gently.
- Remove and Dry: Remove the grain pad after pressing it down, and then dry the filler with a hair dryer.
- Set for 5 Minutes: Leave the filler to set for about 5 minutes.
- Sand the Surface: Gently sand the leather surface to make it smooth. This helps to blend the repair seamlessly with the surrounding leather.
3.7. Applying Colorant to Disguise Repair
- Match the Color: Use a leather touch-up kit to match the color of the leather. You can also send a piece of leather to CARDIAGTECH.NET for professional color matching. Check their color charts database to see if your color has already been matched.
- Apply Colorant: Use a cotton swab to apply the colorant to the filler. Dry with a hair dryer for about 1 minute.
- Repeat Application: Apply more color until it blends in perfectly with the surrounding leather. Thin, even layers are key to a seamless finish.
3.8. Finishing Touches
- Apply Leather Finish: Sponge some color onto the filler and further around it to blend it in with the leather. This helps to seamlessly integrate the repair with the original leather.
- Match the Sheen: Sponge the finish onto the area to match the sheen of the surrounding leather. This final step ensures the repair is virtually invisible.
- Condition the Leather: Once the repair is complete, apply a leather conditioner to moisturize the leather and maintain its suppleness.
4. Advanced Techniques for a Professional Finish
Achieving a truly professional finish often requires advanced techniques and attention to detail.
4.1. Custom Color Matching
Getting the color match perfect is crucial for an invisible repair. CARDIAGTECH.NET offers custom color matching services to ensure the colorant blends seamlessly with your car’s leather.
- Send a Sample: Send a small sample of your car’s leather to CARDIAGTECH.NET.
- Professional Matching: Their experts will analyze the sample and create a custom colorant that perfectly matches your leather.
- Guaranteed Blend: This ensures that the repaired area is virtually indistinguishable from the surrounding leather.
4.2. Mastering Grain Replication
Replicating the leather’s grain pattern is another key element in achieving a professional finish.
- Grain Copier Set: Use CARDIAGTECH.NET’s grain copier set to take an impression of the surrounding leather.
- Create a Grain Pad: Use the impression to create a custom grain pad.
- Emboss the Filler: Press the grain pad into the filler while it’s still wet to emboss the texture.
- Seamless Texture: This ensures that the repaired area has the same texture as the original leather.
4.3. Blending Techniques for Invisible Repairs
Blending the colorant and finish properly is essential for an invisible repair.
- Thin Layers: Apply the colorant and finish in thin, even layers.
- Feathering: Feather the edges of the colorant and finish to blend them into the surrounding leather.
- Multiple Coats: Apply multiple coats of colorant and finish, allowing each coat to dry before applying the next.
- Gradual Integration: This gradual integration ensures a seamless transition between the repaired area and the original leather.
5. Maintaining Your Leather Car Seats
Once you’ve repaired the cigarette burn, proper maintenance is essential to keep your leather car seats in top condition.
5.1. Regular Cleaning
- Dust and Wipe: Regularly dust and wipe down your leather seats with a soft cloth to remove dirt and debris.
- Leather Cleaner: Use a pH-balanced leather cleaner to clean the seats every few months.
- Gentle Cleaning: Apply the cleaner to a microfiber cloth and gently wipe the seats. Avoid applying cleaner directly to the leather.
5.2. Conditioning
- Leather Conditioner: Apply a leather conditioner every 3-6 months to keep the leather supple and prevent cracking.
- Even Application: Apply the conditioner evenly to the seats and allow it to soak in for a few hours.
- Buff Off Excess: Buff off any excess conditioner with a clean cloth.
5.3. Protection from the Elements
- Park in the Shade: Park your car in the shade whenever possible to protect the leather from direct sunlight.
- Window Tint: Consider installing window tint to reduce the amount of UV radiation that enters your car.
- Seat Covers: Use seat covers to protect the leather from spills, stains, and wear.
5.4. Prompt Spill Cleanup
- Act Quickly: Clean up spills immediately to prevent them from staining or damaging the leather.
- Blot Gently: Blot the spill with a clean cloth, working from the outside in.
- Avoid Rubbing: Avoid rubbing the spill, as this can spread it and damage the leather.
- Leather Cleaner: Use a leather cleaner to remove any remaining residue.
6. Common Mistakes to Avoid
Avoiding common mistakes can save you time and ensure a better repair outcome.
6.1. Using the Wrong Products
- Leather-Specific Products: Always use products specifically designed for leather.
- Avoid Harsh Chemicals: Avoid using harsh chemicals or abrasive cleaners, as these can damage the leather.
- Test in a Hidden Area: Test any new product in a hidden area before applying it to the entire seat.
6.2. Applying Too Much Filler at Once
- Thin Layers: Apply the filler in thin layers, allowing each layer to dry before applying the next.
- Avoid Shrinkage: Applying too much filler at once can cause shrinkage and cracking.
- Patience is Key: Patience is key to achieving a smooth, even finish.
6.3. Neglecting Color Matching
- Accurate Match: Ensure the colorant accurately matches the color of your leather.
- Custom Matching: Consider using a custom color matching service for a perfect blend.
- Test Before Applying: Test the colorant in a hidden area before applying it to the entire repaired area.
6.4. Skipping the Finishing Touches
- Leather Finish: Applying a leather finish is essential for sealing and protecting the repaired area.
- Sheen Matching: Ensure the finish matches the sheen of the surrounding leather.
- Seamless Integration: This helps to seamlessly integrate the repair with the original leather.
7. Why Choose CARDIAGTECH.NET for Your Leather Repair Needs
CARDIAGTECH.NET is your trusted partner for all your leather repair needs. With high-quality products, expert advice, and exceptional customer service, CARDIAGTECH.NET ensures you achieve the best possible results.
7.1. High-Quality Products
CARDIAGTECH.NET offers a wide range of high-quality leather repair products, including complete repair kits, colorants, finishes, and conditioners.
- Premium Materials: All products are made from premium materials and are designed to deliver professional-grade results.
- Comprehensive Kits: Complete repair kits include everything you need for a successful repair.
- Trusted Brands: CARDIAGTECH.NET carries trusted brands known for their quality and performance.
7.2. Expert Advice
CARDIAGTECH.NET provides expert advice and support to guide you through the repair process.
- Step-by-Step Guides: Detailed step-by-step guides and videos are available to help you with your repair.
- Customer Support: Knowledgeable customer support representatives are available to answer your questions and provide assistance.
- Professional Tips: CARDIAGTECH.NET shares professional tips and techniques to help you achieve the best possible results.
7.3. Exceptional Customer Service
CARDIAGTECH.NET is committed to providing exceptional customer service.
- Fast Shipping: Orders are processed and shipped quickly to ensure you receive your products in a timely manner.
- Satisfaction Guarantee: CARDIAGTECH.NET offers a satisfaction guarantee on all products.
- Easy Returns: Easy returns are available if you are not completely satisfied with your purchase.
7.4. Success Stories and Testimonials
Many customers have successfully repaired cigarette burns in their leather car seats using CARDIAGTECH.NET products and guidance.
- Before and After Photos: See before and after photos of successful repairs.
- Customer Testimonials: Read customer testimonials and reviews to see how CARDIAGTECH.NET has helped others restore their leather car seats.
- Proven Results: CARDIAGTECH.NET has a proven track record of delivering high-quality products and exceptional results.
8. Cost Analysis of DIY vs. Professional Repair
Deciding whether to repair a cigarette burn yourself or hire a professional depends on your budget, skill level, and the extent of the damage.
8.1. DIY Repair Costs
- Repair Kit: A complete leather repair kit from CARDIAGTECH.NET typically costs between $50 and $150, depending on the contents and quality.
- Additional Supplies: You may need to purchase additional supplies, such as leather cleaner, conditioner, and sandpaper, which can add another $20 to $50 to the cost.
- Total Cost: The total cost of a DIY repair typically ranges from $70 to $200.
8.2. Professional Repair Costs
- Assessment Fee: Some professionals charge an assessment fee to evaluate the damage.
- Labor Costs: Labor costs can range from $50 to $100 per hour, depending on the complexity of the repair.
- Material Costs: Professionals may charge additional fees for materials used in the repair.
- Total Cost: The total cost of a professional repair can range from $150 to $500 or more.
8.3. Factors Influencing the Decision
- Skill Level: If you have experience with leather repair and are comfortable working with tools and chemicals, a DIY repair may be a good option.
- Extent of Damage: If the damage is minor and superficial, a DIY repair is likely sufficient. If the damage is extensive or requires specialized techniques, a professional repair may be necessary.
- Budget: A DIY repair is generally more affordable than a professional repair.
- Time Commitment: A DIY repair requires time and effort, while a professional repair can be completed more quickly.
8.4. Potential Savings with DIY Repair
By choosing a DIY repair, you can save a significant amount of money compared to hiring a professional.
- Cost Savings: DIY repairs can save you hundreds of dollars compared to professional repairs.
- Learning Experience: DIY repairs provide a valuable learning experience and allow you to develop new skills.
- Convenience: DIY repairs can be completed at your own pace and on your own schedule.
9. Frequently Asked Questions (FAQs)
Here are some frequently asked questions about repairing cigarette burns in leather car seats.
- Can I repair a cigarette burn in leather myself?
- Yes, with the right tools, materials, and guidance, you can successfully repair a cigarette burn in leather yourself. CARDIAGTECH.NET provides comprehensive repair kits and step-by-step guides to help you through the process.
- What tools do I need to repair a cigarette burn in leather?
- Essential tools include a leather cleaner, degreaser, scalpel, tweezers, sub-patch material, leather glue, heavy leather filler, palette knife, grain pad (optional), leather colorant, cotton swabs, leather finish, hair dryer, and fine-grit sandpaper.
- How do I match the color of the leather for the repair?
- Use a leather touch-up kit to match the color of the leather. You can also send a piece of leather to CARDIAGTECH.NET for professional color matching. Check their color charts database to see if your color has already been matched.
- How long does it take to repair a cigarette burn in leather?
- The repair time depends on the extent of the damage and your skill level. A simple repair may take 2-3 hours, while a more complex repair could take 4-6 hours.
- What is a sub-patch, and why is it necessary?
- A sub-patch is a piece of canvas or leather that is inserted behind the damaged area to provide a backing for the filler. It is necessary to provide structural support and prevent the filler from falling through the hole.
- How many layers of filler should I apply?
- Apply the filler in thin layers, allowing each layer to dry before applying the next. Typically, about 4 thin layers are needed when filling a hole. If you only slightly cut out a burn, two thin layers may suffice.
- How do I recreate the grain pattern on the repaired area?
- Use a grain pad to emboss a texture into the filler, mimicking the natural grain of the leather. You can purchase a ready-made grain pad or use a grain copier set from CARDIAGTECH.NET to take a custom grain pattern from your leather.
- What is the best way to clean and maintain leather car seats?
- Regularly dust and wipe down your leather seats with a soft cloth. Use a pH-balanced leather cleaner to clean the seats every few months, and apply a leather conditioner every 3-6 months to keep the leather supple and prevent cracking.
- Can I use household cleaners to clean leather car seats?
- No, avoid using household cleaners or abrasive cleaners, as these can damage the leather. Always use products specifically designed for leather.
- Where can I find high-quality leather repair products?
- CARDIAGTECH.NET offers a wide range of high-quality leather repair products, including complete repair kits, colorants, finishes, and conditioners.
10. Get Started Today
Ready to restore your leather car seats to their former glory? CARDIAGTECH.NET provides the tools, materials, and expert advice you need to successfully repair cigarette burns and other leather damage. Don’t let unsightly burns detract from your car’s appearance.
10.1. Visit CARDIAGTECH.NET
Visit CARDIAGTECH.NET today to explore their selection of high-quality leather repair products.
10.2. Contact Us
Contact CARDIAGTECH.NET at 276 Reock St, City of Orange, NJ 07050, United States, or via Whatsapp at +1 (641) 206-8880 for expert advice and support.
10.3. Order Your Repair Kit
Order your complete leather repair kit from CARDIAGTECH.NET and start your repair project today.
Facing challenges with your car’s leather repair? Don’t let those cigarette burns ruin your car’s interior. Contact CARDIAGTECH.NET now for expert guidance and premium repair kits. Our team is ready to assist you with tailored solutions, ensuring a seamless restoration. Reach out via Whatsapp at +1 (641) 206-8880 or visit our website to discover how we can help you achieve a flawless finish. Let us help you restore your car’s beauty and value.