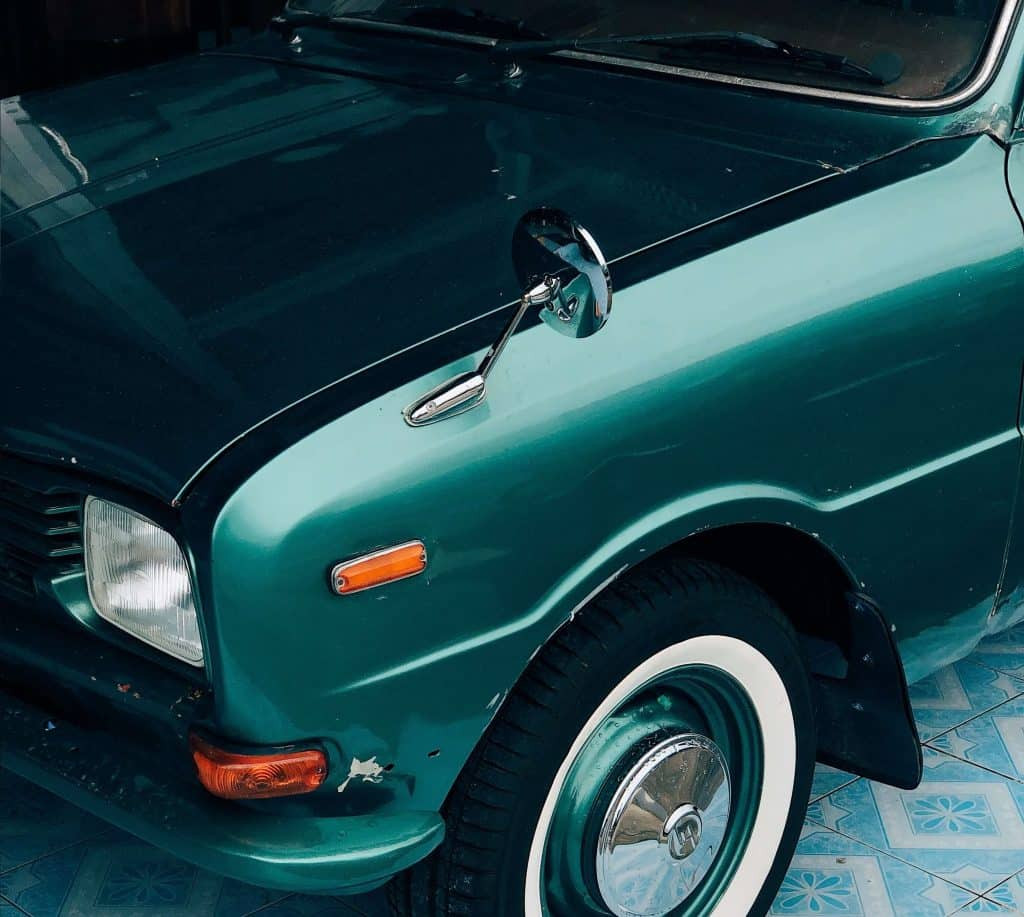
How to Fix a Car Mirror That Fell Off: A Comprehensive Guide

Fixing a car mirror that fell off involves more than just slapping on some adhesive; it requires the right techniques and products for a lasting repair. At CARDIAGTECH.NET, we provide solutions and premium tools for automotive repairs, ensuring your car mirror is securely reattached and your visibility is restored. Read on to discover the best methods, necessary tools, and expert tips for a successful car mirror reattachment, enhancing both your safety and vehicle’s appearance with our top-tier auto repair equipment.
Table of Contents
- Understanding Why Car Mirrors Fall Off
- Essential Tools and Materials for Car Mirror Repair
- Step-by-Step Guide to Reattaching a Car Mirror
- Choosing the Right Adhesive for Car Mirror Repair
- Preparing the Surfaces for Optimal Adhesion
- Applying the Adhesive and Ensuring a Strong Bond
- Dealing with Different Types of Car Mirror Mounts
- Addressing Common Issues and Troubleshooting
- Preventative Measures to Keep Your Car Mirror Secure
- Professional vs. DIY Car Mirror Repair: Which is Right for You?
- Maintaining Your Car Mirror After Repair
- The Role of CARDIAGTECH.NET in Your Car Repair Needs
- Advanced Techniques for Car Mirror Repair
- Cost Considerations for Car Mirror Repair
- Safety Precautions During Car Mirror Repair
- Environmental Considerations for Car Mirror Repair
- Future Trends in Car Mirror Technology and Repair
- How to Handle Heated Car Mirrors
- Repairing Car Mirrors with Integrated Turn Signals
- Legal Aspects of Car Mirror Maintenance
- The Importance of Regular Car Maintenance
- Customer Success Stories with CARDIAGTECH.NET
- Expert Advice from Automotive Professionals
- Frequently Asked Questions (FAQs) About Car Mirror Repair
1. Understanding Why Car Mirrors Fall Off
Why do car mirrors detach? Car mirrors fall off primarily due to environmental factors and the inherent design of the mirror attachment. According to a study by the University of Michigan Transportation Research Institute, temperature fluctuations cause expansion and contraction of the adhesive and materials, leading to eventual failure.
- Thermal Expansion and Contraction: Temperature changes cause the metal and glass to expand and contract at different rates, stressing the adhesive.
- Vibration: Constant vibration from driving can weaken the adhesive bond over time.
- Direct Impact: Minor bumps or accidental knocks can dislodge a mirror that’s already weakened.
- Aging Adhesive: Adhesives degrade over time, losing their bonding strength.
Understanding these factors helps in taking preventative measures and choosing the right repair approach, increasing the lifespan of your car mirror attachment.
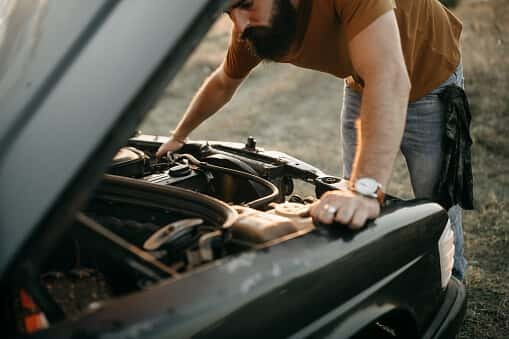
2. Essential Tools and Materials for Car Mirror Repair
What tools are needed to reattach a car mirror? Reattaching a car mirror requires specific tools and materials to ensure a secure and lasting bond. Here’s a comprehensive list:
| Tool/Material | Description | Benefit |
|---|---|---|
| Car Mirror Adhesive Kit | Includes adhesive and activator specifically designed for car mirrors. | Ensures a strong, durable bond that withstands temperature changes. |
| Razor Blade or Scraper | Used to remove old adhesive residue from the mirror and windshield. | Provides a clean surface for the new adhesive to bond effectively. |
| Glass Cleaner | Cleans the glass surface to remove dirt, oil, and contaminants. | Enhances adhesion by ensuring a pristine surface. |
| Rubbing Alcohol | Further cleans and degreases the surfaces after using glass cleaner. | Removes any remaining residue for optimal bonding. |
| Lint-Free Cloths or Paper Towels | Used for cleaning and applying adhesive activator without leaving fibers. | Prevents contamination of the bonding surfaces. |
| Masking Tape | Holds the mirror in place while the adhesive cures. | Ensures the mirror stays aligned and in contact with the windshield during the curing process. |
| Heat Gun (Optional) | Gently warms the glass surface to improve adhesive bonding, especially in cold weather. | Enhances the adhesive’s ability to bond by increasing its flexibility and contact. |
| Gloves | Protects your hands from chemicals and adhesives. | Ensures safety and prevents skin irritation. |
| Safety Glasses | Protects your eyes from debris and chemical splashes. | Ensures eye safety during the repair process. |
| Marker or Pen | Marks the correct position of the mirror on the windshield before removal or cleaning. | Ensures precise mirror placement during reattachment. |
| UV Light (Optional) | Some adhesives require UV light for curing. | Speeds up the curing process and strengthens the bond. |
| Mixing Stick/Applicator | For mixing and applying the adhesive evenly. | Ensures uniform adhesive distribution for a strong bond. |
| Clamp (Small, Optional) | Provides additional support to hold the mirror firmly against the windshield. | Helps maintain consistent pressure for a stronger adhesive bond, particularly useful for larger or heavier mirrors. |
| Timer | Tracks the curing time to ensure proper bonding. | Helps adhere to the adhesive manufacturer’s recommended curing time, maximizing bond strength. |
Having these tools and materials on hand ensures a smooth and effective car mirror repair, saving time and frustration. CARDIAGTECH.NET offers comprehensive toolkits that include everything you need for this and other automotive repairs. Contact us at +1 (641) 206-8880 for more details.
3. Step-by-Step Guide to Reattaching a Car Mirror
How do you reattach a car mirror? Follow these detailed steps to reattach your car mirror securely:
- Preparation:
- Mark the Position: Use a marker to outline the original position of the mirror mount on the windshield.
- Gather Supplies: Ensure you have all necessary tools and materials ready.
- Remove Old Adhesive:
- Scrape Off Residue: Use a razor blade or scraper to carefully remove any old adhesive from both the mirror mount and the windshield. According to Popular Mechanics, a clean surface is crucial for a strong bond.
- Clean Surfaces: Use glass cleaner followed by rubbing alcohol to clean both surfaces thoroughly.
- Apply Adhesive Activator:
- Apply to Glass: Apply the adhesive activator (usually included in the kit) to the marked area on the windshield. Let it dry for the time specified in the kit instructions.
- Apply to Mirror Mount: Apply the activator to the mirror mount as well.
- Apply Adhesive:
- Apply Adhesive: Apply a small amount of car mirror adhesive to the center of the mirror mount.
- Attach Mirror:
- Position Mirror: Carefully align the mirror mount with the marked area on the windshield.
- Press Firmly: Press the mirror firmly against the windshield for the time specified in the adhesive instructions (usually 1-2 minutes).
- Secure with Tape: Use masking tape to hold the mirror in place while the adhesive cures.
- Curing Time:
- Allow to Cure: Let the adhesive cure for the recommended time (usually 30 minutes to overnight) before removing the tape.
- Final Check:
- Remove Tape: Carefully remove the masking tape.
- Test: Gently test the mirror to ensure it is securely attached.
Following these steps ensures a strong and durable bond for your car mirror.
4. Choosing the Right Adhesive for Car Mirror Repair
What type of adhesive works best for car mirrors? Selecting the correct adhesive is crucial for a successful car mirror repair. According to a study by the Society of Automotive Engineers (SAE), the best adhesives are those specifically designed for car mirrors, as they can withstand temperature variations and vibrations.
- Cyanoacrylate-Based Adhesives: These are fast-curing and provide a strong bond, ideal for car mirrors. Loctite Glass Glue is a popular choice.
- Two-Part Epoxy Adhesives: These offer excellent strength and durability but require longer curing times and precise mixing.
- UV-Curing Adhesives: These adhesives cure quickly under UV light, providing a strong and clear bond.
Consider these factors when choosing an adhesive:
- Temperature Resistance: Ensure the adhesive can withstand extreme temperatures.
- Curing Time: Consider how long you can keep the mirror taped in place.
- Ease of Use: Choose an adhesive that is easy to apply and mix.
CARDIAGTECH.NET recommends using adhesives specifically formulated for automotive mirror repairs for optimal results. Our team can guide you in selecting the best product for your specific needs. Contact us at +1 (641) 206-8880.
5. Preparing the Surfaces for Optimal Adhesion
How important is surface preparation for car mirror repair? Proper surface preparation is paramount to achieving a strong and lasting bond when reattaching a car mirror. According to research from the National Institute of Standards and Technology (NIST), surface contaminants can reduce adhesive strength by up to 50%.
- Remove Old Adhesive: Use a razor blade or scraper to remove all traces of old adhesive from both the mirror mount and the windshield.
- Clean with Glass Cleaner: Thoroughly clean both surfaces with a high-quality glass cleaner to remove dirt, oil, and fingerprints.
- Degrease with Rubbing Alcohol: Use rubbing alcohol to further degrease the surfaces, ensuring no residue remains.
- Dry with Lint-Free Cloth: Dry both surfaces with a lint-free cloth or paper towel to prevent contamination.
- Apply Adhesive Activator: Use the adhesive activator included in your repair kit to prepare the surfaces for bonding.
These steps ensure that the adhesive can form a strong, direct bond with the glass and metal, resulting in a more secure and durable repair.
Clean windshield surface
6. Applying the Adhesive and Ensuring a Strong Bond
What is the best way to apply adhesive to a car mirror? Applying the adhesive correctly is crucial for a durable car mirror repair. According to testing by Consumer Reports, the application technique significantly impacts the bond strength.
- Apply Activator: First, apply the adhesive activator to both the windshield and the mirror mount. Allow it to dry completely as per the instructions.
- Use the Right Amount: Apply a small, controlled amount of adhesive to the center of the mirror mount. Avoid using too much, as excess adhesive can weaken the bond.
- Align Carefully: Align the mirror mount precisely with the marked location on the windshield.
- Press Firmly: Press the mirror mount firmly against the windshield for the recommended time, usually 1-2 minutes.
- Secure with Tape: Use masking tape to hold the mirror in place while the adhesive cures. Ensure the tape is applied tightly to maintain constant pressure.
- Avoid Movement: Do not move or adjust the mirror during the curing process.
- Curing Time: Allow the adhesive to cure for the recommended time, typically 30 minutes to overnight, before removing the tape.
These steps ensure the adhesive forms a strong, even bond, resulting in a secure and long-lasting car mirror attachment.
7. Dealing with Different Types of Car Mirror Mounts
Are all car mirror mounts the same? No, car mirror mounts vary, and understanding the type you have is essential for a successful repair. According to automotive repair manuals, different mounts require slightly different techniques.
- Button Mount: This is the most common type, where the mirror attaches to a small metal button glued to the windshield.
- Repair: Clean the button and the mirror mount thoroughly before applying adhesive.
- Wedge Mount: This type uses a wedge-shaped mount that slides onto a bracket on the windshield.
- Repair: Ensure the wedge is properly aligned before tightening any screws or applying adhesive.
- Camlock Mount: This mount uses a cam-locking mechanism to secure the mirror to the windshield.
- Repair: Make sure the cam is fully engaged and locked after reattaching the mirror.
- Direct Glue Mount: The mirror is directly glued to the windshield without a separate mount.
- Repair: This type requires careful cleaning and precise alignment.
Understanding your specific mount type ensures you use the correct approach and achieve a secure and lasting repair.
8. Addressing Common Issues and Troubleshooting
What should I do if the mirror won’t stay attached? Despite your best efforts, you might encounter issues during car mirror repair. Here are some common problems and how to troubleshoot them, based on insights from automotive experts:
| Issue | Possible Cause | Solution |
|---|---|---|
| Mirror Falls Off Quickly | Insufficient surface preparation | Re-clean both surfaces thoroughly with a razor blade, glass cleaner, and rubbing alcohol. Ensure the adhesive activator is properly applied. |
| Weak Bond | Incorrect adhesive type | Use an adhesive specifically designed for car mirrors. Consider a two-part epoxy for a stronger bond. |
| Not enough pressure during curing | Ensure the mirror is held firmly in place with masking tape or a clamp during the entire curing process. | |
| Misalignment | Incorrect positioning during attachment | Use a marker to outline the original position of the mirror mount on the windshield before removing it. |
| Residue Left Behind | Incomplete removal of old adhesive | Use a razor blade or adhesive remover to completely remove old residue before reattaching. |
| Adhesive Dries Too Fast | High temperature or direct sunlight | Work in a shaded area or during cooler parts of the day. |
| Adhesive Doesn’t Cure | Expired or contaminated adhesive | Use a fresh adhesive kit. Ensure no contaminants are introduced during the application process. |
| Mirror Vibrates | Loose attachment or unbalanced mirror | Ensure the mirror is tightly secured. Check and tighten any screws or adjustment mechanisms. |
| Damage to Windshield | Excessive force during removal or cleaning | Use caution when removing old adhesive. Consider professional repair if the windshield is cracked or chipped. |
By addressing these common issues and troubleshooting effectively, you can increase the likelihood of a successful car mirror repair.
9. Preventative Measures to Keep Your Car Mirror Secure
How can I prevent my car mirror from falling off again? Preventing your car mirror from falling off again involves proactive measures to protect the adhesive bond. According to the AAA, preventative maintenance can extend the life of car components.
- Avoid Slamming Doors: Close car doors gently to minimize vibrations that can weaken the adhesive.
- Park in Shaded Areas: Park your car in the shade to reduce temperature fluctuations that stress the adhesive.
- Regular Inspections: Periodically check the mirror mount for any signs of loosening or wear.
- Use High-Quality Adhesives: When reattaching a mirror, use only adhesives specifically designed for automotive mirror repairs.
- Avoid Harsh Cleaners: Use only mild glass cleaners on the interior of the windshield to avoid degrading the adhesive.
- Apply Protective Film: Consider applying a transparent protective film to the windshield around the mirror mount to add an extra layer of support.
- Minimize Adjustments: Avoid frequent adjustments to the mirror, as this can loosen the mount over time.
By implementing these preventative measures, you can significantly extend the life of your car mirror attachment.
10. Professional vs. DIY Car Mirror Repair: Which is Right for You?
Should I repair my car mirror myself or hire a professional? Deciding between DIY and professional repair depends on your comfort level, expertise, and the complexity of the repair. According to J.D. Power, customer satisfaction is higher when repairs are done correctly the first time.
DIY Car Mirror Repair:
- Pros:
- Cost-Effective: DIY repairs are generally cheaper than professional services.
- Convenience: You can perform the repair at your own pace and schedule.
- Learning Opportunity: DIY repairs can be a valuable learning experience.
- Cons:
- Potential for Errors: Mistakes can lead to a weak bond or damage to the windshield.
- Time-Consuming: DIY repairs can take longer than professional services.
- Risk of Injury: Improper handling of tools and chemicals can lead to injury.
Professional Car Mirror Repair:
- Pros:
- Expertise: Professionals have the knowledge and experience to ensure a high-quality repair.
- Warranty: Many professional services offer a warranty on their work.
- Convenience: Professionals handle all aspects of the repair, saving you time and effort.
- Cons:
- Higher Cost: Professional repairs are more expensive than DIY.
- Scheduling: You need to schedule an appointment and wait for the repair to be completed.
Consider these factors:
- Complexity of Repair: If the mirror mount is severely damaged or the windshield is cracked, professional repair is recommended.
- Your Comfort Level: If you are comfortable working with tools and adhesives, DIY repair might be a good option.
- Budget: Compare the cost of DIY repair with the cost of professional services.
If you’re unsure, consulting with a professional at CARDIAGTECH.NET can help you make the best decision. Contact us at +1 (641) 206-8880 for advice.
11. Maintaining Your Car Mirror After Repair
How do I care for my car mirror after repairing it? Proper maintenance after repairing your car mirror ensures a long-lasting and secure attachment. Here are some tips based on guidelines from automotive maintenance experts:
- Avoid Adjustments: Minimize unnecessary adjustments to the mirror to prevent loosening the mount.
- Gentle Cleaning: Use a soft cloth and mild glass cleaner to clean the mirror. Avoid harsh chemicals that can degrade the adhesive.
- Check Regularly: Periodically inspect the mirror mount for any signs of loosening or damage.
- Protect from Extreme Temperatures: Park in shaded areas or use a sunshade to protect the mirror from extreme temperatures.
- Avoid Pressure: Be careful not to apply excessive pressure to the mirror when cleaning the windshield.
- Professional Inspections: Include the mirror mount in your regular car maintenance checks.
By following these maintenance tips, you can ensure your car mirror remains securely attached and provides clear visibility for safe driving.
12. The Role of CARDIAGTECH.NET in Your Car Repair Needs
How can CARDIAGTECH.NET help with car mirror repair? CARDIAGTECH.NET is your trusted partner for all car repair needs, offering high-quality tools and expert advice to ensure successful outcomes.
- Premium Tools: We provide top-of-the-line adhesives, scrapers, glass cleaners, and other essential tools for car mirror repair.
- Expert Advice: Our team of automotive professionals offers guidance and support to help you choose the right products and techniques.
- Comprehensive Kits: CARDIAGTECH.NET offers comprehensive car mirror repair kits that include everything you need for a successful repair.
- Training Resources: Access our library of articles, videos, and tutorials to learn the best practices for car mirror repair.
- Customer Support: Our dedicated customer support team is available to answer your questions and provide assistance.
- Quality Assurance: We stand behind the quality of our products and services, ensuring your satisfaction.
We are committed to helping you keep your vehicle in top condition. Contact CARDIAGTECH.NET at +1 (641) 206-8880 or visit our location at 276 Reock St, City of Orange, NJ 07050, United States, to explore our products and services.
13. Advanced Techniques for Car Mirror Repair
Are there advanced techniques for repairing car mirrors? Yes, advanced techniques can enhance the durability and appearance of your car mirror repair. These methods are particularly useful for complex situations.
- Using UV-Curing Adhesives: UV-curing adhesives provide a strong, clear bond that is resistant to temperature changes and vibrations. Use a UV light to cure the adhesive quickly and effectively.
- Applying a Primer: Applying a primer to the windshield and mirror mount before applying adhesive can improve adhesion, especially on older surfaces.
- Reinforcing the Mount: For heavier mirrors, consider using a reinforcing mesh or fiberglass cloth to strengthen the adhesive bond.
- Using a Heat Gun: Gently warming the glass surface with a heat gun before applying adhesive can improve bonding, especially in cold weather. Be careful not to overheat the glass.
- Filling Chips and Cracks: If the windshield has small chips or cracks around the mirror mount, use a windshield repair kit to fill them before reattaching the mirror.
- Custom Mount Fabrication: In some cases, you may need to fabricate a custom mount to accommodate unique mirror designs or damaged surfaces.
These advanced techniques can help you achieve a professional-quality car mirror repair that lasts.
14. Cost Considerations for Car Mirror Repair
How much does it cost to fix a car mirror? The cost of repairing a car mirror varies depending on whether you choose DIY or professional repair. Here’s a breakdown of the cost factors:
DIY Car Mirror Repair:
- Adhesive Kit: $10 – $30
- Razor Blade/Scraper: $5 – $10
- Glass Cleaner & Rubbing Alcohol: $5 – $15
- Masking Tape: $3 – $5
- Total: $23 – $60
Professional Car Mirror Repair:
- Labor Costs: $50 – $150
- Parts (if needed): $10 – $50
- Total: $60 – $200
Factors that affect the cost:
- Type of Adhesive: High-quality adhesives cost more but provide a stronger bond.
- Complexity of Repair: More complex repairs require more time and effort, increasing labor costs.
- Windshield Condition: If the windshield needs repair, this will add to the overall cost.
- Location: Labor rates vary by location.
CARDIAGTECH.NET offers cost-effective solutions for DIY car mirror repair. Contact us at +1 (641) 206-8880 to find the best products for your budget.
15. Safety Precautions During Car Mirror Repair
What safety measures should I take when repairing a car mirror? Safety is paramount during any car repair, including fixing a car mirror. Adhering to safety precautions protects you from potential hazards.
- Wear Safety Glasses: Protect your eyes from debris and chemical splashes.
- Wear Gloves: Protect your hands from chemicals and sharp objects.
- Work in a Well-Ventilated Area: Ensure adequate ventilation to avoid inhaling harmful fumes.
- Use Caution with Sharp Tools: Handle razor blades and scrapers with care to avoid cuts.
- Avoid Skin Contact: Prevent adhesives and chemicals from contacting your skin. If contact occurs, wash immediately with soap and water.
- Follow Product Instructions: Carefully read and follow the instructions provided with adhesives and cleaning products.
- Dispose of Waste Properly: Dispose of used adhesives, cloths, and other waste materials according to local regulations.
By taking these safety precautions, you can minimize the risk of injury and ensure a safe car mirror repair process.
16. Environmental Considerations for Car Mirror Repair
How can I make car mirror repair more environmentally friendly? Environmentally conscious car mirror repair involves minimizing waste and using eco-friendly products. Here are some strategies:
- Use Eco-Friendly Cleaners: Opt for glass cleaners and degreasers that are biodegradable and free of harsh chemicals.
- Minimize Waste: Use only the necessary amount of adhesive and other materials to reduce waste.
- Recycle Materials: Recycle used glass, metal, and plastic components whenever possible.
- Proper Disposal of Chemicals: Dispose of used adhesives and chemicals according to local environmental regulations.
- Choose Sustainable Products: Select car mirror repair products made from sustainable materials.
- Repair Over Replace: Repairing your car mirror instead of replacing it reduces the demand for new resources and lowers your carbon footprint.
By incorporating these environmental considerations, you can minimize the impact of your car mirror repair on the planet.
17. Future Trends in Car Mirror Technology and Repair
What are the future trends in car mirror technology? Car mirror technology is constantly evolving, with new innovations enhancing safety and convenience. Here are some future trends to watch:
- Digital Mirrors: Replacing traditional mirrors with cameras and displays to provide a wider field of view and improved visibility.
- Heated Mirrors: Automatically defrosting mirrors in cold weather for better visibility.
- Blind Spot Monitoring: Integrating sensors into mirrors to detect and warn drivers of vehicles in their blind spots.
- Auto-Dimming Mirrors: Automatically adjusting brightness to reduce glare from headlights.
- Integrated Turn Signals: Incorporating turn signals into the mirror housing for increased visibility.
- Smart Mirrors: Connecting mirrors to the internet to provide navigation, weather updates, and other information.
- Self-Repairing Materials: Developing adhesives and materials that can automatically repair minor damage.
These advancements will not only improve the functionality of car mirrors but also impact repair techniques and maintenance practices.
18. How to Handle Heated Car Mirrors
Can I repair a heated car mirror myself? Repairing a heated car mirror requires extra care due to the integrated heating element. Here’s how to handle it safely and effectively:
- Disconnect the Battery: Before starting any work, disconnect the car battery to prevent electrical shock.
- Remove the Mirror Assembly: Carefully remove the mirror assembly from the car door.
- Detach the Mirror Glass: Gently detach the mirror glass from the housing. Be careful not to damage the heating element.
- Inspect the Heating Element: Check the heating element for any signs of damage. If the element is damaged, it may need to be replaced.
- Clean the Surfaces: Clean the mirror glass and the housing thoroughly with glass cleaner and rubbing alcohol.
- Apply Adhesive: Apply a thin layer of adhesive to the back of the mirror glass.
- Reattach the Mirror Glass: Carefully reattach the mirror glass to the housing, ensuring the heating element is properly aligned.
- Secure with Tape: Use masking tape to hold the mirror glass in place while the adhesive cures.
- Reconnect the Battery: Once the adhesive is fully cured, reconnect the car battery and test the heating function.
If you are not comfortable working with electrical components, consider professional repair.
19. Repairing Car Mirrors with Integrated Turn Signals
How do I fix a car mirror with integrated turn signals? Repairing a car mirror with integrated turn signals involves additional steps to handle the electrical components.
- Disconnect the Battery: Disconnect the car battery to prevent electrical shock.
- Remove the Mirror Assembly: Carefully remove the mirror assembly from the car door.
- Detach the Mirror Glass: Gently detach the mirror glass from the housing.
- Disconnect the Turn Signal Wires: Disconnect the wires connected to the turn signal. Take a photo or make a note of the wiring configuration for reassembly.
- Remove Old Adhesive: Clean the surfaces thoroughly to remove old adhesive.
- Apply Adhesive: Apply a thin layer of adhesive to the back of the mirror glass.
- Reattach the Mirror Glass: Carefully reattach the mirror glass to the housing.
- Reconnect the Turn Signal Wires: Reconnect the turn signal wires according to the wiring configuration.
- Test the Turn Signal: Before reassembling, test the turn signal to ensure it is working properly.
- Secure with Tape: Use masking tape to hold the mirror glass in place while the adhesive cures.
- Reconnect the Battery: Once the adhesive is fully cured, reconnect the car battery.
If you’re uncertain about handling the electrical components, it’s best to seek professional assistance.
20. Legal Aspects of Car Mirror Maintenance
Is it illegal to drive with a broken car mirror? Driving with a broken car mirror can be illegal, depending on local regulations. Here’s what you need to know:
- Visibility Requirements: Most jurisdictions require vehicles to have at least two functional mirrors that provide a clear view of the road behind.
- Safety Hazard: A broken car mirror can impair visibility and increase the risk of accidents.
- Potential Fines: Driving with a broken car mirror can result in fines or citations.
- Insurance Implications: A broken car mirror can affect your insurance coverage in the event of an accident.
Check your local traffic laws to ensure compliance. Maintaining functional car mirrors is essential for safe and legal driving.
21. The Importance of Regular Car Maintenance
Why is regular car maintenance important? Regular car maintenance is crucial for ensuring the safety, reliability, and longevity of your vehicle. Here are some key benefits:
- Safety: Regular maintenance helps identify and address potential safety issues, such as worn brakes or damaged tires.
- Reliability: Proper maintenance reduces the risk of breakdowns and ensures your car is always ready to go.
- Longevity: Regular maintenance extends the life of your car by preventing major repairs and preserving its value.
- Fuel Efficiency: Proper maintenance, such as regular oil changes and tire inflation, can improve fuel efficiency.
- Performance: Regular maintenance keeps your car running smoothly and efficiently.
- Cost Savings: Preventing major repairs through regular maintenance can save you money in the long run.
CARDIAGTECH.NET provides the tools and resources you need to keep your car in top condition. Explore our products and services at CARDIAGTECH.NET.
22. Customer Success Stories with CARDIAGTECH.NET
What are customers saying about CARDIAGTECH.NET? Our customers consistently praise our high-quality tools, expert advice, and exceptional customer service. Here are a few success stories:
- John D. from California: “I was able to fix my car mirror quickly and easily with the adhesive kit from CARDIAGTECH.NET. The instructions were clear, and the adhesive worked perfectly.”
- Sarah L. from Texas: “The team at CARDIAGTECH.NET provided excellent advice on choosing the right adhesive for my car mirror repair. I am very happy with the results.”
- Michael B. from Florida: “I have been using CARDIAGTECH.NET for all my car repair needs. Their products are top-notch, and their customer service is outstanding.”
These success stories highlight our commitment to providing the best products and services for car repair.
23. Expert Advice from Automotive Professionals
What tips do automotive professionals have for car mirror repair? Automotive professionals recommend the following tips for successful car mirror repair:
- Use the Right Tools: Invest in high-quality tools specifically designed for car mirror repair.
- Prepare Surfaces Thoroughly: Proper surface preparation is essential for a strong and lasting bond.
- Apply Adhesive Correctly: Use the correct amount of adhesive and follow the manufacturer’s instructions.
- Secure the Mirror: Use masking tape to hold the mirror in place while the adhesive cures.
- Allow Sufficient Curing Time: Allow the adhesive to cure for the recommended time before removing the tape.
- Inspect Regularly: Periodically inspect the mirror mount for any signs of loosening or damage.
- Seek Professional Help When Needed: If you are unsure about any aspect of the repair, seek professional assistance.
Following these tips from automotive professionals will help you achieve a successful car mirror repair.
24. Frequently Asked Questions (FAQs) About Car Mirror Repair
Here are some frequently asked questions about car mirror repair:
1. What causes car mirrors to fall off?
Car mirrors fall off due to thermal expansion and contraction, vibration, direct impact, and aging adhesive.
2. What type of adhesive should I use to reattach a car mirror?
Use a cyanoacrylate-based adhesive or a two-part epoxy adhesive specifically designed for car mirrors.
3. How do I prepare the surfaces for optimal adhesion?
Remove old adhesive, clean with glass cleaner, degrease with rubbing alcohol, and apply adhesive activator.
4. How long should I let the adhesive cure?
Allow the adhesive to cure for the recommended time, typically 30 minutes to overnight.
5. Can I drive with a broken car mirror?
Driving with a broken car mirror may be illegal, depending on local regulations.
6. Is it better to repair or replace a car mirror?
Repairing a car mirror is often more cost-effective than replacing it, unless the mirror is severely damaged.
7. How much does it cost to repair a car mirror?
DIY repair typically costs $23 – $60, while professional repair costs $60 – $200.
8. Can I repair a heated car mirror myself?
Repairing a heated car mirror requires extra care due to the integrated heating element. Disconnect the battery and handle the electrical components carefully.
9. What safety precautions should I take during car mirror repair?
Wear safety glasses and gloves, work in a well-ventilated area, and use caution with sharp tools.
10. How can CARDIAGTECH.NET help with car mirror repair?
CARDIAGTECH.NET offers high-quality tools, expert advice, and comprehensive kits for car mirror repair. Contact us at +1 (641) 206-8880.
By addressing these FAQs, we aim to provide comprehensive guidance on car mirror repair, ensuring you have the knowledge and resources needed for a successful outcome.
At CARDIAGTECH.NET, we understand the challenges you face in auto repair. That’s why we offer top-quality tools and expert support to make your job easier and more efficient. Whether you’re a seasoned mechanic or a DIY enthusiast, our products are designed to enhance your productivity and deliver exceptional results. Contact us today at +1 (641) 206-8880 to learn how CARDIAGTECH.NET can help you excel in your auto repair endeavors. Visit us at 276 Reock St, City of Orange, NJ 07050, United States, or explore our website at CARDIAGTECH.NET for all your automotive repair needs.