How to Fix a Broken Fuse Holder in Car: A Comprehensive Guide
Fixing a broken fuse holder in your car involves diagnosing the issue, safely disconnecting the power, and either repairing or replacing the damaged holder. CARDIAGTECH.NET provides the tools and expertise needed to restore your car’s electrical system efficiently. Let’s dive into how to address this problem effectively, ensuring your vehicle’s electrical components function smoothly.
1. What is a Fuse Holder and Why Does it Break?
A fuse holder is a protective component in your car’s electrical system designed to house and secure fuses. Its primary function is to protect electrical circuits from overcurrents. When a circuit experiences excessive current, the fuse inside the holder blows, interrupting the flow of electricity and preventing damage to other components. According to a study by the National Highway Traffic Safety Administration (NHTSA), electrical failures, including fuse-related issues, account for approximately 5% of vehicle accidents annually.
Fuse holders break due to several reasons:
- Overloads: Exceeding the current capacity of the fuse can cause the holder to overheat and melt.
- Corrosion: Moisture and environmental factors can corrode the metal components, leading to poor contact and eventual failure.
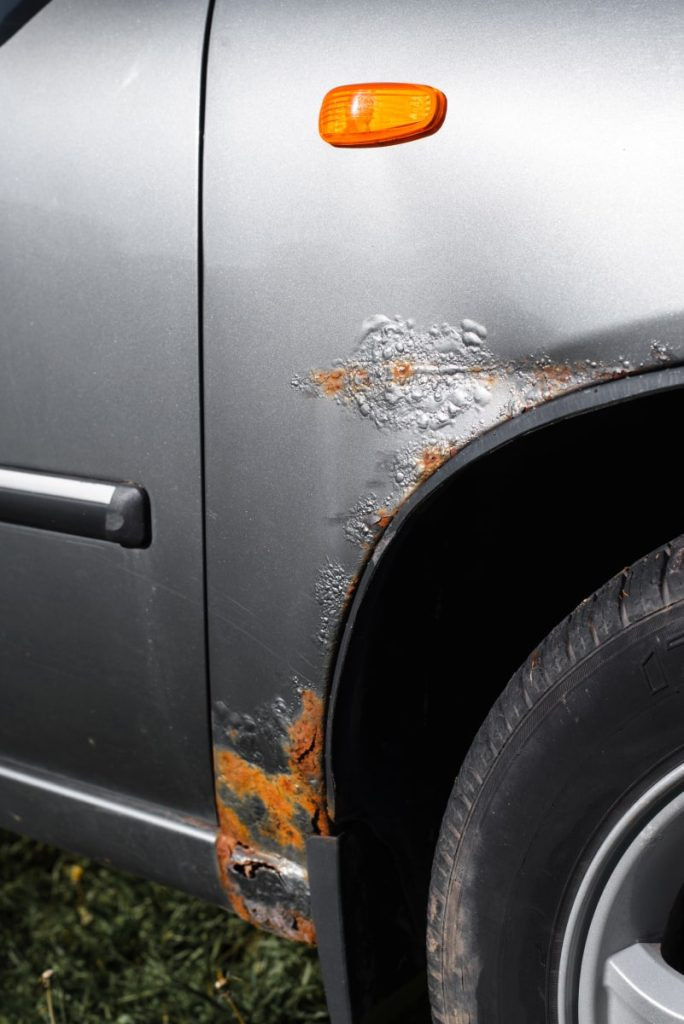
- Physical Damage: Accidents or impacts can physically damage the holder, causing it to crack or break.
- Wear and Tear: Over time, the constant insertion and removal of fuses can wear out the holder’s contacts, leading to a loose connection.
2. Identifying a Broken Fuse Holder
Recognizing the signs of a broken fuse holder early can prevent further damage to your vehicle’s electrical system. Common symptoms include:
- Non-Functional Electrical Components: The most obvious sign is when a specific electrical component, such as the radio, lights, or power windows, stops working.
- Blown Fuses: If a fuse repeatedly blows after being replaced, it could indicate a problem with the fuse holder or the circuit it protects.
- Visible Damage: Inspect the fuse holder for any signs of melting, cracking, or corrosion.
- Loose Fuses: A fuse that doesn’t fit snugly in the holder can indicate a worn or damaged holder.
- Burning Smell: A burning smell near the fuse box can indicate overheating and potential damage to the fuse holder.
3. Essential Tools and Materials
Before starting the repair, gather the necessary tools and materials to ensure a smooth and safe process. Having the right equipment not only makes the job easier but also helps prevent further damage to your vehicle. CARDIAGTECH.NET offers a wide range of high-quality tools perfect for any automotive electrical repair.
- New Fuse Holder: Purchase a replacement fuse holder that matches the specifications of the original.
- Fuses: Ensure you have the correct amperage fuses for replacement.
- Wire Strippers: To strip the insulation from the wires.
- Wire Crimpers: For securely crimping connectors to the wires.
- Pliers: To grip and manipulate wires and connectors.
- Screwdrivers: A set of screwdrivers (Phillips and flathead) to remove and install the fuse box.
- Multimeter: To test the continuity and voltage of the circuit.
- Electrical Tape: To insulate and protect wire connections.
- Heat Shrink Tubing: Provides a secure and insulated connection.
- Heat Gun: To shrink the heat shrink tubing.
- Wiring Diagram: A wiring diagram for your vehicle model is crucial for identifying the correct circuits and wiring.
- Safety Glasses: To protect your eyes from debris.
- Gloves: To protect your hands from dirt and electrical shock.
4. Step-by-Step Guide to Fixing a Broken Fuse Holder
Here’s a detailed guide on how to fix a broken fuse holder, ensuring you can safely and effectively restore your car’s electrical system.
4.1. Safety First: Disconnect the Battery
Before you begin any electrical work on your car, it’s crucial to disconnect the battery. This prevents accidental short circuits and electrical shocks.
- Locate the Battery: Typically, the battery is located under the hood, but in some vehicles, it may be in the trunk or under the rear seat.
- Disconnect the Negative Terminal: Use a wrench to loosen the nut on the negative (-) terminal. Remove the cable and tuck it away from the terminal to prevent accidental contact.
- Disconnect the Positive Terminal: Repeat the process for the positive (+) terminal.
4.2. Locate the Fuse Box
The fuse box is usually located in the driver’s side footwell, under the dashboard, or in the engine compartment. Consult your car’s manual for the exact location. According to a report by the AAA, knowing the location of your car’s fuse box can save significant time and money on minor electrical repairs.
- Consult Your Car’s Manual: Your car’s manual will provide the exact location of the fuse box and a diagram of the fuses.
- Check Common Locations: Look under the dashboard on the driver’s side, in the glove compartment, or under the hood near the battery.
4.3. Identify the Faulty Fuse Holder
Once you’ve located the fuse box, identify the fuse holder that is broken. Use the wiring diagram to help you locate the correct fuse and holder.
- Use the Wiring Diagram: Match the fuse number and function with the diagram to pinpoint the correct fuse holder.
- Visual Inspection: Look for signs of damage such as melting, corrosion, or cracks.
- Test with a Multimeter: Use a multimeter to check for continuity. If there is no continuity, the fuse holder may be faulty.
4.4. Remove the Damaged Fuse Holder
Carefully remove the damaged fuse holder. This may involve disconnecting wires or unscrewing the holder from the fuse box.
- Disconnect Wires: Use a small screwdriver or pliers to disconnect any wires attached to the fuse holder. Make sure to note the position of each wire for reconnection.
- Unscrew the Holder: If the fuse holder is screwed in, use the appropriate screwdriver to remove the screws.
- Remove the Holder: Gently pull the fuse holder out of the fuse box.
4.5. Prepare the Wires
Prepare the wires for connection to the new fuse holder. This involves stripping the insulation and, if necessary, crimping new connectors.
- Strip the Insulation: Use wire strippers to remove about 1/2 inch of insulation from the end of each wire.
- Inspect the Wires: Check for any signs of corrosion or damage. If the wires are corroded, cut back to a clean section.
- Crimp Connectors: If the original connectors are damaged or corroded, crimp new connectors onto the wires.
4.6. Install the New Fuse Holder
Install the new fuse holder in the fuse box, ensuring all connections are secure.
- Connect the Wires: Attach the wires to the new fuse holder, matching the positions you noted earlier. Ensure the connections are tight and secure.
- Screw in the Holder: If the fuse holder is screwed in, replace the screws and tighten them securely.
- Test the Connection: Use a multimeter to test the continuity of the connection.
4.7. Secure the Connections
To protect the connections from corrosion and ensure a long-lasting repair, use electrical tape or heat shrink tubing.
- Electrical Tape: Wrap electrical tape around each connection to insulate and protect it from moisture.
- Heat Shrink Tubing: Slide heat shrink tubing over the connection and use a heat gun to shrink it, creating a secure and waterproof seal.
4.8. Replace the Fuse
Insert a new fuse of the correct amperage into the new fuse holder. Refer to your car’s manual for the correct fuse size.
- Check the Manual: Verify the correct amperage for the fuse you are replacing.
- Insert the Fuse: Gently push the new fuse into the fuse holder, ensuring it fits snugly.
4.9. Reconnect the Battery
Reconnect the battery, starting with the positive terminal, then the negative terminal.
- Reconnect the Positive Terminal: Attach the positive (+) cable to the positive terminal and tighten the nut securely.
- Reconnect the Negative Terminal: Attach the negative (-) cable to the negative terminal and tighten the nut securely.
- Test the System: Start your car and test the electrical component that was not working to ensure it is now functioning correctly.
5. Advanced Troubleshooting
If the fuse continues to blow or the electrical component still doesn’t work, there may be an underlying issue in the circuit.
- Check for Short Circuits: Use a multimeter to check for shorts in the circuit. A short circuit can cause the fuse to blow repeatedly.
- Inspect Wiring: Look for damaged or frayed wiring that may be causing the issue.
- Consult a Professional: If you are unable to diagnose the problem, consult a professional mechanic.
6. The Importance of Using Quality Tools
Using high-quality tools is crucial for any automotive repair. Quality tools not only make the job easier but also ensure a safer and more reliable repair. CARDIAGTECH.NET provides a range of professional-grade tools designed to meet the needs of both amateur and professional mechanics.
- Durability: Quality tools are built to last, withstanding the rigors of regular use.
- Precision: Precision tools ensure accurate and reliable results, preventing damage to your vehicle.
- Safety: High-quality tools are designed with safety in mind, reducing the risk of injury.
7. Maintaining Your Car’s Electrical System
Regular maintenance of your car’s electrical system can prevent many common issues, including broken fuse holders.
- Regular Inspections: Inspect the fuse box and wiring regularly for signs of damage or corrosion.
- Keep it Clean: Keep the fuse box clean and dry to prevent corrosion.
- Replace Fuses Promptly: Replace blown fuses immediately with the correct amperage fuse.
- Professional Check-ups: Have your car’s electrical system checked by a professional mechanic during regular maintenance.
8. Common Mistakes to Avoid
Avoiding common mistakes can save you time and prevent further damage to your vehicle.
- Using the Wrong Fuse: Always use the correct amperage fuse for the circuit. Using a fuse with a higher amperage can damage the electrical components.
- Ignoring Underlying Issues: If a fuse repeatedly blows, don’t just keep replacing it. Identify and fix the underlying issue.
- Neglecting Safety: Always disconnect the battery before working on the electrical system.
- Poor Connections: Ensure all wire connections are secure and properly insulated.
9. The Role of CARDIAGTECH.NET in Automotive Repairs
CARDIAGTECH.NET stands out as a premier provider of automotive diagnostic and repair tools. We offer a comprehensive selection of high-quality tools, including multimeters, wire crimpers, and fuse box testers, essential for diagnosing and fixing issues like broken fuse holders. Our tools are designed for both professional mechanics and DIY enthusiasts, ensuring accuracy, durability, and safety. By choosing CARDIAGTECH.NET, you’re investing in equipment that enhances your repair efficiency and prolongs the life of your vehicle.
10. Understanding Fuse Box Corrosion
Fuse box corrosion is a common issue that can lead to various electrical problems in your car. It occurs when moisture and contaminants come into contact with the metal components of the fuse box, causing them to corrode. This corrosion can disrupt the flow of electricity and lead to blown fuses, malfunctioning electrical components, and even electrical fires. According to a study by the American Automobile Association (AAA), corrosion is a factor in over 50% of electrical system failures in vehicles older than five years.
10.1. Causes of Fuse Box Corrosion
Several factors can contribute to fuse box corrosion:
- Moisture: Water leaks, humidity, and condensation can all introduce moisture into the fuse box.
- Road Salt: In regions where road salt is used during winter, salt can enter the fuse box and accelerate corrosion.
- Battery Acid: Battery acid leaks can also cause corrosion in the fuse box.
- Environmental Contaminants: Dust, dirt, and other contaminants can accumulate in the fuse box and contribute to corrosion.
10.2. Signs of Fuse Box Corrosion
Identifying the signs of fuse box corrosion early can help prevent more serious electrical problems. Common signs include:
- Visible Corrosion: Look for green or white deposits on the metal components of the fuse box.
- Blown Fuses: Repeatedly blown fuses can indicate corrosion in the fuse box.
- Malfunctioning Electrical Components: If electrical components such as lights, radio, or power windows are not working properly, it could be due to corrosion in the fuse box.
- Difficulty Inserting or Removing Fuses: Corrosion can make it difficult to insert or remove fuses from the fuse box.
10.3. How to Clean Fuse Box Corrosion
Cleaning fuse box corrosion is a relatively simple process that can help restore proper electrical function.
- Disconnect the Battery: As with any electrical work, start by disconnecting the battery to prevent electrical shock.
- Locate the Fuse Box: Identify the fuse box and open it to access the fuses and terminals.
- Inspect for Corrosion: Carefully inspect the fuse box for signs of corrosion.
- Remove Fuses: Remove all the fuses from the fuse box.
- Clean the Terminals: Use a wire brush or sandpaper to gently clean the corroded terminals. Be careful not to damage the terminals.
- Apply Corrosion Inhibitor: Apply a corrosion inhibitor to the terminals to help prevent future corrosion.
- Replace Fuses: Replace the fuses with new ones of the correct amperage.
- Reconnect the Battery: Reconnect the battery and test the electrical components to ensure they are working properly.
11. Understanding Fuse Amperage and Voltage
Fuses are rated by amperage and voltage, and it’s essential to use the correct fuses for your car’s electrical system. Using the wrong fuses can lead to electrical problems and even fires.
11.1. What is Fuse Amperage?
Fuse amperage is the amount of electrical current that a fuse can handle before it blows. Fuses are designed to blow when the current exceeds the rated amperage, protecting the electrical circuit from damage. According to the National Electrical Manufacturers Association (NEMA), using fuses with the correct amperage is crucial for preventing electrical fires and equipment damage.
11.2. What is Fuse Voltage?
Fuse voltage is the maximum voltage that a fuse can handle. While it’s important to use a fuse with the correct voltage rating, it’s generally safe to use a fuse with a higher voltage rating than the circuit it’s protecting. However, it’s never safe to use a fuse with a lower voltage rating.
11.3. How to Choose the Correct Fuse
Choosing the correct fuse for your car’s electrical system is essential for safety and proper function.
- Consult Your Car’s Manual: Your car’s manual will provide a diagram of the fuse box and a list of the correct fuses for each circuit.
- Match the Amperage: Make sure the new fuse has the same amperage rating as the old fuse.
- Check the Voltage: Ensure the new fuse has a voltage rating that is equal to or greater than the circuit it’s protecting.
- Use the Correct Type: Use the correct type of fuse for your car’s electrical system. There are several types of fuses, including blade fuses, glass fuses, and ceramic fuses.
12. Upgrading Your Fuse Box
In some cases, it may be necessary to upgrade your fuse box. This is especially true if you’re adding new electrical components to your car, such as a high-powered audio system or auxiliary lighting.
12.1. Reasons to Upgrade Your Fuse Box
There are several reasons why you might need to upgrade your fuse box:
- Adding New Electrical Components: If you’re adding new electrical components to your car, you may need to upgrade your fuse box to accommodate the additional circuits.
- Increased Power Consumption: If you’re using electrical components that draw a lot of power, you may need to upgrade your fuse box to handle the increased load.
- Corrosion: If your fuse box is heavily corroded, it may be necessary to replace it with a new one.
- Damage: If your fuse box is damaged, it may be necessary to replace it with a new one.
12.2. How to Upgrade Your Fuse Box
Upgrading your fuse box is a more complex process that requires some electrical knowledge and experience.
- Disconnect the Battery: As with any electrical work, start by disconnecting the battery to prevent electrical shock.
- Remove the Old Fuse Box: Remove the old fuse box from your car.
- Install the New Fuse Box: Install the new fuse box in your car.
- Connect the Wires: Connect the wires to the new fuse box, making sure to match the wiring diagram.
- Replace Fuses: Replace the fuses with new ones of the correct amperage.
- Reconnect the Battery: Reconnect the battery and test the electrical components to ensure they are working properly.
13. The Benefits of Professional Fuse Holder Repair
While it’s possible to repair a broken fuse holder yourself, there are several benefits to having a professional mechanic do the job.
- Expertise: Professional mechanics have the expertise and experience to diagnose and repair electrical problems quickly and efficiently.
- Tools: Professional mechanics have access to specialized tools that can make the job easier and more accurate.
- Safety: Professional mechanics are trained to work safely with electrical systems, reducing the risk of electrical shock and other injuries.
- Warranty: Many professional mechanics offer a warranty on their work, giving you peace of mind.
14. How to Choose a Reliable Mechanic
Choosing a reliable mechanic is essential for ensuring that your car is repaired properly.
- Ask for Recommendations: Ask friends, family, and colleagues for recommendations.
- Check Online Reviews: Check online reviews to see what other customers have to say about the mechanic.
- Look for Certifications: Look for mechanics who are certified by the National Institute for Automotive Service Excellence (ASE).
- Get an Estimate: Get an estimate from the mechanic before authorizing any work.
- Ask Questions: Ask the mechanic questions about the repair process and the parts they will be using.
15. Contact CARDIAGTECH.NET for Your Automotive Repair Needs
At CARDIAGTECH.NET, we understand the challenges you face as an automotive technician or garage owner. The physical demands, constant exposure to chemicals, and the need to stay updated with ever-evolving technology can be overwhelming. That’s why we offer a comprehensive range of high-quality automotive tools and equipment designed to enhance your efficiency, precision, and safety.
Whether you’re a young mechanic starting your career or an experienced shop owner, our tools provide the reliability and performance you need to excel. We’re committed to helping you increase your productivity, reduce repair times, and boost your shop’s profitability.
Ready to elevate your automotive repair capabilities? Contact CARDIAGTECH.NET today!
- Address: 276 Reock St, City of Orange, NJ 07050, United States
- WhatsApp: +1 (641) 206-8880
- Website: CARDIAGTECH.NET
Let us help you streamline your work, minimize errors, and maximize customer satisfaction. Invest in CARDIAGTECH.NET tools and experience the difference in your daily operations. Our team is ready to assist you with expert advice and support to ensure you have the right tools for every job.
FAQ: Fixing a Broken Fuse Holder
1. What causes a fuse holder to break?
Fuse holders break due to overloads, corrosion, physical damage, and wear and tear. Exceeding the current capacity of the fuse causes overheating and melting, while moisture leads to corrosion.
2. What are the signs of a broken fuse holder?
Signs include non-functional electrical components, repeatedly blown fuses, visible damage (melting, cracking, corrosion), loose fuses, and burning smells.
3. Can I replace a fuse holder myself?
Yes, with the right tools and knowledge, you can replace a fuse holder yourself. However, if you’re not comfortable working with electrical systems, it’s best to consult a professional.
4. What tools do I need to replace a fuse holder?
Essential tools include a new fuse holder, fuses, wire strippers, wire crimpers, pliers, screwdrivers, a multimeter, electrical tape, heat shrink tubing, and a heat gun.
5. How do I disconnect the battery safely?
Disconnect the negative terminal first, then the positive terminal. Use a wrench to loosen the nuts and remove the cables, tucking them away from the terminals to prevent accidental contact.
6. Where is the fuse box located in my car?
The fuse box is typically located in the driver’s side footwell, under the dashboard, or in the engine compartment. Consult your car’s manual for the exact location.
7. How do I choose the correct fuse for replacement?
Refer to your car’s manual for the correct amperage and type of fuse. Ensure the new fuse matches these specifications to prevent electrical issues.
8. What is fuse amperage and why is it important?
Fuse amperage is the amount of electrical current a fuse can handle before blowing. Using the correct amperage is crucial to protect the circuit and prevent damage.
9. What is fuse voltage and how does it affect my car’s electrical system?
Fuse voltage is the maximum voltage a fuse can handle. It’s generally safe to use a fuse with a higher voltage rating, but never a lower one.
10. How can CARDIAGTECH.NET help with automotive repairs?
CARDIAGTECH.NET offers a comprehensive selection of high-quality automotive diagnostic and repair tools, including multimeters, wire crimpers, and fuse box testers, essential for diagnosing and fixing electrical issues.
By following these steps and utilizing the right tools from CARDIAGTECH.NET, you can effectively fix a broken fuse holder and ensure the reliability of your vehicle’s electrical system.