How Do You Fix Suspension On A Car Expertly?
Is your car’s ride feeling bumpy? CARDIAGTECH.NET can help you understand How Do You Fix Suspension On A Car, ensuring a smooth ride and optimal handling. Discover common suspension issues, repair solutions, and the importance of professional car maintenance to keep your vehicle performing at its best with suspension components and suspension repair.
1. Understanding Your Vehicle’s Suspension System
The suspension system in your car is a complex network of components linking the chassis to the wheels. This intricate system ensures a comfortable ride by absorbing shocks from uneven road surfaces. Key components include:
- Springs: Support the vehicle’s weight and absorb initial impacts.
- Shock Absorbers & Struts: Dampen spring oscillations, preventing excessive bouncing.
- Control Arms: Connect wheels to the frame, allowing controlled movement.
- Sway Bars (Anti-Roll Bars): Reduce body roll during turns, enhancing stability.
- Bushings & Bearings: Provide flexibility and minimize noise between moving parts.
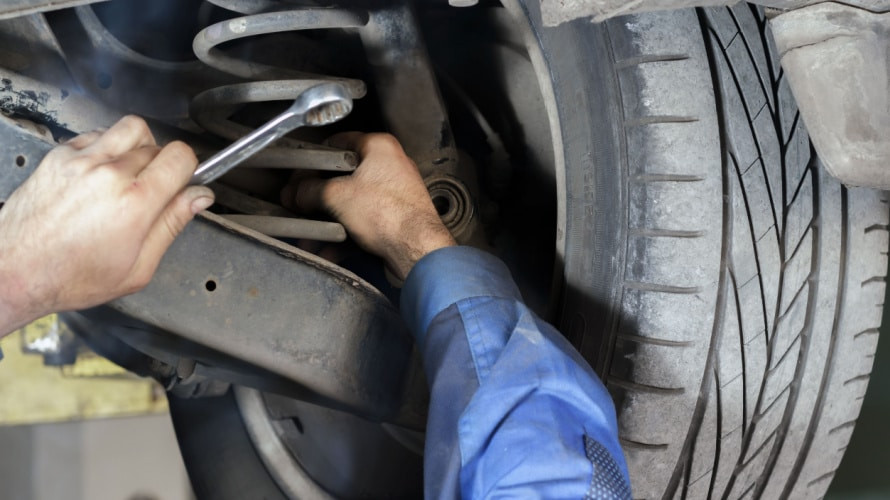
Car suspension system featuring springs, shock absorbers, and struts
A well-functioning suspension system is critical for:
- Comfortable Ride: Minimizing vibrations and bumps.
- Stable Handling: Maintaining balance and preventing body roll.
- Optimal Tire Contact: Ensuring even weight distribution and traction.
According to a study by the National Highway Traffic Safety Administration (NHTSA), suspension issues can significantly impact vehicle stability, increasing the risk of accidents. Regular maintenance and timely repairs are essential for safety and performance.
2. Diagnosing Common Suspension Problems
Identifying suspension problems early can prevent costly repairs and ensure your safety. Here are some common signs of suspension issues:
- Bouncing Ride: Excessive bouncing after hitting bumps indicates worn shock absorbers or struts.
- Uneven Tire Wear: Unusual wear patterns can signal misalignment or worn suspension parts.
- Steering Issues: Pulling to one side or difficulty steering may indicate suspension problems.
- Clunking Noises: Noises over bumps can point to worn bushings, ball joints, or sway bar links.
- Leaking Fluid: Visible leaks on shock absorbers or struts suggest they need replacement.
- Vehicle Sagging: Uneven vehicle height or sagging can indicate broken or weak springs.
A survey by the Car Care Council found that approximately 10% of vehicles have suspension issues, highlighting the importance of regular inspections.
3. How to Inspect Your Car’s Suspension: A Step-by-Step Guide
Conducting a basic inspection of your car’s suspension can help you identify potential problems early. Here’s how to do it:
- Visual Inspection:
- Shocks and Struts: Look for signs of leaking fluid. A small amount of weeping is normal, but excessive leaking indicates a problem.
- Springs: Check for cracks, breaks, or sagging. Compare the height on all four corners of the vehicle.
- Bushings: Inspect for cracks, tears, or excessive wear. Use a flashlight to get a better view.
- Ball Joints and Tie Rod Ends: Look for looseness or play. You can try to move these components by hand (with gloves on) to check for excessive movement.
- The Bounce Test:
- Push down firmly on each corner of the vehicle and release.
- Observe how the vehicle rebounds. It should bounce back up and settle without excessive oscillation (more than two bounces).
- Excessive bouncing indicates worn shocks or struts.
- Listen for Noises:
- Drive your car over bumps and listen for any unusual noises such as clunking, rattling, or squeaking.
- Note when and where you hear the noises to help diagnose the problem.
- Check Tire Wear:
- Examine your tires for uneven wear patterns.
- Feathering, cupping, or excessive wear on one side can indicate suspension or alignment issues.
- Steering Check:
- While driving on a straight, level road, check if the car pulls to one side.
- Also, note if the steering feels loose or imprecise.
Tools You Might Need
- Flashlight
- Gloves
- Jack and Jack Stands (for a more thorough inspection)
- Wrench Set (for tightening or checking connections)
By following these steps, you can get a good sense of the condition of your car’s suspension system. If you notice any significant issues or are unsure about something, it’s always best to consult a professional mechanic at CARDIAGTECH.NET for a more detailed inspection. Regular checks can help catch problems early and prevent more extensive and costly repairs down the road.
4. Detailed Guide on How Do You Fix Suspension On A Car
4.1. Replacing Shock Absorbers and Struts
When to Replace:
- Mileage: Every 50,000 to 80,000 miles, or as recommended by the manufacturer.
- Symptoms: Bouncing ride, leaking fluid, poor handling.
Tools Needed:
- New shock absorbers or struts
- Jack and jack stands
- Wrench set
- Socket set
- Spring compressor (for struts)
- Penetrating oil
- Torque wrench
Steps:
- Preparation:
- Loosen the lug nuts on the wheel of the corner you’re working on.
- Jack up the vehicle and secure it with jack stands.
- Remove the wheel.
- Remove Old Unit:
- Spray penetrating oil on all bolts and nuts to loosen them.
- Disconnect any brake lines or ABS sensors attached to the strut assembly.
- Unbolt the shock absorber or strut from the lower control arm and the upper mount.
- If replacing struts, use a spring compressor to safely compress the spring before removing the top nut.
- Install New Unit:
- Carefully install the new shock absorber or strut, ensuring it is properly aligned.
- If installing a new strut, transfer the spring and upper mount to the new strut, ensuring the spring is correctly seated.
- Tighten all bolts and nuts to the manufacturer’s specified torque.
- Reassemble:
- Reattach any brake lines or ABS sensors.
- Reinstall the wheel.
- Lower the vehicle and torque the lug nuts to the correct specification.
- Repeat:
- Repeat the process for the other shock absorbers or struts.
- It’s generally recommended to replace shocks/struts in pairs (front or rear) to maintain even handling.
4.2. Replacing Worn Bushings
When to Replace:
- Symptoms: Clunking or rattling noises, loose handling, visible cracks or wear.
Tools Needed:
- New bushings
- Jack and jack stands
- Wrench set
- Socket set
- Ball joint press or bushing removal tool
- Penetrating oil
- Grease
Steps:
- Preparation:
- Jack up the vehicle and secure it with jack stands.
- Remove the wheel.
- Remove Control Arm:
- Disconnect the component (e.g., control arm) from the vehicle.
- Spray penetrating oil on the bushing housing.
- Remove Old Bushing:
- Use a ball joint press or bushing removal tool to press out the old bushing.
- Ensure you are pressing the bushing out in the correct direction to avoid damaging the component.
- Install New Bushing:
- Clean the bushing housing.
- Apply grease to the new bushing and the housing.
- Use the ball joint press to press the new bushing into place.
- Ensure the bushing is seated correctly.
- Reassemble:
- Reinstall the component back onto the vehicle.
- Tighten all bolts to the manufacturer’s specified torque.
- Reinstall the wheel.
- Lower the vehicle and torque the lug nuts.
- Repeat:
- Repeat the process for any other worn bushings.
4.3. Replacing Broken or Damaged Springs
When to Replace:
- Symptoms: Vehicle sagging, uneven ride height, broken or cracked spring.
Tools Needed:
- New springs
- Jack and jack stands
- Wrench set
- Socket set
- Spring compressor
- Penetrating oil
Steps:
- Preparation:
- Loosen the lug nuts on the wheel.
- Jack up the vehicle and secure it with jack stands.
- Remove the wheel.
- Compress Spring:
- Use a spring compressor to safely compress the spring.
- Ensure the compressor is correctly positioned to avoid slippage.
- Remove Old Spring:
- Disconnect any components attached to the suspension that may impede spring removal.
- Carefully remove the old spring.
- Install New Spring:
- Position the new spring in place.
- Slowly release the spring compressor, ensuring the spring is correctly seated.
- Reassemble:
- Reattach any disconnected components.
- Reinstall the wheel.
- Lower the vehicle and torque the lug nuts.
- Repeat:
- Repeat the process for the other spring on the same axle.
- Always replace springs in pairs to ensure even ride height and handling.
4.4. Aligning Your Vehicle’s Wheels
When to Align:
- Symptoms: Uneven tire wear, pulling to one side, after replacing suspension components.
- Frequency: Every 2-3 years, or after any major suspension work.
Tools Needed:
- Wheel alignment machine (professional equipment)
Steps:
- Preparation:
- Ensure the vehicle is on a level surface.
- Inspect tires for wear and inflate to the correct pressure.
- Check suspension components for any damage or wear.
- Mount Alignment Equipment:
- Attach the alignment heads to each wheel.
- Take Initial Measurements:
- Record the initial alignment angles (camber, caster, toe).
- Adjust Alignment Angles:
- Adjust the camber, caster, and toe angles to the manufacturer’s specifications.
- This usually involves adjusting tie rods, control arms, or strut mounts.
- Final Measurements:
- Take final measurements to ensure all angles are within the specified range.
- Test Drive:
- Test drive the vehicle to ensure it tracks straight and the steering wheel is centered.
Note: Wheel alignment requires specialized equipment and knowledge. It’s best to have this done by a professional.
4.5. Replacing Compromised Ball Joints
When to Replace:
- Symptoms: Clunking noises, loose steering, uneven tire wear.
Tools Needed:
- New ball joints
- Jack and jack stands
- Wrench set
- Socket set
- Ball joint press
- Hammer
- Penetrating oil
Steps:
- Preparation:
- Loosen the lug nuts.
- Jack up the vehicle and secure it with jack stands.
- Remove the wheel.
- Disconnect Ball Joint:
- Disconnect the ball joint from the steering knuckle and control arm.
- Spray penetrating oil on any stubborn bolts or nuts.
- Remove Old Ball Joint:
- Use a ball joint press to press out the old ball joint.
- If the ball joint is riveted, you may need to grind off the rivets.
- Install New Ball Joint:
- Position the new ball joint in place.
- Use the ball joint press to press in the new ball joint.
- If necessary, install new rivets or bolts to secure the ball joint.
- Reassemble:
- Reattach the ball joint to the steering knuckle and control arm.
- Tighten all bolts to the manufacturer’s specified torque.
- Reinstall the wheel.
- Lower the vehicle and torque the lug nuts.
- Repeat:
- Repeat the process for any other worn ball joints.
4.6. Replacing Sway Bar Links
When to Replace:
- Symptoms: Rattling noises, especially over bumps, poor handling.
Tools Needed:
- New sway bar links
- Jack and jack stands
- Wrench set
- Socket set
- Penetrating oil
Steps:
- Preparation:
- Loosen the lug nuts.
- Jack up the vehicle and secure it with jack stands.
- Remove the wheel.
- Remove Old Sway Bar Link:
- Spray penetrating oil on the sway bar link bolts.
- Disconnect the sway bar link from the sway bar and the suspension.
- Install New Sway Bar Link:
- Position the new sway bar link in place.
- Tighten the bolts to the manufacturer’s specified torque.
- Reassemble:
- Reinstall the wheel.
- Lower the vehicle and torque the lug nuts.
- Repeat:
- Repeat the process on the other side.
- It’s usually recommended to replace sway bar links in pairs.
4.7. Strut Mount Replacement
When to Replace:
- Symptoms: Clunking noises, especially over bumps, poor steering response.
Tools Needed:
- New strut mounts
- Jack and jack stands
- Wrench set
- Socket set
- Spring compressor
- Penetrating oil
Steps:
- Preparation:
- Loosen the lug nuts.
- Jack up the vehicle and secure it with jack stands.
- Remove the wheel.
- Remove Strut Assembly:
- Disconnect any brake lines or ABS sensors attached to the strut assembly.
- Unbolt the strut from the lower control arm and the upper mount.
- Compress Spring:
- Use a spring compressor to safely compress the spring.
- Remove Old Strut Mount:
- Remove the top nut from the strut assembly.
- Remove the old strut mount.
- Install New Strut Mount:
- Position the new strut mount in place.
- Tighten the top nut to the manufacturer’s specified torque.
- Reassemble:
- Reattach any brake lines or ABS sensors.
- Reinstall the wheel.
- Lower the vehicle and torque the lug nuts.
- Repeat:
- Repeat the process on the other side.
4.8. Tie Rod End Replacement
When to Replace:
- Symptoms: Loose steering, uneven tire wear, difficulty maintaining alignment.
Tools Needed:
- New tie rod ends
- Jack and jack stands
- Wrench set
- Socket set
- Tie rod end puller
- Penetrating oil
- Alignment tools (for temporary alignment)
Steps:
- Preparation:
- Loosen the lug nuts.
- Jack up the vehicle and secure it with jack stands.
- Remove the wheel.
- Remove Old Tie Rod End:
- Loosen the jam nut on the tie rod.
- Disconnect the tie rod end from the steering knuckle using a tie rod end puller.
- Unscrew the tie rod end from the tie rod, counting the number of turns it takes to remove.
- Install New Tie Rod End:
- Screw the new tie rod end onto the tie rod, using the same number of turns as it took to remove the old one.
- Connect the tie rod end to the steering knuckle.
- Tighten the jam nut and the tie rod end nut to the manufacturer’s specified torque.
- Reassemble:
- Reinstall the wheel.
- Lower the vehicle and torque the lug nuts.
- Alignment:
- Perform a wheel alignment to ensure proper steering and tire wear.
Note: Replacing tie rod ends requires a wheel alignment afterward.
5. The Importance of Professional Suspension Service
While some suspension repairs can be DIY projects, many require specialized knowledge and equipment. Here’s why professional service is often the best choice:
- Expertise: Certified technicians can accurately diagnose complex issues.
- Equipment: Access to specialized tools like alignment machines and spring compressors.
- Quality Parts: Using high-quality replacement parts ensures durability and performance.
- Safety: Proper installation is critical for vehicle safety and handling.
According to AAA, the average cost of suspension repair can range from $1,000 to $5,000, depending on the extent of the damage and the type of vehicle. Investing in professional service can prevent further damage and ensure the job is done right the first time.
6. Maintaining Your Suspension for Longevity
Preventive maintenance can extend the life of your suspension system and save you money in the long run:
- Regular Inspections: Check for signs of wear, leaks, and damage.
- Proper Tire Inflation: Maintaining correct tire pressure reduces stress on suspension components.
- Avoid Potholes: Minimize driving on rough roads and avoid potholes whenever possible.
- Load Management: Avoid overloading your vehicle, which can strain the suspension.
- Alignment Checks: Ensure your wheels are properly aligned to prevent uneven tire wear.
7. Troubleshooting Suspension Problems: A Quick Guide
Here’s a handy table to help you quickly identify and troubleshoot common suspension problems:
| Symptom | Possible Cause | Solution |
|---|---|---|
| Bouncing Ride | Worn shock absorbers or struts | Replace shocks or struts |
| Uneven Tire Wear | Misalignment, worn suspension parts | Get a wheel alignment, replace worn parts |
| Steering Issues | Misalignment, worn tie rod ends, ball joints | Get a wheel alignment, replace tie rod ends or ball joints |
| Clunking Noises | Worn bushings, ball joints, sway bar links | Replace worn bushings, ball joints, or sway bar links |
| Leaking Fluid | Damaged shock absorbers or struts | Replace shocks or struts |
| Vehicle Sagging | Broken or weak springs | Replace springs |
| Rattling Noises | Worn sway bar links | Replace sway bar links |
| Loose Steering | Worn tie rod ends | Replace tie rod ends |
| Difficulty Maintaining Alignment | Worn tie rod ends or other suspension parts | Replace worn parts, get a wheel alignment |
8. How CARDIAGTECH.NET Can Help With Your Suspension Needs
At CARDIAGTECH.NET, we understand the importance of a properly functioning suspension system. Here’s how we can assist you:
- High-Quality Tools: We offer a wide range of automotive tools and equipment to help you with your suspension repairs.
- Expert Advice: Our team can provide guidance and support to help you choose the right tools for your specific needs.
- Comprehensive Solutions: From diagnostic tools to replacement parts, we have everything you need to maintain and repair your suspension system.
We are committed to providing top-notch products and services to ensure your vehicle performs at its best. Contact us today to learn more about our offerings and how we can help you with your suspension needs.
Address: 276 Reock St, City of Orange, NJ 07050, United States
Whatsapp: +1 (641) 206-8880
Website: CARDIAGTECH.NET
9. Real-World Examples of Suspension Repairs
To illustrate the importance of proper suspension maintenance, here are a couple of real-world examples:
Case Study 1: Worn Shock Absorbers
- Problem: A customer complained of a bouncy ride and poor handling on their SUV.
- Diagnosis: Inspection revealed worn shock absorbers with leaking fluid.
- Solution: Replaced all four shock absorbers.
- Outcome: The customer reported a significantly improved ride quality and handling.
Case Study 2: Broken Spring
- Problem: A customer noticed their car was sitting lower on one side.
- Diagnosis: Inspection revealed a broken coil spring.
- Solution: Replaced both coil springs on the front axle.
- Outcome: The car’s ride height was restored, and handling was back to normal.
These examples demonstrate how addressing suspension issues promptly can restore vehicle performance and safety.
10. Cost Analysis: DIY vs. Professional Suspension Repair
When deciding whether to tackle a suspension repair yourself or hire a professional, consider the following cost factors:
| Factor | DIY | Professional |
|---|---|---|
| Parts | Cost of replacement parts (shocks, struts, bushings, etc.) | Cost of parts included in the service |
| Tools | Cost of necessary tools (jack, jack stands, wrench set, spring compressor) | Tool costs are already factored into the service fee |
| Labor | Your time and effort | Labor costs charged by the mechanic |
| Alignment | Additional cost for wheel alignment (if needed) | Wheel alignment often included in the service or offered at an additional cost |
| Risk | Potential for errors or further damage | Lower risk of errors due to expertise and experience |
| Time | Time spent on diagnosis, repair, and potential re-do | Faster turnaround time |
While DIY repairs can save money on labor costs, they also come with risks and require a significant investment in tools and time. Professional service ensures the job is done correctly and can prevent further damage.
11. Future Trends in Suspension Technology
The automotive industry is constantly evolving, and suspension technology is no exception. Here are some emerging trends to watch for:
- Adaptive Suspension Systems: These systems use sensors and electronic controls to adjust damping rates in real-time, providing optimal ride comfort and handling in various driving conditions.
- Air Suspension: Air springs replace traditional coil springs, offering adjustable ride height and improved load-carrying capacity.
- Magnetic Ride Control: This technology uses a special fluid in the shock absorbers that can be instantly adjusted using electromagnets, providing precise control over damping forces.
- Lightweight Materials: The use of lightweight materials like aluminum and carbon fiber in suspension components can reduce vehicle weight and improve fuel efficiency.
These advancements promise to deliver even smoother rides, better handling, and increased vehicle efficiency in the years to come.
12. Safety Precautions When Working on Suspensions
Working on your car’s suspension can be dangerous if proper safety precautions are not followed. Here are some essential safety tips:
- Use Jack Stands: Never work under a vehicle supported only by a jack. Always use jack stands to securely support the vehicle.
- Wear Safety Glasses: Protect your eyes from debris and chemicals.
- Use Gloves: Protect your hands from sharp edges, hot surfaces, and chemicals.
- Disconnect the Battery: Disconnect the negative battery cable to prevent electrical shocks.
- Use a Spring Compressor Properly: When working with struts, use a spring compressor to safely compress the spring before disassembly.
- Follow Torque Specifications: Tighten all bolts and nuts to the manufacturer’s specified torque.
- Work in a Well-Ventilated Area: Some suspension components may contain chemicals that can be harmful if inhaled.
- Consult a Professional: If you are not comfortable performing a suspension repair, consult a professional mechanic at CARDIAGTECH.NET.
13. Addressing Customer Concerns About Suspension Repairs
We understand that suspension repairs can be a source of concern for many customers. Here are some common questions and our responses:
- Question: How do I know if my suspension needs repair?
- Answer: Look for signs such as a bouncy ride, uneven tire wear, steering issues, and clunking noises.
- Question: How much will it cost to repair my suspension?
- Answer: The cost depends on the extent of the damage and the type of vehicle. We can provide an accurate estimate after a thorough inspection.
- Question: Can I drive my car with a damaged suspension?
- Answer: It is not recommended to drive with a damaged suspension, as it can be unsafe and cause further damage to your vehicle.
- Question: How long will the repair take?
- Answer: The repair time depends on the complexity of the job. We will provide an estimated completion time when you schedule your service.
We are committed to providing transparent and reliable service to address all your suspension concerns.
14. Suspension Maintenance Checklist for Car Owners
To help you stay on top of your suspension maintenance, here’s a handy checklist:
- [ ] Inspect shocks and struts for leaks every 6 months.
- [ ] Check bushings for cracks and wear annually.
- [ ] Inspect springs for damage or sagging annually.
- [ ] Get a wheel alignment every 2-3 years or after any major suspension work.
- [ ] Maintain proper tire inflation at all times.
- [ ] Avoid potholes and rough roads whenever possible.
- [ ] Do not overload your vehicle.
Following this checklist can help you identify potential issues early and keep your suspension system in top condition.
15. FAQ: Addressing Your Burning Questions About Car Suspensions
Here are some frequently asked questions about car suspensions:
- What is the main function of a car suspension?
- The main function is to ensure a comfortable ride, stable handling, and optimal tire contact with the road.
- How often should I replace my shock absorbers?
- Every 50,000 to 80,000 miles, or as recommended by the manufacturer.
- What are the signs of worn bushings?
- Clunking noises, loose handling, and visible cracks or wear.
- Can I replace my suspension components myself?
- Some repairs can be DIY projects, but many require specialized knowledge and equipment.
- How important is wheel alignment?
- Wheel alignment is critical for preventing uneven tire wear and ensuring proper steering and handling.
- What is adaptive suspension?
- Adaptive suspension systems use sensors and electronic controls to adjust damping rates in real-time.
- How does air suspension work?
- Air springs replace traditional coil springs, offering adjustable ride height and improved load-carrying capacity.
- What is magnetic ride control?
- This technology uses a special fluid in the shock absorbers that can be instantly adjusted using electromagnets.
- What are the safety precautions when working on suspensions?
- Use jack stands, wear safety glasses and gloves, disconnect the battery, and follow torque specifications.
- How can CARDIAGTECH.NET help with my suspension needs?
- We offer high-quality tools, expert advice, and comprehensive solutions for all your suspension repair and maintenance needs.
Conclusion
Understanding how do you fix suspension on a car is essential for maintaining your vehicle’s safety, comfort, and performance. By recognizing the signs of suspension problems, performing regular maintenance, and seeking professional service when needed, you can keep your suspension system in top condition. Remember, CARDIAGTECH.NET is here to provide you with the tools, knowledge, and support you need to tackle any suspension repair or maintenance project. Contact us today to learn more and ensure your vehicle is always ready for the road.
Address: 276 Reock St, City of Orange, NJ 07050, United States
Whatsapp: +1 (641) 206-8880
Website: CARDIAGTECH.NET