**How Do You Fix Plastic Under Your Car: A Comprehensive Guide**
How Do You Fix Plastic Under Your Car? Fixing the plastic under your car, often the splash shield, involves assessing the damage and choosing the appropriate repair method. CARDIAGTECH.NET provides top-notch tools and equipment to make this task easier and more effective, ensuring your vehicle is protected and performs optimally.
1. Understanding the Importance of Plastic Under Your Car
The plastic components under your car, such as splash shields and underbody panels, play a vital role in protecting your vehicle. These parts shield the engine compartment from road debris, water, and other elements that can cause damage. Understanding their function helps you appreciate the importance of maintaining and repairing them.
1.1. What is a Splash Shield?
A splash shield, also known as an engine splash guard, is a protective panel located under the engine compartment. Its primary functions include:
- Protection from Debris: Prevents rocks, salt, and other road debris from entering the engine bay.
- Water Resistance: Minimizes water splashing onto sensitive engine components.
- Aerodynamics: Improves airflow under the vehicle, contributing to better fuel efficiency.
According to a study by the University of Michigan Transportation Research Institute, proper underbody panels can improve fuel efficiency by up to 5% by reducing aerodynamic drag.
1.2. Types of Plastic Used in Underbody Protection
Several types of plastic are used in underbody protection, each offering different levels of durability and flexibility:
- Polyethylene (PE): Lightweight and flexible, commonly used for splash shields.
- Polypropylene (PP): More rigid than PE, offering better impact resistance.
- Acrylonitrile Butadiene Styrene (ABS): Known for its strength and heat resistance.
- Fiber-Reinforced Plastics: Composites that offer superior strength and durability.
1.3. Common Problems with Plastic Under Car
Plastic under car components are susceptible to various types of damage. Here are some common issues:
- Cracks and Breaks: Caused by impacts from road debris or accidents.
- Sagging: Due to loose or broken fasteners.
- Holes: Resulting from corrosion or impact damage.
- Detachment: Complete or partial separation from the vehicle.
2. Identifying the Need for Repair
Recognizing when your plastic under car needs repair is crucial for preventing further damage to your vehicle. Regular inspections can help you identify potential issues early on.
2.1. Signs of Damage
Look for these signs of damage that indicate your plastic under car needs attention:
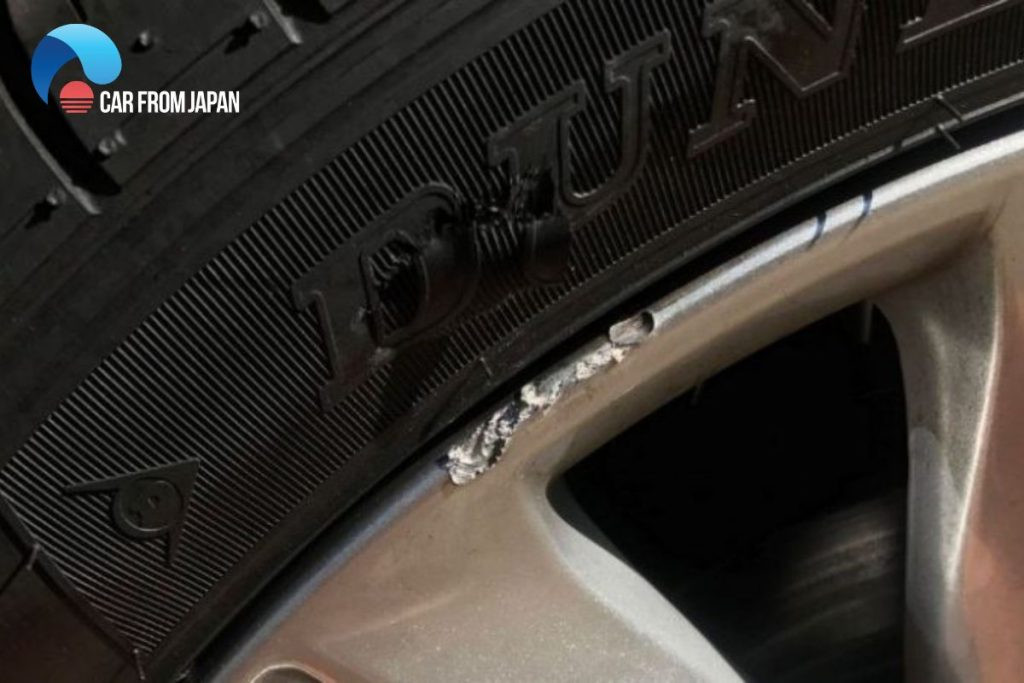
- Scraping Noises: A scraping sound while driving may indicate that the splash shield is dragging.
- Visible Cracks or Breaks: Inspect the plastic panels for any visible damage.
- Loose or Hanging Parts: Check if any parts are hanging or appear to be detached.
- Unusual Noises: Rattling or flapping sounds can indicate loose plastic components.
2.2. Tools for Inspection
To thoroughly inspect the plastic under your car, you’ll need the following tools, available at CARDIAGTECH.NET:
| Tool | Description |
|---|---|
| Floor Jack | Lifts the vehicle safely for inspection |
| Jack Stands | Provides stable support while working under the car |
| Flashlight | Illuminates dark areas for better visibility |
| Inspection Mirror | Helps to see hard-to-reach areas |
| Gloves | Protects hands from dirt and grease |
| Pry Bar or Screwdriver | Useful for checking the stability of plastic components and fasteners |
Using these tools from CARDIAGTECH.NET ensures a safe and effective inspection, allowing you to accurately assess the condition of the plastic under your car.
2.3. When to Consult a Professional
While minor damage can often be repaired at home, certain situations warrant professional attention:
- Extensive Damage: Large cracks, breaks, or missing pieces.
- Structural Issues: Damage affecting the vehicle’s frame or other critical components.
- Uncertainty: If you’re unsure about the extent of the damage or how to proceed.
3. How to Assess the Damage
Before you start any repairs, it’s important to thoroughly assess the damage. This will help you determine the best course of action and the materials you’ll need.
3.1. Cleaning the Area
Start by cleaning the affected area. Remove any dirt, grease, or debris using a degreaser and a brush. This will allow you to see the extent of the damage more clearly and ensure that any repair materials adhere properly.
3.2. Identifying the Type of Plastic
Knowing the type of plastic you’re working with is essential for selecting the right repair methods and materials. Look for markings on the plastic component or consult your vehicle’s repair manual.
3.3. Evaluating the Severity of the Damage
Assess the size, location, and type of damage. Minor cracks and holes can often be repaired with simple methods, while more extensive damage may require replacement of the entire component.
4. DIY Repair Methods
For minor damage, several DIY repair methods can effectively restore the integrity of the plastic under your car. These methods are cost-effective and can be completed with the right tools and materials from CARDIAGTECH.NET.
4.1. Patching with Plastic Repair Kits
Plastic repair kits are available at CARDIAGTECH.NET and typically include a bonding agent and a reinforcing mesh. Here’s how to use them:
- Clean the Area: Thoroughly clean the damaged area with a degreaser.
- Apply Bonding Agent: Apply the bonding agent to the damaged area and surrounding surface.
- Apply Mesh: Place the reinforcing mesh over the bonding agent.
- Apply Additional Bonding Agent: Apply another layer of bonding agent over the mesh.
- Cure: Allow the bonding agent to cure according to the manufacturer’s instructions.
These kits are ideal for repairing cracks and small holes in plastic components.
4.2. Using Plastic Welding
Plastic welding involves melting the plastic and fusing it together. This method requires a plastic welding kit, available at CARDIAGTECH.NET, which includes a welding tool and plastic filler rods.
- Prepare the Area: Clean the damaged area and bevel the edges of the crack or break.
- Heat the Welding Tool: Heat the plastic welding tool to the recommended temperature.
- Apply Filler Rod: Use the welding tool to melt the filler rod and fuse it to the plastic component.
- Smooth the Surface: Smooth the welded area with the welding tool or a sanding tool.
- Cool: Allow the repaired area to cool completely.
Plastic welding provides a strong and durable repair for larger cracks and breaks.
4.3. Applying Epoxy Adhesives
Epoxy adhesives are strong and versatile, making them suitable for repairing various types of plastic damage. You can find high-quality epoxy adhesives at CARDIAGTECH.NET.
- Clean the Area: Clean the damaged area with a degreaser and roughen the surface with sandpaper.
- Mix Epoxy: Mix the epoxy components according to the manufacturer’s instructions.
- Apply Epoxy: Apply the epoxy adhesive to the damaged area.
- Clamp: Clamp the repaired area together to ensure a strong bond.
- Cure: Allow the epoxy to cure according to the manufacturer’s instructions.
Epoxy adhesives are effective for repairing cracks, holes, and detached pieces.
4.4. Reinforcing with Wire Mesh and Zip Ties
For added strength, consider reinforcing the repaired area with wire mesh and zip ties. This method is particularly useful for areas that are subject to stress or impact.
- Apply Patch or Adhesive: Repair the damaged area using one of the methods above.
- Cut Wire Mesh: Cut a piece of wire mesh that is slightly larger than the repaired area.
- Position Mesh: Position the wire mesh over the repaired area.
- Secure with Zip Ties: Use zip ties to secure the wire mesh to the plastic component.
- Trim Excess: Trim any excess wire mesh or zip ties.
4.5. Temporary Fixes
If you need a quick, temporary fix, consider using duct tape or heavy-duty tape. While these methods are not permanent, they can provide temporary protection until you can perform a more thorough repair.
5. Essential Tools and Materials
Having the right tools and materials is essential for successful plastic repairs. CARDIAGTECH.NET offers a wide range of high-quality tools and materials to meet your needs.
5.1. List of Necessary Tools
Here’s a list of essential tools available at CARDIAGTECH.NET for repairing plastic under your car:
| Tool | Description |
|---|---|
| Plastic Repair Kit | Includes bonding agents and reinforcing mesh for patching cracks and holes |
| Plastic Welding Kit | Contains a welding tool and filler rods for fusing plastic together |
| Epoxy Adhesives | Strong and versatile adhesives for repairing various types of plastic damage |
| Heat Gun | Used to soften plastic for shaping and bonding |
| Sandpaper | Used to prepare surfaces for bonding and to smooth repaired areas |
| Degreaser | Used to clean surfaces and remove grease and dirt |
| Clamps | Used to hold repaired areas together while adhesives cure |
| Drill | Useful for creating holes for zip ties or fasteners |
| Wire Mesh | Provides added strength and reinforcement to repaired areas |
| Zip Ties | Used to secure wire mesh and other materials to the plastic component |
| Safety Glasses | Protects eyes from debris and fumes |
| Gloves | Protects hands from chemicals and sharp edges |
5.2. Recommended Repair Materials
In addition to the tools listed above, CARDIAGTECH.NET also offers a variety of high-quality repair materials:
| Material | Description |
|---|---|
| Plastic Filler Rods | Used with plastic welding tools to fill cracks and gaps |
| Bonding Agents | Chemical solutions that create a strong bond between plastic surfaces |
| Reinforcing Mesh | Provides added strength and support to repaired areas |
| Epoxy Resin | A two-part adhesive that creates a strong, durable bond |
| Duct Tape | A temporary solution for holding parts in place until a more permanent repair can be made |
| Fasteners | Replacement clips, screws, and bolts for securing plastic components |
5.3. Safety Equipment
Safety should always be a top priority when working on your vehicle. Make sure to wear safety glasses and gloves to protect yourself from debris, chemicals, and sharp edges. CARDIAGTECH.NET provides a range of safety equipment to keep you protected.
6. Step-by-Step Repair Guide
Here’s a detailed step-by-step guide to repairing the plastic under your car. This guide assumes you have already assessed the damage and gathered the necessary tools and materials from CARDIAGTECH.NET.
6.1. Preparing the Vehicle
- Park on a Level Surface: Ensure your vehicle is parked on a level surface.
- Engage Parking Brake: Engage the parking brake to prevent the vehicle from rolling.
- Loosen Lug Nuts: Loosen the lug nuts on the wheels you’ll be removing.
- Lift the Vehicle: Use a floor jack from CARDIAGTECH.NET to lift the vehicle.
- Support with Jack Stands: Place jack stands under the vehicle’s frame for support.
- Remove Wheels: Remove the wheels to provide better access to the plastic under car.
6.2. Removing the Damaged Plastic
- Locate Fasteners: Identify all the fasteners (clips, screws, bolts) that secure the damaged plastic component.
- Remove Fasteners: Use the appropriate tools to remove the fasteners.
- Detach Plastic: Carefully detach the plastic component from the vehicle.
6.3. Cleaning and Preparing the Surface
- Clean the Plastic: Clean the plastic component with a degreaser to remove dirt, grease, and debris.
- Sand the Surface: Use sandpaper to roughen the surface of the plastic, which will help the repair materials adhere better.
- Wipe Clean: Wipe the surface clean with a cloth or paper towel.
6.4. Applying Repair Materials
Choose the appropriate repair method based on the type and severity of the damage. Follow the instructions provided with the repair materials.
- Patching with Plastic Repair Kit:
- Apply the bonding agent to the damaged area.
- Place the reinforcing mesh over the bonding agent.
- Apply another layer of bonding agent over the mesh.
- Allow the bonding agent to cure.
- Using Plastic Welding:
- Heat the plastic welding tool.
- Apply the filler rod to the damaged area.
- Smooth the welded area.
- Allow the repaired area to cool.
- Applying Epoxy Adhesives:
- Mix the epoxy components.
- Apply the epoxy adhesive to the damaged area.
- Clamp the repaired area together.
- Allow the epoxy to cure.
6.5. Reinforcing the Repair
For added strength, reinforce the repaired area with wire mesh and zip ties.
- Position Wire Mesh: Position the wire mesh over the repaired area.
- Secure with Zip Ties: Use zip ties to secure the wire mesh to the plastic component.
- Trim Excess: Trim any excess wire mesh or zip ties.
6.6. Reinstalling the Plastic
- Position Plastic: Position the repaired plastic component back onto the vehicle.
- Secure Fasteners: Reinstall the fasteners (clips, screws, bolts) to secure the plastic component.
- Tighten Fasteners: Tighten the fasteners to the appropriate torque.
6.7. Final Inspection
- Visual Inspection: Visually inspect the repaired area to ensure that it is securely attached and that there are no gaps or loose parts.
- Test Drive: Take the vehicle for a test drive to ensure that there are no unusual noises or vibrations.
7. Preventive Measures
Taking preventive measures can help extend the life of the plastic under your car and reduce the need for repairs.
7.1. Regular Inspections
Regularly inspect the plastic under your car for signs of damage. Catching minor issues early can prevent them from turning into more significant problems.
7.2. Avoiding Road Hazards
Avoid driving over road hazards such as potholes, speed bumps, and debris. These hazards can cause impact damage to the plastic under your car.
7.3. Proper Maintenance
Ensure that the fasteners that secure the plastic under your car are properly tightened. Loose fasteners can cause the plastic to sag and drag, leading to damage.
7.4. Applying Protective Coatings
Consider applying a protective coating to the plastic under your car. These coatings can help protect the plastic from UV damage, corrosion, and impact damage.
8. When to Replace vs. Repair
Knowing when to replace the plastic under your car versus repairing it is crucial for maintaining your vehicle’s integrity and safety.
8.1. Factors to Consider
Consider the following factors when deciding whether to replace or repair:
- Severity of Damage: Minor cracks and holes can often be repaired, while extensive damage may require replacement.
- Location of Damage: Damage to critical areas may necessitate replacement.
- Cost of Repair vs. Replacement: Compare the cost of repairing the plastic to the cost of replacing it.
- Availability of Parts: Check the availability of replacement parts.
- Your Skill Level: Assess your ability to perform the repair safely and effectively.
8.2. Signs That Replacement is Necessary
Replace the plastic under your car if you notice any of the following signs:
- Extensive Cracks and Breaks: Multiple large cracks or breaks.
- Missing Pieces: Significant portions of the plastic are missing.
- Structural Damage: Damage to the vehicle’s frame or other critical components.
- Repeated Repairs: Frequent repairs indicate that the plastic is no longer structurally sound.
8.3. Purchasing Replacement Parts
CARDIAGTECH.NET offers a wide selection of high-quality replacement parts for the plastic under your car. Ensure that you purchase the correct parts for your vehicle’s make and model.
9. Benefits of Using Quality Tools
Investing in quality tools from CARDIAGTECH.NET offers numerous benefits when repairing the plastic under your car.
9.1. Precision and Accuracy
Quality tools provide greater precision and accuracy, ensuring that repairs are performed correctly.
9.2. Durability and Reliability
Durable tools are built to last and can withstand the rigors of automotive repair.
9.3. Safety
Quality tools are designed with safety in mind, reducing the risk of injury during repairs.
9.4. Efficiency
Efficient tools can help you complete repairs more quickly and easily.
9.5. Cost Savings
Investing in quality tools can save you money in the long run by reducing the need for frequent replacements.
10. The Role of Professional Mechanics
While DIY repairs can be effective for minor damage, certain situations warrant the expertise of professional mechanics.
10.1. Complex Repairs
Complex repairs, such as structural damage or damage to critical components, should be performed by a professional mechanic.
10.2. Lack of Experience
If you lack the experience or confidence to perform the repair safely and effectively, consult a professional mechanic.
10.3. Specialized Tools
Some repairs require specialized tools that are only available to professional mechanics.
10.4. Warranty Concerns
If your vehicle is still under warranty, consult a professional mechanic to avoid voiding the warranty.
11. Environmental Considerations
When repairing or replacing the plastic under your car, it’s important to consider the environmental impact.
11.1. Recycling Plastic
Recycle the old plastic components whenever possible. Many auto parts stores and recycling centers accept plastic auto parts.
11.2. Proper Disposal
Dispose of any waste materials, such as used adhesives and solvents, properly. Follow local regulations for hazardous waste disposal.
11.3. Using Eco-Friendly Products
Use eco-friendly repair materials whenever possible. These products are less harmful to the environment.
12. Real-World Examples and Case Studies
To illustrate the concepts discussed in this guide, here are some real-world examples and case studies:
12.1. Case Study 1: Repairing a Cracked Splash Shield
A vehicle owner noticed a scraping noise while driving. Upon inspection, they found that the splash shield was cracked and dragging. Using a plastic repair kit from CARDIAGTECH.NET, they cleaned the area, applied the bonding agent and reinforcing mesh, and allowed the repair to cure. The scraping noise was eliminated, and the splash shield was restored to its original condition.
12.2. Case Study 2: Replacing a Damaged Underbody Panel
A vehicle owner drove over a large rock, causing significant damage to the underbody panel. The panel was cracked and had several missing pieces. After assessing the damage, they decided to replace the panel. They purchased a replacement panel from CARDIAGTECH.NET, removed the old panel, and installed the new panel. The vehicle’s underbody protection was restored, and the risk of further damage was eliminated.
12.3. Example: Using Plastic Welding to Repair a Bumper
A car bumper had a large crack after a minor collision. The owner used a plastic welding kit from CARDIAGTECH.NET to repair the crack. They cleaned the area, beveled the edges of the crack, and used the welding tool to melt the filler rod and fuse it to the bumper. The repaired area was smoothed, and the bumper was restored to its original condition.
13. FAQ: Addressing Common Questions
1. How do I know if my splash shield is damaged?
Listen for scraping noises while driving, and visually inspect for cracks, breaks, or hanging parts.
2. Can I drive with a damaged splash shield?
Driving with a damaged splash shield can increase the risk of damage to engine components and reduce fuel efficiency, so it’s best to repair it as soon as possible.
3. What tools do I need to repair the plastic under my car?
Essential tools include a floor jack, jack stands, flashlight, inspection mirror, gloves, pry bar or screwdriver, plastic repair kit, plastic welding kit, epoxy adhesives, heat gun, sandpaper, degreaser, clamps, drill, wire mesh, zip ties, safety glasses. These tools are available at CARDIAGTECH.NET.
4. Can I use duct tape for a temporary fix?
Yes, duct tape can provide a temporary fix, but it’s not a permanent solution.
5. How do I choose the right repair method?
Consider the type and severity of the damage, as well as your skill level.
6. When should I replace the plastic under my car?
Replace the plastic if there are extensive cracks, missing pieces, structural damage, or repeated repairs.
7. How can I prevent damage to the plastic under my car?
Regularly inspect the plastic, avoid road hazards, ensure proper maintenance, and apply protective coatings.
8. Is it safe to perform DIY repairs?
DIY repairs can be safe if you follow proper safety precautions and use the right tools and materials.
9. What are the benefits of using quality tools?
Quality tools provide precision, durability, safety, efficiency, and cost savings.
10. When should I consult a professional mechanic?
Consult a professional mechanic for complex repairs, lack of experience, specialized tools, or warranty concerns.
14. Connect with CARDIAGTECH.NET
Ready to get started on your plastic repair project? Visit CARDIAGTECH.NET today to explore our wide selection of high-quality tools and materials.
- Address: 276 Reock St, City of Orange, NJ 07050, United States
- WhatsApp: +1 (641) 206-8880
- Website: CARDIAGTECH.NET
Contact us today for expert advice and support. Our team is here to help you find the right tools and materials for your specific needs.
15. Call to Action
Don’t let a damaged plastic under car compromise your vehicle’s performance and safety. Contact CARDIAGTECH.NET today for expert advice and the highest quality tools and materials. Our knowledgeable team can help you select the perfect tools for your specific needs and guide you through the repair process.
Are you facing these challenges?
- Difficulty finding the right tools for plastic repair?
- Struggling to keep up with the latest repair techniques?
- Need to improve the efficiency of your repair work?
CARDIAGTECH.NET offers solutions that enhance your work efficiency, ensure accuracy, and save you time and money.
Don’t wait any longer—contact us now via WhatsApp at +1 (641) 206-8880 or visit CARDIAGTECH.NET to discover how our products can revolutionize your automotive repair experience. Act now and see the difference quality tools can make!
Mechanic showing what could cause a scraping noise while driving
16. Final Thoughts
Repairing the plastic under your car is a manageable task with the right knowledge, tools, and materials. By following the steps outlined in this comprehensive guide and utilizing the high-quality products available at CARDIAGTECH.NET, you can effectively restore your vehicle’s underbody protection and prevent further damage. Whether you’re a seasoned mechanic or a DIY enthusiast, CARDIAGTECH.NET is your trusted partner for all your automotive repair needs. Remember to prioritize safety, take your time, and enjoy the satisfaction of a job well done.