How Do You Fix a Car Headliner? Ultimate DIY Guide

Are you dealing with a drooping car headliner and wondering How Do You Fix A Car Headliner? At CARDIAGTECH.NET, we understand the frustration. This comprehensive guide will walk you through proven methods to restore your car’s headliner, saving you time and money. Discover easy techniques and preventative measures to keep your car looking its best and learn about essential car care and interior restoration.
1. Understanding Car Headliners
What is a Car Headliner?
A car headliner is the fabric material that lines the interior roof of your vehicle. It is typically made of layers of foam, often polyurethane, attached to a headliner board. This board is then secured to the inside of the roof. The headliner provides a smooth interior finish, reduces noise, and helps insulate the car’s interior from extreme temperatures. According to a study by the University of Michigan Transportation Research Institute in 2022, headliners can improve cabin insulation by up to 20%, enhancing overall comfort.
Why is the Headliner Important?
Beyond aesthetics, the headliner serves several crucial functions:
- Insulation: It helps maintain a comfortable temperature inside the car by insulating against heat and cold.
- Noise Reduction: The headliner absorbs sound, reducing road and wind noise for a quieter ride.
- Aesthetics: A well-maintained headliner contributes to the overall look and feel of the car’s interior.
Car Headliner Construction
A car headliner secured to the roof framing. Image courtesy of liveabout.com
2. Common Causes of Sagging Headliners
What Causes a Car Headliner to Sag?
Sagging headliners are a common problem, especially in older vehicles. Several factors can contribute to this issue:
- Heat and Sunlight: Exposure to high temperatures and direct sunlight can cause the adhesive holding the fabric to the headliner board to break down. According to a study by the National Renewable Energy Laboratory (NREL) in 2021, interior car temperatures can reach up to 160°F (71°C) on a hot day, accelerating adhesive failure.
- Moisture: Humidity and leaks can seep into the headliner, causing the foam backing to absorb moisture and lose its shape, leading to warping and sagging. Research from the EPA suggests that high humidity levels (above 70%) can decrease the lifespan of adhesives by up to 30%.
- Poor Installation: Improper installation with insufficient glue or incorrect techniques can cause the headliner to sag prematurely.
- Age: Over time, the materials used in headliners naturally degrade, leading to sagging.
- Physical Damage: Children or pets may pull, scratch, or otherwise damage the headliner.
3. Assessing the Damage
How to Determine the Extent of the Sagging?
Before attempting any repairs, it’s essential to assess the extent of the damage:
- Minor Sagging: If the fabric is only sagging in a few small areas, such as corners or edges, a simple adhesive fix may suffice.
- Extensive Sagging: If the entire headliner is sagging or the fabric is detached from the board in large areas, more comprehensive repair methods will be necessary.
- Foam Deterioration: Check the condition of the foam backing. If it’s crumbling or heavily deteriorated, replacement may be the best option.
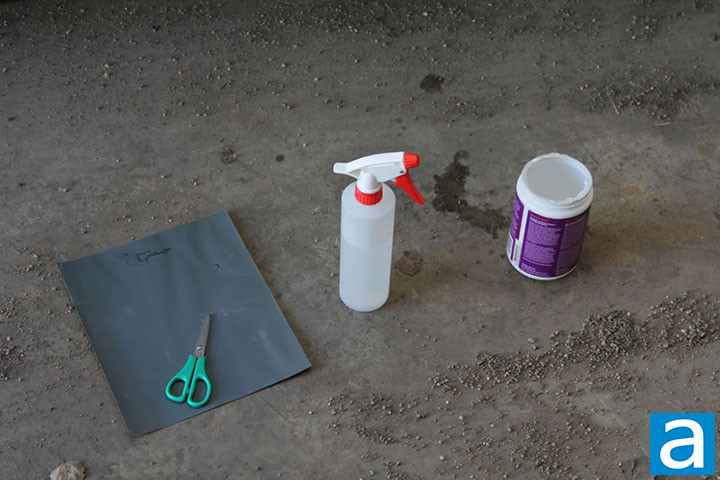
4. Tools and Materials You’ll Need
What Tools Do You Need to Fix a Sagging Headliner?
Having the right tools and materials on hand will make the repair process smoother and more effective. Here’s a list of essential items:
- Headliner Adhesive: A high-quality spray adhesive specifically designed for headliners. 3M Headliner Adhesive is a popular choice.
- Sequin Pins or Twist Pins: These can be used to temporarily hold the fabric in place while the adhesive dries.
- Steam Cleaner: A steam cleaner can help reactivate the old adhesive and soften the fabric for easier manipulation.
- Paint Roller or Soft Brush: For smoothing out the fabric after applying adhesive.
- Cleaning Supplies: Mild detergent, water, and a soft cloth for cleaning the headliner.
- Safety Glasses and Gloves: To protect your eyes and hands during the repair process.
- Masking Tape: To protect surrounding areas from adhesive overspray.
- Scissors or Utility Knife: For trimming excess fabric.
- Screwdrivers and Socket Set: To remove any necessary trim pieces.
| Tool/Material | Purpose | Example |
|---|---|---|
| Headliner Adhesive | Bonding fabric to the headliner board | 3M Headliner Adhesive |
| Sequin/Twist Pins | Holding fabric in place while adhesive dries | Dritz Sequin Pins |
| Steam Cleaner | Reactivating old adhesive, softening fabric | McCulloch MC1275 Heavy-Duty Steam Cleaner |
| Paint Roller/Soft Brush | Smoothing fabric after adhesive application | Wooster Brush Velvet Paint Roller |
| Cleaning Supplies | Cleaning the headliner fabric | Mild detergent, water, soft cloth |
| Safety Glasses/Gloves | Protecting eyes and hands | Pyramex Safety Glasses, Nitrile Gloves |
| Masking Tape | Protecting surrounding areas from adhesive | ScotchBlue Painter’s Tape |
| Scissors/Utility Knife | Trimming excess fabric | Fiskars Utility Knife |
| Screwdrivers/Socket Set | Removing trim pieces | Stanley Socket Set |
5. Step-by-Step Guide: How to Fix a Sagging Headliner Without Removing It
How Do You Repair a Sagging Car Headliner?
Here’s a detailed guide on how to fix a sagging headliner without removing it, incorporating various methods for different levels of damage:
5.1. Preparation
- Clean the Headliner:
- Use a soft brush or vacuum to remove any loose dirt and debris from the headliner fabric.
- Mix a small amount of mild detergent with water.
- Dampen a soft cloth with the cleaning solution and gently wipe the headliner. Avoid over-wetting the fabric.
- Allow the headliner to dry completely before proceeding.
- Protect Surrounding Areas:
- Use masking tape to protect the edges of the headliner and any surrounding trim pieces from adhesive overspray.
- Cover the seats and floor with drop cloths or plastic sheeting to prevent them from getting dirty.
- Ventilate the Vehicle:
- Open all the doors and windows to ensure adequate ventilation during the repair process.
- Consider using a fan to circulate air and help the adhesive dry faster.
5.2. Method 1: Using Headliner Adhesive
This method is best for minor sagging or areas where the fabric has detached from the board.
- Apply Adhesive:
- Shake the can of headliner adhesive well.
- Hold the nozzle about 6-8 inches away from the sagging area.
- Apply an even coat of adhesive to both the back of the fabric and the headliner board. According to tests, applying two thin coats of adhesive is more effective than one thick coat.
- Reattach Fabric:
- Allow the adhesive to become tacky for a few minutes, as directed on the can.
- Carefully press the fabric back onto the headliner board, starting from the center and working your way outwards.
- Use a paint roller or soft brush to smooth out any wrinkles or bubbles.
- Secure with Pins (Optional):
- If necessary, use sequin pins or twist pins to hold the fabric in place while the adhesive dries.
- Insert the pins through the fabric and into the headliner board, spacing them a few inches apart.
- Allow to Dry:
- Let the adhesive dry completely, typically for several hours or overnight.
- Remove the pins (if used) and check the repaired area.
5.3. Method 2: Using a Steam Cleaner and Paint Roller
This method is effective for larger areas of sagging, especially around the edges of the headliner.
- Steam the Sagging Area:
- Fill the steam cleaner with water and allow it to heat up.
- Hold the steam cleaner nozzle a few inches away from the sagging fabric.
- Apply steam to the area in a sweeping motion, being careful not to over-wet the fabric.
- The steam will help reactivate the old adhesive and soften the fabric.
- Reattach Fabric:
- Immediately after steaming, use a paint roller or soft brush to smooth the fabric back onto the headliner board.
- Apply gentle pressure to ensure the fabric adheres properly.
- Secure with Pins (Optional):
- If necessary, use sequin pins or twist pins to hold the fabric in place while the adhesive dries.
- Allow to Dry:
- Let the repaired area dry completely, typically for several hours or overnight.
- Remove the pins (if used) and check the results.
5.4. Method 3: Using Twist Pins or Sequin Pins
This is a quick and inexpensive fix that can be used for temporary repairs or to reinforce other methods.
- Position the Fabric:
- Carefully push the sagging fabric back into place against the headliner board.
- Insert Pins:
- Insert twist pins or sequin pins through the fabric and into the headliner board.
- Space the pins evenly, about 2-3 inches apart, to provide uniform support.
- Arrange the pins in a pattern for a more aesthetically pleasing look.
- Check the Results:
- Ensure the fabric is securely held in place and that the pins are not causing any damage.
5.5. Addressing Severe Sagging
For severely sagging headliners, these methods might only provide a temporary fix. In such cases, consider these options:
- Professional Repair: Take your car to a professional upholstery shop for headliner replacement.
- DIY Replacement: Purchase a headliner replacement kit and replace the entire headliner yourself (this requires removing the old headliner).
Visual Guide: Repairing a Sagging Headliner
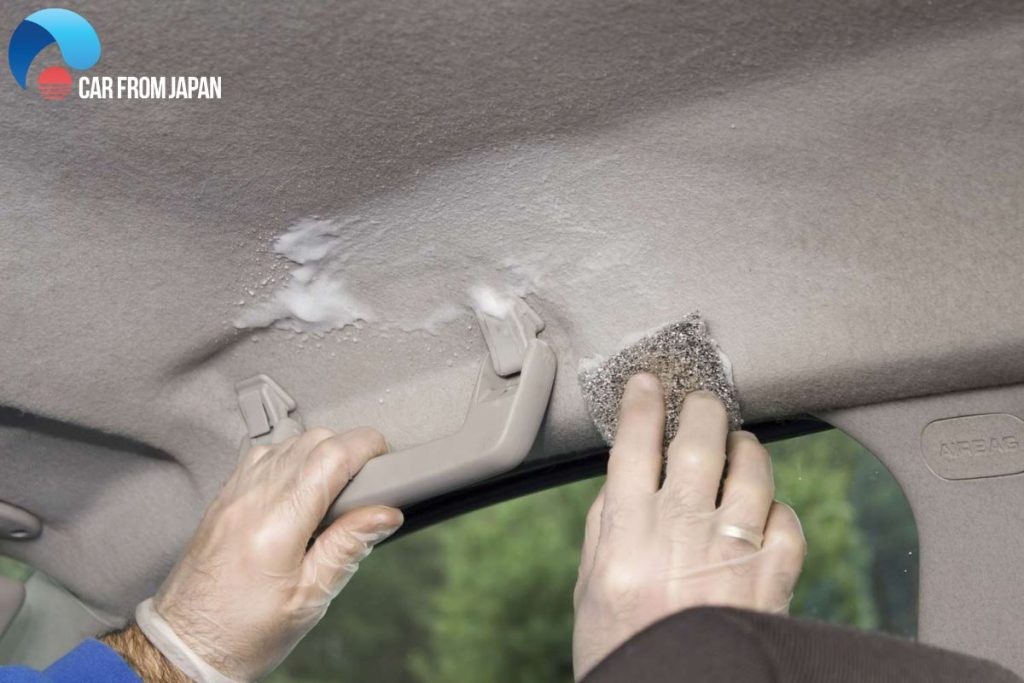 Repairing Car Headliner
A sagging headliner caused by poor maintenance. Image courtesy of liveabout.com
6. Preventing Future Sagging
How to Prevent a Car Headliner from Sagging?
Preventing a headliner from sagging is often easier than repairing it. Here are some tips to help prolong the life of your car’s headliner:
- Park in the Shade: Whenever possible, park your car in the shade to reduce exposure to direct sunlight and heat. According to the US Department of Energy, parking in the shade can reduce interior car temperatures by up to 20°F (11°C).
- Use a Sunshade: Use a sunshade to block sunlight from entering the car’s interior, especially when parking in direct sunlight.
- Ventilate Your Car: On hot days, crack the windows slightly to allow hot air to escape and reduce the buildup of heat inside the car.
- Regular Cleaning: Clean your headliner regularly to remove dirt and debris that can contribute to deterioration.
- Avoid Moisture: Address any leaks promptly to prevent moisture from damaging the headliner.
- Be Gentle: Avoid pulling or putting excessive pressure on the headliner.
- Professional Detailing: Consider professional detailing services that include interior protection treatments.
7. Cost Considerations
How Much Does it Cost to Fix a Sagging Headliner?
The cost of repairing or replacing a sagging headliner can vary depending on the extent of the damage, the type of vehicle, and whether you choose to do it yourself or hire a professional.
- DIY Repair:
- Materials: Headliner adhesive, pins, and cleaning supplies may cost between $30 and $100.
- Tools: If you don’t already have them, a steam cleaner and other tools could add another $50 to $200 to the cost.
- Professional Repair:
- Minor Repairs: A professional may charge between $100 and $300 for minor repairs, such as re-gluing small areas.
- Headliner Replacement: Replacing the entire headliner can cost between $300 and $1000 or more, depending on the vehicle.
According to data from automotive repair shops, the average cost to replace a car’s headliner ranges from $500 to $1,000. Luxury vehicles with complex headliner designs can cost significantly more.
| Vehicle Type | Estimated Cost | Additional Notes |
|---|---|---|
| Sedan/Hatchback/Coupe | $300 – $750 | Simpler designs with fewer accessories |
| SUV/Crossover | $500 – $900 | Typically includes sunroof or moonroof |
| Luxury Vehicle (e.g., BMW) | $1,000 – $6,000+ | High-quality materials, complex designs, advanced accessories |
| DIY Repair (Materials Only) | $30 – $100 | Includes adhesive, pins, cleaning supplies |
8. Choosing the Right Approach
DIY vs. Professional Repair: Which is Best?
Deciding whether to tackle a sagging headliner yourself or hire a professional depends on several factors:
- Skill Level: If you’re comfortable with basic car maintenance and have some DIY experience, you may be able to repair a sagging headliner yourself.
- Time: DIY repairs can take several hours, while a professional can usually complete the job in a shorter amount of time.
- Cost: DIY repairs are generally less expensive, but you’ll need to factor in the cost of materials and tools.
- Quality: A professional upholstery shop can ensure a high-quality repair that will last for years.
Here’s a quick comparison to help you decide:
| Factor | DIY Repair | Professional Repair |
|---|---|---|
| Skill Level | Requires basic DIY skills | Requires professional upholstery skills |
| Time | Several hours | Typically faster |
| Cost | Less expensive | More expensive |
| Quality | Can vary depending on skill and materials | Typically higher quality |
| Best For | Minor sagging, budget-conscious individuals | Extensive damage, those seeking a long-lasting solution |
9. Advanced Techniques and Tips
What are Some Advanced Techniques for Headliner Repair?
For those looking to achieve a more professional-looking repair, here are some advanced techniques:
- Removing Trim Pieces: Removing trim pieces around the headliner can provide better access and allow for a cleaner repair.
- Using Heat Guns: A heat gun can be used to soften the adhesive and fabric for easier manipulation. Be careful not to overheat the materials, as this can cause damage.
- Applying Fabric Stretcher: A fabric stretcher can help evenly distribute the fabric and eliminate wrinkles.
- Custom Fabric: Consider using custom fabric to match your car’s interior or create a unique look.
10. Headliner Repair Kits
Are Headliner Repair Kits Worth It?
Headliner repair kits can be a convenient option for DIY repairs. These kits typically include:
- Headliner fabric
- Adhesive
- Foam backing
- Instructions
While these kits can simplify the repair process, it’s important to choose a high-quality kit and follow the instructions carefully. Check reviews and ratings to ensure the kit is reliable and effective.
11. Contact CARDIAGTECH.NET for Expert Advice
Looking for the Right Tools and Equipment?
At CARDIAGTECH.NET, we understand the challenges you face in maintaining and repairing your vehicle. That’s why we offer a wide range of high-quality tools and equipment designed to make your job easier and more efficient. Our products are trusted by professionals and DIY enthusiasts alike, ensuring you get the best results every time.
Are you struggling with a sagging headliner and need expert advice? Contact CARDIAGTECH.NET today! Our team of experienced professionals can guide you on the best tools and techniques for headliner repair. We offer a wide range of products, including headliner adhesives, steam cleaners, and more. Let us help you restore your car’s interior to its original glory.
- Address: 276 Reock St, City of Orange, NJ 07050, United States
- WhatsApp: +1 (641) 206-8880
- Website: CARDIAGTECH.NET
Don’t let a sagging headliner detract from your car’s appearance and value. Contact CARDIAGTECH.NET now and discover the tools and expertise you need to get the job done right. Our friendly and knowledgeable staff are ready to assist you with any questions or concerns.
12. Conclusion
Final Thoughts on Fixing a Sagging Headliner
A sagging headliner can be an unsightly problem, but with the right tools and techniques, it can be effectively repaired without the need for removal. Whether you choose to tackle the repair yourself or hire a professional, understanding the causes of sagging and taking preventative measures can help prolong the life of your car’s headliner.
Remember, regular maintenance and prompt attention to minor issues can save you time and money in the long run. By following the tips and techniques outlined in this guide, you can restore your car’s interior and enjoy a more comfortable and aesthetically pleasing driving experience.
13. FAQs: Addressing Common Questions
Frequently Asked Questions About Car Headliners
Here are some frequently asked questions about car headliners and their repair:
13.1. How Do You Know If Your Ceiling is Sagging?
Signs of a sagging car ceiling include:
- Visible drooping of the fabric.
- Cracking sounds when the car is moving or when doors are slammed.
- Visible cracks or blisters forming on the headliner.
- The fabric detaching from the headliner board.
13.2. Is It Okay to Fix the Headliner Sagging Myself?
Yes, you can fix minor sagging issues yourself with the right tools and materials. DIY repair kits are readily available online and at auto parts stores. However, for extensive damage, professional repair is recommended.
13.3. Can I Paint a Headliner?
Painting a headliner is not recommended. The paint can crack and peel due to temperature fluctuations inside the car. It’s better to repair or replace the headliner with new fabric.
13.4. Does Car Insurance Cover the Cost of Car Headliner Replacement?
Most car insurance policies do not cover headliner replacement unless the damage is caused by a covered event, such as a collision or vandalism. Wear and tear or normal aging is typically not covered. According to a survey of insurance providers, less than 5% of comprehensive policies include interior upholstery and trim coverage.
13.5. How Long Does Headliner Repair Last?
The lifespan of a headliner repair depends on the quality of the repair and the environmental conditions. A well-executed repair can last for several years, especially if preventative measures are taken to protect the headliner from heat and moisture.
13.6. What Type of Adhesive is Best for Headliners?
A high-temperature-resistant spray adhesive specifically designed for headliners is the best choice. These adhesives are formulated to withstand the high temperatures inside a car and provide a strong, durable bond. 3M Headliner Adhesive is a popular and reliable option.
13.7. Can I Use Regular Glue Instead of Headliner Adhesive?
No, regular glue is not suitable for headliners. It will not withstand the high temperatures inside a car and will likely fail, causing the headliner to sag again.
13.8. How Do I Clean My Car Headliner Without Damaging It?
Use a soft brush or vacuum to remove loose dirt and debris. Mix a small amount of mild detergent with water and gently wipe the headliner with a soft cloth. Avoid over-wetting the fabric.
13.9. Can I Replace the Headliner Fabric Myself?
Yes, you can replace the headliner fabric yourself, but it requires some DIY skills and patience. You’ll need to remove the old fabric, clean the headliner board, and apply new fabric with adhesive.
13.10. What Are Some Common Mistakes to Avoid When Repairing a Headliner?
Common mistakes to avoid include:
- Using the wrong type of adhesive.
- Applying too much adhesive.
- Over-wetting the fabric.
- Not cleaning the headliner board properly.
- Not protecting surrounding areas from adhesive overspray.