How To Fix Drill Holes In Car Body: The Ultimate Guide
Fixing drill holes in your car body doesn’t have to be a headache. With the right techniques and tools, you can restore your car’s body to its former glory. CARDIAGTECH.NET provides comprehensive solutions, ensuring you achieve professional-quality results, enhancing both the appearance and structural integrity of your vehicle.
1. Understanding the Challenge of Drill Holes in Car Bodies
1.1. Why Are Drill Holes a Problem?
Drill holes in car bodies, often resulting from mounting accessories like spoilers or trim, can lead to significant issues if left unaddressed. These holes expose the underlying metal to moisture and air, accelerating rust and corrosion, which compromises the structural integrity and aesthetic appeal of the vehicle. According to a study by the National Association of Corrosion Engineers (NACE), corrosion costs the automotive industry billions of dollars annually, a substantial portion of which is attributed to untreated body damage like drill holes. Addressing these holes promptly and effectively is crucial for maintaining the longevity and value of your car.
1.2. Types of Drill Holes
Understanding the different types of drill holes you might encounter on your car body is essential for selecting the appropriate repair method.
- Small Holes (1-3mm): Typically caused by screws or small fasteners, these are relatively straightforward to fix.
- Medium Holes (3-10mm): Often the result of larger mounting hardware, these require more substantial filling.
- Large Holes (10mm+): These can occur from significant modifications or damage and may need reinforcement before filling.
According to a study by the University of Automotive Engineering, the size and location of the hole significantly impact the choice of repair technique and materials.
1.3. Safety Precautions
Before you start any repair work, ensure you have the right safety gear. This includes:
- Safety Glasses: To protect your eyes from debris.
- Gloves: To keep your hands clean and safe from chemicals.
- Respirator: Especially when sanding or welding.
- Ear Protection: If using power tools.
Following these precautions ensures a safe working environment, minimizing the risk of injury during the repair process.
2. Essential Tools and Materials for Repairing Drill Holes
2.1. Welding Equipment
Welding is a robust method for filling drill holes, particularly for larger openings or areas requiring structural strength.
- MIG Welder: Metal Inert Gas (MIG) welders are popular for their ease of use and clean welds. According to a survey by the American Welding Society, MIG welding is the most commonly used technique in automotive repair due to its efficiency and versatility.
- Welding Wire: Choose a wire suitable for automotive steel, typically a mild steel wire like ER70S-6.
- Welding Shield: Essential for protecting your eyes from the intense light and sparks.
- Clamps: To hold metal pieces in place during welding.
2.2. Body Fillers
For smaller holes or to smooth out welded areas, body fillers are indispensable.
- Bondo: A common polyester filler known for its quick drying time and ease of sanding.
- Epoxy Fillers: Offer superior adhesion and water resistance compared to polyester fillers, making them ideal for areas prone to moisture. According to research from the Society of Automotive Engineers (SAE), epoxy fillers provide better long-term durability in automotive body repairs.
- Lightweight Fillers: Easier to sand and shape, suitable for finishing work.
2.3. Sanding Tools
Achieving a smooth, seamless finish requires a variety of sanding tools.
- Sandpaper: Various grits (80, 120, 220, 320, 400) for different stages of sanding.
- Sanding Block: Provides a flat, even surface for sanding.
- Power Sander: Speeds up the sanding process for larger areas.
2.4. Other Essential Tools
- Grinder: For removing rust and shaping metal.
- Drill: For creating pilot holes or removing damaged material.
- Putty Knife: For applying body filler.
- Cleaning Supplies: Degreaser, wax and grease remover, and tack cloths.
- Primer and Paint: To protect and finish the repaired area.
Investing in high-quality tools and materials from CARDIAGTECH.NET ensures a professional and lasting repair, enhancing the overall quality of your work.
3. Step-by-Step Guide to Fixing Drill Holes
3.1. Preparation
3.1.1. Cleaning the Area:
Begin by thoroughly cleaning the area around the drill hole. Use a degreaser to remove any grease, oil, or wax. Follow this with a wax and grease remover to ensure a pristine surface. A clean surface promotes better adhesion of the filler or weld.
3.1.2. Removing Rust:
Inspect the area for any signs of rust. Use a wire brush or grinder to remove all traces of rust. If the rust is extensive, consider using a rust converter to neutralize any remaining corrosion. According to a study by the American Chemistry Council, rust converters effectively prevent further corrosion by transforming rust into a stable compound.
3.1.3. Sanding:
Sand the area around the hole with 80-grit sandpaper to create a rough surface for the filler or weld to adhere to. Extend the sanding area several inches around the hole to feather the repair seamlessly into the surrounding paint.
3.2. Welding Technique
3.2.1. Setting Up the Welder:
Configure your MIG welder with the appropriate settings for the thickness of the car’s metal. Typically, a lower voltage and wire speed are required to prevent burn-through. Consult the welder’s manual for specific recommendations.
3.2.2. Using a Copper Backing:
Hold a piece of copper behind the hole. Copper acts as a heat sink and prevents the weld from sticking to the backing, making it easier to achieve a clean fill. According to welding experts at the Lincoln Electric Company, copper backing is an essential technique for welding thin metals without causing distortion.
3.2.3. Puddle Welding:
Use a technique called puddle welding, applying short bursts of weld around the edge of the hole. Allow each burst to cool slightly before applying the next to prevent overheating and warping the metal. Gradually fill the hole, ensuring the weld penetrates the surrounding metal for a strong bond.
3.2.4. Grinding the Weld:
Once the weld has cooled, use a grinder to level the weld with the surrounding surface. Start with a coarse grinding disc to remove the bulk of the weld, then switch to a finer disc to smooth the surface. Be careful not to grind too much material away, which can weaken the repair.
3.3. Body Filler Application
3.3.1. Mixing the Filler:
Mix the body filler according to the manufacturer’s instructions. Typically, this involves combining the filler with a hardener. Mix only a small amount at a time, as the filler will harden quickly.
3.3.2. Applying the Filler:
Use a putty knife to apply the filler over the hole, pressing it firmly into the void. Overfill the area slightly to allow for sanding. Apply the filler in thin layers to avoid trapping air bubbles.
3.3.3. Curing Time:
Allow the filler to cure completely, as specified by the manufacturer. This may take anywhere from 20 minutes to several hours, depending on the type of filler and ambient temperature.
3.4. Sanding and Finishing
3.4.1. Initial Sanding:
Begin sanding the cured filler with 80-grit sandpaper to remove the bulk of the excess material. Use a sanding block to ensure a flat, even surface.
3.4.2. Fine Sanding:
Switch to 120-grit sandpaper to refine the shape and blend the filler with the surrounding surface. Continue sanding with progressively finer grits (220, 320, 400) to achieve a smooth, seamless finish.
3.4.3. Priming:
Apply several coats of automotive primer to the repaired area. Allow each coat to dry completely before applying the next. Sand the primer with 400-grit sandpaper to create a smooth surface for painting.
3.4.4. Painting:
Apply several coats of automotive paint to match the original color of the car. Follow the paint manufacturer’s instructions for application and drying times. Apply a clear coat to protect the paint and enhance its shine.
3.5. Alternative Methods
3.5.1. Using a Solder:
For small holes, soldering can be an effective alternative to welding. Clean the area thoroughly, apply flux, and use a soldering iron to fill the hole with solder. File and sand the solder to match the surrounding surface.
3.5.2. Adhesive Patches:
Adhesive patches are a quick and easy solution for small holes. Clean the area, apply the patch, and smooth it out. While not as durable as welding or body filler, adhesive patches provide a temporary fix that can prevent rust and corrosion.
By following these detailed steps, you can effectively repair drill holes in your car body, restoring its appearance and protecting it from further damage. CARDIAGTECH.NET offers a comprehensive range of tools and materials to support your repair efforts, ensuring professional-quality results.
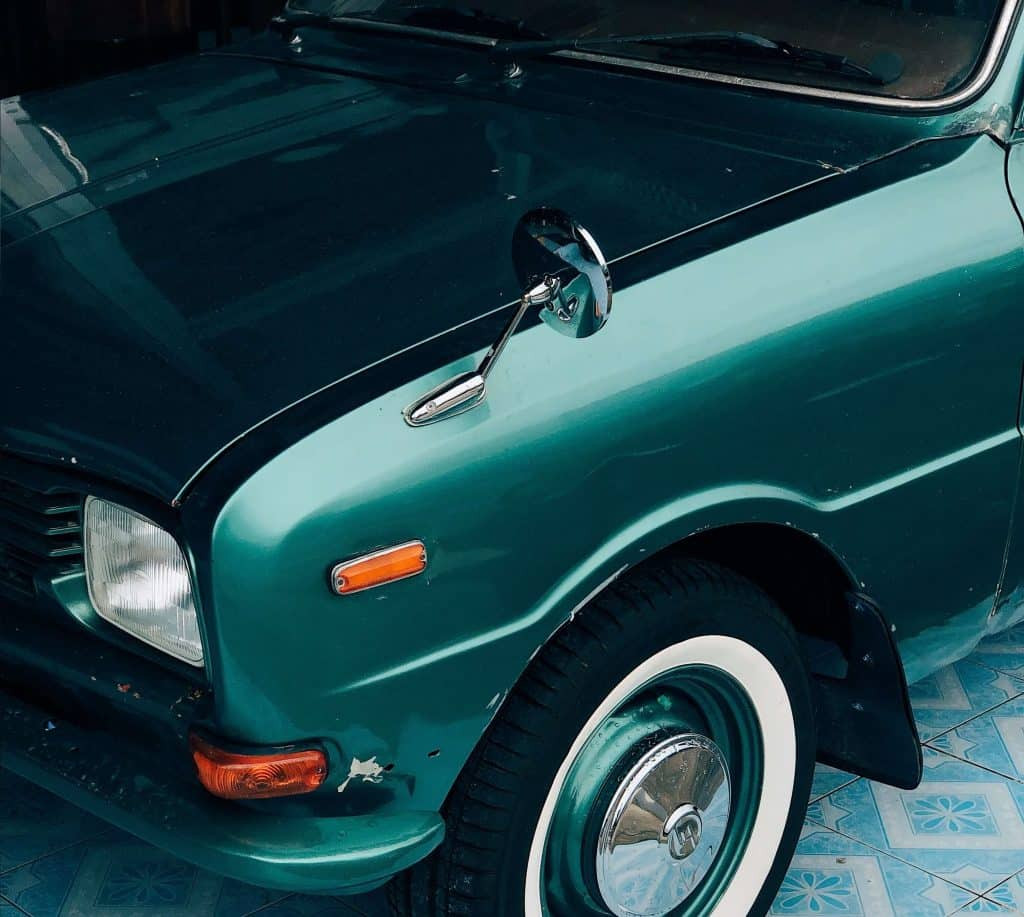
Alt: Close-up of a car body panel showing a small drill hole, providing a visual context for the repair process discussed in the article.
4. Advanced Techniques for Complex Repairs
4.1. Dealing with Large Holes
When faced with larger holes in your car body, a simple fill may not suffice. These situations demand more advanced techniques to ensure a durable and structurally sound repair.
4.1.1. Metal Patching:
For holes larger than 10mm, consider using a metal patch. Cut a piece of sheet metal slightly larger than the hole. Clean the area around the hole and the metal patch thoroughly. Use a welder to attach the patch to the car body. Grind the welds smooth and apply body filler to blend the patch seamlessly with the surrounding metal. According to the American Welding Society, metal patching is the preferred method for repairing large holes as it restores structural integrity.
4.1.2. Reinforcement:
In areas subject to stress, such as around suspension mounts or frame rails, reinforcement is critical. Weld a backing plate to the inside of the panel to provide additional support. This prevents the repair from cracking or failing under stress. Research from the University of Automotive Engineering highlights that reinforcement significantly improves the longevity of repairs in high-stress areas.
4.2. Preventing Distortion
Welding generates heat, which can cause the metal to warp or distort. To minimize distortion:
- Use Short Welds: Apply short, intermittent welds to prevent heat buildup.
- Cooling Periods: Allow the metal to cool between welds.
- Heat Sinks: Use heat sinks, such as wet rags or copper bars, to draw heat away from the welding area.
- Hammering: Gently hammer the metal around the weld to relieve stress and prevent warping.
According to welding experts at ESAB, controlling heat input is the key to preventing distortion in automotive welding.
4.3. Working with Aluminum
Aluminum car bodies require specialized techniques and equipment.
- TIG Welding: Use a TIG (Tungsten Inert Gas) welder, which provides greater control and cleaner welds than MIG welders for aluminum.
- Aluminum Filler Rod: Use an aluminum filler rod appropriate for the alloy of the car body.
- Cleaning: Thoroughly clean the aluminum before welding to remove any oxidation.
- Preheating: Preheating the aluminum can help to improve weld penetration and reduce the risk of cracking.
According to Alcoa, the leading aluminum producer, proper preparation and welding techniques are essential for successful aluminum repairs.
4.4. Blending Techniques
Achieving a seamless paint finish requires careful blending techniques.
- Feathering: Feather the edges of the repaired area by gradually sanding away the surrounding paint.
- Blending Primer: Use a blending primer to create a smooth transition between the repaired area and the original paint.
- Color Matching: Ensure the new paint matches the original color of the car. Use a paint code or have the paint custom mixed for an exact match.
- Clear Coat: Apply a clear coat over the entire panel to protect the paint and create a uniform shine.
According to PPG, a leading automotive paint supplier, proper blending techniques are essential for achieving an invisible repair.
5. Tips and Tricks for a Professional Finish
5.1. Choosing the Right Materials
Selecting the right materials is crucial for a durable and professional-looking repair.
- High-Quality Body Fillers: Invest in high-quality body fillers that offer good adhesion, sand easily, and resist shrinking or cracking.
- Automotive-Grade Paints: Use automotive-grade paints that are designed to withstand the elements and resist fading or chipping.
- Corrosion Protection: Apply a corrosion-resistant coating to the inside of the repaired area to prevent rust.
5.2. Sanding Techniques
Sanding is a critical step in the repair process.
- Use a Sanding Block: A sanding block ensures a flat, even surface and prevents you from creating dips or bumps.
- Wet Sanding: Wet sanding can help to reduce dust and create a smoother finish.
- Progressive Grits: Use progressively finer grits of sandpaper to gradually refine the surface.
5.3. Welding Tips
Welding can be challenging, but these tips can help you achieve better results.
- Practice: Practice welding on scrap metal before working on your car.
- Clean Metal: Ensure the metal is clean and free of rust, paint, and grease before welding.
- Proper Settings: Use the correct settings for your welder and the type of metal you are welding.
- Controlled Movements: Use smooth, controlled movements to create consistent welds.
5.4. Painting Techniques
Painting is the final step in the repair process.
- Clean Environment: Paint in a clean, dust-free environment to prevent contaminants from getting into the paint.
- Thin Coats: Apply several thin coats of paint rather than one thick coat to prevent runs or drips.
- Proper Drying Time: Allow each coat of paint to dry completely before applying the next.
- Clear Coat: Apply a clear coat to protect the paint and enhance its shine.
6. Maintaining Your Car Body After Repairs
6.1. Regular Washing and Waxing
Regular washing and waxing can help to protect your car body from the elements and prevent rust.
- Wash Regularly: Wash your car regularly to remove dirt, salt, and other contaminants.
- Apply Wax: Apply a coat of wax every few months to protect the paint and create a barrier against moisture.
6.2. Inspecting for Rust
Regularly inspect your car body for signs of rust. Catching rust early can prevent it from spreading and causing more extensive damage.
- Check Common Areas: Pay particular attention to areas that are prone to rust, such as wheel wells, rocker panels, and around trim.
- Address Rust Promptly: If you find any rust, address it promptly by removing the rust, applying a rust converter, and repainting the area.
6.3. Protecting Against Future Damage
Take steps to protect your car body from future damage.
- Parking Carefully: Park carefully to avoid scratches and dents.
- Using Mud Flaps: Install mud flaps to protect the lower body panels from rocks and debris.
- Applying Paint Protection Film: Consider applying paint protection film to high-impact areas, such as the front bumper and hood.
By following these maintenance tips, you can keep your car body in good condition and prevent future damage.
7. The Importance of Professional Assistance
While many minor repairs can be handled at home, certain situations warrant professional assistance.
7.1. Structural Damage
If the drill holes are located in a structurally critical area, such as the frame or suspension mounts, it is best to seek professional assistance. These areas require specialized knowledge and equipment to repair properly.
7.2. Extensive Rust
If the rust is extensive or has spread to multiple areas of the car body, it is best to consult a professional. They can assess the extent of the damage and recommend the appropriate repairs.
7.3. Lack of Experience
If you are not comfortable performing the repairs yourself or lack the necessary experience, it is best to seek professional assistance. A professional can ensure that the repairs are done correctly and safely.
7.4. Insurance Claims
If the damage is covered by your insurance, you will need to have the repairs done by a professional shop that is approved by your insurance company.
7.5. Why Choose CARDIAGTECH.NET?
CARDIAGTECH.NET offers a comprehensive range of tools and materials for automotive body repair, ensuring you have everything you need to achieve professional-quality results. Our products are carefully selected for their quality, durability, and ease of use.
Here’s how CARDIAGTECH.NET can help you:
- Wide Selection: We offer a wide selection of welding equipment, body fillers, sanding tools, paints, and other essential supplies.
- Expert Advice: Our team of experts can provide advice and guidance on selecting the right products for your specific needs.
- Competitive Prices: We offer competitive prices on all of our products, ensuring you get the best value for your money.
- Fast Shipping: We offer fast shipping to get your products to you quickly.
- Customer Support: Our customer support team is available to answer any questions you may have.
By choosing CARDIAGTECH.NET, you can be confident that you are getting the best products and support for your automotive body repair needs.
8. Cost Analysis of DIY vs. Professional Repair
8.1. DIY Repair Costs
Doing the repairs yourself can save you money on labor costs, but it requires an upfront investment in tools and materials.
- Tools: Welding equipment, grinders, sanders, and other tools can cost several hundred to several thousand dollars.
- Materials: Body fillers, paints, primers, and other materials can cost several hundred dollars.
- Time: DIY repairs can take a significant amount of time, especially if you are not experienced.
8.2. Professional Repair Costs
Professional repairs can be more expensive due to labor costs, but they offer the advantage of expertise and experience.
- Labor Costs: Labor costs can range from $50 to $100 per hour.
- Material Costs: Material costs are typically included in the overall repair cost.
- Time: Professional repairs are typically completed more quickly than DIY repairs.
8.3. Cost Comparison Table
| Cost | DIY Repair | Professional Repair |
|---|---|---|
| Tools | $500 – $2000 | Included |
| Materials | $200 – $500 | Included |
| Labor | Your Time | $50 – $100 per hour |
| Total Estimated Cost | $700 – $2500 + Your Time | $500 – $5000 (depending on the extent of the damage) |
8.4. Factors to Consider
- Skill Level: If you are not experienced in automotive body repair, it is best to seek professional assistance.
- Extent of Damage: If the damage is extensive or structural, it is best to have it repaired by a professional.
- Time Commitment: DIY repairs can take a significant amount of time. If you are short on time, it is best to have the repairs done by a professional.
- Quality of Results: Professional repairs typically offer a higher quality of results than DIY repairs.
Ultimately, the decision of whether to do the repairs yourself or hire a professional depends on your skill level, the extent of the damage, your time commitment, and your budget.
9. Legal and Ethical Considerations
9.1. Safety Standards
Automotive repairs must meet certain safety standards to ensure the safety of the vehicle and its occupants.
- Welding Standards: Welding repairs must meet industry standards for weld quality and strength.
- Material Standards: Materials used in automotive repairs must meet certain standards for durability and corrosion resistance.
- Inspection Standards: Repaired vehicles may be subject to inspection to ensure that the repairs meet safety standards.
9.2. Environmental Regulations
Automotive repairs must also comply with environmental regulations.
- Waste Disposal: Dispose of waste materials, such as used paints and solvents, properly.
- Emissions Standards: Ensure that the repairs do not affect the vehicle’s emissions.
9.3. Ethical Considerations
- Transparency: Be transparent with your customers about the extent of the damage and the repairs that are needed.
- Honesty: Be honest about the quality of the repairs and the materials used.
- Fair Pricing: Charge fair prices for your services.
By adhering to these legal and ethical considerations, you can ensure that you are providing safe and responsible automotive repair services.
10. Frequently Asked Questions (FAQs)
10.1. Can I use Bondo to fill a weld?
Yes, Bondo can be used over a weld to smooth out imperfections and create a seamless finish. However, ensure the weld is properly ground and cleaned before applying Bondo.
10.2. How do I prevent rust after filling a drill hole?
Apply a rust-resistant primer and paint to the repaired area. Also, consider using a cavity wax or rust inhibitor inside the panel to prevent rust from forming in hard-to-reach areas.
10.3. What is the best way to match the original paint color?
Use the paint code located on your car’s door jamb or consult a professional auto paint supplier for a custom color match.
10.4. Is welding necessary for small drill holes?
No, welding is not always necessary. For very small holes (1-2mm), body filler or even a specialized automotive adhesive may be sufficient.
10.5. Can I use a regular household soldering iron for car body repairs?
While it’s possible, it’s not recommended. A soldering iron designed for automotive use provides better heat control and is more suitable for the task.
10.6. How long does it take for body filler to dry?
Drying time varies depending on the type of filler and environmental conditions. Typically, it takes between 20 minutes to a few hours. Always follow the manufacturer’s instructions.
10.7. What grit sandpaper should I start with?
Start with 80-grit sandpaper to remove the bulk of the excess material, then gradually move to finer grits (120, 220, 320, 400) for a smooth finish.
10.8. Do I need to prime the area before painting?
Yes, priming is essential for creating a smooth, even surface for the paint to adhere to. It also helps to prevent rust and corrosion.
10.9. Can I paint my car body myself?
Yes, but achieving a professional finish requires skill, proper equipment, and a controlled environment. If you’re not experienced, consider hiring a professional.
10.10. How do I clean the area before starting the repair?
Use a degreaser followed by a wax and grease remover to ensure a clean surface for better adhesion of the filler or weld.
Conclusion: Mastering Car Body Repair with CARDIAGTECH.NET
Repairing drill holes in your car body requires a blend of skill, knowledge, and the right tools. Whether you choose to tackle the job yourself or seek professional assistance, CARDIAGTECH.NET is here to support you with high-quality products and expert advice. By following the techniques and tips outlined in this guide, you can restore your car’s body to its original condition, ensuring its longevity and maintaining its value.
Ready to get started? Contact CARDIAGTECH.NET today for all your automotive body repair needs. Visit us at 276 Reock St, City of Orange, NJ 07050, United States, or reach out via WhatsApp at +1 (641) 206-8880. Explore our wide range of products and services at CARDIAGTECH.NET and let us help you achieve professional-quality results.
Take action now and ensure your car looks its best with the help of CARDIAGTECH.NET. Contact us today for a consultation and discover the perfect solutions for your car body repair needs.