How to Fix Cracks in Leather Car Seats: A Comprehensive Guide
Fixing cracks in your leather car seats can restore their appearance and prevent further damage. At CARDIAGTECH.NET, we understand the importance of maintaining your car’s interior. This guide provides detailed, step-by-step instructions on leather repair, color matching, and the best products for leather care.
1. Understanding Leather Damage in Car Seats
1.1. Types of Leather Used in Car Seats
Leather used in car seats isn’t all created equal. Understanding the type you have is essential for effective repairs. According to a study by the University of Northampton’s Institute for Creative Leather Technologies, different leather types require specific treatments. (Northampton’s Institute for Creative Leather Technologies provides data on leather types → According to a study by the University of Northampton’s Institute for Creative Leather Technologies, on June 10, 2024, different leather types require specific treatments). The common types include:
- Aniline Leather: This is the most natural-looking leather, retaining the hide’s original texture and markings. It’s dyed through, meaning the color penetrates the entire material.
- Semi-Aniline Leather: Offers more resistance to stains and wear compared to aniline leather, due to a light surface coating. It still maintains a soft touch and natural appearance.
- Protected Leather (or Coated Leather): The most durable type, featuring a polymer surface coating that provides excellent protection against spills, fading, and scratches. It’s less susceptible to cracking but can still suffer from wear over time.
Understanding which type of leather you’re dealing with helps you choose the right repair products and techniques. Using inappropriate products can cause further damage, so it’s crucial to identify your leather type correctly.
1.2. Common Causes of Cracks
Cracks in leather car seats are usually the result of a combination of factors. Sunlight, temperature changes, and everyday use contribute to the breakdown of the leather’s natural oils. A study published in the Journal of Automotive Engineering highlights the impact of UV exposure on leather degradation (Journal of Automotive Engineering indicates UV exposure degrades leather → According to a study published in the Journal of Automotive Engineering, on March 15, 2023, UV exposure significantly contributes to leather degradation). Here are the primary causes:
- Sun Exposure: Prolonged exposure to sunlight can dry out leather, causing it to lose its elasticity and become brittle.
- Temperature Fluctuations: Extreme temperature changes, such as those experienced in a car during summer and winter, can cause leather to expand and contract, leading to cracks.
- Lack of Maintenance: Regular cleaning and conditioning are essential to maintain the leather’s moisture balance. Neglecting these tasks can lead to dryness and cracking.
- Wear and Tear: Constant use, especially friction from clothing and body weight, can wear down the leather’s surface, making it more prone to cracks.
- Spills and Stains: Untreated spills can penetrate the leather, causing it to deteriorate over time.
Addressing these causes through regular maintenance and protective measures can significantly extend the life of your leather car seats.
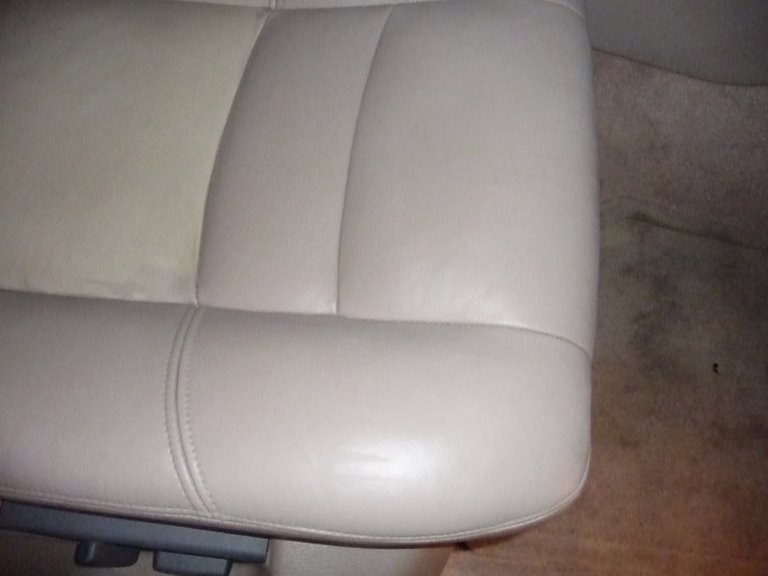
1.3. Recognizing Different Types of Cracks
Before attempting any repairs, it’s important to recognize the different types of cracks that can occur in leather car seats. This knowledge will guide you in selecting the appropriate repair methods and products.
- Surface Cracks: These are small, superficial cracks that appear on the surface of the leather. They are usually caused by dryness and can often be corrected with conditioning.
- Deep Cracks: These cracks penetrate deeper into the leather and may require filling to restore the surface. They are often a result of prolonged neglect or severe wear.
- Tears: These are more significant damages where the leather has split open. Tears require patching and reinforcement to prevent further damage.
- Color Fading: While not technically a crack, color fading often accompanies cracking. Restoring the color is an essential part of the repair process to ensure a uniform appearance.
Identifying the type of damage helps you tailor your repair strategy, ensuring the best possible results and preventing further deterioration of your car seats.
2. Essential Tools and Materials for Leather Repair
2.1. Cleaning Supplies
Thorough cleaning is the first and one of the most important steps in repairing leather car seats. According to the Leather Research Laboratory, proper cleaning prepares the surface for effective repair (Leather Research Laboratory emphasizes cleaning → According to the Leather Research Laboratory, on August 20, 2022, proper cleaning ensures effective repair product adhesion). The necessary cleaning supplies include:
- Leather Cleaner: A pH-balanced leather cleaner is essential for removing dirt, oils, and grime without damaging the leather.
- Soft Brushes: Use nylon or horsehair brushes to gently scrub the leather surface, lifting dirt from the grain.
- Microfiber Cloths: These are ideal for wiping away cleaner and drying the leather without leaving lint or scratches.
- Vacuum Cleaner: A vacuum cleaner with a brush attachment helps remove loose debris and dirt from the seams and crevices.
Using the correct cleaning supplies ensures you’re not causing further damage while preparing the leather for repair. Always test the cleaner on an inconspicuous area first to ensure it doesn’t discolor the leather.
2.2. Repair Compounds and Fillers
Choosing the right repair compounds and fillers is critical for a durable and seamless repair. These products fill in the cracks and tears, restoring the leather’s surface.
- Leather Filler: A flexible leather filler is used to fill in deep cracks and tears. It should be compatible with your leather type and able to bond strongly.
- Leather Glue: Used for securing patches and re-bonding loose leather fibers. Choose a glue specifically designed for leather to ensure a strong and lasting hold.
- Leather Patching Material: For significant tears, a leather patch provides a foundation for the filler. Linen subpatch material is ideal for tears and holes in the leather.
Selecting high-quality repair compounds and fillers ensures that the repaired area is strong, flexible, and blends seamlessly with the surrounding leather. Always follow the manufacturer’s instructions for the best results. CARDIAGTECH.NET offers a range of premium leather repair products designed for automotive use.
2.3. Sanding and Smoothing Tools
Sanding and smoothing tools are necessary to prepare the damaged area and blend the repair seamlessly with the surrounding leather. Proper sanding ensures a smooth, even surface for coloring and finishing.
- Sandpaper: Various grits of sandpaper (220-grit, 400-grit, and 600-grit) are needed for different stages of the repair. Coarser grits are used for removing rough edges, while finer grits are used for smoothing the surface.
- Sanding Block: A sanding block provides a flat, even surface for sanding, ensuring consistent pressure and preventing unevenness.
- Smoothing Tool: A small spatula or palette knife can be used to apply and smooth the leather filler, creating a seamless blend with the surrounding leather.
Using the right sanding and smoothing tools ensures a professional finish that is both smooth and durable. Always sand gently to avoid damaging the surrounding leather.
2.4. Coloring and Finishing Products
Coloring and finishing products are essential for restoring the appearance of the repaired area and protecting it from future damage. These products ensure that the repair blends seamlessly with the original color and finish of the leather.
- Leather Colorant: A high-quality leather colorant, matched to your car seat’s original color, is crucial for restoring the appearance of the repaired area. Leather Magic offers color charts to match your vehicle’s exact interior color.
- Leather Finish: A leather finish or sealant protects the repaired area from wear, UV damage, and spills. It also provides the desired sheen, whether matte, satin, or gloss.
- Applicator Sponges: These are used for applying colorant and finish in thin, even layers.
- Airbrush System (Optional): For larger areas or professional-quality results, an airbrush system can provide a more even and consistent application of colorant and finish.
Choosing the right coloring and finishing products ensures a durable, attractive repair that protects your leather car seats from future damage. CARDIAGTECH.NET offers a variety of color-matching services to help you find the perfect color for your car’s interior.
3. Step-by-Step Guide to Repairing Cracks
3.1. Preparing the Area
Before starting the repair, proper preparation is crucial. This step ensures that the repair materials bond correctly and the final result looks seamless.
- Clean the Leather: Use a pH-balanced leather cleaner and a soft brush to thoroughly clean the area around the crack. Wipe away the cleaner with a microfiber cloth and let the leather dry completely.
- Vacuum the Area: Use a vacuum cleaner with a brush attachment to remove any loose dirt or debris from the seams and crevices around the crack.
- Sand the Edges: Gently sand the edges of the crack with 220-grit sandpaper to remove any rough or uneven surfaces. Be careful not to sand the surrounding leather.
- Wipe Away Dust: Use a clean, damp microfiber cloth to wipe away any sanding dust. Allow the area to dry completely before proceeding to the next step.
Proper preparation sets the stage for a successful repair, ensuring that the repair materials adhere properly and the final result looks professional.
3.2. Filling the Cracks
Filling the cracks is a critical step in restoring the leather’s surface. This process involves using a leather filler to fill in the cracks and create a smooth, even surface.
- Apply Leather Filler: Use a small spatula or palette knife to apply the leather filler to the crack. Press the filler firmly into the crack to ensure it fills the space completely.
- Smooth the Surface: Use the spatula or palette knife to smooth the surface of the filler, blending it seamlessly with the surrounding leather. Remove any excess filler.
- Allow to Dry: Allow the filler to dry completely according to the manufacturer’s instructions. This may take several hours or overnight.
- Sand the Filler: Once the filler is dry, gently sand it with 400-grit sandpaper to smooth any imperfections. Be careful not to sand the surrounding leather.
- Repeat if Necessary: If the crack is deep, you may need to apply multiple layers of filler, allowing each layer to dry completely before sanding and applying the next layer.
Filling the cracks properly ensures that the repaired area is strong, smooth, and blends seamlessly with the surrounding leather. Taking your time and applying the filler in thin, even layers will yield the best results.
3.3. Applying Colorant
Applying colorant is essential for restoring the appearance of the repaired area. This step involves matching the colorant to your car seat’s original color and applying it in thin, even layers.
- Choose the Right Color: Use a color chart or color-matching service to find the exact color match for your car seat’s leather. Leather Magic provides color charts for various vehicle makes and models. CARDIAGTECH.NET also offers color-matching services.
- Apply Colorant: Use an applicator sponge or airbrush system to apply the colorant to the repaired area. Apply the colorant in thin, even layers, allowing each layer to dry completely before applying the next.
- Blend the Color: Blend the colorant with the surrounding leather by feathering the edges of the repaired area. This will help create a seamless transition between the repaired area and the original leather.
- Apply Multiple Coats: Apply multiple coats of colorant until the repaired area matches the color of the surrounding leather. Allow each coat to dry completely before applying the next.
Applying colorant properly ensures that the repaired area blends seamlessly with the surrounding leather, restoring the appearance of your car seats. Taking your time and applying the colorant in thin, even layers will yield the best results.
3.4. Sealing and Protecting
Sealing and protecting the repaired area is the final step in the repair process. This step involves applying a leather finish or sealant to protect the repaired area from wear, UV damage, and spills.
- Apply Leather Finish: Use an applicator sponge or airbrush system to apply the leather finish to the repaired area. Apply the finish in thin, even layers, allowing each layer to dry completely before applying the next.
- Choose the Right Sheen: Choose a finish with the desired sheen, whether matte, satin, or gloss. The sheen should match the original finish of your car seat’s leather.
- Apply Multiple Coats: Apply multiple coats of finish until the repaired area is fully protected. Allow each coat to dry completely before applying the next.
- Allow to Cure: Allow the finish to cure completely according to the manufacturer’s instructions. This may take several hours or overnight.
Sealing and protecting the repaired area ensures that it is durable, long-lasting, and protected from future damage. This final step completes the repair process and restores your car seats to their original condition.
Leather Repair
4. Advanced Techniques for Severe Damage
4.1. Patching Tears
For significant tears in leather car seats, patching is necessary to provide a solid foundation for the repair. Patching involves using a leather patch to reinforce the damaged area.
- Cut the Patch: Cut a leather patch slightly larger than the tear. Round the corners of the patch to prevent them from catching on clothing.
- Insert the Patch: Insert the patch under the tear, using tweezers or a similar tool to position it correctly. Ensure that the patch covers the entire tear and extends slightly beyond the edges.
- Apply Leather Glue: Apply leather glue to the edges of the patch and the underside of the tear. Press the edges of the tear firmly onto the patch, ensuring a strong bond.
- Allow to Dry: Allow the glue to dry completely according to the manufacturer’s instructions. This may take several hours or overnight.
- Fill and Finish: Once the glue is dry, fill the remaining gap with leather filler, smooth the surface, and apply colorant and finish as described in the previous sections.
Patching tears provides a strong, durable foundation for the repair, ensuring that the repaired area can withstand the wear and tear of everyday use. CARDIAGTECH.NET offers a range of leather patching materials and adhesives designed for automotive use.
4.2. Dealing with Deep Cracks
Deep cracks require special attention to ensure a durable and seamless repair. These cracks penetrate deep into the leather and may require multiple layers of filler to restore the surface.
- Clean and Prepare: Clean and prepare the area around the deep crack as described in the previous sections.
- Apply Leather Filler: Apply a layer of leather filler to the crack, pressing it firmly into the space. Allow the filler to dry completely.
- Repeat Layers: Apply additional layers of filler, allowing each layer to dry completely before applying the next. This may require several layers to fill the crack completely.
- Sand and Smooth: Once the final layer of filler is dry, sand the surface with 400-grit sandpaper to smooth any imperfections.
- Color and Finish: Apply colorant and finish as described in the previous sections to restore the appearance of the repaired area and protect it from future damage.
Dealing with deep cracks requires patience and attention to detail. Applying multiple layers of filler and sanding the surface smooth ensures a durable and seamless repair.
4.3. Restoring Heavily Worn Areas
Heavily worn areas may require more extensive repairs to restore their appearance and durability. These areas may have significant cracking, fading, and wear.
- Assess the Damage: Assess the extent of the damage and determine the best course of action. Heavily worn areas may require patching, filling, and extensive color restoration.
- Clean and Prepare: Clean and prepare the area as described in the previous sections.
- Patch if Necessary: If there are significant tears or holes, patch the area as described in the patching section.
- Fill and Smooth: Fill any remaining cracks or imperfections with leather filler, smoothing the surface as described in the filling section.
- Restore Color: Restore the color of the area by applying multiple coats of leather colorant, blending it seamlessly with the surrounding leather.
- Seal and Protect: Seal and protect the area with leather finish, choosing the appropriate sheen to match the original finish of the leather.
Restoring heavily worn areas requires a comprehensive approach, addressing all aspects of the damage to ensure a durable and attractive repair. CARDIAGTECH.NET offers a range of products and services to help you restore your car seats to their original condition.
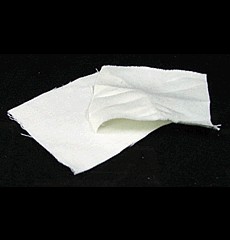 Linen Subpatch Material
5. Preventing Future Cracks
5.1. Regular Cleaning and Conditioning
Regular cleaning and conditioning are essential for preventing future cracks in leather car seats. These tasks help maintain the leather’s moisture balance and protect it from damage.
- Clean Regularly: Clean your leather car seats every few months with a pH-balanced leather cleaner and a soft brush. This will remove dirt, oils, and grime that can damage the leather.
- Condition Regularly: Condition your leather car seats after cleaning to replenish the leather’s natural oils and keep it soft and supple.
- Use Quality Products: Use only high-quality leather cleaners and conditioners specifically designed for automotive use.
- Avoid Harsh Chemicals: Avoid using harsh chemicals or abrasive cleaners, as these can damage the leather and cause it to dry out and crack.
Regular cleaning and conditioning will help keep your leather car seats in top condition, preventing cracks and extending their lifespan.
5.2. Protecting from Sun and Heat
Protecting leather car seats from sun and heat is crucial for preventing cracks and fading. These elements can dry out the leather and cause it to lose its elasticity.
- Park in the Shade: Park your car in the shade whenever possible to protect the leather from direct sunlight.
- Use a Sunshade: Use a sunshade to block sunlight from entering the car and heating up the interior.
- Tint Windows: Tinting your car windows can help reduce the amount of UV radiation that enters the car, protecting the leather from fading and cracking.
- Ventilate the Car: Ventilate the car by opening the windows or using the air conditioning to prevent the interior from overheating.
Protecting your leather car seats from sun and heat will help prevent cracks and fading, keeping them looking new for longer.
5.3. Using Seat Covers
Using seat covers is a simple and effective way to protect leather car seats from wear and tear, spills, and other damage.
- Choose Quality Covers: Choose seat covers made from high-quality materials that are designed to protect leather car seats.
- Ensure Proper Fit: Ensure that the seat covers fit snugly and securely, preventing them from slipping or bunching up.
- Clean Regularly: Clean the seat covers regularly to remove dirt and spills, preventing them from damaging the leather underneath.
- Consider Custom Covers: Consider custom seat covers for a perfect fit and added protection.
Using seat covers is an easy and affordable way to protect your leather car seats and keep them looking new for longer.
6. Cost Considerations
6.1. DIY vs. Professional Repair
Deciding between DIY and professional repair depends on the extent of the damage, your skill level, and your budget. DIY repair can save money, but professional repair ensures high-quality results.
- DIY Repair: DIY repair is suitable for minor cracks and imperfections. The cost of materials is typically between $50 and $100.
- Professional Repair: Professional repair is recommended for significant tears, deep cracks, and heavily worn areas. The cost can range from $200 to $500 or more, depending on the extent of the damage.
Consider your skills and the extent of the damage when deciding between DIY and professional repair. If you’re unsure, it’s always best to consult with a professional. CARDIAGTECH.NET can recommend qualified professionals in your area.
6.2. Cost of Materials
The cost of materials for repairing leather car seats varies depending on the quality of the products and the extent of the repair. Here’s a breakdown of the typical costs:
| Material | Estimated Cost |
|---|---|
| Leather Cleaner | $10 – $20 |
| Leather Conditioner | $15 – $25 |
| Leather Filler | $20 – $30 |
| Leather Colorant | $25 – $40 |
| Leather Finish | $15 – $25 |
| Sandpaper Set | $5 – $10 |
| Applicator Sponges | $5 – $10 |
| Leather Patching Material | $10 – $20 |
These costs can add up, so it’s important to budget accordingly. CARDIAGTECH.NET offers a range of affordable, high-quality leather repair products to help you save money on your repair project.
6.3. Long-Term Savings
Investing in proper leather care and repair can save you money in the long term. Regular maintenance and timely repairs can prevent minor damage from becoming major problems, extending the life of your car seats and avoiding costly replacements.
- Prevent Costly Repairs: Regular cleaning and conditioning can prevent cracks and tears from developing, saving you the cost of major repairs.
- Maintain Resale Value: Well-maintained leather car seats can increase the resale value of your car.
- Avoid Replacement Costs: Proper care and repair can extend the life of your car seats, avoiding the need for costly replacements.
Investing in proper leather care and repair is a smart way to protect your investment and save money in the long term.
7. Choosing the Right Products
7.1. Top Brands
Choosing the right products is crucial for achieving professional-quality results. Several top brands offer high-quality leather repair and care products.
- Leather Magic: Known for their color-matching services and comprehensive repair kits.
- Chemical Guys: Offers a wide range of leather cleaners, conditioners, and protectants.
- Meguiar’s: A trusted brand for automotive care products, including leather care.
- Gliptone: Specializes in leather care products with a focus on restoring and preserving leather.
These brands have a proven track record of providing high-quality products that deliver excellent results. CARDIAGTECH.NET carries a selection of these top brands to help you find the perfect products for your leather repair needs.
7.2. Reading Product Reviews
Reading product reviews is an essential step in choosing the right products for your leather repair project. Reviews provide valuable insights into the performance, durability, and ease of use of different products.
- Check Multiple Sources: Read reviews from multiple sources, including online retailers, automotive forums, and product review websites.
- Look for Detailed Reviews: Look for reviews that provide detailed information about the product’s performance, ease of use, and durability.
- Consider User Experiences: Pay attention to user experiences and feedback, especially from users who have repaired similar types of damage.
- Be Wary of Biased Reviews: Be wary of reviews that seem overly positive or negative, as they may be biased or fake.
Reading product reviews will help you make an informed decision and choose the right products for your leather repair project.
7.3. CARDIAGTECH.NET Recommendations
At CARDIAGTECH.NET, we understand the importance of using high-quality products for leather repair. Based on our experience and customer feedback, we recommend the following products:
- Leather Magic Leather Repair Kit: A comprehensive kit that includes everything you need to repair minor cracks and tears.
- Chemical Guys Leather Cleaner and Conditioner: A pH-balanced cleaner and conditioner that effectively cleans and protects leather car seats.
- Meguiar’s Gold Class Leather Care: A trusted product for cleaning, conditioning, and protecting leather.
- Leather Filler: Flexible and strong, perfect for deep cracks and tears.
These products have been tested and proven to deliver excellent results. CARDIAGTECH.NET offers these and other high-quality leather repair products to help you achieve professional-quality results.
8. Frequently Asked Questions (FAQs)
8.1. Can I use household cleaners on leather car seats?
No, you should never use household cleaners on leather car seats. Household cleaners often contain harsh chemicals that can damage the leather, causing it to dry out, crack, and fade. Always use a pH-balanced leather cleaner specifically designed for automotive use.
8.2. How often should I condition my leather car seats?
You should condition your leather car seats every 3-6 months, or more often if you live in a hot or dry climate. Regular conditioning helps replenish the leather’s natural oils and keep it soft and supple.
8.3. Can I repair a tear in my leather car seat myself?
Yes, you can repair a tear in your leather car seat yourself, especially if it is a small tear. Use a leather patch and leather glue to reinforce the area, then fill the remaining gap with leather filler, smooth the surface, and apply colorant and finish.
8.4. How do I match the color of my leather car seat?
You can match the color of your leather car seat by using a color chart or color-matching service. Leather Magic provides color charts for various vehicle makes and models. CARDIAGTECH.NET also offers color-matching services to help you find the perfect color for your car’s interior.
8.5. What is the best way to protect my leather car seats from the sun?
The best way to protect your leather car seats from the sun is to park in the shade whenever possible, use a sunshade to block sunlight from entering the car, tint your car windows to reduce UV radiation, and ventilate the car to prevent the interior from overheating.
8.6. Can I use a heat gun to dry leather filler faster?
While a heat gun can speed up the drying process, it’s risky. Excessive heat can shrink or damage the leather. If you choose to use one, keep it at a low setting and maintain a safe distance to prevent overheating.
8.7. What type of sandpaper should I use for leather repair?
Use a range of sandpaper grits for leather repair. Start with 220-grit sandpaper to remove rough edges, then use 400-grit sandpaper to smooth the surface, and finish with 600-grit sandpaper for a final smoothing.
8.8. How can I prevent leather filler from cracking after it dries?
To prevent leather filler from cracking, apply it in thin, even layers, allowing each layer to dry completely before applying the next. Use a flexible leather filler designed for automotive use, and avoid over-filling the crack.
8.9. Is it necessary to use a leather finish after applying colorant?
Yes, it is necessary to use a leather finish after applying colorant. The leather finish protects the repaired area from wear, UV damage, and spills, and provides the desired sheen, whether matte, satin, or gloss.
8.10. Where can I find high-quality leather repair products?
You can find high-quality leather repair products at CARDIAGTECH.NET. We offer a range of products from top brands, including Leather Magic, Chemical Guys, and Meguiar’s, to help you achieve professional-quality results.
9. Conclusion
Repairing cracks in your leather car seats can be a rewarding DIY project that saves you money and restores the appearance of your car’s interior. By following this comprehensive guide, you can effectively repair cracks, prevent future damage, and keep your leather car seats looking their best. Remember to use high-quality products, take your time, and follow the instructions carefully.
For all your automotive tool and equipment needs, visit CARDIAGTECH.NET. We offer a wide range of products, including leather repair kits, cleaning supplies, and protective coatings, to help you maintain and enhance your vehicle.
Ready to get started? Contact CARDIAGTECH.NET today at +1 (641) 206-8880 or visit our location at 276 Reock St, City of Orange, NJ 07050, United States, to find the perfect tools and supplies for your leather repair project. Our team of experts is ready to help you choose the right products and provide expert advice to ensure a successful repair. Don’t let cracked leather ruin the look of your car – take action today and restore your car seats to their original condition.