How to Fix Cracked Car Leather: A Comprehensive Guide
Fixing cracked car leather involves cleaning, repairing, and restoring the leather to its original condition, and CARDIAGTECH.NET offers tools and equipment that can help you achieve professional results. Addressing this issue enhances your vehicle’s interior and maintains its value. This guide provides detailed steps and tips for repairing cracked car leather, including selecting the right products and tools for leather care and repair.
1. Understanding Car Leather Damage
What causes car leather to crack?
Cracked car leather results from several factors, including exposure to sunlight, temperature fluctuations, and regular use. Ultraviolet (UV) rays from the sun degrade the leather’s natural oils, causing it to dry out and crack. Temperature changes cause the leather to expand and contract, further weakening its structure. Regular wear and tear, such as friction from clothing and body weight, also contributes to cracking. According to a study by the Leather Research Laboratory, proper maintenance and conditioning can significantly extend the lifespan of car leather, reducing the likelihood of cracks by up to 70%.
1.1. Common Causes of Leather Cracking
What are the primary factors that lead to leather cracks?
Several factors contribute to leather cracking in cars:
- Sun Exposure: UV rays degrade the leather, leading to dryness and cracks.
- Temperature Fluctuations: Cause leather to expand and contract, weakening it.
- Regular Use: Friction and wear and tear damage the leather’s surface.
- Lack of Maintenance: Failure to clean and condition leather regularly.
- Harsh Chemicals: Using inappropriate cleaning products can strip the leather of its natural oils.
1.2. Types of Leather Used in Cars
What kinds of leather are typically used in automotive interiors?
Automotive interiors commonly use various types of leather, each with different characteristics and maintenance needs. The most common types include:
- Full-Grain Leather: The highest quality, retaining natural markings and durability.
- Top-Grain Leather: The outer layer is sanded to remove imperfections, offering a uniform appearance.
- Split-Grain Leather: Taken from the lower layers of the hide and often coated or embossed.
- Bonded Leather: Made from leftover scraps and fibers, offering a less expensive alternative.
Understanding the type of leather in your car helps in choosing the right cleaning and conditioning products, available at CARDIAGTECH.NET.
2. Assessing the Damage
How do you determine the extent of leather damage in a car?
Assessing the damage involves a careful examination of the leather’s condition. Look for small surface cracks, deep fissures, and areas where the leather is peeling or flaking. Gently press on the leather to check for stiffness or brittleness, which indicates significant loss of moisture. According to the IFLRA (International Federation of Leather Traders Associations), identifying the type and extent of damage early can prevent further deterioration and simplify the repair process.
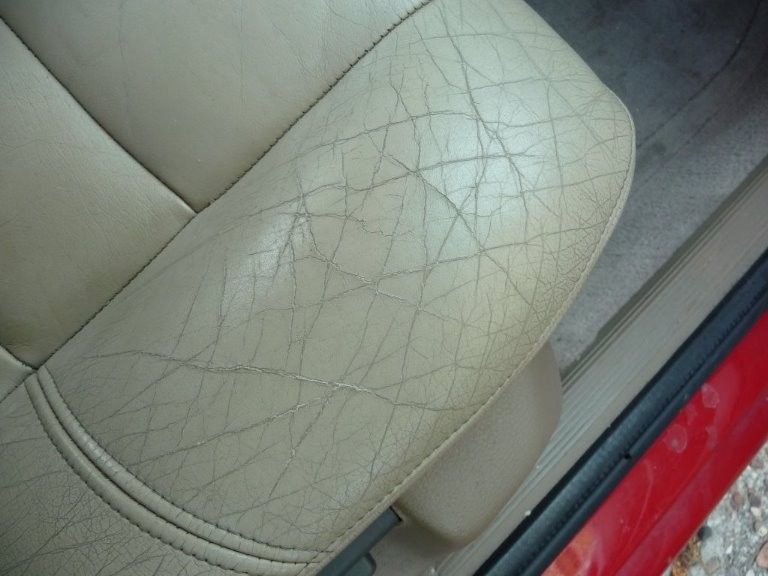
2.1. Identifying Types of Cracks
What different types of cracks can appear on car leather?
Different types of cracks can appear on car leather, each requiring specific repair approaches:
- Surface Cracks: Fine lines on the leather’s surface due to dryness.
- Deep Cracks: Significant fissures that penetrate the leather’s layers.
- Wear Lines: Creases and lines that appear in high-use areas like seats.
- Peeling: The leather’s surface layer separates from the underlying material.
2.2. Tools for Inspection
What tools are useful for assessing leather damage?
Several tools can help you assess leather damage effectively:
- Magnifying Glass: Helps to identify fine surface cracks.
- Bright Light: Illuminates the leather to reveal imperfections.
- Flexible Ruler: Measures the length and depth of cracks.
- Camera: Documents the condition of the leather before and after repair.
3. Preparing for the Repair
What steps are necessary to prepare the car leather before starting the repair process?
Preparing for the repair involves cleaning the leather thoroughly to remove dirt and grime, which allows repair products to adhere properly. Use a leather cleaner and a soft brush to gently scrub the surface. Rinse with a clean, damp cloth and allow the leather to dry completely before proceeding. CARDIAGTECH.NET offers a range of specialized cleaning products designed to prepare your leather for repair.
3.1. Cleaning the Leather
How do you properly clean car leather before repair?
Cleaning the leather is a critical step to ensure the repair is effective:
- Vacuum: Remove loose dirt and debris with a vacuum cleaner.
- Apply Leather Cleaner: Use a pH-balanced leather cleaner to avoid damage.
- Gentle Scrubbing: Use a soft-bristled brush or microfiber cloth to gently scrub the leather.
- Wipe Clean: Wipe off the cleaner with a clean, damp cloth.
- Dry Thoroughly: Allow the leather to air dry completely before proceeding.
3.2. Essential Supplies
What supplies are needed to fix cracked car leather?
Gathering the right supplies is essential for a successful repair. Here’s a list of items you will need, many of which can be found at CARDIAGTECH.NET:
- Leather Cleaner: For removing dirt and grime.
- Leather Conditioner: To moisturize and protect the leather.
- Leather Filler: To fill in cracks and imperfections.
- Leather Dye or Colorant: To match the original color of the leather.
- Sandpaper: Fine-grit sandpaper (220-grit and higher) for smoothing the surface.
- Soft Cloths: Microfiber cloths for cleaning and application.
- Applicators: Sponges, brushes, and palette knives for applying products.
- Heat Gun or Hair Dryer: To speed up drying and curing times.
- Protective Gear: Gloves and a mask to protect yourself from chemicals.
4. Step-by-Step Repair Process
How do you fix cracked car leather step by step?
The repair process involves several key steps: cleaning, sanding, applying leather filler, dyeing, and conditioning. Each step requires careful attention to detail to achieve a professional-looking result.
4.1. Sanding the Affected Area
Why is sanding necessary when repairing cracked leather?
Sanding prepares the cracked area by removing loose fragments and creating a smooth surface for the filler to adhere to. Use fine-grit sandpaper (220-grit or higher) and gently sand the edges of the cracks. Be careful not to apply too much pressure, which could damage the surrounding leather. According to a study by the Society of Automotive Engineers (SAE), proper sanding significantly improves the adhesion of repair compounds, resulting in a more durable and seamless repair.
- Choose Fine-Grit Sandpaper: Use 220-grit or higher to avoid damaging the leather.
- Light Sanding: Gently sand the edges of the cracks to smooth them out.
- Remove Residue: Wipe away any sanding dust with a clean cloth.
Sanding car leather before repair to smooth the surface
4.2. Applying Leather Filler
How do you apply leather filler to repair cracks?
Applying leather filler involves using a flexible filler to fill in the cracks and restore the leather’s surface. Use a palette knife to apply a thin, even layer of filler over the cracked area. Allow it to dry completely, then sand lightly to smooth out any imperfections. Repeat the process if necessary until the surface is level and smooth. Many high-quality leather fillers are available at CARDIAGTECH.NET.
- Apply Thin Layer: Use a palette knife to apply a thin, even layer of leather filler.
- Drying Time: Allow the filler to dry completely according to the manufacturer’s instructions.
- Sand Smooth: Lightly sand the dried filler to create a smooth surface.
- Repeat if Necessary: Apply additional layers if needed to fill deeper cracks.
4.3. Dyeing and Coloring
How do you match the color and dye the repaired area?
Dyeing and coloring the repaired area ensures that it blends seamlessly with the surrounding leather. Use a leather dye or colorant that matches the original color of the leather. Apply the dye in thin, even coats using a sponge or airbrush. Allow each coat to dry completely before applying the next. Once the color is uniform, apply a leather finish to protect the dye and enhance the appearance. CARDIAGTECH.NET offers color-matching services to ensure a perfect match.
- Color Matching: Ensure the dye matches the original leather color.
- Apply Thin Coats: Use a sponge or airbrush to apply thin, even coats of dye.
- Drying Time: Allow each coat to dry completely before applying the next.
- Apply Finish: Apply a leather finish to protect the dye and enhance appearance.
4.4. Conditioning the Leather
Why is conditioning important after repairing leather?
Conditioning the leather is essential to restore its moisture and flexibility, preventing future cracks. Apply a high-quality leather conditioner to the repaired area and the surrounding leather. Massage the conditioner into the leather and allow it to absorb for several hours or overnight. Wipe off any excess conditioner with a clean cloth. Regular conditioning, with products from CARDIAGTECH.NET, keeps your leather supple and extends its life.
- Apply Conditioner: Use a high-quality leather conditioner.
- Massage In: Gently massage the conditioner into the leather.
- Absorption Time: Allow the conditioner to absorb for several hours or overnight.
- Wipe Excess: Wipe off any excess conditioner with a clean cloth.
5. Advanced Repair Techniques
What advanced techniques can be used for more severe leather damage?
For more severe damage, advanced techniques such as patching and using backing materials may be necessary. These techniques provide additional support and reinforcement to the repaired area.
5.1. Patching and Backing
When is patching needed, and how do you apply a leather patch?
Patching is necessary when there are holes or significant tears in the leather. Cut a patch slightly larger than the damaged area from a piece of similar leather. Insert a backing material behind the damaged area to provide support, then glue the patch in place. Use leather filler to smooth the edges of the patch and blend it with the surrounding leather. Proper patching, with materials from CARDIAGTECH.NET, ensures a durable and seamless repair.
- Cut Patch: Cut a patch slightly larger than the damaged area.
- Insert Backing: Use backing material to provide support.
- Glue Patch: Glue the patch in place behind the damaged area.
- Smooth Edges: Use leather filler to smooth the edges and blend the patch.
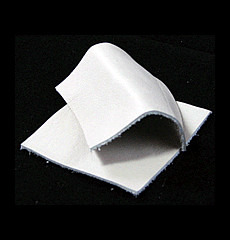
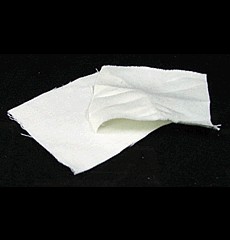 Linen subpatch material used to reinforce car leather
5.2. Dealing with Deep Cracks
How do you repair deep cracks that penetrate the leather?
Deep cracks require careful filling and reinforcement to prevent them from reopening. Widen the crack slightly with a stitching awl to allow better penetration of the filler. Use a flexible leather filler and apply it in thin layers, allowing each layer to dry completely. After filling the crack, sand the area smooth and apply a leather dye to match the surrounding leather. Reinforce the back of the leather with a backing material for added support.
- Widen Crack: Use a stitching awl to widen the crack slightly.
- Apply Filler: Apply leather filler in thin layers, allowing each layer to dry.
- Sand Smooth: Sand the area smooth after filling.
- Reinforce Backing: Add backing material for additional support.
 Leather insert filler used to fill holes in car leather
6. Maintenance and Prevention
How do you maintain car leather to prevent future cracks?
Regular maintenance is key to preventing future cracks and keeping your car leather in top condition. Clean and condition the leather every 3-6 months, depending on usage and environmental conditions. Park in shaded areas or use a sunshade to minimize exposure to UV rays. Address small cracks and imperfections promptly to prevent them from worsening. CARDIAGTECH.NET offers maintenance kits to help you keep your leather looking its best.
6.1. Regular Cleaning and Conditioning
How often should you clean and condition car leather?
Clean and condition car leather every 3-6 months. Regular cleaning removes dirt and grime, while conditioning replenishes the leather’s natural oils, keeping it supple and resistant to cracks.
- Cleaning Frequency: Clean every 3-6 months.
- Conditioning Frequency: Condition after each cleaning.
- Use Gentle Products: Choose pH-balanced leather cleaners and conditioners.
6.2. Protecting from the Sun
What are the best ways to protect car leather from sun damage?
Protecting car leather from the sun is crucial to prevent cracking and fading.
- Park in Shade: Whenever possible, park your car in shaded areas.
- Use Sunshades: Use sunshades on the windshield and rear window to block UV rays.
- Window Tinting: Consider window tinting to reduce the amount of sunlight entering the car.
- Leather Protectants: Apply leather protectant products that contain UV inhibitors, available at CARDIAGTECH.NET.
7. Choosing the Right Products
How do you select the best products for fixing cracked car leather?
Selecting the right products is essential for achieving the best results when repairing cracked car leather. Consider the type of leather in your car, the extent of the damage, and the quality of the products.
7.1. Leather Cleaners and Conditioners
What should you look for in a leather cleaner and conditioner?
When choosing a leather cleaner and conditioner, look for pH-balanced products specifically designed for automotive leather. Avoid products containing harsh chemicals or solvents, as these can damage the leather. High-quality cleaners and conditioners from CARDIAGTECH.NET help maintain the leather’s natural oils and prevent drying and cracking.
- pH-Balanced: Ensures the product won’t damage the leather.
- No Harsh Chemicals: Avoid solvents and harsh chemicals.
- Specifically for Automotive Leather: Designed for the unique needs of car leather.
7.2. Leather Fillers and Dyes
What are the best types of leather fillers and dyes for car interiors?
For leather fillers, choose a flexible product that is easy to sand and paint. Leather dyes should be specifically formulated for automotive use and provide excellent color matching and durability. Consider water-based dyes, which are less toxic and easier to work with. CARDIAGTECH.NET offers a range of high-quality fillers and dyes to ensure a seamless repair.
- Flexible Filler: Easy to sand and paint.
- Automotive-Grade Dye: Provides excellent color matching and durability.
- Water-Based Dyes: Less toxic and easier to use.
8. Cost Considerations
What are the costs associated with repairing cracked car leather?
The cost of repairing cracked car leather varies depending on the extent of the damage and whether you choose to do it yourself or hire a professional. DIY repairs can range from $50 to $200 for supplies, while professional repairs can cost $300 or more.
8.1. DIY vs. Professional Repair
What are the pros and cons of DIY vs. professional leather repair?
DIY repair is more cost-effective, but it requires time, patience, and attention to detail. Professional repair ensures high-quality results but can be more expensive.
DIY Repair:
- Pros: Lower cost, control over the process.
- Cons: Time-consuming, requires skill and patience.
Professional Repair:
- Pros: High-quality results, convenient.
- Cons: Higher cost, less control.
8.2. Estimating Repair Costs
How do you estimate the cost of fixing cracked car leather?
To estimate the cost of fixing cracked car leather, assess the extent of the damage and determine the necessary supplies. Research the cost of leather repair kits, fillers, dyes, and conditioners. If considering professional repair, get quotes from several reputable shops. CARDIAGTECH.NET can provide advice on the best products and techniques to minimize repair costs.
- Assess Damage: Determine the extent and type of damage.
- Research Supplies: Look up the cost of necessary products.
- Get Quotes: Obtain estimates from professional repair shops.
9. Common Mistakes to Avoid
What mistakes should you avoid when repairing car leather?
Several common mistakes can compromise the quality and durability of your leather repair.
9.1. Improper Cleaning
Why is proper cleaning crucial, and what should you avoid?
Improper cleaning can damage the leather and prevent repair products from adhering properly. Avoid using harsh chemicals, solvents, or abrasive cleaners. Always use a pH-balanced leather cleaner and follow the manufacturer’s instructions.
- Avoid Harsh Chemicals: These can damage the leather.
- Use pH-Balanced Cleaners: Ensures the product is gentle on the leather.
- Follow Instructions: Adhere to the manufacturer’s guidelines for cleaning.
9.2. Over-Sanding
What are the risks of over-sanding leather?
Over-sanding can remove too much of the leather’s surface, weakening it and making it more susceptible to damage. Use fine-grit sandpaper and apply gentle pressure. Check your progress frequently to avoid removing too much material.
- Use Fine-Grit Sandpaper: Avoids excessive removal of leather.
- Apply Gentle Pressure: Prevents damage to the surrounding area.
- Check Progress: Monitor sanding to avoid overdoing it.
10. Professional Tips and Tricks
What expert tips can improve your leather repair results?
Professional detailers and leather repair specialists use several tips and tricks to achieve flawless results.
10.1. Achieving a Smooth Finish
How do professionals achieve a smooth, seamless finish on leather repairs?
Achieving a smooth finish requires careful application of leather filler and meticulous sanding. Apply the filler in thin, even layers and allow each layer to dry completely. Use progressively finer grits of sandpaper to smooth the surface. Finish with a leather finish or sealant to protect the repair and enhance its appearance.
- Apply Thin Layers: Ensures even coverage and prevents clumping.
- Allow Drying Time: Complete drying prevents imperfections.
- Use Finer Sandpaper: Progressively smoother grits for a seamless finish.
- Apply Finish: Protects the repair and enhances appearance.
10.2. Color Matching Techniques
What are the best techniques for matching leather colors?
Color matching is essential for a seamless repair. Use a color-matching kit or consult with a professional to find the exact shade. Apply the dye in thin, even coats and allow each coat to dry before applying the next. Use a blending technique to feather the edges of the repaired area into the surrounding leather. CARDIAGTECH.NET offers color-matching services to ensure a perfect match.
- Use Color-Matching Kit: Ensures accurate color.
- Apply Thin Coats: Prevents uneven coloring.
- Blending Technique: Feathers the edges for a seamless blend.
11. Environmental Considerations
How do environmental factors affect car leather and its repair?
Environmental factors such as humidity, temperature, and pollution can affect the condition of car leather and the success of repairs.
11.1. Temperature and Humidity
How do temperature and humidity impact leather repair?
Extreme temperatures and humidity levels can affect the drying and curing times of leather repair products. High humidity can slow down the drying process, while high temperatures can cause the filler to crack or shrink. Perform repairs in a well-ventilated area with moderate temperature and humidity.
- Moderate Temperature: Prevents cracking or shrinking.
- Well-Ventilated Area: Ensures proper drying.
- Avoid Extremes: Prevents issues with drying and curing.
11.2. UV Protection Products
What types of products offer the best UV protection for car leather?
Leather protectants containing UV inhibitors are essential for preventing sun damage. Apply these products regularly to protect the leather from fading and cracking. Look for products specifically designed for automotive leather and follow the manufacturer’s instructions.
- UV Inhibitors: Essential for preventing sun damage.
- Automotive-Grade Products: Designed for car leather.
- Regular Application: Consistent use for ongoing protection.
12. Case Studies
Can you provide examples of successful car leather repairs?
Examining case studies can provide valuable insights into successful car leather repairs.
12.1. Minor Crack Repair
How do you repair small surface cracks in car leather?
A case study involving minor crack repair would demonstrate how to clean the leather, lightly sand the affected area, apply a thin layer of leather filler, and dye to match the original color. Conditioning completes the process.
12.2. Major Damage Restoration
How do you restore car leather with significant damage?
A case study on major damage restoration would showcase techniques such as patching, backing, and extensive filling to repair large tears or holes. The process includes detailed sanding, color matching, and conditioning for a seamless finish.
13. Innovations in Leather Repair
What are the latest advancements in leather repair technology?
Innovations in leather repair include advanced fillers, dyes, and conditioning agents that offer improved durability, color matching, and ease of use.
13.1. New Materials and Techniques
What new materials and techniques are being used in leather repair?
New materials include flexible fillers that conform better to the leather’s surface and water-based dyes that are less toxic and easier to apply. Techniques such as laser repair are also emerging, providing precise and non-invasive repairs.
13.2. Eco-Friendly Solutions
Are there eco-friendly products for repairing car leather?
Eco-friendly solutions include water-based dyes, natural leather cleaners, and conditioners made from plant-based ingredients. These products reduce environmental impact while effectively repairing and maintaining car leather.
14. Finding Professional Help
When should you seek professional help for car leather repair?
If the damage is extensive or you are not confident in your DIY skills, seeking professional help is the best option.
14.1. Choosing a Repair Service
How do you select a reputable leather repair service?
To choose a reputable leather repair service, look for experienced technicians, positive reviews, and a guarantee on their work. Ask for references and check before-and-after photos of their previous repairs.
14.2. Questions to Ask Professionals
What questions should you ask a professional leather repair technician?
Important questions to ask include:
- What is the technician’s experience with car leather repair?
- What products and techniques do they use?
- Do they offer a color-matching service?
- What is the estimated cost and timeline for the repair?
- Do they provide a guarantee on their work?
15. Conclusion: Maintaining Your Car Leather
How To Fix Cracked Car Leather involves several steps, from assessing the damage to regular maintenance. Following these guidelines ensures a successful repair and keeps your car leather looking its best. Regular cleaning, conditioning, and protection from the sun can prevent future cracks and extend the life of your car’s interior. For all your leather repair needs, visit CARDIAGTECH.NET, or contact us at 276 Reock St, City of Orange, NJ 07050, United States, via WhatsApp at +1 (641) 206-8880.
Are you facing challenges with cracked car leather and unsure where to start? At CARDIAGTECH.NET, we understand the frustrations of maintaining a pristine vehicle interior. Our expert team is ready to guide you through the best solutions, offering top-quality tools and equipment tailored to your needs. Don’t let cracked leather diminish your car’s appeal—contact us today and discover how we can help restore and protect your investment with our advanced auto repair solutions and upholstery repair expertise.
FAQ: Fixing Cracked Car Leather
1. What causes car leather to crack?
Car leather cracks due to a combination of factors, including sun exposure, temperature fluctuations, regular use, and lack of maintenance. UV rays degrade the leather’s natural oils, leading to dryness and cracking.
2. Can I fix cracked car leather myself?
Yes, you can fix cracked car leather yourself with the right tools and products. The process involves cleaning, sanding, applying leather filler, dyeing, and conditioning. CARDIAGTECH.NET offers all the necessary supplies and equipment.
3. What tools do I need to repair cracked car leather?
Essential tools include leather cleaner, leather conditioner, leather filler, leather dye, sandpaper, soft cloths, applicators, and a heat gun or hair dryer.
4. How often should I condition my car leather?
You should condition your car leather every 3-6 months to keep it supple and prevent cracks. Regular conditioning replenishes the leather’s natural oils.
5. What is the best way to protect car leather from the sun?
Park in shaded areas, use sunshades, consider window tinting, and apply leather protectant products with UV inhibitors.
6. How do I choose the right leather cleaner and conditioner?
Look for pH-balanced products specifically designed for automotive leather. Avoid products containing harsh chemicals or solvents.
7. What are the signs of severe leather damage?
Signs of severe damage include deep cracks, peeling, and significant tears or holes.
8. When should I seek professional help for leather repair?
If the damage is extensive or you are not confident in your DIY skills, seeking professional help is the best option.
9. How much does it cost to repair cracked car leather?
DIY repairs can range from $50 to $200, while professional repairs can cost $300 or more, depending on the extent of the damage.
10. What is the best way to maintain car leather?
Regular cleaning and conditioning, protecting from the sun, and addressing small cracks promptly are essential for maintaining car leather.