**How To Fix Chipped Paint On A Car: Your Ultimate Guide**
Is your car marred by unsightly paint chips? CARDIAGTECH.NET offers a comprehensive guide on How To Fix Chipped Paint On A Car and restore your vehicle’s pristine appearance. Discover expert techniques and essential tools to tackle paint damage effectively, including color matching and clear coat application.
1. Understanding Chipped Car Paint: Causes and Consequences
Chipped paint on a car is more than just a cosmetic issue; it’s a gateway to potential long-term damage. Understanding the primary causes and potential consequences will emphasize the importance of timely and effective repair.
1.1. Common Causes of Car Paint Chips
Several factors contribute to paint chips, with some being more prevalent than others. Knowing these can help you take preventative measures.
- Road Debris: Gravel, stones, and other debris kicked up by tires are major culprits, especially on highways.
- Weather: Harsh weather conditions, including extreme temperatures and exposure to salt, accelerate paint deterioration.
- Accidents: Minor collisions, even those seemingly insignificant, often result in paint chipping.
- Poor Paint Quality: Sometimes, the paint job itself is the issue, with inadequate adhesion or insufficient layers.
- Environmental Factors: Exposure to UV rays, acid rain, and bird droppings can degrade paint over time.
1.2. Why You Should Address Paint Chips Promptly
Ignoring paint chips might seem harmless, but it can lead to significant problems down the road. Addressing them quickly provides numerous advantages.
- Preventing Rust: Exposed metal is vulnerable to rust, which can spread rapidly and compromise the structural integrity of your car.
- Maintaining Aesthetics: Paint chips detract from your car’s appearance, reducing its overall appeal and value.
- Preserving Resale Value: A car with well-maintained paintwork commands a higher resale price than one with visible damage.
- Avoiding Costly Repairs: Addressing small chips is far more cost-effective than dealing with extensive rust damage or panel replacement later on.
- Ensuring Safety: While minor, unattended damage can sometimes lead to larger issues affecting vehicle safety over time.
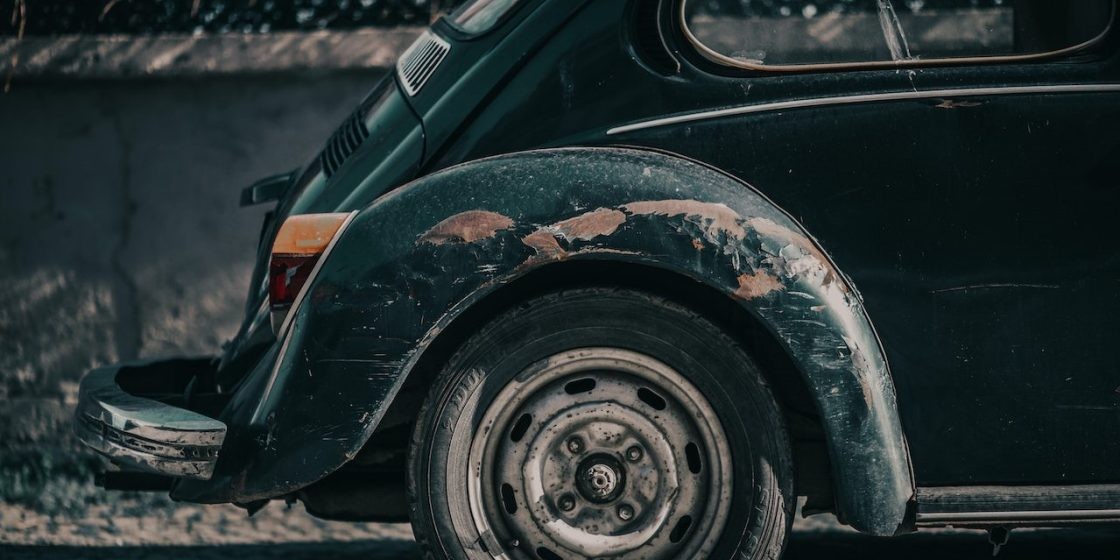
Road debris causes chipped paint on a car
Alt: Car bonnet showing severe stone chips requiring repair, highlighting the damage from road debris.
2. Essential Tools and Materials for DIY Paint Chip Repair
Before embarking on your paint chip repair journey, gather the necessary tools and materials. Having everything on hand will streamline the process and ensure a professional-looking result. CARDIAGTECH.NET recommends high-quality tools for lasting repairs. Contact us at Whatsapp: +1 (641) 206-8880 for expert advice.
2.1. Core Supplies
These are the fundamental items you’ll need for any paint chip repair project.
- Touch-Up Paint: Obtain touch-up paint that precisely matches your car’s color code. This code is typically found on a sticker inside the driver’s side door or in the owner’s manual.
- Primer: A good quality primer is essential for ensuring the touch-up paint adheres properly and provides a smooth base.
- Clear Coat: A clear coat protects the touch-up paint from UV rays and environmental damage, providing a glossy finish.
- Wax and Grease Remover: This cleans the affected area, removing any contaminants that could interfere with paint adhesion.
- Rubbing Alcohol: Ideal for further cleaning and degreasing the area, ensuring a pristine surface for repair.
2.2. Specialized Tools
These tools will help you achieve a more precise and professional repair.
- Fine-Tipped Applicator Brush: These brushes allow for precise application of paint, especially in small chips.
- Microfiber Cloths: Essential for cleaning and buffing without scratching the paint.
- Wet/Dry Sandpaper (Various Grits): Use different grits for smoothing the area and blending the repair with the surrounding paint.
- Sandpaper Block: Provides a stable and even surface for sanding, ensuring consistent results.
- Polishing Compound: Helps to blend the repair and restore the shine to the surrounding paintwork.
- Detailing Swabs: Useful for applying small amounts of product in tight areas.
2.3. Optional but Helpful Items
These items can make the process easier and improve the final result.
- Masking Tape: Protects surrounding areas from accidental paint application.
- Heat Gun or Hair Dryer: Speeds up the drying process for faster completion.
- Magnifying Glass: Helps you see small imperfections and ensures precise application.
- Gloves: Protect your hands from chemicals and paint.
- Respirator Mask: Protects you from inhaling harmful fumes, especially when working indoors.
3. Step-by-Step Guide: Fixing Chipped Paint on Your Car
Repairing chipped paint requires patience and attention to detail. This step-by-step guide, enhanced by CARDIAGTECH.NET, ensures you achieve professional results, preventing rust and maintaining your car’s value.
3.1. Preparation: Cleaning the Affected Area
Proper preparation is critical for a successful repair.
- Wash the Car: Start by washing your car to remove dirt and grime.
- Clean the Chip: Use wax and grease remover on the chipped area. Apply it with a microfiber cloth and gently scrub to remove any contaminants.
- Rubbing Alcohol: Follow up with rubbing alcohol for a final clean. This ensures the surface is completely free of any residues.
- Dry Thoroughly: Allow the area to air dry completely before proceeding to the next step.
3.2. Sanding the Edges
Sanding helps to smooth out any raised edges around the chip, creating a seamless surface for the new paint.
- Choose the Right Sandpaper: Use wet/dry sandpaper with a fine grit (2000-3000 grit) for this step.
- Wet Sanding: Wet the sandpaper and the surrounding area with water. This prevents the sandpaper from clogging and reduces the risk of scratching the paint.
- Gently Sand: Lightly sand the edges of the chip in a circular motion. Be careful not to apply too much pressure, as this could damage the surrounding paint.
- Check the Surface: Periodically check the surface with your finger to ensure the edges are smooth and even with the surrounding paint.
- Clean Again: After sanding, clean the area again with rubbing alcohol to remove any sanding residue.
- Dry Completely: Ensure the area is completely dry before moving on to the next step.
3.3. Applying Primer
Primer is essential for ensuring the touch-up paint adheres properly and provides a smooth base.
- Shake the Primer: Shake the primer bottle well to ensure the contents are properly mixed.
- Apply a Thin Coat: Use a fine-tipped applicator brush to apply a thin, even coat of primer to the chipped area. Be careful not to apply too much, as this could create a raised bump.
- Allow to Dry: Let the primer dry completely according to the manufacturer’s instructions. This usually takes about 30 minutes.
- Light Sanding (If Necessary): If the primer dries unevenly, lightly sand it with very fine grit sandpaper (3000-5000 grit) to create a smooth surface.
- Clean Again: Clean the area with rubbing alcohol to remove any sanding residue.
3.4. Applying Touch-Up Paint
Applying the touch-up paint requires patience and precision.
- Shake the Paint: Shake the touch-up paint bottle well to ensure the contents are properly mixed.
- Apply in Thin Layers: Use a fine-tipped applicator brush to apply a very thin layer of touch-up paint to the chipped area. It’s better to apply multiple thin layers than one thick layer.
- Drying Time: Allow each layer to dry completely before applying the next. This usually takes about 20-30 minutes per layer.
- Multiple Coats: Apply several thin coats until the paint is level with the surrounding paintwork.
- Avoid Overlapping: Be careful not to overlap the paint onto the surrounding area, as this could create a noticeable edge.
- Final Drying: Allow the final coat to dry completely for at least 24 hours before proceeding to the next step.
3.5. Applying Clear Coat
A clear coat protects the touch-up paint and provides a glossy finish.
- Shake the Clear Coat: Shake the clear coat bottle well to ensure the contents are properly mixed.
- Apply a Thin Layer: Use a fine-tipped applicator brush to apply a thin, even layer of clear coat to the painted area.
- Drying Time: Allow the clear coat to dry completely according to the manufacturer’s instructions. This usually takes about 24-48 hours.
- Multiple Coats (Optional): For added protection and shine, you can apply a second thin coat of clear coat after the first coat has dried.
- Final Drying: Allow the final coat to dry completely for at least 48 hours before proceeding to the next step.
3.6. Blending and Polishing
Blending and polishing are crucial for achieving a seamless repair.
- Wet Sanding (If Necessary): If there are any imperfections or unevenness in the clear coat, lightly wet sand the area with very fine grit sandpaper (3000-5000 grit).
- Polishing Compound: Apply a small amount of polishing compound to a microfiber cloth.
- Buffing: Gently buff the area in a circular motion until the repair is blended with the surrounding paintwork.
- Clean the Residue: Clean the area with a clean microfiber cloth to remove any polishing compound residue.
- Waxing (Optional): For added protection and shine, you can apply a coat of wax to the repaired area.
For expert tools, visit CARDIAGTECH.NET at 276 Reock St, City of Orange, NJ 07050, United States.
4. Advanced Techniques for Challenging Paint Chips
Sometimes, standard methods might not suffice, especially when dealing with deeper or more complex damage. These advanced techniques from CARDIAGTECH.NET can help.
4.1. Dealing with Deep Chips
Deep chips require extra attention to ensure a durable and seamless repair.
- Multiple Primer Layers: Apply several thin layers of primer, allowing each layer to dry completely before applying the next. This helps to fill the chip and create a solid base for the paint.
- Build Up the Paint: Apply multiple thin layers of touch-up paint, allowing each layer to dry completely. This helps to build up the paint to the level of the surrounding paintwork.
- Patience is Key: Take your time and be patient. Rushing the process can result in a less than perfect repair.
4.2. Repairing Chips with Rust
Rust must be addressed before any paint repair can be effective.
- Remove the Rust: Use a wire brush or rust remover to carefully remove all traces of rust from the chipped area.
- Apply Rust Converter: Apply a rust converter to the area to prevent future rust formation.
- Prime and Paint: Follow the standard repair process, starting with primer and ending with clear coat.
4.3. Blending Larger Areas
Blending larger areas requires a slightly different approach to ensure a seamless finish.
- Feathering: Feather the edges of the touch-up paint by lightly sanding with very fine grit sandpaper. This helps to blend the repair with the surrounding paintwork.
- Blending Compound: Use a blending compound to further blend the repair and remove any noticeable edges.
- Polishing: Polish the area to restore the shine and create a uniform finish.
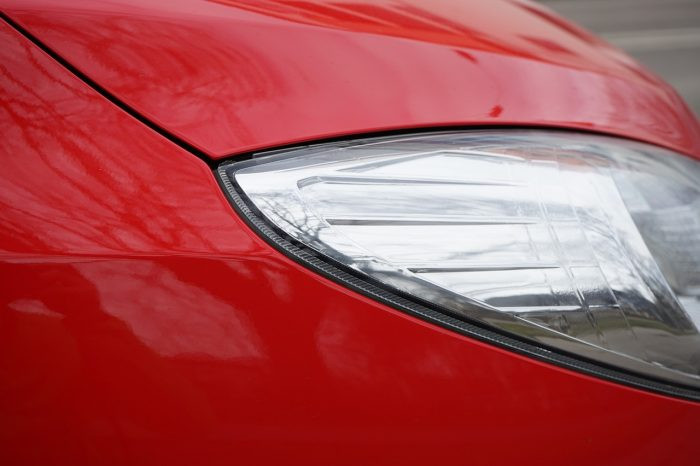
Road debris causes chipped paint on a car
Alt: Close-up of a hand using a fine brush to carefully apply touch-up paint to a small chip on a car panel.
5. Preventative Measures: Protecting Your Car’s Paint
Prevention is always better than cure. Here are proactive steps to minimize the risk of paint chips, recommended by CARDIAGTECH.NET.
5.1. Protective Films and Coatings
These provide a physical barrier against road debris and environmental factors.
- Paint Protection Film (PPF): A clear, self-healing film applied to vulnerable areas of your car, such as the hood, bumper, and fenders.
- Ceramic Coating: A chemical polymer solution that provides a protective layer against scratches, UV rays, and chemical contaminants.
5.2. Safe Driving Habits
Adjusting your driving habits can significantly reduce the likelihood of paint chips.
- Maintain Distance: Keep a safe distance from other vehicles, especially trucks and construction vehicles.
- Avoid Gravel Roads: If possible, avoid driving on gravel or unpaved roads, as these are more likely to kick up debris.
- Drive Slowly: Drive slowly on roads with loose gravel or debris to minimize the impact of flying objects.
5.3. Regular Maintenance
Regular washing and waxing can help protect your car’s paint from damage.
- Wash Regularly: Wash your car regularly to remove dirt, grime, and road salt.
- Wax Frequently: Apply a coat of wax every few months to protect the paint and provide a barrier against environmental contaminants.
- Detailing: Consider professional detailing services for a thorough cleaning and protection of your car’s paint.
6. The Importance of Color Matching for Flawless Repairs
Achieving a seamless repair hinges on the accuracy of the color match. A mismatch can make the repair more noticeable than the original chip.
6.1. Finding Your Car’s Paint Code
The paint code is essential for ordering the correct touch-up paint.
- Location: Check the driver’s side doorjamb, glove compartment, or owner’s manual for the paint code sticker.
- Format: The paint code is usually a combination of letters and numbers.
- Verification: Verify the paint code with your car’s manufacturer or a local auto parts store to ensure accuracy.
6.2. Custom Color Matching
When an exact match is crucial, consider custom color matching.
- Professional Services: Auto paint suppliers can custom mix paint to match your car’s specific color, ensuring a perfect blend.
- Sample Matching: Take a small sample of your car’s paint (e.g., from inside the fuel door) to the paint supplier for accurate matching.
6.3. Test Before Application
Always test the touch-up paint before applying it to the car.
- Inconspicuous Area: Apply a small amount of paint to an inconspicuous area, such as the inside of the trunk lid.
- Color Accuracy: Check the color match in different lighting conditions to ensure it blends seamlessly with the surrounding paint.
- Adjustments: If the color is slightly off, consult with the paint supplier for adjustments.
7. DIY vs. Professional Repair: Making the Right Choice
Deciding whether to tackle the repair yourself or hire a professional depends on the severity of the damage and your comfort level. CARDIAGTECH.NET can provide tools and expert advice to help you decide.
7.1. When DIY is Suitable
DIY repair is appropriate for minor chips and scratches.
- Small Chips: Small, isolated chips that haven’t penetrated the metal can be easily repaired with touch-up paint.
- Surface Scratches: Light scratches that haven’t gone through the clear coat can be buffed out with polishing compound.
- Confidence: If you’re comfortable working with tools and have a steady hand, DIY repair can be a cost-effective option.
7.2. When to Seek Professional Help
Professional repair is necessary for more extensive damage.
- Large Areas: Large areas of chipped or scratched paint require specialized equipment and techniques for a seamless repair.
- Rust Damage: Rust requires professional treatment to prevent further corrosion.
- Structural Damage: Damage to the underlying metal or body panels requires professional repair.
- Lack of Confidence: If you’re not confident in your ability to perform the repair, it’s best to leave it to the professionals.
7.3. Cost Comparison
Consider the cost of materials versus the cost of professional services.
- DIY Costs: DIY repair can cost as little as $20-$50 for materials.
- Professional Costs: Professional repair can range from $100 to $500 or more, depending on the extent of the damage.
8. Choosing the Right Touch-Up Paint: A Comprehensive Guide
Selecting the appropriate touch-up paint is vital for a successful and seamless repair. The market offers various types, each with unique characteristics.
8.1. Types of Touch-Up Paint
Understanding the different types of touch-up paint can help you make an informed decision.
- Paint Pens: These pens offer precise application for small chips and scratches. They are easy to use and provide controlled paint flow.
- Bottles with Brush: These bottles come with a small brush attached to the lid, suitable for slightly larger chips. They provide good coverage and are relatively easy to use.
- Spray Cans: Spray cans are ideal for larger areas and offer even coverage. However, they require more skill to avoid overspray and uneven application.
- Two-Part Systems: These systems involve mixing two components to create a durable and long-lasting finish. They are often used for professional repairs.
8.2. Factors to Consider
When choosing touch-up paint, consider the following factors:
- Color Match: Ensure the paint matches your car’s color code precisely.
- Paint Quality: Opt for high-quality paint that is durable and resistant to fading.
- Ease of Use: Choose a product that is easy to apply and provides consistent results.
- Drying Time: Consider the drying time, especially if you need to apply multiple coats.
- Finish: Determine whether you need a matte, gloss, or metallic finish to match your car’s paint.
8.3. Top Brands
Several reputable brands offer high-quality touch-up paint.
| Brand | Product Type | Key Features | Price Range |
|---|---|---|---|
| Dupli-Color | Paint Pens, Bottles | Wide range of colors, easy to use, good color match | $10-$20 |
| AutomotiveTouchup | Bottles, Spray Cans | Custom color matching, high-quality paint, durable finish | $20-$40 |
| Quixx | Paint Pens | Includes clear coat pen, easy to use, good for small scratches | $15-$25 |
| Dr. ColorChip | Kits | Unique blending solution, easy to apply, professional-looking results | $30-$50 |
9. Mastering the Art of Wet Sanding: A Detailed Guide
Wet sanding is a crucial technique for achieving a smooth and seamless repair. It involves sanding the paint with water to prevent clogging and reduce the risk of scratches.
9.1. Preparing for Wet Sanding
Proper preparation is essential for successful wet sanding.
- Gather Supplies: You’ll need wet/dry sandpaper (various grits), a sanding block, a spray bottle with water, and a microfiber cloth.
- Choose the Right Grit: Start with a higher grit (2000-3000 grit) for initial sanding and gradually move to finer grits (3000-5000 grit) for final smoothing.
- Soak the Sandpaper: Soak the sandpaper in water for at least 15-20 minutes before use.
- Clean the Area: Clean the area with rubbing alcohol to remove any contaminants.
9.2. The Wet Sanding Process
Follow these steps for effective wet sanding:
- Spray Water: Spray water on the sandpaper and the area you’ll be sanding.
- Use a Sanding Block: Wrap the sandpaper around a sanding block to provide a stable and even surface.
- Gentle Pressure: Apply gentle pressure and sand in a circular motion.
- Keep it Wet: Keep the sandpaper and the area wet by spraying water frequently.
- Check Progress: Periodically check your progress by wiping the area with a microfiber cloth.
- Move to Finer Grit: Gradually move to finer grits of sandpaper until the surface is smooth and even.
9.3. Post-Sanding Care
After wet sanding, it’s essential to properly care for the area.
- Clean the Area: Clean the area with rubbing alcohol to remove any sanding residue.
- Polish: Apply polishing compound to restore the shine and remove any remaining imperfections.
- Wax: Apply a coat of wax to protect the paint and provide a glossy finish.
10. Maximizing Gloss and Protection with Clear Coat Application
A clear coat is essential for protecting the touch-up paint and providing a glossy finish. Proper application is crucial for achieving professional results.
10.1. Preparing for Clear Coat
Proper preparation is key to a smooth and even clear coat application.
- Clean the Area: Clean the area with rubbing alcohol to remove any contaminants.
- Masking: Mask off the surrounding areas to protect them from overspray.
- Shake the Can: Shake the clear coat can well for at least 2-3 minutes.
10.2. Applying the Clear Coat
Follow these steps for effective clear coat application:
- Test Spray: Test the spray on a piece of cardboard to ensure the nozzle is working properly.
- Thin Coats: Apply thin, even coats of clear coat, allowing each coat to dry for 10-15 minutes before applying the next.
- Consistent Distance: Maintain a consistent distance of about 8-10 inches from the surface.
- Overlapping: Overlap each pass by about 50% to ensure even coverage.
- Avoid Runs: Avoid applying too much clear coat in one area, as this can cause runs.
10.3. Post-Application Care
After applying the clear coat, it’s important to properly care for the area.
- Drying Time: Allow the clear coat to dry completely for at least 24-48 hours.
- Wet Sanding (If Necessary): If there are any imperfections or orange peel, lightly wet sand the area with very fine grit sandpaper.
- Polish: Polish the area to restore the shine and remove any remaining imperfections.
- Wax: Apply a coat of wax to protect the paint and provide a glossy finish.
11. The Role of Polishing Compounds in Restoring Shine
Polishing compounds are essential for restoring shine and removing imperfections after paint repair. Understanding how to use them effectively can significantly improve the final result.
11.1. Types of Polishing Compounds
Different types of polishing compounds serve different purposes.
- Cutting Compounds: These are the most abrasive compounds and are used to remove heavy scratches and imperfections.
- Polishing Compounds: These are less abrasive and are used to remove swirl marks and light scratches.
- Finishing Polishes: These are the least abrasive and are used to enhance the shine and remove any remaining imperfections.
11.2. Application Techniques
Proper application is crucial for achieving the desired results.
- Clean the Area: Clean the area with rubbing alcohol to remove any contaminants.
- Apply Compound: Apply a small amount of polishing compound to a microfiber cloth or polishing pad.
- Buffing: Gently buff the area in a circular motion, applying even pressure.
- Check Progress: Periodically check your progress by wiping the area with a clean microfiber cloth.
- Repeat: Repeat the process as needed until the desired results are achieved.
11.3. Choosing the Right Pad
The type of pad you use can affect the outcome of the polishing process.
- Foam Pads: These are the most common type of pad and are suitable for a variety of polishing tasks.
- Microfiber Pads: These pads are more aggressive and are used for removing heavy scratches and imperfections.
- Wool Pads: These pads are the most aggressive and are used for severe paint correction.
12. Cost-Effective Solutions: Budget-Friendly Paint Chip Repair
Repairing paint chips doesn’t have to break the bank. CARDIAGTECH.NET offers cost-effective solutions for budget-conscious car owners.
12.1. DIY Kits
DIY paint chip repair kits offer an affordable way to tackle minor damage.
- All-in-One Kits: These kits typically include touch-up paint, primer, clear coat, and applicators.
- Cost: DIY kits can range from $20 to $50, depending on the brand and contents.
- Effectiveness: These kits are effective for small chips and scratches, but may not provide the same level of results as professional repair.
12.2. Affordable Materials
Choosing affordable materials can help you save money on your repair project.
- Generic Touch-Up Paint: Generic touch-up paint can be a cheaper alternative to brand-name paint, but be sure to match the color code accurately.
- Household Cleaners: Household cleaners like dish soap and rubbing alcohol can be used for cleaning and degreasing the area.
- DIY Applicators: You can make your own applicators by wrapping a small piece of microfiber cloth around the end of a toothpick or skewer.
12.3. Local Auto Parts Stores
Local auto parts stores often offer competitive prices on paint repair materials.
- Sales and Discounts: Keep an eye out for sales and discounts on touch-up paint, primer, and clear coat.
- Expert Advice: Auto parts store employees can provide expert advice on choosing the right materials for your repair project.
13. Common Mistakes to Avoid When Fixing Chipped Paint
Avoiding these common mistakes can save you time, money, and frustration. CARDIAGTECH.NET highlights these pitfalls to ensure a successful repair.
13.1. Neglecting Preparation
Proper preparation is essential for a successful repair.
- Skipping Cleaning: Failing to thoroughly clean the area can result in poor paint adhesion and a less than perfect finish.
- Ignoring Sanding: Neglecting to sand the edges of the chip can result in a noticeable edge and an uneven surface.
- Rushing the Process: Rushing the preparation process can lead to mistakes and a less than satisfactory result.
13.2. Incorrect Paint Application
Applying the paint incorrectly can result in a poor finish.
- Applying Too Much Paint: Applying too much paint can result in runs and an uneven surface.
- Ignoring Drying Time: Failing to allow each coat of paint to dry completely can result in a tacky finish.
- Using the Wrong Applicator: Using the wrong applicator can result in uneven coverage and a less than perfect finish.
13.3. Improper Finishing
Improper finishing can detract from the overall appearance of the repair.
- Skipping Polishing: Neglecting to polish the area can result in a dull finish and a noticeable repair.
- Using the Wrong Compound: Using the wrong polishing compound can damage the paint and worsen the appearance of the repair.
- Rushing the Process: Rushing the finishing process can lead to mistakes and a less than satisfactory result.
14. Maintaining Your Car’s Paint After Repair: Long-Term Care
Proper maintenance after repair ensures the longevity and appearance of your car’s paint. CARDIAGTECH.NET provides tips for lasting protection.
14.1. Regular Washing and Waxing
Regular washing and waxing help to protect the paint from environmental contaminants and maintain its shine.
- Wash Frequency: Wash your car at least every two weeks to remove dirt, grime, and road salt.
- Wax Frequency: Apply a coat of wax every few months to protect the paint and provide a barrier against environmental contaminants.
- Gentle Products: Use gentle car wash soap and wax to avoid damaging the paint.
14.2. Avoiding Harsh Chemicals
Harsh chemicals can damage the paint and accelerate its deterioration.
- Avoid Abrasive Cleaners: Avoid using abrasive cleaners or scouring pads, as these can scratch the paint.
- Use Car-Specific Products: Use car-specific cleaning products that are designed to be gentle on the paint.
- Remove Contaminants Promptly: Remove bird droppings, tree sap, and other contaminants promptly to prevent damage.
14.3. Protective Measures
Taking protective measures can help to prevent future damage.
- Parking in Shade: Park your car in the shade to protect it from UV rays.
- Using a Car Cover: Use a car cover to protect it from environmental contaminants.
- Applying Protective Films: Apply protective films to vulnerable areas of your car, such as the hood and bumper.
15. Seeking Expert Assistance: When to Consult a Professional
Knowing when to seek professional help can save you time, money, and frustration. CARDIAGTECH.NET connects you with trusted experts for complex repairs.
15.1. Severe Damage
Severe damage requires specialized equipment and techniques for a seamless repair.
- Large Areas: Large areas of chipped or scratched paint.
- Rust Damage: Rust that has penetrated the metal.
- Structural Damage: Damage to the underlying metal or body panels.
15.2. Lack of Confidence
If you’re not confident in your ability to perform the repair, it’s best to leave it to the professionals.
- Complex Repairs: Complex repairs that require specialized skills and knowledge.
- Expensive Materials: Repairs that require expensive materials or equipment.
- Time Constraints: If you don’t have the time to perform the repair yourself.
15.3. Ensuring Quality
Professional repair ensures a high-quality finish and lasting results.
- Expertise: Professionals have the expertise and experience to perform the repair correctly.
- Equipment: Professionals have access to specialized equipment and materials.
- Warranty: Professionals often offer a warranty on their work.
Don’t let paint chips diminish your car’s appeal. Follow this guide and contact CARDIAGTECH.NET at Whatsapp: +1 (641) 206-8880 for expert advice and premium tools. Your car deserves the best care.
FAQ: How To Fix Chipped Paint On A Car
1. Can I use regular household paint to touch up my car paint chips?
No, you should never use regular household paint to touch up your car. Automotive paint is specifically formulated to adhere to metal surfaces and withstand the harsh conditions of outdoor use. Household paint will not adhere properly, will fade quickly, and can even damage your car’s original paint.
2. How do I find the exact color code for my car’s paint?
Your car’s paint code is typically located on a sticker inside the driver’s side doorjamb, in the glove compartment, or in the owner’s manual. The code is usually a combination of letters and numbers. You can also contact your car’s manufacturer or a local auto parts store for assistance in finding the correct color code.
3. What is the best way to apply touch-up paint to a small paint chip?
The best way to apply touch-up paint to a small paint chip is to use a fine-tipped applicator brush or a paint pen. Apply the paint in thin, even layers, allowing each layer to dry completely before applying the next. Avoid applying too much paint at once, as this can result in runs and an uneven surface.
4. How long does it take for touch-up paint to dry?
Touch-up paint typically takes about 20-30 minutes to dry to the touch. However, it’s best to allow the paint to dry completely for at least 24 hours before applying clear coat or polishing compound.
5. Do I need to apply clear coat after touching up a paint chip?
Yes, you should always apply clear coat after touching up a paint chip. Clear coat protects the touch-up paint from UV rays and environmental damage, and it provides a glossy finish that blends seamlessly with the surrounding paintwork.
6. What is wet sanding and why is it important?
Wet sanding is a technique that involves sanding the paint with water to prevent clogging and reduce the risk of scratches. Wet sanding is important because it helps to smooth out any imperfections and create a seamless surface for the new paint.
7. Can I use a hair dryer to speed up the drying process?
Yes, you can use a hair dryer to speed up the drying process, but be careful not to overheat the paint. Use a low heat setting and keep the hair dryer moving to avoid damaging the paint.
8. How do I remove rust from a paint chip?
To remove rust from a paint chip, use a wire brush or rust remover to carefully remove all traces of rust from the affected area. Apply a rust converter to prevent future rust formation.
9. What are the best preventative measures to protect my car’s paint from future chips?
The best preventative measures to protect your car’s paint from future chips include maintaining a safe distance from other vehicles, avoiding gravel roads, driving slowly on roads with loose gravel, and applying protective films to vulnerable areas of your car.
10. Is it worth it to hire a professional for paint chip repair?
Whether it’s worth hiring a professional for paint chip repair depends on the severity of the damage and your comfort level. If the damage is minor and you’re confident in your ability to perform the repair, DIY repair can be a cost-effective option. However, if the damage is severe or you’re not comfortable performing the repair yourself, it’s best to leave it to the professionals.
Contact CARDIAGTECH.NET at +1 (641) 206-8880 for reliable tools and expert guidance on How To Fix Chipped Paint On A Car. We’re here to help!