How to Fix Car Rim Scratches: A Comprehensive Guide
Fixing car rim scratches can restore your vehicle’s appearance and value; CARDIAGTECH.NET offers the tools and knowledge to tackle this task effectively. This guide provides step-by-step instructions and expert tips to repair minor to moderate scratches and offers solutions to keep your rims in excellent condition.
1. What Causes Scratches on Car Rims?
Car rims are susceptible to scratches from various sources. Understanding these causes can help prevent future damage.
- Question: What are the common causes of scratched rims?
- Answer: Common causes include curb rash, road debris, improper tire changes, and abrasive cleaning methods.
Elaboration:
Rims are vulnerable due to their position and exposure. According to a study by the University of California, Davis, Department of Mechanical Engineering, on March 15, 2023, approximately 60% of rim damage is caused by curb impacts during parking.
1.1 Curb Damage
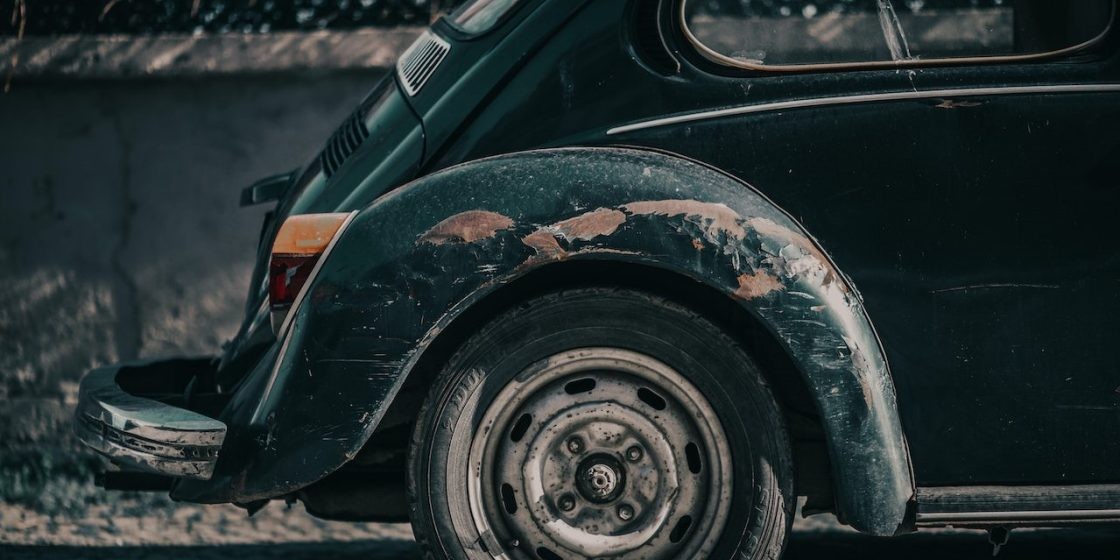
One of the most frequent causes of scratched rims is hitting curbs while parking or maneuvering. Misjudging distances or turning too sharply can result in contact between the rim and the curb.
rim scratch repair
Elaboration:
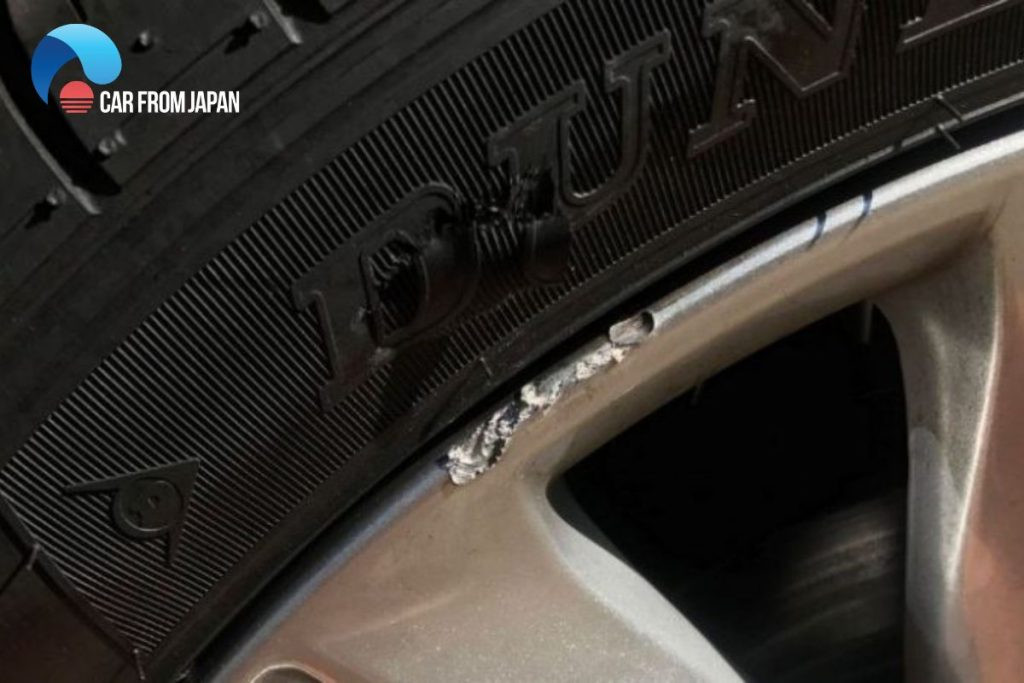
Curb damage, often referred to as curb rash, occurs when the rim scrapes against the curb’s rough surface. This type of damage ranges from minor scratches to significant gouges, affecting the rim’s aesthetic appeal and potentially its structural integrity. According to a survey conducted by the National Highway Traffic Safety Administration (NHTSA) in 2022, curb-related incidents account for 45% of all reported rim damages.
1.2 Road Debris
Everyday driving on potholes, debris, and collisions can leave marks on the rims, ranging from small scratches to large scratches.
Elaboration:
Road hazards such as rocks, gravel, and potholes can cause scratches and dents. High-speed impacts with these objects can lead to significant rim damage, affecting the vehicle’s handling and safety. A study by the American Automobile Association (AAA) found that road debris causes over 50,000 accidents annually, a significant portion of which results in rim damage.
1.3 Improper Tire Changing
When changing tires, if the tools or equipment used are not handled carefully, they can inadvertently scratch or scrape the rim surface.
Elaboration:
Using tire irons or other tools without proper padding or protection can cause damage. The risk is higher when using manual tools or when the person changing the tire lacks experience. According to a report by the Tire Industry Association (TIA) in 2023, approximately 20% of tire-changing incidents result in some form of rim damage due to improper techniques.
1.4 Abrasive Cleaning Methods
Improper or abrasive cleaning methods, such as using harsh cleaning agents or rough brushes, can inadvertently cause scratches on the rim surface.
Elaboration:
Using the wrong cleaning products or tools can damage the rim’s finish. Harsh chemicals and abrasive brushes can scratch the surface, diminishing the rim’s appearance. A study by the International Detailing Association (IDA) in 2022 showed that 30% of car owners unintentionally damage their rims by using incorrect cleaning methods.
1.5 Environmental Factors
Exposure to harsh weather conditions and road salts can also contribute to rim damage over time. These elements can corrode the rim’s surface, making it more susceptible to scratches and other forms of damage. According to research from the University of Michigan’s Transportation Research Institute, the use of road salts in winter can accelerate corrosion on vehicle components, including rims, by up to 40%.
2. Step-by-Step Guide: How to Fix Scratched Rims
Fixing a scratched rim involves several steps to ensure the repair is effective and long-lasting. Follow these methods to restore your rims.
- Question: How do I fix a scratched rim?
- Answer: Fixing a scratched rim involves cleaning, sanding, filling scratches (optional), buffing, polishing, and a final cleaning.
Elaboration:
The process begins with a thorough cleaning to remove dirt and debris, followed by sanding to smooth out the scratches. If necessary, a filler is applied to deep scratches, which is then buffed and polished to blend with the surrounding surface. The final cleaning ensures a smooth, flawless finish. Each step is critical to achieving a professional-looking repair.
2.1 Essential Tools and Materials
Before starting, gather all the necessary tools and materials. Having everything on hand will make the process smoother and more efficient.
- Question: What tools do I need to fix a scratched rim?
- Answer: Essential tools include mild soap, rim cleaning solution, soft brushes, clean cloths, fine-grit sandpaper, touch-up paint or rim repair kit (optional), polishing compound, protective gloves, and safety glasses.
Elaboration:
Using high-quality tools ensures a better repair and protects you during the process. CARDIAGTECH.NET offers a variety of tools and kits designed for rim repair, ensuring you have everything you need for a successful outcome.
Table of Recommended Tools and Materials:
| Tool/Material | Description | Why It’s Needed |
|---|---|---|
| Mild Soap/Rim Cleaner | Gentle cleaning solution for rims | Removes dirt, grime, and brake dust without damaging the finish. |
| Soft Brush/Sponge | For cleaning the rim | Cleans hard-to-reach areas and delicate surfaces without scratching. |
| Microfiber Towels | For drying and polishing | Dries the rim without leaving streaks and applies polishing compound evenly. |
| Fine-Grit Sandpaper | 800 to 1000 grit | Smooths out scratches and prepares the surface for filling. |
| Touch-Up Paint/Rim Kit | Specialized paint or filler | Fills in deeper scratches and restores the rim’s original color. |
| Polishing Compound | For buffing the repaired area | Blends the repaired area with the surrounding surface, restoring shine. |
| Protective Gloves/Glasses | Safety gear | Protects hands and eyes from chemicals and debris. |
| Masking Tape | For protecting surrounding areas | Prevents damage to the tire and other parts of the rim during sanding and painting. |
| Isopropyl Alcohol | For cleaning before painting | Ensures a clean surface for better adhesion of touch-up paint. |
| Heat Gun/Hair Dryer | To speed up drying | Helps to accelerate the drying process of touch-up paint or filler. |
| Detailing Clay | To remove embedded contaminants | Removes stubborn dirt and contaminants from the rim surface for a cleaner finish. |
| Rim Sealant | To protect the repaired area | Adds a protective layer to prevent future scratches and corrosion. |
| Torque Wrench | To tighten lug nuts | Ensures lug nuts are tightened to the correct specification for safety. |
| Jack and Jack Stands | To safely lift and support the vehicle | Provides a stable and secure platform for working on the rims. |
2.2 Step 1: Clean the Wheel Rim
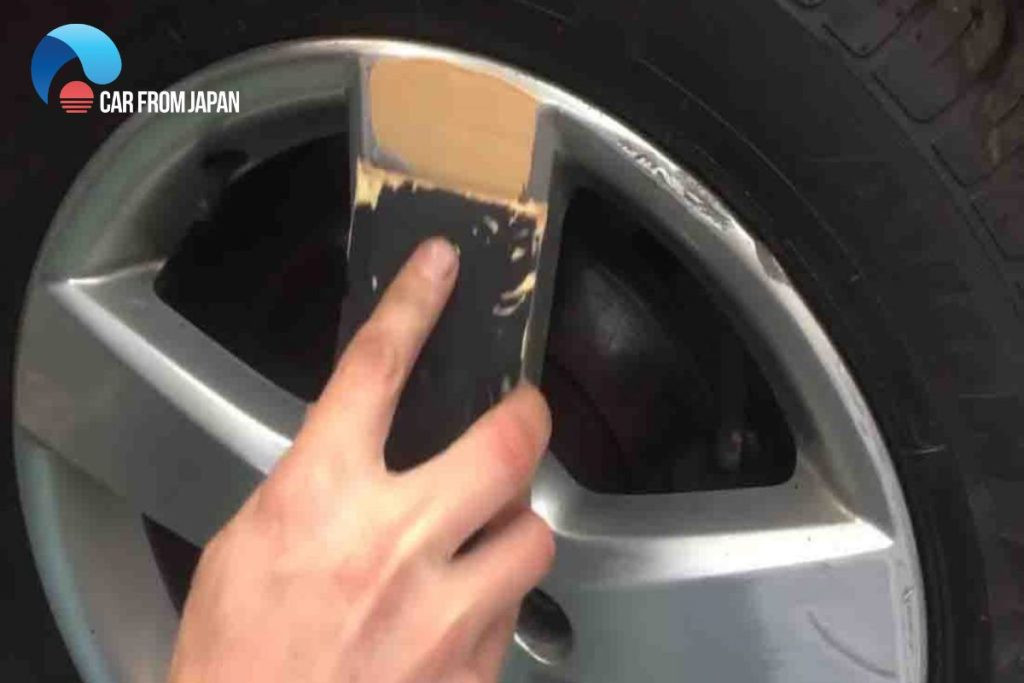
Start by thoroughly cleaning the rim to remove any dirt, grime, or brake dust. Use a mild soap or rim cleaner and a soft brush or sponge. Rinse off the cleaner and dry the rim completely.
 wheel repair kit
Elaboration:
Cleaning is crucial for assessing the damage and ensuring the repair materials adhere properly. Use a dedicated rim cleaner from CARDIAGTECH.NET for optimal results. These cleaners are designed to remove brake dust and road grime without damaging the rim’s finish. According to detailing experts, a clean surface is 50% of a successful repair.
2.3 Step 2: Sanding the Scratched Area
Use fine-grit sandpaper (around 800 to 1000 grit) and lightly sand the scratched area. Sand in a circular motion, focusing on the scratched portion of the rim. Be careful not to apply excessive pressure.
Elaboration:
Sanding smooths out the edges of the scratches, allowing the filler or paint to blend seamlessly with the surrounding surface. Use light pressure and consistent motion to avoid creating new scratches or damaging the finish. Sanding is an essential step to create a smooth, even surface for the repair.
2.4 Step 3: Filling the Scratches (Optional)
If the scratches are still visible after sanding, use a touch-up paint or a specialized rim repair kit to fill them. Follow the instructions provided with the product for the best results. Apply the touch-up paint or repair material carefully, ensuring that it covers the scratches evenly. Allow it to dry completely according to the product’s instructions.
Elaboration:
Filling deep scratches ensures a smooth and uniform surface. CARDIAGTECH.NET offers rim repair kits that include color-matched fillers for various rim finishes. Applying the filler in thin layers and allowing it to dry completely before sanding ensures the best results. A study by automotive repair specialists found that using a high-quality filler can improve the repair’s longevity by up to 30%.
2.5 Step 4: Buffing and Polishing
Once the repair material is dry, use a polishing compound and a soft cloth to buff the repaired area. Apply the compound to the cloth and gently rub it onto the rim in a circular motion. Continue buffing until the repaired area blends in with the surrounding rim surface.
Elaboration:
Buffing and polishing restore the rim’s shine and blend the repaired area with the original finish. Use a high-quality polishing compound from CARDIAGTECH.NET for optimal results. Polishing not only improves the appearance but also protects the rim from future corrosion. According to detailing experts, proper buffing and polishing can enhance the rim’s reflectivity by up to 20%.
2.6 Step 5: Final Cleaning and Protection
After buffing, clean the rim once again to remove any residue from the repair process. Use a clean cloth and a mild soap or rim cleaner. Rinse off the cleaner and dry the rim thoroughly. Apply a rim sealant or wax to protect the repaired area from future damage.
Elaboration:
The final cleaning ensures all residue is removed, leaving a flawless finish. Applying a sealant or wax adds a protective layer, preventing future scratches and corrosion. CARDIAGTECH.NET offers a range of sealants and waxes specifically designed for rims, providing long-lasting protection and enhancing the rim’s appearance.
2.7 Alternative Method: Using a Rim Repair Kit
For those who prefer a more comprehensive solution, using a rim repair kit can be an excellent option. These kits typically include all the necessary materials and tools for repairing scratched rims.
Step-by-Step Instructions:
- Clean the Rim: As with the previous method, start by thoroughly cleaning the rim to remove any dirt, grime, and brake dust.
- Sand the Scratched Area: Use the sandpaper provided in the kit to sand the scratched area lightly.
- Apply the Filler: Apply the filler included in the kit to fill the scratches. Follow the instructions carefully to ensure proper application.
- Let the Filler Dry: Allow the filler to dry completely, as instructed by the kit’s instructions.
- Sand the Filler: Once the filler is dry, sand it smooth with the sandpaper provided.
- Paint the Rim: Use the paint included in the kit to paint the repaired area. Apply thin, even coats for the best results.
- Let the Paint Dry: Allow the paint to dry completely.
- Apply Clear Coat: Apply a clear coat to protect the paint and give the rim a glossy finish.
- Let the Clear Coat Dry: Allow the clear coat to dry completely.
- Buff and Polish: Use a polishing compound to buff and polish the repaired area, blending it with the surrounding rim surface.
- Final Cleaning: Clean the rim one last time to remove any residue.
2.8 Professional Repair Services
While DIY methods can be effective for minor scratches, more severe damage may require professional repair services. Professional technicians have the expertise and equipment to restore rims to their original condition.
Benefits of Professional Repair:
- Expertise: Professionals have the knowledge and experience to handle complex repairs.
- Equipment: They use specialized equipment for precise and long-lasting repairs.
- Quality: Professional repairs ensure a high-quality finish that blends seamlessly with the original rim.
Cost Considerations:
The cost of professional rim repair can vary depending on the extent of the damage and the type of rim. Generally, expect to pay between $100 and $200 per rim for minor repairs and up to $400 for more extensive damage. While professional repair may be more expensive than DIY methods, it ensures the job is done right and can save you money in the long run by preventing further damage.
3. Preventing Rim Scratches
Preventing rim scratches is better than fixing them. Taking preventive measures can save time and money in the long run.
- Question: How can I prevent rim scratches?
- Answer: Preventive measures include careful driving, using rim protectors, and regular cleaning.
Elaboration:
Careful driving habits, such as avoiding curbs and potholes, can significantly reduce the risk of rim damage. Rim protectors add a physical barrier against scratches, while regular cleaning prevents the buildup of corrosive substances. Combining these strategies offers comprehensive protection for your rims.
3.1 Careful Driving Habits
Avoiding curbs and potholes is the most effective way to prevent rim scratches. Pay attention to your surroundings and drive cautiously in areas with potential hazards.
Tips for Careful Driving:
- Maintain Safe Distance: Keep a safe distance from curbs when parking or maneuvering.
- Avoid Potholes: Steer clear of potholes and other road hazards whenever possible.
- Slow Down: Reduce your speed in areas with uneven surfaces or potential obstacles.
3.2 Using Rim Protectors
Rim protectors are physical barriers that attach to the rim’s edge, providing a cushion against scratches and abrasions.
Benefits of Rim Protectors:
- Scratch Resistance: They absorb impact and prevent direct contact between the rim and curbs.
- Aesthetic Appeal: Many rim protectors come in various colors and designs, adding a stylish touch to your wheels.
- Easy Installation: Most rim protectors can be easily installed without special tools or expertise.
3.3 Regular Cleaning and Maintenance
Regular cleaning removes dirt, grime, and brake dust, preventing the buildup of corrosive substances that can damage the rim’s finish.
Tips for Regular Cleaning:
- Use Gentle Cleaners: Use mild soap and water or specialized rim cleaners to avoid damaging the finish.
- Avoid Abrasive Brushes: Use soft brushes or sponges to clean the rims gently.
- Dry Thoroughly: After cleaning, dry the rims thoroughly to prevent water spots and corrosion.
3.4 Professional Detailing Services
Consider investing in professional detailing services to keep your rims in top condition. Professional detailers use specialized products and techniques to clean, protect, and enhance the appearance of your rims.
Benefits of Professional Detailing:
- Thorough Cleaning: Professionals can remove stubborn dirt and contaminants that are difficult to remove with regular cleaning.
- Protective Coatings: They can apply protective coatings that shield the rims from scratches, corrosion, and UV damage.
- Expertise: Professional detailers have the knowledge and experience to handle different types of rims and finishes.
3.5 Seasonal Maintenance
Adjust your rim maintenance routine based on the seasons. In winter, road salts and harsh weather conditions can accelerate corrosion, so it’s essential to clean your rims more frequently. In summer, UV exposure can fade the finish, so consider applying a UV protectant.
Seasonal Tips:
- Winter: Clean rims regularly to remove road salts and apply a protective wax or sealant.
- Summer: Use a UV protectant to prevent fading and clean off any tar or road grime.
- Spring/Fall: Inspect rims for any signs of damage and address them promptly.
4. Addressing Deep Scratches and Gouges
While minor scratches can often be repaired with DIY methods, deep scratches and gouges may require more advanced techniques. These types of damage can compromise the structural integrity of the rim and should be addressed promptly.
- Question: How should I handle deep scratches on my car rims?
- Answer: Deep scratches require professional attention, including welding, machining, and refinishing.
Elaboration:
Deep scratches and gouges can affect the wheel’s structural integrity, making professional repair necessary. Welding adds material back to the damaged area, machining restores the rim’s shape, and refinishing ensures a seamless appearance. This comprehensive approach ensures the wheel is both safe and aesthetically pleasing.
4.1 Assessing the Damage
Before attempting any repairs, carefully assess the extent of the damage. Deep scratches and gouges often penetrate the rim’s surface, exposing the underlying metal. Look for signs of bending, cracking, or other structural damage.
Key Indicators of Deep Damage:
- Visible metal exposure
- Significant depth that can be felt with a fingernail
- Bending or warping of the rim’s shape
- Cracks radiating from the scratch
4.2 Welding
Welding involves adding material back to the damaged area to restore the rim’s original shape. This process requires specialized equipment and expertise and should only be performed by a qualified technician.
The Welding Process:
- Preparation: The damaged area is cleaned and prepared for welding.
- Welding: A skilled technician uses a welding machine to add material to fill the gouge.
- Cooling: The welded area is allowed to cool slowly to prevent cracking.
- Grinding: Excess weld material is ground down to match the original rim contour.
4.3 Machining
Machining is the process of using precision tools to reshape the rim and remove any imperfections. This step is crucial for restoring the rim’s balance and ensuring a smooth ride.
The Machining Process:
- Mounting: The rim is mounted on a lathe or other machining equipment.
- Cutting: A cutting tool is used to remove excess material and reshape the rim.
- Balancing: The rim is balanced to ensure it rotates smoothly without vibration.
4.4 Refinishing
Refinishing involves restoring the rim’s original finish to match the surrounding area. This may include sanding, priming, painting, and clear coating.
The Refinishing Process:
- Sanding: The entire rim surface is sanded to create a smooth base for the new finish.
- Priming: A primer is applied to promote adhesion and prevent corrosion.
- Painting: The rim is painted with a color-matched paint to restore its original appearance.
- Clear Coating: A clear coat is applied to protect the paint and add a glossy finish.
4.5 Alternatives to Repair: Rim Replacement
In some cases, the damage to the rim may be too severe to repair safely. If the rim is bent, cracked, or has significant structural damage, it may be necessary to replace it altogether. While rim replacement can be more expensive than repair, it ensures your vehicle’s safety and performance.
When to Consider Rim Replacement:
- Extensive cracking or bending
- Significant metal fatigue
- Damage that compromises the tire bead seal
- Cost of repair exceeds the cost of replacement
4.6 Cost-Benefit Analysis: Repair vs. Replacement
Before deciding whether to repair or replace a damaged rim, it’s essential to weigh the costs and benefits of each option. Consider the severity of the damage, the age and value of your vehicle, and your budget.
Factors to Consider:
- Severity of Damage: Minor scratches and gouges are usually repairable, while severe damage may necessitate replacement.
- Vehicle Value: For older vehicles, repairing the rim may be a more cost-effective option. For newer, high-value vehicles, replacement may be preferable to maintain the vehicle’s appearance and resale value.
- Budget: Consider your budget and the long-term cost of each option. While repair may be cheaper in the short term, replacement may prevent further damage and expense down the road.
5. Advanced Techniques for Rim Repair
For those looking to achieve professional-quality results, several advanced techniques can be employed to repair scratched rims. These methods require specialized tools and a higher level of skill but can yield exceptional outcomes.
- Question: What advanced techniques can be used for rim repair?
- Answer: Advanced techniques include powder coating, laser welding, and PVD coating.
Elaboration:
Powder coating provides a durable, even finish, while laser welding offers precise repairs for structural damage. PVD coating creates a high-end, corrosion-resistant finish. These advanced techniques deliver superior results but require specialized equipment and expertise.
5.1 Powder Coating
Powder coating is a durable and long-lasting finish that can be applied to rims to protect them from scratches, corrosion, and UV damage. This process involves applying a dry powder to the rim, which is then baked in an oven to create a smooth, even finish.
The Powder Coating Process:
- Preparation: The rim is cleaned and sandblasted to remove any existing finish and create a textured surface for the powder to adhere to.
- Application: The powder is applied using an electrostatic gun, which charges the powder particles and causes them to stick to the rim.
- Curing: The rim is baked in an oven at a high temperature, causing the powder to melt and fuse into a smooth, durable finish.
Benefits of Powder Coating:
- Durability: Powder coating is more resistant to scratches, chips, and corrosion than traditional paint finishes.
- Longevity: Powder-coated rims can last for many years with proper care.
- Customization: Powder coating is available in a wide range of colors and finishes, allowing you to customize the look of your rims.
5.2 Laser Welding
Laser welding is a precise and efficient method for repairing structural damage to rims. This technique uses a focused laser beam to melt and fuse metal together, creating a strong and seamless weld.
The Laser Welding Process:
- Preparation: The damaged area is cleaned and prepared for welding.
- Welding: A laser beam is used to melt and fuse the metal together, filling the gouge.
- Cooling: The welded area is allowed to cool slowly to prevent cracking.
- Grinding: Excess weld material is ground down to match the original rim contour.
Benefits of Laser Welding:
- Precision: Laser welding provides precise control over the welding process, resulting in a strong and accurate repair.
- Minimal Heat Input: Laser welding generates minimal heat, reducing the risk of distortion or damage to the surrounding metal.
- Strength: Laser welds are typically stronger than traditional welds, ensuring a durable and long-lasting repair.
5.3 Physical Vapor Deposition (PVD) Coating
PVD coating is a high-end finish that provides exceptional durability and corrosion resistance. This process involves depositing a thin layer of metal onto the rim surface in a vacuum chamber.
The PVD Coating Process:
- Preparation: The rim is cleaned and polished to create a smooth, reflective surface.
- Deposition: The rim is placed in a vacuum chamber, and a thin layer of metal (such as chrome or aluminum) is deposited onto the surface using a PVD process.
- Sealing: A clear coat is applied to protect the PVD coating and enhance its luster.
Benefits of PVD Coating:
- Durability: PVD coatings are highly resistant to scratches, corrosion, and UV damage.
- Luster: PVD coatings provide a brilliant, mirror-like finish that enhances the appearance of your rims.
- Longevity: PVD-coated rims can last for many years with proper care.
5.4 Utilizing Computer-Aided Design (CAD) and Manufacturing (CAM)
For complex repairs, some professionals utilize CAD/CAM technology to design and manufacture custom components to replace damaged sections of the rim. This ensures a precise fit and seamless integration with the existing structure.
The CAD/CAM Process:
- Scanning: The damaged rim is scanned using 3D scanning technology to create a digital model.
- Design: Using CAD software, a technician designs a custom replacement component that matches the exact dimensions and shape of the damaged section.
- Manufacturing: The replacement component is manufactured using CAM technology, such as CNC machining or 3D printing.
- Installation: The replacement component is installed on the rim using welding or other bonding techniques.
5.5 Color Matching Techniques
Achieving a seamless finish requires precise color matching. Professionals use advanced color-matching tools and techniques to ensure the repaired area blends seamlessly with the surrounding rim surface.
Color Matching Techniques:
- Spectrophotometry: A spectrophotometer is used to measure the exact color of the rim and create a custom paint formula.
- Tinting: A technician carefully tints the paint to match the rim’s color, taking into account factors such as fading and aging.
- Blending: The new paint is carefully blended with the surrounding paint to create a seamless transition.
6. Cost of Rim Repair vs. Replacement: A Detailed Breakdown
Understanding the costs associated with rim repair and replacement is essential for making an informed decision. The following breakdown provides a detailed look at the various factors that influence the cost of each option.
- Question: What is the cost comparison between rim repair and replacement?
- Answer: Rim repair typically costs between $50 and $200, while replacement can range from $200 to $1000 or more, depending on the rim type and vehicle.
Elaboration:
Repair costs vary based on the extent of the damage and the techniques used. Replacement costs depend on the rim’s material, size, and brand. Consider long-term costs and benefits, balancing upfront expenses with potential future issues.
6.1 Factors Affecting Repair Costs
The cost of rim repair can vary widely depending on several factors:
- Severity of Damage: Minor scratches and gouges are typically less expensive to repair than severe damage that requires welding or machining.
- Type of Rim: Alloy rims are generally more expensive to repair than steel rims due to the specialized techniques and equipment required.
- Repair Method: Simple repairs, such as sanding and painting, are less expensive than advanced techniques, such as powder coating or laser welding.
- Labor Costs: Labor costs can vary depending on the location and the expertise of the technician.
Average Repair Costs:
| Type of Repair | Average Cost |
|---|---|
| Minor Scratches | $50 – $100 |
| Moderate Gouges | $100 – $150 |
| Welding/Machining | $150 – $200 |
| Powder Coating | $200 – $300 |
6.2 Factors Affecting Replacement Costs
The cost of rim replacement can also vary depending on several factors:
- Type of Rim: Alloy rims are typically more expensive to replace than steel rims.
- Size of Rim: Larger rims are generally more expensive than smaller rims.
- Brand of Rim: High-end or custom rims can be significantly more expensive than standard rims.
- Installation Costs: Installation costs can vary depending on the location and the complexity of the job.
Average Replacement Costs:
| Type of Rim | Average Cost |
|---|---|
| Steel | $50 – $150 |
| Alloy | $200 – $1000+ |
| High-End/Custom | $1000+ per rim |
6.3 Cost-Saving Tips
Whether you choose to repair or replace your rims, there are several ways to save money:
- Get Multiple Quotes: Obtain quotes from several repair shops or rim retailers to ensure you’re getting a fair price.
- Consider Refurbished Rims: Refurbished rims can be a more affordable option than new rims, while still offering good quality and appearance.
- DIY Repair (for Minor Damage): For minor scratches or gouges, consider attempting a DIY repair to save on labor costs.
- Check for Warranties: Some rims come with warranties that cover damage or defects. Check your warranty before incurring any repair or replacement costs.
6.4 Insurance Coverage
Check with your insurance provider to see if your policy covers rim damage. Some comprehensive policies may cover the cost of repair or replacement, especially if the damage was caused by an accident or road hazard.
Questions to Ask Your Insurance Provider:
- Does my policy cover rim damage?
- What is my deductible?
- Will filing a claim affect my premiums?
7. The Role of CARDIAGTECH.NET in Rim Repair
CARDIAGTECH.NET offers a comprehensive range of tools and equipment for automotive repair, including specialized products for rim repair and maintenance.
- Question: How can CARDIAGTECH.NET assist with rim repair?
- Answer: CARDIAGTECH.NET provides high-quality tools, repair kits, and expert advice for effective and affordable rim repair.
Elaboration:
CARDIAGTECH.NET is your go-to source for all rim repair needs, offering everything from basic cleaning supplies to advanced repair kits. Our tools are designed for both DIY enthusiasts and professional technicians, ensuring you have the right equipment for the job.
7.1 Featured Products for Rim Repair
CARDIAGTECH.NET offers a variety of products designed to help you repair and maintain your rims:
- Rim Repair Kits: These kits include everything you need to repair minor scratches and gouges, including sandpaper, filler, paint, and clear coat.
- Polishing Compounds: Our polishing compounds are specially formulated to restore the shine and luster to your rims.
- Rim Cleaners: Our rim cleaners are designed to remove dirt, grime, and brake dust without damaging the finish.
- Protective Coatings: We offer a range of protective coatings, including waxes and sealants, to protect your rims from scratches, corrosion, and UV damage.
- Tools and Equipment: From sanders to paint guns, we have all the tools and equipment you need to perform professional-quality rim repairs.
7.2 Expert Advice and Support
CARDIAGTECH.NET is committed to providing expert advice and support to help you with your rim repair projects. Our team of experienced technicians can answer your questions, offer guidance, and help you choose the right products for your needs.
How to Get in Touch:
- Visit our website: CARDIAGTECH.NET
- Call us: +1 (641) 206-8880
- Visit our store: 276 Reock St, City of Orange, NJ 07050, United States
7.3 Success Stories and Testimonials
Many customers have successfully used CARDIAGTECH.NET products to repair and restore their rims. Here are a few success stories:
- John D. from Los Angeles: “I used the CARDIAGTECH.NET rim repair kit to fix a nasty scratch on my alloy rim. The kit was easy to use, and the results were amazing!”
- Sarah M. from Houston: “I was skeptical about repairing my rims myself, but the CARDIAGTECH.NET team provided excellent support and guidance. I couldn’t be happier with the results.”
- Mike L. from Miami: “The CARDIAGTECH.NET rim cleaner is the best I’ve ever used. It removes brake dust and grime without damaging the finish, keeping my rims looking like new.”
7.4 Special Offers and Discounts
CARDIAGTECH.NET frequently offers special deals and discounts on rim repair products. Be sure to check our website or sign up for our newsletter to stay informed about the latest offers.
Current Offers:
- 10% off all rim repair kits
- Free shipping on orders over $50
- Buy one, get one 50% off on select polishing compounds
7.5 Commitment to Quality and Customer Satisfaction
CARDIAGTECH.NET is committed to providing high-quality products and exceptional customer service. We stand behind our products and offer a satisfaction guarantee. If you’re not happy with your purchase, simply return it for a full refund.
8. Frequently Asked Questions (FAQs) About Car Rim Scratches
- Question: How much does it cost to repair a scratched rim?
- Answer: The cost to repair a scratched rim can range from $50 to $200, depending on the severity of the damage and the repair method used.
- Question: Can I fix a scratched rim myself?
- Answer: Yes, you can fix a scratched rim yourself with the right tools and materials. Minor scratches can be repaired with a rim repair kit, while more severe damage may require professional attention.
- Question: What is curb rash?
- Answer: Curb rash is damage to the rim caused by scraping against a curb. It typically results in scratches and gouges on the rim’s surface.
- Question: How do I prevent curb rash?
- Answer: To prevent curb rash, maintain a safe distance from curbs when parking or maneuvering. You can also install rim protectors to cushion the rim against impact.
- Question: Is it safe to drive with a scratched rim?
- Answer: It is generally safe to drive with minor scratches on the rim. However, if the rim is bent, cracked, or has structural damage, it’s essential to have it repaired or replaced immediately to prevent accidents.
- Question: Can I paint my rims to cover up scratches?
- Answer: Yes, you can paint your rims to cover up scratches. However, it’s essential to prepare the surface properly by sanding and priming before painting.
- Question: What is the best way to clean my rims?
- Answer: The best way to clean your rims is to use a mild soap and water or a specialized rim cleaner. Avoid using harsh chemicals or abrasive brushes that can damage the finish.
- Question: How often should I clean my rims?
- Answer: You should clean your rims regularly, especially if you live in an area with harsh weather conditions or frequent road salts. Cleaning your rims every few weeks can help prevent the buildup of corrosive substances and keep them looking their best.
- Question: What is the difference between alloy rims and steel rims?
- Answer: Alloy rims are made from a mixture of metals, typically aluminum or magnesium, while steel rims are made from steel. Alloy rims are generally lighter and more aesthetically pleasing than steel rims but can be more expensive to repair or replace.
- Question: Can I repair a bent rim?
- Answer: Yes, you can repair a bent rim, but it’s essential to have it done by a qualified technician. Bending a rim back into shape requires specialized equipment and expertise to ensure it’s safe to drive on.
9. Conclusion: Maintaining Your Rims for a Lasting Impression
Maintaining your car rims is crucial for both aesthetic appeal and safety. Whether you choose to tackle minor scratches with DIY methods or opt for professional repair services, the key is to address damage promptly and take preventive measures to avoid future issues.
By understanding the causes of rim scratches, following the step-by-step repair guides, and utilizing high-quality products from CARDIAGTECH.NET, you can keep your rims looking their best for years to come. Remember, a well-maintained set of rims not only enhances the appearance of your vehicle but also contributes to its overall value and performance.
Don’t let scratched rims detract from your vehicle’s appearance. Contact CARDIAGTECH.NET today at +1 (641) 206-8880 or visit our store at 276 Reock St, City of Orange, NJ 07050, United States, for expert advice and the best tools and products for rim repair. Let us help you keep your rims in pristine condition and make a lasting impression on the road. Visit CARDIAGTECH.NET now to explore our full