How to Fix Car Refrigerant Leak: A Comprehensive Guide
Fixing a car refrigerant leak can seem daunting, but with the right knowledge, tools, and a systematic approach, you can tackle this issue effectively. At CARDIAGTECH.NET, we provide the equipment and expertise to help you diagnose and repair refrigerant leaks, ensuring your vehicle’s air conditioning system operates efficiently. Detecting and addressing car AC leaks early can prevent costly damage to your compressor and other components. Find top-notch leak detection tools and AC repair solutions at CARDIAGTECH.NET.
1. Understanding Car Refrigerant Leaks
Car refrigerant leaks are a common issue affecting vehicle air conditioning systems. Refrigerant, often called “freon” (though modern systems use different refrigerants), is the lifeblood of your AC, responsible for cooling the air inside your car. When a leak occurs, the system loses its cooling capacity, leading to discomfort and potential damage to other components.
1.1 What is Refrigerant?
Refrigerant is a chemical compound used in air conditioning systems to absorb heat from the inside of your car and release it outside. Older vehicles used R-12, which was phased out due to its ozone-depleting properties. Newer cars use R-134a or the more environmentally friendly R-1234yf. Understanding the type of refrigerant your car uses is crucial for proper maintenance and repair.
1.2 Why Refrigerant Leaks Occur
Refrigerant leaks can occur for several reasons, including:
- Corrosion: Over time, moisture and contaminants can corrode the metal components of the AC system, leading to leaks.
- Wear and Tear: Hoses, seals, and O-rings can degrade due to age, temperature fluctuations, and pressure, causing them to crack or fail.
- Physical Damage: Road debris, accidents, or improper maintenance can physically damage components like the condenser or evaporator, resulting in leaks.
- Vibration: Constant vibration can loosen fittings and connections, leading to refrigerant escaping.
- Component Failure: Compressors, evaporators, and condensers can fail internally, causing leaks.
1.3 Identifying a Refrigerant Leak
Detecting a refrigerant leak early can save you money and prevent further damage. Here are common signs of a refrigerant leak:
- Weak or No Cold Air: The most obvious sign is that your AC blows warm air instead of cold air.
- Hissing Sound: You might hear a hissing sound coming from under the dashboard or the engine compartment, indicating escaping refrigerant.
- Oily Residue: Look for oily residue around fittings, hoses, or components, which can indicate a leak.
- Moldy Smell: A moldy or musty smell inside the car can be due to a leaking evaporator core.
- AC Compressor Issues: The AC compressor might cycle on and off frequently or not engage at all.
2. Tools and Equipment Needed to Fix Refrigerant Leaks
Having the right tools and equipment is essential for diagnosing and repairing refrigerant leaks effectively. CARDIAGTECH.NET offers a wide range of high-quality tools designed for AC system maintenance.
2.1 Essential Tools
- Refrigerant Leak Detector: A refrigerant leak detector is crucial for pinpointing the exact location of the leak. Electronic leak detectors are more sensitive and accurate than soap-and-water methods.
- Manifold Gauge Set: This tool measures the high and low-side pressures in the AC system, helping you diagnose performance issues.
- Vacuum Pump: A vacuum pump is used to evacuate the AC system, removing air and moisture before recharging with refrigerant.
- Refrigerant Recovery Machine: This machine safely removes and stores refrigerant from the AC system.
- AC Gauges: These gauges provide real-time pressure readings, essential for diagnosing and troubleshooting AC system issues.
- UV Dye and UV Light: Adding UV dye to the system and using a UV light can help you find leaks that are otherwise difficult to detect.
- Wrench Set: Wrenches are needed to tighten or loosen fittings and connections.
- Screwdriver Set: Various screwdrivers are necessary for removing panels and accessing AC components.
- O-Ring Assortment: Having a variety of O-rings on hand ensures you can replace any that are damaged or worn.
- Safety Glasses and Gloves: Protecting your eyes and skin is essential when working with refrigerants.
2.2 Advanced Tools
- Nitrogen Tank and Regulator: Nitrogen is used to pressurize the AC system for leak testing.
- Electronic Leak Detector with UV Capability: Combines electronic detection with UV dye to find even the smallest leaks.
- Thermal Imaging Camera: Can detect temperature differences caused by refrigerant leaks.
2.3 Why Choose CARDIAGTECH.NET Tools?
Investing in high-quality tools from CARDIAGTECH.NET ensures accuracy, durability, and safety. Our tools are designed for professional use and provide reliable performance for all your AC repair needs. Contact us via Whatsapp at +1 (641) 206-8880 for expert advice on selecting the right tools for your specific needs.
3. Step-by-Step Guide to Fixing a Car Refrigerant Leak
Fixing a car refrigerant leak requires a systematic approach. Follow these steps to diagnose and repair the leak effectively.
3.1 Safety Precautions
Before starting any AC repair work, take the following safety precautions:
- Wear Safety Glasses and Gloves: Refrigerant can cause frostbite if it comes into contact with your skin or eyes.
- Work in a Well-Ventilated Area: Refrigerant vapors can be harmful if inhaled.
- Avoid Open Flames: Refrigerant is flammable under certain conditions.
- Follow Manufacturer’s Instructions: Always follow the instructions provided with your tools and equipment.
- Proper Disposal: Dispose of used refrigerant properly according to local regulations.
3.2 Diagnosing the Leak
- Visual Inspection: Start by visually inspecting all AC components, including hoses, fittings, the compressor, condenser, and evaporator. Look for oily residue or signs of damage.
- Soap and Water Test: Mix soap and water in a spray bottle and spray the solution on fittings and connections. If bubbles form, it indicates a leak.
- Electronic Leak Detector: Use an electronic leak detector to scan all AC components. Follow the manufacturer’s instructions for proper use. The detector will beep or display a reading when it detects refrigerant.
- UV Dye Test: Add UV dye to the AC system and run the AC for a few minutes. Then, use a UV light to inspect the components. Leaks will appear as bright glowing spots.
- Pressure Test with Nitrogen: After evacuating any remaining refrigerant, pressurize the system with nitrogen to about 150 PSI. Listen for hissing sounds and use soap and water or an electronic leak detector to pinpoint the leak.
3.3 Repairing the Leak
Once you have identified the leak, take the following steps to repair it:
- Recover Remaining Refrigerant: Use a refrigerant recovery machine to safely remove any remaining refrigerant from the system.
- Replace Leaking Component: Depending on the location of the leak, you may need to replace a hose, fitting, O-ring, or an entire component like the condenser or evaporator.
- Replace O-Rings and Seals: Whenever you disconnect a fitting, replace the O-rings to ensure a tight seal.
- Tighten Fittings: Make sure all fittings and connections are properly tightened, but avoid over-tightening, which can damage the threads.
- Evacuate the System: Use a vacuum pump to evacuate the AC system for at least 30-45 minutes. This removes air and moisture, which can damage the compressor and reduce cooling efficiency.
- Recharge the System: Use a refrigerant charging station to recharge the system with the correct amount of refrigerant, as specified by the vehicle manufacturer.
- Test the System: After recharging, start the engine and turn on the AC. Check the vent temperature to ensure it is blowing cold air. Use a manifold gauge set to verify the high and low-side pressures are within the specified range.
3.4 Component-Specific Repairs
- Condenser: If the condenser has a leak due to physical damage or corrosion, it must be replaced. Remove the old condenser, install the new one, and reconnect the refrigerant lines.
- Evaporator: The evaporator is located inside the dashboard and is more challenging to access. If it leaks, you will need to remove the dashboard to replace it.
- Hoses and Fittings: Replace damaged hoses and fittings. Ensure the new components are compatible with the refrigerant used in your system.
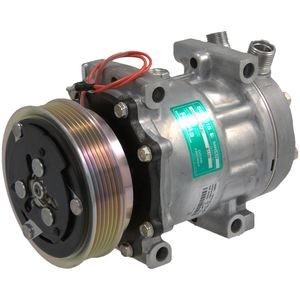
- Compressor: If the compressor is leaking, it often indicates internal damage. Replacing the compressor is usually the best option.
3.5 Tips for a Successful Repair
- Use Quality Parts: Always use high-quality replacement parts to ensure durability and reliability.
- Follow Torque Specifications: Use a torque wrench to tighten fittings to the specified torque to prevent leaks.
- Keep the System Clean: Prevent contaminants from entering the system by keeping all parts clean during the repair.
- Double-Check Your Work: After completing the repair, double-check all connections and test the system thoroughly.
4. Common Causes of Refrigerant Leaks and How to Prevent Them
Understanding the common causes of refrigerant leaks can help you take preventive measures to extend the life of your AC system.
4.1 Corrosion
Corrosion is a major cause of refrigerant leaks. Moisture and contaminants can corrode the metal components of the AC system over time.
Prevention:
- Regular AC Service: Have your AC system serviced regularly to check for leaks and corrosion.
- Use Refrigerant with Additives: Some refrigerants contain additives that help prevent corrosion.
- Keep the System Dry: Evacuate the system properly during repairs to remove moisture.
4.2 Wear and Tear
Hoses, seals, and O-rings can degrade due to age, temperature fluctuations, and pressure.
Prevention:
- Replace Worn Parts: Replace hoses, seals, and O-rings as part of routine maintenance.
- Use High-Quality Components: Use high-quality replacement parts that are designed to withstand temperature and pressure changes.
- Lubricate O-Rings: Lubricate O-rings with refrigerant oil before installation to ensure a good seal.
4.3 Physical Damage
Road debris, accidents, or improper maintenance can physically damage AC components.
Prevention:
- Protect the Condenser: Install a mesh screen in front of the condenser to protect it from road debris.
- Drive Carefully: Avoid driving through areas with loose gravel or debris.
- Proper Maintenance: Follow the manufacturer’s maintenance schedule to prevent damage.
4.4 Vibration
Constant vibration can loosen fittings and connections, leading to refrigerant escaping.
Prevention:
- Tighten Fittings Regularly: Check and tighten fittings periodically to ensure they are secure.
- Use Locking Fasteners: Use locking fasteners on critical connections to prevent them from loosening due to vibration.
- Proper Mounting: Ensure all AC components are properly mounted and secured to minimize vibration.
4.5 Component Failure
Compressors, evaporators, and condensers can fail internally, causing leaks.
Prevention:
- Regular Inspections: Have your AC system inspected regularly for signs of component failure.
- Proper Lubrication: Ensure the compressor is properly lubricated to prevent wear and tear.
- Avoid Overcharging: Overcharging the system with refrigerant can put excessive strain on the compressor and other components.
5. Choosing the Right Refrigerant
Selecting the right refrigerant for your vehicle is crucial for optimal performance and environmental responsibility.
5.1 Types of Refrigerants
- R-12: An older refrigerant phased out due to its ozone-depleting properties. It is illegal to use R-12 in most countries.
- R-134a: The most common refrigerant used in vehicles manufactured from the mid-1990s to the present. It is less harmful to the ozone layer than R-12 but still has a high global warming potential.
- R-1234yf: A newer refrigerant with a much lower global warming potential than R-134a. It is being used in many newer vehicles.
- CO2 (R-744): An environmentally friendly refrigerant with a very low global warming potential. It is being used in some electric and hybrid vehicles.
5.2 Compatibility
Ensure the refrigerant you use is compatible with your vehicle’s AC system. Using the wrong refrigerant can damage the system and void warranties. Check your vehicle’s owner’s manual or the label on the AC system to determine the correct refrigerant.
5.3 Environmental Considerations
Consider the environmental impact of the refrigerant you choose. R-1234yf and CO2 are more environmentally friendly options than R-134a.
5.4 Regulations
Be aware of local regulations regarding refrigerant use and disposal. Many jurisdictions require technicians to be certified to handle refrigerants.
5.5 Consult with CARDIAGTECH.NET
If you’re unsure which refrigerant is right for your vehicle, consult with the experts at CARDIAGTECH.NET. We can provide guidance and ensure you select the appropriate refrigerant for your AC system. Reach out to us on Whatsapp at +1 (641) 206-8880 for personalized assistance.
6. Cost of Fixing a Refrigerant Leak
The cost of fixing a refrigerant leak can vary widely depending on the location and severity of the leak, the type of refrigerant used, and the cost of labor.
6.1 Factors Affecting Cost
- Location of the Leak: Leaks in easily accessible areas like hoses or fittings are typically less expensive to repair than leaks in the evaporator or compressor.
- Type of Refrigerant: R-1234yf is more expensive than R-134a, so recharging a system with R-1234yf will cost more.
- Replacement Parts: The cost of replacement parts can vary depending on the make and model of your vehicle and the quality of the parts.
- Labor Costs: Labor rates vary depending on the shop and location. Complex repairs that require removing the dashboard or engine components will cost more.
6.2 Estimated Costs
- Minor Leak Repair (Hoses, Fittings, O-Rings): $50 – $200
- Condenser Replacement: $300 – $800
- Evaporator Replacement: $800 – $1500
- Compressor Replacement: $500 – $1200
- Refrigerant Recharge: $50 – $200 (depending on the type of refrigerant and the amount needed)
6.3 DIY vs. Professional Repair
While some minor refrigerant leaks can be repaired DIY, more complex repairs should be left to professionals. DIY repairs can save money, but they require the right tools, knowledge, and safety precautions. Professional technicians have the expertise and equipment to diagnose and repair leaks accurately and safely.
6.4 CARDIAGTECH.NET Solutions
At CARDIAGTECH.NET, we offer tools and equipment that can help you save on repair costs. By investing in our high-quality tools, you can diagnose and repair minor leaks yourself, avoiding expensive labor costs. Contact us on Whatsapp at +1 (641) 206-8880 to learn more about our cost-effective solutions.
7. Maintaining Your Car’s AC System
Regular maintenance is essential for keeping your car’s AC system in good condition and preventing refrigerant leaks.
7.1 Regular Inspections
Have your AC system inspected at least once a year to check for leaks, corrosion, and other issues.
7.2 Recharge as Needed
Refrigerant levels can decrease over time, even without a leak. Recharge the system as needed to maintain optimal cooling performance.
7.3 Clean the Condenser
Keep the condenser clean and free of debris to ensure proper airflow and cooling efficiency.
7.4 Use the AC Regularly
Run the AC for at least 10 minutes per month, even in the winter, to keep the compressor lubricated and prevent seals from drying out.
7.5 Replace the Cabin Air Filter
Replace the cabin air filter regularly to ensure good airflow and prevent contaminants from entering the AC system.
7.6 Professional Service
Have your AC system serviced by a professional technician every 2-3 years to check for leaks, clean the system, and replace any worn parts.
7.7 Trust CARDIAGTECH.NET for Maintenance Tools
CARDIAGTECH.NET offers a wide range of maintenance tools and equipment to help you keep your AC system in top condition. From vacuum pumps to refrigerant leak detectors, we have everything you need to maintain your AC system and prevent costly repairs. Contact us via Whatsapp at +1 (641) 206-8880 for expert advice and product recommendations.
8. Environmental Impact of Refrigerant Leaks
Refrigerant leaks can have a significant environmental impact, contributing to ozone depletion and global warming.
8.1 Ozone Depletion
Older refrigerants like R-12 contain chlorofluorocarbons (CFCs) that deplete the ozone layer, which protects the Earth from harmful ultraviolet radiation.
8.2 Global Warming
Even newer refrigerants like R-134a have a high global warming potential, meaning they trap heat in the atmosphere and contribute to climate change.
8.3 Regulations
Many countries have regulations in place to control the use and disposal of refrigerants and prevent leaks.
8.4 Responsible Practices
Follow responsible practices to minimize the environmental impact of refrigerant leaks:
- Repair Leaks Promptly: Repair refrigerant leaks as soon as possible to prevent further emissions.
- Use Proper Equipment: Use refrigerant recovery and recycling equipment to prevent refrigerant from escaping into the atmosphere.
- Dispose of Refrigerant Properly: Dispose of used refrigerant properly according to local regulations.
- Choose Environmentally Friendly Refrigerants: Use environmentally friendly refrigerants like R-1234yf or CO2 whenever possible.
8.5 CARDIAGTECH.NET and Environmental Responsibility
CARDIAGTECH.NET is committed to environmental responsibility. We offer tools and equipment that help technicians repair leaks and handle refrigerants safely and responsibly, minimizing the environmental impact. Reach out to us on Whatsapp at +1 (641) 206-8880 to learn more about our eco-friendly solutions.
9. Troubleshooting Common AC Problems
Even with regular maintenance, AC problems can occur. Here are some common AC problems and how to troubleshoot them.
9.1 AC Not Blowing Cold Air
- Possible Causes: Low refrigerant level, faulty compressor, clogged condenser, blocked evaporator, or a malfunctioning blend door.
- Troubleshooting Steps: Check the refrigerant level, inspect the compressor and condenser, and verify the blend door is functioning properly.
9.2 AC Blowing Warm Air
- Possible Causes: Refrigerant leak, faulty compressor, clogged condenser, or a malfunctioning expansion valve.
- Troubleshooting Steps: Check for refrigerant leaks, inspect the compressor and condenser, and test the expansion valve.
9.3 AC Cycling On and Off
- Possible Causes: Low refrigerant level, faulty pressure switch, or a malfunctioning compressor.
- Troubleshooting Steps: Check the refrigerant level, test the pressure switch, and inspect the compressor.
9.4 No Airflow
- Possible Causes: Blown fuse, faulty blower motor, or a clogged cabin air filter.
- Troubleshooting Steps: Check the fuse, test the blower motor, and replace the cabin air filter.
9.5 Unusual Noises
- Possible Causes: Faulty compressor, worn belt, or debris in the blower motor.
- Troubleshooting Steps: Inspect the compressor and belt, and remove any debris from the blower motor.
9.6 CARDIAGTECH.NET for Troubleshooting Tools
CARDIAGTECH.NET provides a comprehensive range of diagnostic tools to help you troubleshoot AC problems effectively. Our AC gauges, manifold gauge sets, and electronic leak detectors are designed to provide accurate and reliable results, helping you identify and resolve AC issues quickly. Contact us on Whatsapp at +1 (641) 206-8880 for assistance in selecting the right tools for your troubleshooting needs.
10. The Importance of Professional AC Service
While some AC repairs can be done DIY, professional AC service is essential for complex repairs and maintenance.
10.1 Expertise
Professional technicians have the expertise and training to diagnose and repair AC problems accurately and safely.
10.2 Equipment
Professional shops have specialized equipment like refrigerant recovery machines, vacuum pumps, and charging stations.
10.3 Safety
Working with refrigerants can be dangerous. Professional technicians are trained to handle refrigerants safely and prevent environmental damage.
10.4 Warranty
Professional repairs often come with a warranty, providing peace of mind.
10.5 Comprehensive Service
Professional AC service includes a comprehensive inspection, leak detection, repair, and recharge.
10.6 CARDIAGTECH.NET: Empowering Professionals
CARDIAGTECH.NET is dedicated to providing professional technicians with the tools and equipment they need to deliver top-quality AC service. Our products are designed for performance, reliability, and safety, helping technicians provide efficient and effective repairs. Contact us via Whatsapp at +1 (641) 206-8880 to learn more about our professional-grade solutions and how they can enhance your service offerings.
Conclusion
Fixing a car refrigerant leak requires knowledge, the right tools, and a systematic approach. By understanding the causes of leaks, taking preventive measures, and using quality tools from CARDIAGTECH.NET, you can keep your AC system running efficiently and avoid costly repairs. Whether you’re a DIY enthusiast or a professional technician, CARDIAGTECH.NET has the solutions you need to tackle any AC challenge.
Remember, early detection and prompt repair of refrigerant leaks are crucial for maintaining the performance of your car’s AC system and protecting the environment. Invest in the right tools, follow safety precautions, and don’t hesitate to seek professional help when needed.
For all your AC repair and maintenance needs, trust CARDIAGTECH.NET. Our high-quality tools, expert advice, and commitment to customer satisfaction make us the preferred choice for automotive professionals and DIY enthusiasts alike. Contact us today to learn more about our products and how we can help you keep your car’s AC system in top condition.
Address: 276 Reock St, City of Orange, NJ 07050, United States
Whatsapp: +1 (641) 206-8880
Website: CARDIAGTECH.NET
Are you facing AC problems and unsure where to start? Don’t let a refrigerant leak ruin your driving experience. Contact CARDIAGTECH.NET today for expert advice and the best tools on the market. Our team is ready to assist you in diagnosing and fixing your AC issues, ensuring your car stays cool and comfortable. Reach out to us now and let us help you get your AC system back on track.
FAQ: Car Refrigerant Leaks
Here are some frequently asked questions about car refrigerant leaks:
-
What causes refrigerant leaks in cars?
Refrigerant leaks can be caused by corrosion, wear and tear, physical damage, vibration, and component failure.
-
How do I know if my car has a refrigerant leak?
Common signs include weak or no cold air, hissing sounds, oily residue around fittings, a moldy smell inside the car, and AC compressor issues.
-
Can I fix a refrigerant leak myself?
Minor leaks can be repaired DIY, but complex repairs should be left to professionals due to the need for specialized equipment and safety precautions.
-
What tools do I need to fix a refrigerant leak?
Essential tools include a refrigerant leak detector, manifold gauge set, vacuum pump, refrigerant recovery machine, and safety glasses and gloves.
-
What type of refrigerant does my car use?
Check your vehicle’s owner’s manual or the label on the AC system to determine the correct refrigerant. Common refrigerants include R-134a and R-1234yf.
-
How much does it cost to fix a refrigerant leak?
The cost varies depending on the location and severity of the leak, the type of refrigerant, and labor costs. Minor repairs can cost $50-$200, while major repairs like condenser or evaporator replacement can range from $300 to $1500.
-
How often should I have my AC system serviced?
Have your AC system inspected at least once a year and serviced by a professional every 2-3 years.
-
What is the environmental impact of refrigerant leaks?
Refrigerant leaks can contribute to ozone depletion and global warming. It is important to repair leaks promptly and dispose of refrigerant properly.
-
Can overfilling refrigerant damage the AC system?
Yes, overfilling the system with refrigerant can put excessive strain on the compressor and other components, leading to damage.
-
Where can I find quality tools and equipment for AC repair?
CARDIAGTECH.NET offers a wide range of high-quality tools and equipment for AC repair and maintenance. Contact us for expert advice and product recommendations.


