How To Fix Scratch On Car: A Comprehensive Guide
Fixing a scratch on your car is totally achievable and can bring back that showroom shine. CARDIAGTECH.NET offers top-notch auto repair tools to effectively address and eliminate car scratches, restoring your vehicle’s flawless appearance. Explore the best techniques and products for paint correction, surface protection, and achieving a professional finish.
Table of Contents
- Understanding Car Scratches
- Essential Tools and Materials
- Identifying the Type of Scratch
- Step-by-Step Guide to Fixing Clear Coat Scratches
- Repairing Base Coat Scratches: A Detailed Approach
- Addressing Primer Coat Scratches: Advanced Techniques
- Professional Tips for a Flawless Finish
- Preventive Measures: Protecting Your Car’s Paint
- Advanced Scratch Removal Techniques
- Cost-Effective DIY Scratch Repair Solutions
- Debunking Common Scratch Repair Myths
- The Science Behind Car Paint and Scratches
- Tools and Equipment Available at CARDIAGTECH.NET
- Why Choose CARDIAGTECH.NET for Your Auto Repair Needs
- Maintaining Your Car’s Appearance: Long-Term Strategies
- The Future of Car Scratch Repair Technology
- Success Stories: Real-World Scratch Repair Transformations
- FAQ: Your Questions About Car Scratch Repair Answered
- Conclusion: Achieve a Scratch-Free Finish With CARDIAGTECH.NET
1. Understanding Car Scratches
Car scratches are an unfortunate reality for vehicle owners, ranging from minor cosmetic blemishes to deeper damages that threaten the car’s structural integrity. Recognizing the different types of scratches—clear coat, base coat, and primer coat—is crucial for effective repair and maintaining your car’s value. Understanding these distinctions allows for targeted repairs, protecting your investment and enhancing your vehicle’s aesthetic appeal.
1.1. The Anatomy of Car Paint
Car paint consists of several layers, each serving a specific purpose:
- Clear Coat: The outermost layer, providing gloss and protection against UV rays and environmental damage.
- Base Coat: The color layer, giving your car its unique hue.
- Primer Coat: A bonding layer that adheres the paint to the metal surface, preventing corrosion.
- E-Coat: The initial layer applied to the bare metal, providing corrosion resistance.
1.2. Types of Car Scratches Explained
1.2.1. Clear Coat Scratches
These are superficial scratches affecting only the clear coat layer. They are often caused by:
- Minor abrasions from washing.
- Contact with branches or bushes.
- Light scrapes from debris.
They typically appear as faint lines or swirls on the surface.
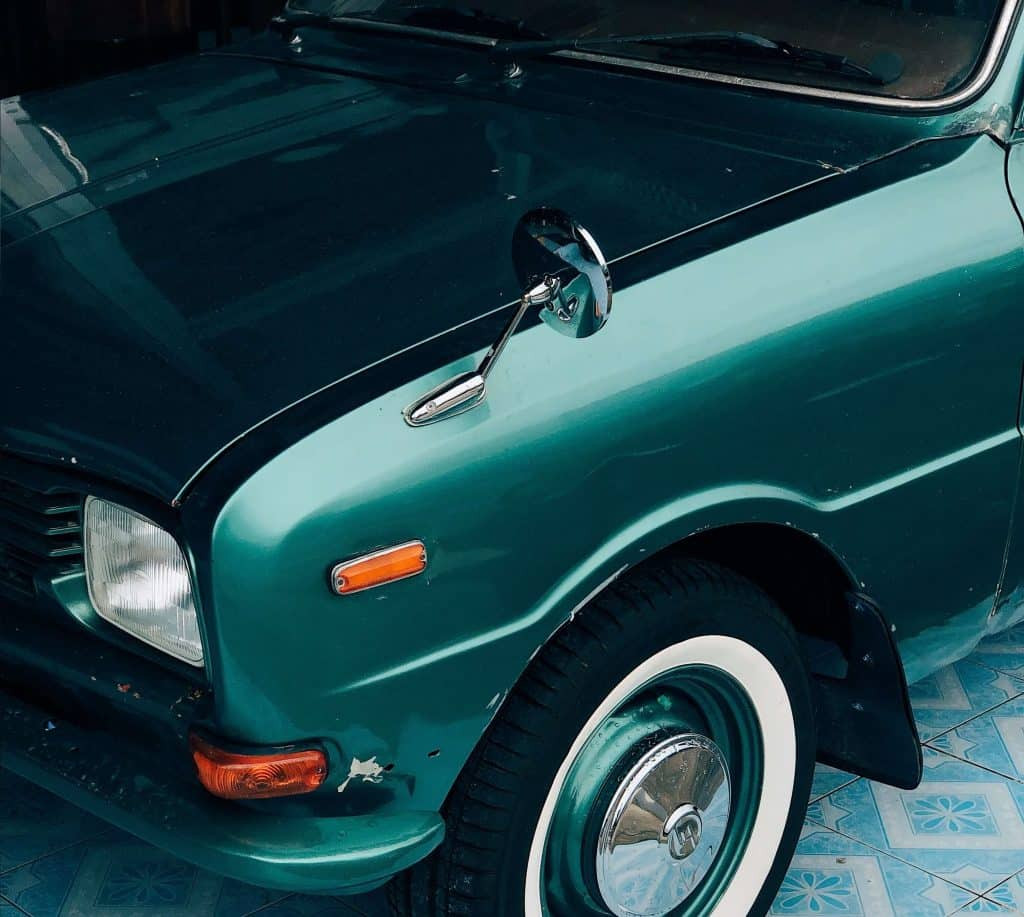
1.2.2. Base Coat Scratches
Base coat scratches penetrate through the clear coat and into the color layer. They result from:
- Deeper scrapes from rocks or road debris.
- Keying or intentional damage.
- More aggressive washing mishaps.
These scratches are more noticeable, revealing the underlying color.
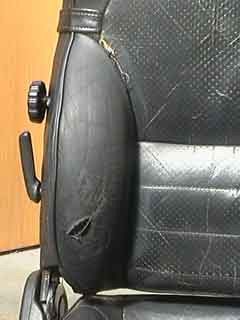
1.2.3. Primer Coat Scratches
Primer coat scratches are the most severe, reaching through all paint layers to the primer. Common causes include:
- Collisions or accidents.
- Deep gouges from sharp objects.
- Significant impacts that remove paint layers.
These scratches expose the primer layer, indicating serious damage that requires immediate attention.
1.3. The Impact of Scratches on Your Car’s Value
Scratches not only diminish your car’s appearance but also reduce its resale value. According to Kelley Blue Book, even minor scratches can lower a car’s value by hundreds of dollars. More severe scratches and paint damage can lead to significant depreciation.
1.4. Why Addressing Scratches Promptly Is Essential
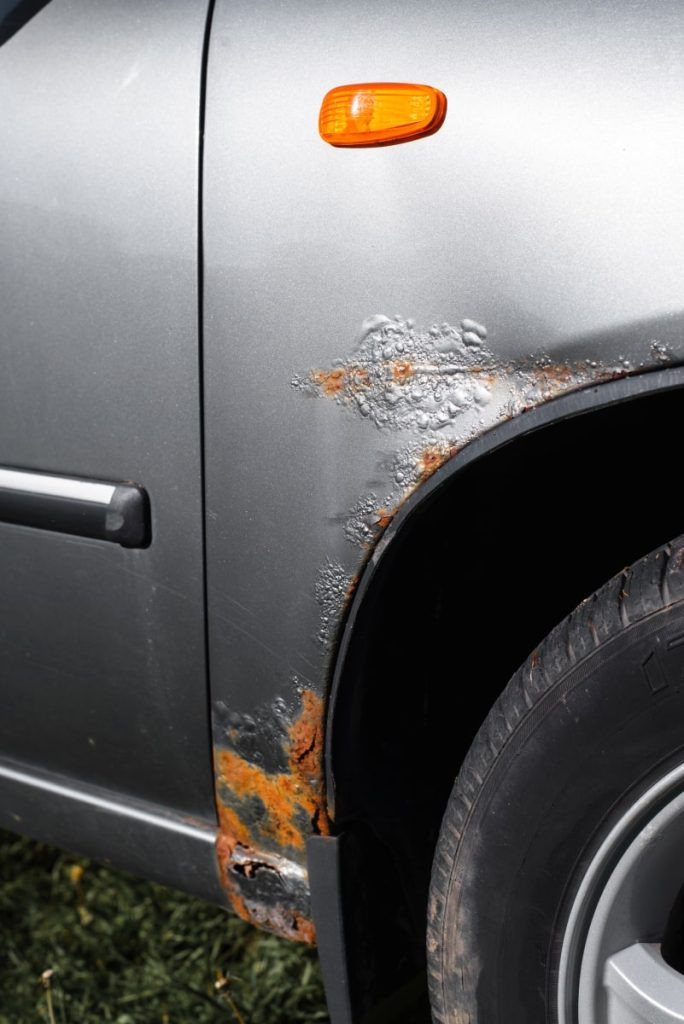
Addressing scratches promptly prevents further damage such as:
- Rust and Corrosion: Exposed metal can rust, compromising the car’s structural integrity.
- Paint Degradation: Scratches weaken the surrounding paint, making it more susceptible to chipping and peeling.
- Aesthetic Decline: Untreated scratches worsen over time, detracting from the car’s overall appearance.
By understanding the types and impact of car scratches, you can take informed action to protect and maintain your vehicle. Now, let’s explore the essential tools and materials needed for effective scratch repair.
2. Essential Tools and Materials
Having the right tools and materials is essential for effectively fixing scratches on your car. High-quality tools not only make the job easier but also ensure a professional finish, enhancing your vehicle’s appearance and protecting its value. CARDIAGTECH.NET offers a wide range of tools designed for auto repair, making it easier than ever to tackle scratch removal at home.
2.1. Basic Cleaning Supplies
- Car Wash Soap: Use a pH-balanced car wash soap to gently remove dirt and grime without damaging the paint. Brands like Meguiar’s and Chemical Guys offer excellent options.
- Microfiber Wash Mitt: A soft microfiber wash mitt prevents scratching while cleaning. Look for mitts with long, plush fibers.
- Two Buckets: Employ the two-bucket method—one for soapy water and one for rinsing—to avoid transferring dirt back onto the car.
- Drying Towels: High-quality microfiber drying towels quickly and safely dry your car, minimizing water spots.
2.2. Scratch Repair Compounds and Polishes
- Scratch Remover Compound: These compounds contain mild abrasives to level out the clear coat around the scratch. Popular options include Meguiar’s ScratchX and 3M Scratch Remover.
- Rubbing Compound: More aggressive than scratch removers, rubbing compounds are used for deeper scratches. Use with caution to avoid damaging the surrounding paint.
- Polishing Compound: Polishing compounds refine the finish after using scratch or rubbing compounds, restoring gloss and clarity.
- Car Polish: A good car polish enhances shine and protects the paint. Opt for products with UV protection to prevent fading.
2.3. Sanding Supplies
- Sandpaper: Various grits of sandpaper (1000, 2000, 3000) are necessary for leveling imperfections. Use wet sanding techniques to minimize scratching.
- Sanding Block: A sanding block ensures even pressure and a uniform finish.
2.4. Application and Buffing Tools
- Microfiber Cloths: Essential for applying compounds and polishes, and for buffing surfaces.
- Foam Applicator Pads: Use these pads for even application of scratch removers, polishes, and waxes.
- Dual-Action (DA) Polisher: A DA polisher significantly speeds up the buffing process and provides a more consistent finish. Brands like Griot’s Garage and Porter-Cable are highly regarded.
2.5. Touch-Up Paint and Accessories
- Touch-Up Paint: Purchase touch-up paint that matches your car’s color code.
- Fine-Tipped Brushes: Small brushes are ideal for precise application of touch-up paint.
- Blending Solution: Helps blend touch-up paint seamlessly with the surrounding paint.
2.6. Protective Gear
- Gloves: Protect your hands from chemicals and abrasives.
- Mask: Wear a mask to avoid inhaling dust and fumes.
- Eye Protection: Safety glasses or goggles protect your eyes from debris and chemicals.
2.7. Additional Useful Tools
- Detailing Clay: Removes embedded contaminants from the paint surface.
- Isopropyl Alcohol (IPA): Used to clean surfaces before applying compounds and polishes.
- Painter’s Tape: Protects adjacent areas from accidental damage.
- Inspection Light: Helps identify imperfections and ensure thorough scratch removal.
2.8. Where to Buy Quality Tools
CARDIAGTECH.NET offers a curated selection of high-quality auto repair tools. Investing in reliable tools from CARDIAGTECH.NET ensures you achieve professional results and maintain your car’s appearance effectively.
By gathering these essential tools and materials, you’ll be well-prepared to tackle car scratch repair. Next, we’ll discuss how to identify the type of scratch you’re dealing with.
3. Identifying the Type of Scratch
Before you start fixing a scratch on your car, it’s essential to accurately identify the type of scratch you’re dealing with. Different types of scratches require different repair techniques. Knowing whether you’re dealing with a clear coat, base coat, or primer coat scratch will guide your approach and ensure the best possible outcome.
3.1. The Fingernail Test
The fingernail test is a simple and effective method for determining the depth of a scratch:
-
Clean the Area: Thoroughly clean the area around the scratch with car wash soap and water. Dry it with a microfiber towel.
-
Run Your Fingernail: Gently run your fingernail perpendicular to the scratch.
-
Evaluate the Result:
- Clear Coat Scratch: If your fingernail doesn’t catch on the scratch, it’s likely a clear coat scratch. These are superficial and usually the easiest to repair.
- Base Coat Scratch: If your fingernail catches slightly on the scratch, it has penetrated the clear coat and reached the base coat (color layer).
- Primer Coat Scratch: If your fingernail catches significantly on the scratch and you can see the underlying primer (usually gray, white, or black), the scratch is deep and requires more extensive repair.
3.2. The Polish Test
Another method to identify the scratch type is the polish test:
-
Apply Polish: Apply a small amount of car polish to a microfiber cloth.
-
Rub the Scratch: Gently rub the polish onto the scratched area in a circular motion.
-
Inspect the Result:
- Clear Coat Scratch: If the scratch disappears or significantly diminishes, it’s a clear coat scratch. The polish has filled in the minor imperfection.
- Base Coat or Primer Coat Scratch: If the scratch remains visible after polishing, it’s likely a base coat or primer coat scratch. These require more aggressive repair methods.
3.3. Visual Inspection
Carefully examine the scratch under good lighting to determine its depth:
- Clear Coat Scratches: These appear as fine lines or swirls on the surface. They often look like a haze or cloudiness on the clear coat.
- Base Coat Scratches: These are more visible and may show a slight color difference where the clear coat is broken.
- Primer Coat Scratches: These are easily identifiable by the distinct color of the primer layer, which contrasts sharply with the car’s paint.
3.4. Using a Paint Depth Gauge
For a precise measurement, consider using a paint depth gauge:
- Calibrate the Gauge: Follow the manufacturer’s instructions to calibrate the gauge on an undamaged area of the car.
- Measure the Paint Depth: Place the gauge on the scratched area and take a reading.
- Compare Readings: Compare the reading on the scratched area with the reading on the undamaged area. The difference in depth will indicate the type and severity of the scratch.
3.5. What to Do After Identifying the Scratch Type
Once you’ve identified the type of scratch, you can select the appropriate repair method:
- Clear Coat Scratches: Can often be repaired with scratch remover compounds and polishing.
- Base Coat Scratches: May require touch-up paint followed by sanding and polishing.
- Primer Coat Scratches: Need more extensive repair, including sanding, touch-up paint, and possibly primer application before painting.
By accurately identifying the type of scratch, you’ll be better equipped to perform effective repairs and restore your car’s finish. Now, let’s move on to the step-by-step guide for fixing clear coat scratches.
4. Step-by-Step Guide to Fixing Clear Coat Scratches
Clear coat scratches are the most common type of car scratch and, fortunately, often the easiest to fix. This step-by-step guide provides a clear process for removing these superficial blemishes, helping you restore your car’s shine using tools available at CARDIAGTECH.NET.
4.1. Preparation
- Gather Your Supplies:
- Car wash soap
- Two buckets
- Microfiber wash mitt
- Microfiber drying towels
- Scratch remover compound
- Polishing compound
- Microfiber cloths
- Foam applicator pads
- Painter’s tape (optional)
- Wash the Car: Thoroughly wash the area around the scratch with car wash soap and water. Use the two-bucket method to avoid reintroducing dirt.
- Dry the Area: Dry the area with a clean microfiber drying towel. Ensure the surface is completely dry before proceeding.
- Tape Off the Area (Optional): Use painter’s tape to protect the surrounding paint from accidental damage during the repair process.
4.2. Applying Scratch Remover
- Apply Compound: Apply a small amount of scratch remover compound to a foam applicator pad or a clean microfiber cloth.
- Rub the Scratch: Gently rub the compound onto the scratched area using a circular motion. Apply moderate pressure.
- Buff the Area: Continue buffing the area for several minutes, allowing the compound to work into the scratch.
- Wipe Off Residue: Use a clean microfiber cloth to wipe off any excess compound.
4.3. Polishing the Area
- Apply Polishing Compound: Apply a small amount of polishing compound to a clean foam applicator pad or microfiber cloth.
- Polish the Area: Gently polish the area using a circular motion. Apply light pressure.
- Buff to Shine: Continue buffing until the polish is evenly distributed and the surface is glossy.
- Wipe Off Residue: Use a clean microfiber cloth to wipe off any remaining polish.
4.4. Using a Dual-Action (DA) Polisher (Optional)
- Attach Polishing Pad: Attach a clean polishing pad to your DA polisher.
- Apply Compound: Apply a small amount of scratch remover compound to the pad.
- Polish the Area: Use the DA polisher on a low speed setting to work the compound into the scratch. Move the polisher in overlapping passes.
- Switch to Polishing Compound: Repeat the process with polishing compound to refine the finish.
- Wipe Clean: Wipe the area with a clean microfiber cloth to remove any residue.
4.5. Inspecting the Results
- Check Under Light: Use an inspection light to carefully examine the repaired area. Look for any remaining scratches or swirl marks.
- Repeat if Necessary: If scratches are still visible, repeat the scratch removal and polishing steps.
- Apply Wax or Sealant: To protect the repaired area, apply a coat of car wax or sealant.
4.6. Tips for Best Results
- Work in a Shaded Area: Avoid working in direct sunlight, as it can cause compounds to dry too quickly.
- Use Clean Materials: Always use clean microfiber cloths and applicator pads to prevent introducing new scratches.
- Apply Even Pressure: Consistent pressure ensures uniform scratch removal and polishing.
- Take Your Time: Rushing the process can lead to unsatisfactory results.
4.7. Products Recommended by CARDIAGTECH.NET
- Meguiar’s ScratchX: An effective scratch remover compound for clear coat scratches.
- Meguiar’s Ultimate Polish: A high-quality polishing compound to restore shine.
- Griot’s Garage DA Polisher: A reliable dual-action polisher for professional results.
By following this step-by-step guide, you can effectively remove clear coat scratches and restore your car’s appearance. Next, we’ll delve into repairing base coat scratches.
5. Repairing Base Coat Scratches: A Detailed Approach
Base coat scratches are deeper than clear coat scratches, requiring a more detailed approach to repair. This involves using touch-up paint to restore the color layer and then blending it seamlessly with the surrounding paint. This guide provides a comprehensive method for repairing base coat scratches using tools available at CARDIAGTECH.NET, ensuring a professional-looking finish.
5.1. Preparation
- Gather Your Supplies:
- Car wash soap
- Two buckets
- Microfiber wash mitt
- Microfiber drying towels
- Touch-up paint (matching your car’s color code)
- Fine-tipped brushes or toothpicks
- 2000-grit sandpaper
- Sanding block
- Rubbing compound
- Polishing compound
- Microfiber cloths
- Foam applicator pads
- Painter’s tape (optional)
- Blending solution (optional)
- Wash the Car: Thoroughly wash the area around the scratch with car wash soap and water. Use the two-bucket method.
- Dry the Area: Dry the area with a clean microfiber drying towel.
- Tape Off the Area (Optional): Use painter’s tape to protect the surrounding paint.
5.2. Applying Touch-Up Paint
- Shake the Paint: Thoroughly shake the touch-up paint to ensure the color is consistent.
- Apply Thin Coats: Use a fine-tipped brush or toothpick to apply thin, even coats of touch-up paint to the scratch. Avoid applying too much paint at once to prevent drips and unevenness.
- Allow to Dry: Allow each coat of paint to dry completely before applying the next. This may take several hours, depending on the paint and environmental conditions.
- Build Up Layers: Apply multiple thin coats until the touch-up paint is slightly higher than the surrounding paint. This will allow for sanding and blending.
5.3. Sanding the Area
- Wet Sanding: Wrap a small piece of 2000-grit sandpaper around a sanding block. Wet the sandpaper with water.
- Sand Lightly: Gently sand the touch-up paint to level it with the surrounding paint. Use light, even pressure and keep the sandpaper wet.
- Check Progress: Periodically check your progress to avoid sanding too much paint. The goal is to create a smooth, even surface.
5.4. Applying Rubbing Compound
- Apply Compound: Apply a small amount of rubbing compound to a foam applicator pad or microfiber cloth.
- Rub the Area: Rub the compound onto the sanded area using a circular motion. Apply moderate pressure.
- Buff the Surface: Continue buffing until the sanding marks are removed and the surface is smooth.
- Wipe Off Residue: Use a clean microfiber cloth to wipe off any excess compound.
5.5. Polishing the Area
- Apply Polishing Compound: Apply a small amount of polishing compound to a clean foam applicator pad or microfiber cloth.
- Polish the Area: Gently polish the area using a circular motion. Apply light pressure.
- Buff to Shine: Continue buffing until the polish is evenly distributed and the surface is glossy.
- Wipe Off Residue: Use a clean microfiber cloth to wipe off any remaining polish.
5.6. Using a Dual-Action (DA) Polisher (Optional)
- Attach Polishing Pad: Attach a clean polishing pad to your DA polisher.
- Apply Compound: Apply a small amount of rubbing compound to the pad.
- Polish the Area: Use the DA polisher on a low speed setting to work the compound into the area. Move the polisher in overlapping passes.
- Switch to Polishing Compound: Repeat the process with polishing compound to refine the finish.
- Wipe Clean: Wipe the area with a clean microfiber cloth to remove any residue.
5.7. Inspecting the Results
- Check Under Light: Use an inspection light to carefully examine the repaired area. Look for any remaining scratches, sanding marks, or unevenness.
- Repeat if Necessary: If imperfections are still visible, repeat the sanding, rubbing compound, and polishing steps.
- Apply Wax or Sealant: To protect the repaired area, apply a coat of car wax or sealant.
5.8. Tips for Best Results
- Match the Paint: Ensure the touch-up paint exactly matches your car’s color code for a seamless repair.
- Apply Thin Coats: Multiple thin coats of touch-up paint are better than one thick coat.
- Wet Sand Carefully: Use plenty of water when sanding to avoid scratching the paint.
- Be Patient: This process requires patience and attention to detail.
5.9. Products Recommended by CARDIAGTECH.NET
- AutomotiveTouchup Paint: High-quality touch-up paint matching various car colors.
- 3M Rubbing Compound: An effective rubbing compound for removing sanding marks.
- Meguiar’s Ultimate Polish: A reliable polishing compound for restoring shine.
By following this detailed approach, you can effectively repair base coat scratches and restore your car’s finish. Next, we’ll cover addressing primer coat scratches.
6. Addressing Primer Coat Scratches: Advanced Techniques
Primer coat scratches are the deepest and most challenging to repair, as they penetrate through all paint layers to the primer. Addressing these scratches requires a more advanced approach, including applying primer, touch-up paint, and careful blending techniques. This comprehensive guide provides step-by-step instructions for repairing primer coat scratches using tools available at CARDIAGTECH.NET, ensuring a durable and professional-looking result.
6.1. Preparation
-
Gather Your Supplies:
- Car wash soap
- Two buckets
- Microfiber wash mitt
- Microfiber drying towels
- 180-grit sandpaper
- 320-grit sandpaper
- 400-grit sandpaper
- Primer
- Touch-up paint (matching your car’s color code)
- Fine-tipped brushes or toothpicks
- 2000-grit sandpaper
- Sanding block
- Rubbing compound
- Polishing compound
- Microfiber cloths
- Foam applicator pads
- Painter’s tape (optional)
- Blending solution (optional)
-
Wash the Car: Thoroughly wash the area around the scratch with car wash soap and water. Use the two-bucket method.
-
Dry the Area: Dry the area with a clean microfiber drying towel.
-
Tape Off the Area (Optional): Use painter’s tape to protect the surrounding paint from accidental damage.
6.2. Sanding the Area
- Initial Sanding: Start with 180-grit sandpaper to remove any rust or rough edges. Use a sanding block for even pressure.
- Refine the Surface: Switch to 320-grit sandpaper to smooth the area further.
- Final Sanding: Finish with 400-grit sandpaper to create a smooth surface for the primer to adhere to.
6.3. Applying Primer
- Shake the Primer: Thoroughly shake the primer can to ensure the mixture is consistent.
- Apply Thin Coats: Apply thin, even coats of primer to the sanded area. Hold the can about 8-10 inches away from the surface.
- Allow to Dry: Allow each coat of primer to dry completely before applying the next. This may take several hours, depending on the primer and environmental conditions.
- Build Up Layers: Apply multiple thin coats until the primer is level with the surrounding paint.
6.4. Applying Touch-Up Paint
- Shake the Paint: Thoroughly shake the touch-up paint to ensure the color is consistent.
- Apply Thin Coats: Use a fine-tipped brush or toothpick to apply thin, even coats of touch-up paint to the primed area.
- Allow to Dry: Allow each coat of paint to dry completely before applying the next. This may take several hours.
- Build Up Layers: Apply multiple thin coats until the touch-up paint is slightly higher than the surrounding paint.
6.5. Wet Sanding the Area
- Wet Sanding: Wrap a small piece of 2000-grit sandpaper around a sanding block. Wet the sandpaper with water.
- Sand Lightly: Gently sand the touch-up paint to level it with the surrounding paint. Use light, even pressure and keep the sandpaper wet.
- Check Progress: Periodically check your progress to avoid sanding too much paint. The goal is to create a smooth, even surface.
6.6. Applying Rubbing Compound
- Apply Compound: Apply a small amount of rubbing compound to a foam applicator pad or microfiber cloth.
- Rub the Area: Rub the compound onto the sanded area using a circular motion. Apply moderate pressure.
- Buff the Surface: Continue buffing until the sanding marks are removed and the surface is smooth.
- Wipe Off Residue: Use a clean microfiber cloth to wipe off any excess compound.
6.7. Polishing the Area
- Apply Polishing Compound: Apply a small amount of polishing compound to a clean foam applicator pad or microfiber cloth.
- Polish the Area: Gently polish the area using a circular motion. Apply light pressure.
- Buff to Shine: Continue buffing until the polish is evenly distributed and the surface is glossy.
- Wipe Off Residue: Use a clean microfiber cloth to wipe off any remaining polish.
6.8. Using a Dual-Action (DA) Polisher (Optional)
- Attach Polishing Pad: Attach a clean polishing pad to your DA polisher.
- Apply Compound: Apply a small amount of rubbing compound to the pad.
- Polish the Area: Use the DA polisher on a low speed setting to work the compound into the area. Move the polisher in overlapping passes.
- Switch to Polishing Compound: Repeat the process with polishing compound to refine the finish.
- Wipe Clean: Wipe the area with a clean microfiber cloth to remove any residue.
6.9. Inspecting the Results
- Check Under Light: Use an inspection light to carefully examine the repaired area. Look for any remaining scratches, sanding marks, or unevenness.
- Repeat if Necessary: If imperfections are still visible, repeat the sanding, primer, touch-up paint, rubbing compound, and polishing steps.
- Apply Wax or Sealant: To protect the repaired area, apply a coat of car wax or sealant.
6.10. Tips for Best Results
- Address Rust: If there is rust, remove it completely before applying primer.
- Apply Thin Coats: Multiple thin coats of primer and touch-up paint are better than one thick coat.
- Wet Sand Carefully: Use plenty of water when sanding to avoid scratching the paint.
- Be Patient: This process requires patience and attention to detail.
6.11. Products Recommended by CARDIAGTECH.NET
- Rust-Oleum Automotive Primer: A high-quality primer for ensuring proper adhesion.
- AutomotiveTouchup Paint: High-quality touch-up paint matching various car colors.
- 3M Rubbing Compound: An effective rubbing compound for removing sanding marks.
- Meguiar’s Ultimate Polish: A reliable polishing compound for restoring shine.
By following this advanced approach, you can effectively repair primer coat scratches and restore your car’s finish. Next, we’ll explore professional tips for achieving a flawless finish.
Primer Coat Scratch Repair
7. Professional Tips for a Flawless Finish
Achieving a flawless finish when repairing car scratches requires more than just the right tools and materials. It involves mastering specific techniques and paying attention to detail. This section provides professional tips to help you achieve a showroom-quality result, enhancing your car’s appearance and maintaining its value.
7.1. Surface Preparation Is Key
- Thorough Cleaning: Always start with a thoroughly cleaned surface. Use a pH-balanced car wash soap to remove all dirt, grime, and contaminants.
- Detailing Clay: Use detailing clay to remove embedded contaminants that washing alone can’t remove. This ensures a smooth surface for polishing and painting.
- Isopropyl Alcohol (IPA) Wipe: Before applying any compounds or paint, wipe the area with isopropyl alcohol (IPA) to remove any remaining oils or residue.
7.2. Mastering Sanding Techniques
- Wet Sanding: Always wet sand to minimize scratching. Use plenty of water and keep the sandpaper lubricated.
- Progressive Sanding: Start with coarser grits (e.g., 180-grit for rust removal) and gradually move to finer grits (e.g., 2000-grit for blending).
- Sanding Block: Use a sanding block to ensure even pressure and a uniform surface.
7.3. Touch-Up Paint Application
- Thin Coats: Apply multiple thin coats of touch-up paint rather than one thick coat. This prevents drips and ensures even coverage.
- Blending Solution: Use a blending solution to seamlessly integrate the touch-up paint with the surrounding paint.
- Fine-Tipped Brushes: Invest in fine-tipped brushes for precise application, especially for small scratches.
7.4. Polishing Techniques
- Dual-Action (DA) Polisher: A DA polisher is essential for achieving a professional finish. It provides even polishing and reduces the risk of swirl marks.
- Polishing Pads: Use the correct polishing pad for the compound you are using. Foam pads are typically used for polishing, while microfiber pads are used for cutting.
- Test Spot: Before polishing the entire area, do a test spot to ensure the compound and pad combination is working correctly.
7.5. Compound and Polish Selection
- Start with the Least Aggressive: Always start with the least aggressive compound or polish necessary to achieve the desired result.
- High-Quality Products: Invest in high-quality compounds and polishes from reputable brands like Meguiar’s, 3M, and Griot’s Garage.
- Read the Labels: Always read and follow the manufacturer’s instructions for each product.
7.6. Environmental Conditions
- Temperature and Humidity: Work in a temperature-controlled environment, ideally between 60-75°F (15-24°C). Avoid working in high humidity, as it can affect the drying time of paints and compounds.
- Lighting: Use good lighting to inspect your work. An inspection light can help reveal imperfections that are not visible under normal lighting conditions.
- Ventilation: Ensure good ventilation when working with chemicals and paints.
7.7. Protective Measures
- Painter’s Tape: Use painter’s tape to protect adjacent areas from accidental damage.
- Gloves and Mask: Always wear gloves and a mask to protect your skin and respiratory system from chemicals and dust.
- Eye Protection: Wear safety glasses or goggles to protect your eyes from debris and splashes.
7.8. Final Inspection
- Multiple Angles: Inspect the repaired area from multiple angles to ensure there are no remaining imperfections.
- Natural Light: Check the repair in natural light to reveal any inconsistencies in color or finish.
- Touch Test: Run your hand over the repaired area to feel for any unevenness.
7.9. Recommended Products from CARDIAGTECH.NET
- Griot’s Garage DA Polisher: A top-rated dual-action polisher for achieving a professional finish.
- Meguiar’s M105 Ultra-Cut Compound: A high-quality cutting compound for removing deep scratches and imperfections.
- Meguiar’s M205 Ultra Finishing Polish: A reliable finishing polish for restoring gloss and shine.
- 3M Automotive Masking Tape: High-quality painter’s tape for protecting adjacent areas.
By following these professional tips, you can achieve a flawless finish when repairing car scratches, enhancing your car’s appearance and maintaining its value. Next, we’ll cover preventive measures to protect your car’s paint.
8. Preventive Measures: Protecting Your Car’s Paint
Preventing scratches on your car is essential for maintaining its appearance and value. While it’s impossible to avoid all scratches, there are several proactive measures you can take to minimize the risk of damage. This section outlines effective strategies to protect your car’s paint, ensuring it remains in pristine condition.
8.1. Regular Washing and Detailing
- Frequent Washing: Wash your car regularly to remove dirt, dust, and debris that can cause scratches. Aim to wash your car every two weeks, or more frequently if you drive in harsh conditions.
- Proper Washing Technique: Use the two-bucket method with a pH-balanced car wash soap and a soft microfiber wash mitt. Rinse the mitt frequently to avoid transferring dirt back onto the car.
- Gentle Drying: Dry your car with high-quality microfiber drying towels. Avoid using old towels or shop rags, as they can scratch the paint.
8.2. Waxing and Sealing
- Regular Waxing: Apply a coat of car wax every three months to protect the paint from UV rays, environmental contaminants, and minor scratches.
- Paint Sealants: Consider using a paint sealant instead of wax for longer-lasting protection. Sealants can provide protection for up to six months or more.
- Ceramic Coatings: For the ultimate protection, consider a professional ceramic coating. Ceramic coatings provide years of protection against scratches, UV rays, and chemical damage.
8.3. Parking Strategies
- Covered Parking: Whenever possible, park your car in a garage or under a carport to protect it from the elements.
- Avoid Trees and Bushes: Avoid parking your car near trees or bushes that could scratch the paint.
- Door Ding Prevention: Park in areas where there is plenty of space between cars to avoid door dings.
8.4. Protective Films
- Paint Protection Film (PPF): Apply paint