Can You Fix A Total Loss Car? Comprehensive Guide
Can You Fix A Total Loss Car? Absolutely, and at CARDIAGTECH.NET, we’re here to guide you through every step of the process with the right tools and knowledge. Understanding the ins and outs of salvaged vehicles, repair options, and potential cost savings can empower you to make informed decisions. We’ll also cover crucial aspects like obtaining a salvage title and ensuring your repaired vehicle meets safety standards, all while keeping an eye on long-term value and insurance considerations.
Table of Contents
- Understanding Total Loss Vehicles: What Does It Mean?
- Is Fixing a Total Loss Car Worth It? Weighing the Pros and Cons
- Step-by-Step Guide: How to Fix a Total Loss Car
- Essential Tools and Equipment for Repairing Total Loss Cars from CARDIAGTECH.NET
- Navigating the Legal Landscape: Salvage Titles and Inspections
- Insurance and Total Loss Cars: What You Need to Know
- Cost Analysis: Comparing Repair Costs to Vehicle Value
- Finding the Right Parts: OEM vs. Aftermarket
- Safety Considerations: Ensuring a Roadworthy Repair
- DIY vs. Professional Repair: Which Route Should You Take?
- Maintaining the Value of Your Repaired Total Loss Car
- Frequently Asked Questions (FAQs) About Fixing Total Loss Cars
- CARDIAGTECH.NET: Your Partner in Total Loss Car Repair
1. Understanding Total Loss Vehicles: What Does It Mean?
A total loss vehicle, often referred to as a salvaged vehicle, is a car that has been deemed uneconomical to repair by an insurance company. This typically occurs when the repair costs exceed a certain percentage of the vehicle’s pre-accident actual cash value (ACV). The threshold varies by state, often ranging from 70% to 90%.
Defining Total Loss:
- Economic Threshold: When repair costs surpass a specific percentage (e.g., 75% in North Carolina) of the ACV, the vehicle is declared a total loss.
- Severe Damage: This can result from accidents, floods, fires, or other incidents causing significant structural or mechanical damage.
Common Causes of Total Loss:
- Accidents: Collisions resulting in extensive body damage, frame damage, or mechanical failures.
- Natural Disasters: Flooding, hail storms, and fires can cause irreparable damage.
- Theft and Vandalism: Severe damage from theft or vandalism can lead to a total loss declaration.
Example Scenario:
Imagine a car with a pre-accident ACV of $10,000. If the estimated repair costs are $7,500 (75% of ACV), the insurance company might declare it a total loss.
Why Insurance Companies Total Vehicles:
- Cost Efficiency: Repairing extensively damaged vehicles can be more expensive than paying out the ACV.
- Liability: Insurance companies aim to minimize potential liabilities associated with repaired vehicles that might not be as safe as before the damage.
Understanding these basics is the first step in determining whether fixing a total loss car is a viable option for you.
 Salvage Yard with Damaged Cars
2. Is Fixing a Total Loss Car Worth It? Weighing the Pros and Cons
Deciding whether to repair a total loss vehicle involves carefully considering the advantages and disadvantages. Here’s a balanced look to help you make an informed choice.
Potential Benefits:
- Cost Savings: Repairing a total loss car can be significantly cheaper than buying a new or used vehicle. You can acquire a functional car for a fraction of the market price.
- Customization: You have the freedom to choose repair shops and parts, allowing for personalized modifications or upgrades.
- Learning Experience: Fixing a car yourself can be a rewarding educational experience, enhancing your mechanical skills and automotive knowledge.
- Resale Value: With proper repairs and documentation, you can potentially resell the vehicle for a profit or at least recoup some of your investment.
Potential Drawbacks:
- Safety Concerns: Improperly repaired vehicles can pose safety risks due to compromised structural integrity.
- Hidden Damage: Total loss cars may have hidden damage that is not immediately apparent, leading to unexpected repair costs.
- Insurance Challenges: Insuring a repaired total loss vehicle can be more expensive or difficult, as insurance companies may view them as higher risk.
- Resale Value Limitations: Repaired total loss vehicles typically have lower resale values compared to non-salvaged vehicles.
- Time and Effort: Repairing a car requires significant time and effort, especially if you’re doing it yourself.
- Legal Requirements: Obtaining a salvage title and passing inspections can be a complex and time-consuming process.
Weighing the Factors:
To determine if fixing a total loss car is worth it, consider these factors:
- Extent of Damage: Assess the severity of the damage and the cost of necessary repairs.
- Mechanical Skills: Evaluate your mechanical abilities or the cost of hiring a professional.
- Budget: Set a budget for repairs and stick to it to avoid overspending.
- Time Commitment: Determine if you have the time to dedicate to the repair process.
- Long-Term Goals: Consider your long-term plans for the vehicle, such as personal use or resale.
Example Table:
| Factor | Advantage | Disadvantage |
|---|---|---|
| Cost | Cheaper than buying a new car; potential for significant savings | Hidden damage can lead to unexpected costs |
| Customization | Freedom to choose parts and repair shops | Ensuring quality and safety can be challenging |
| Resale Value | Potential to recoup investment | Lower resale value compared to non-salvaged vehicles |
| Insurance | Possible, but may be more expensive | Can be difficult to find affordable coverage |
| Legal Compliance | Necessary for legal operation | Salvage titles and inspections can be complex |
By carefully weighing these pros and cons, you can make an informed decision about whether fixing a total loss car aligns with your goals and resources.
 Damaged Car in a Repair Shop
3. Step-by-Step Guide: How to Fix a Total Loss Car
Repairing a total loss car is a complex process that requires careful planning, execution, and attention to detail. Here’s a comprehensive step-by-step guide to help you through the process.
Step 1: Assessment of Damage
- Thorough Inspection: Conduct a detailed inspection of the vehicle to identify all damages, including structural, mechanical, and cosmetic issues.
- Professional Opinion: Consider getting a professional mechanic or body shop to assess the damage and provide an estimate of repair costs.
- Documentation: Take photos and document all visible damage for insurance and legal purposes.
Step 2: Create a Repair Plan
- Prioritize Repairs: Identify essential repairs needed to make the vehicle safe and functional.
- Budget Allocation: Allocate a budget for each repair category, including parts, labor, and tools.
- Timeline: Set a realistic timeline for completing the repairs, considering your availability and the complexity of the work.
Step 3: Obtain Necessary Parts
- Sourcing Parts: Research and source necessary parts from reputable suppliers, considering OEM (Original Equipment Manufacturer) and aftermarket options.
- Quality Check: Ensure all parts meet quality standards and are compatible with your vehicle model.
- Inventory Management: Keep a detailed inventory of all parts received and track expenses.
Step 4: Structural Repairs
- Frame Straightening: If the frame is bent or damaged, have it professionally straightened using specialized equipment.
- Body Panel Replacement: Replace damaged body panels with new or used parts, ensuring proper alignment and fit.
- Welding: Perform necessary welding repairs to reinforce structural integrity.
Step 5: Mechanical Repairs
- Engine and Transmission: Address any engine or transmission issues, including repairs, replacements, or maintenance.
- Suspension and Steering: Inspect and repair suspension and steering components to ensure proper handling and stability.
- Braking System: Replace brake pads, rotors, and calipers as needed, ensuring the braking system is in optimal condition.
Step 6: Electrical Repairs
- Wiring Harness: Inspect and repair any damaged wiring harnesses, connectors, and electrical components.
- Lighting: Replace damaged headlights, taillights, and turn signals to ensure visibility and safety.
- Battery and Charging System: Test and replace the battery, alternator, and starter as needed.
Step 7: Cosmetic Repairs
- Body Work: Perform body work to smooth out dents, scratches, and imperfections.
- Painting: Apply primer, paint, and clear coat to match the original color and finish.
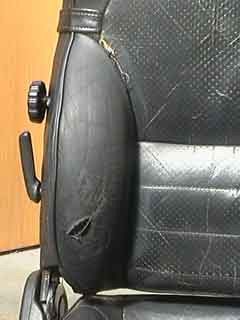
- Interior Repairs: Repair or replace damaged interior components, such as seats, carpets, and trim.
Step 8: Final Inspection
- Safety Check: Conduct a comprehensive safety check to ensure all systems are functioning correctly and the vehicle meets safety standards.
- Test Drive: Perform a test drive to evaluate handling, braking, and overall performance.
- Documentation: Document all repairs and inspections for legal and insurance purposes.
Step 9: Salvage Title and Inspection
- Salvage Title Application: Apply for a salvage title at your local DMV (Department of Motor Vehicles).
- State Inspection: Schedule and pass a state inspection to ensure the vehicle meets safety and roadworthiness standards.
- Documentation: Obtain all necessary documentation to register and insure the vehicle.
Step 10: Registration and Insurance
- Vehicle Registration: Register the vehicle at your local DMV to obtain license plates and registration documents.
- Insurance Coverage: Obtain insurance coverage for the repaired vehicle, ensuring you have adequate protection.
By following these steps, you can successfully repair a total loss car and get it back on the road safely and legally. Remember to prioritize safety and quality throughout the repair process to ensure long-term reliability and value. And don’t forget, CARDIAGTECH.NET is here to support you with all the necessary tools and equipment.
 Mechanic Repairing Car Engine
4. Essential Tools and Equipment for Repairing Total Loss Cars from CARDIAGTECH.NET
Repairing a total loss car requires a comprehensive set of tools and equipment to handle various tasks, from structural repairs to mechanical and electrical work. CARDIAGTECH.NET offers a wide range of high-quality tools to help you complete your project efficiently and safely.
Structural Repair Tools:
- Frame Straightening Machine: Essential for correcting frame damage and ensuring proper alignment.
- CARDIAGTECH.NET Recommendation: Heavy-duty frame straightening machine with hydraulic power.
- Price Range: $5,000 – $15,000
- Welding Equipment: MIG (Metal Inert Gas) and TIG (Tungsten Inert Gas) welders for joining metal parts.
- CARDIAGTECH.NET Recommendation: Multi-process welder with adjustable settings.
- Price Range: $500 – $2,000
- Cutting Tools: Plasma cutters and angle grinders for cutting and shaping metal.
- CARDIAGTECH.NET Recommendation: High-performance plasma cutter with precise cutting capabilities.
- Price Range: $300 – $1,500
- Body Repair Tools: Dent pullers, hammers, and dollies for repairing body panels.
- CARDIAGTECH.NET Recommendation: Comprehensive body repair kit with various attachments.
- Price Range: $200 – $800
Mechanical Repair Tools:
- Socket Sets and Wrenches: Essential for disassembling and reassembling mechanical components.
- CARDIAGTECH.NET Recommendation: High-quality socket set with a wide range of sizes and durable construction.
- Price Range: $100 – $500
- Engine Hoist and Stand: For lifting and supporting engines during repairs.
- CARDIAGTECH.NET Recommendation: Heavy-duty engine hoist with adjustable boom and stable base.
- Price Range: $200 – $1,000
- Diagnostic Tools: Scan tools and code readers for diagnosing engine and electrical problems.
- CARDIAGTECH.NET Recommendation: Advanced diagnostic scan tool with live data and bi-directional controls.
- Price Range: $300 – $2,000
- Brake Tools: Brake bleeder kits and caliper tools for servicing braking systems.
- CARDIAGTECH.NET Recommendation: Professional brake bleeder kit with multiple adapters and easy operation.
- Price Range: $50 – $300
Electrical Repair Tools:
- Multimeter: For testing voltage, current, and resistance in electrical circuits.
- CARDIAGTECH.NET Recommendation: Digital multimeter with auto-ranging and accurate readings.
- Price Range: $50 – $200
- Wiring Tools: Wire strippers, crimpers, and soldering irons for repairing wiring harnesses.
- CARDIAGTECH.NET Recommendation: Comprehensive wiring kit with various connectors and terminals.
- Price Range: $50 – $300
- Battery Tester: For testing battery health and charging system performance.
- CARDIAGTECH.NET Recommendation: Battery tester with load testing capabilities and digital display.
- Price Range: $50 – $200
Safety Equipment:
- Safety Glasses: Protecting eyes from debris and sparks.
- CARDIAGTECH.NET Recommendation: Anti-scratch and anti-fog safety glasses.
- Price Range: $10 – $30
- Gloves: Protecting hands from chemicals and sharp objects.
- CARDIAGTECH.NET Recommendation: Heavy-duty mechanic gloves.
- Price Range: $10 – $30
- Respirator: Protecting lungs from fumes and dust.
- CARDIAGTECH.NET Recommendation: Respirator with organic vapor cartridges.
- Price Range: $30 – $100
- Work Boots: Protecting feet from heavy objects and slippery surfaces.
- CARDIAGTECH.NET Recommendation: Steel-toed work boots.
- Price Range: $50 – $200
Example Table:
| Tool/Equipment | CARDIAGTECH.NET Recommendation | Price Range |
|---|---|---|
| Frame Straightener | Hydraulic-powered heavy-duty machine | $5,000 – $15,000 |
| Welder | Multi-process welder with adjustable settings | $500 – $2,000 |
| Plasma Cutter | High-performance with precise cutting | $300 – $1,500 |
| Socket Set | High-quality, durable construction | $100 – $500 |
| Engine Hoist | Heavy-duty with adjustable boom and stable base | $200 – $1,000 |
| Diagnostic Scan Tool | Advanced, live data, bi-directional controls | $300 – $2,000 |
| Multimeter | Digital, auto-ranging, accurate readings | $50 – $200 |
| Safety Glasses | Anti-scratch and anti-fog | $10 – $30 |
| Mechanic Gloves | Heavy-duty | $10 – $30 |
Investing in high-quality tools from CARDIAGTECH.NET will not only make the repair process easier but also ensure the safety and longevity of your repaired vehicle.
 Mechanic Using Diagnostic Tool
5. Navigating the Legal Landscape: Salvage Titles and Inspections
When dealing with a total loss car, understanding the legal requirements is crucial. Salvage titles and inspections are essential steps to ensure your repaired vehicle is roadworthy and legally compliant.
Salvage Title:
- Definition: A salvage title is issued to a vehicle that has been declared a total loss by an insurance company due to damage exceeding a certain percentage of its value.
- Obtaining a Salvage Title:
- Contact your local Department of Motor Vehicles (DMV) or equivalent agency.
- Submit the necessary paperwork, including the original title, proof of ownership, and application forms.
- Pay the required fees.
- Purpose: The salvage title indicates that the vehicle has been damaged and is not roadworthy until repaired and inspected.
State Inspections:
- Purpose: State inspections ensure that the repaired vehicle meets safety and roadworthiness standards before it can be registered and driven on public roads.
- Inspection Process:
- Repair the vehicle according to the required standards.
- Schedule an inspection at a certified inspection station.
- Bring the vehicle and necessary documentation, including the salvage title and repair receipts.
- The inspector will examine the vehicle for safety issues, such as brakes, lights, suspension, and structural integrity.
- Passing the Inspection:
- If the vehicle passes the inspection, you will receive a certificate of inspection.
- This certificate is required to apply for a rebuilt title.
- Failing the Inspection:
- If the vehicle fails the inspection, you will receive a list of deficiencies that need to be corrected.
- Repair the identified issues and schedule a re-inspection.
Rebuilt Title:
- Definition: A rebuilt title is issued after a salvage vehicle has been repaired and has passed a state inspection.
- Obtaining a Rebuilt Title:
- Submit the salvage title, inspection certificate, and any other required documentation to the DMV.
- Pay the necessary fees.
- Significance: A rebuilt title indicates that the vehicle has been repaired and is now considered roadworthy, but it also signifies its history as a salvage vehicle.
Legal Considerations:
- State Laws: Salvage title and inspection requirements vary by state. Check your local DMV for specific regulations.
- Disclosure: When selling a vehicle with a rebuilt title, you are legally obligated to disclose its salvage history to potential buyers.
- Liability: Ensure all repairs are performed to a high standard to avoid potential liability issues.
Example Table:
| Step | Description | Documentation Required |
|---|---|---|
| Obtain Salvage Title | Apply at DMV after vehicle is declared a total loss | Original title, proof of ownership, application forms, fees |
| Repair Vehicle | Perform necessary repairs to meet safety standards | Repair receipts, documentation of parts used |
| State Inspection | Schedule and pass inspection at a certified station | Salvage title, repair receipts |
| Obtain Rebuilt Title | Submit required documents to DMV after passing inspection | Salvage title, inspection certificate, application forms, fees |
| Disclosure | Disclose salvage history when selling the vehicle | Full repair history |
Navigating the legal landscape of salvage titles and inspections can be complex, but understanding the requirements is essential for ensuring your repaired vehicle is safe, legal, and insurable. Always consult with your local DMV or a legal professional for specific guidance.
, representing the importance of navigating the legal landscape of salvage titles and inspections.") DMV Sign
DMV Sign
6. Insurance and Total Loss Cars: What You Need to Know
Insuring a total loss car after it has been repaired can be more complex than insuring a vehicle with a clean title. Here’s what you need to know to navigate the insurance landscape effectively.
Challenges in Insuring Repaired Total Loss Cars:
- Higher Risk Perception: Insurance companies often view repaired total loss cars as higher risk due to potential structural or mechanical issues resulting from the initial damage and subsequent repairs.
- Limited Coverage Options: Some insurers may offer limited coverage options for repaired total loss cars, such as liability-only coverage, and may not provide comprehensive or collision coverage.
- Increased Premiums: Even if you can obtain full coverage, expect to pay higher premiums compared to a vehicle with a clean title.
Tips for Obtaining Insurance:
- Shop Around: Contact multiple insurance companies to compare quotes and coverage options.
- Disclose the Vehicle’s History: Be transparent about the vehicle’s salvage history and provide all relevant documentation, including the rebuilt title and repair receipts.
- Highlight Safety Measures: Emphasize any safety-related repairs or upgrades you’ve made, such as new brakes, suspension components, or structural reinforcements.
- Obtain an Independent Inspection: Consider getting an independent inspection from a certified mechanic to verify the quality and safety of the repairs.
- Consider Usage-Based Insurance: Some insurers offer usage-based insurance programs that track driving behavior and reward safe driving with lower premiums.
Required Documentation:
- Rebuilt Title: Proof that the vehicle has been repaired and passed a state inspection.
- Repair Receipts: Detailed records of all repairs performed, including parts and labor costs.
- Inspection Reports: Reports from any independent inspections or safety checks.
- Photos: Before-and-after photos of the repairs can help demonstrate the extent of the work performed.
Coverage Options:
- Liability Coverage: Covers damages and injuries you may cause to others in an accident.
- Collision Coverage: Covers damage to your vehicle resulting from a collision with another vehicle or object.
- Comprehensive Coverage: Covers damage to your vehicle from non-collision events, such as theft, vandalism, or natural disasters.
- Uninsured/Underinsured Motorist Coverage: Protects you if you’re involved in an accident with an uninsured or underinsured driver.
Example Table:
| Coverage Type | Description | Availability for Total Loss Cars | Premium Cost |
|---|---|---|---|
| Liability | Covers damages you cause to others | Generally available | Moderate |
| Collision | Covers damage to your vehicle in a collision | May be limited or unavailable | Higher |
| Comprehensive | Covers damage from non-collision events (theft, weather) | May be limited or unavailable | Higher |
| Uninsured/Underinsured | Protects you from uninsured drivers | Generally available | Moderate |
Securing insurance for a repaired total loss car requires diligence and transparency. By shopping around, providing detailed documentation, and highlighting safety measures, you can increase your chances of obtaining affordable and comprehensive coverage.
 Insurance Claim Form
7. Cost Analysis: Comparing Repair Costs to Vehicle Value
Before embarking on the journey of repairing a total loss car, it’s essential to conduct a thorough cost analysis to determine if the project is financially viable. This involves comparing the repair costs to the vehicle’s potential value after repairs.
Estimating Repair Costs:
- Comprehensive Assessment: Obtain detailed estimates from multiple repair shops to understand the full scope of the necessary repairs.
- Parts Pricing: Research the cost of replacement parts, considering both OEM (Original Equipment Manufacturer) and aftermarket options.
- Labor Costs: Factor in labor costs for any work you plan to outsource to professional mechanics or technicians.
- Hidden Costs: Be prepared for unexpected costs, such as hidden damage or additional repairs that may arise during the process.
Determining Vehicle Value:
- Pre-Accident Value: Research the vehicle’s pre-accident market value using resources like Kelley Blue Book, Edmunds, or NADAguides.
- Post-Repair Value: Understand that a repaired total loss car will typically have a lower market value than a comparable vehicle with a clean title.
- Salvage Title Impact: The salvage title will impact the value, often reducing it by 20% to 40% compared to a vehicle with a clean title.
Cost Analysis Formula:
- Total Repair Costs: Sum of all repair expenses, including parts, labor, and any additional costs.
- Potential Vehicle Value: Estimated market value of the repaired vehicle, considering the salvage title and condition.
- Profitability Calculation: Subtract the total repair costs from the potential vehicle value to determine if the project is financially viable.
Example Scenario:
- Pre-Accident Value: $10,000
- Estimated Repair Costs: $6,000
- Potential Value After Repairs (with salvage title): $7,000
- Profitability: $7,000 (Potential Value) – $6,000 (Repair Costs) = $1,000
In this scenario, the project could be considered financially viable, as there is a potential profit of $1,000.
Break-Even Analysis:
- Calculate Break-Even Point: Determine the maximum amount you can spend on repairs while still breaking even, considering the potential vehicle value.
- Contingency Planning: Set aside a contingency fund to cover unexpected costs and avoid exceeding your budget.
Example Table:
| Item | Cost | Notes |
|---|---|---|
| Parts | $3,000 | Research OEM vs. Aftermarket for cost savings |
| Labor | $2,000 | Get multiple estimates |
| Inspection Fees | $200 | Required for rebuilt title |
| Miscellaneous | $800 | Contingency for unexpected costs |
| Total Repair Costs | $6,000 | |
| Pre-Accident Value | $10,000 | Use Kelley Blue Book or Edmunds |
| Post-Repair Value | $7,000 | Estimate based on salvage title and condition |
| Potential Profit | $1,000 | Post-Repair Value – Total Repair Costs |
Conducting a thorough cost analysis is crucial for making an informed decision about repairing a total loss car. By carefully estimating repair costs, determining vehicle value, and calculating profitability, you can assess whether the project is financially worthwhile.
 Cost Analysis Chart
8. Finding the Right Parts: OEM vs. Aftermarket
When repairing a total loss car, one of the critical decisions you’ll face is choosing between Original Equipment Manufacturer (OEM) parts and aftermarket parts. Each option has its own set of advantages and disadvantages, impacting the cost, quality, and performance of your repaired vehicle.
OEM Parts:
- Definition: OEM parts are manufactured by the original manufacturer of the vehicle. They are designed to meet the exact specifications and standards of the original components.
- Advantages:
- Guaranteed Fit: OEM parts are designed to fit perfectly, ensuring proper installation and functionality.
- Quality Assurance: OEM parts undergo rigorous testing and quality control processes, ensuring reliability and durability.
- Warranty Coverage: OEM parts often come with a warranty, providing peace of mind in case of defects or failures.
- Disadvantages:
- Higher Cost: OEM parts are typically more expensive than aftermarket parts due to their higher quality and brand recognition.
- Limited Availability: OEM parts may be harder to find for older or less common vehicle models.
Aftermarket Parts:
- Definition: Aftermarket parts are manufactured by companies other than the original vehicle manufacturer. They are designed to be compatible with a wide range of vehicle models.
- Advantages:
- Lower Cost: Aftermarket parts are generally more affordable than OEM parts, making them an attractive option for budget-conscious repairs.
- Wider Availability: Aftermarket parts are readily available from various suppliers and retailers.
- Variety of Options: Aftermarket parts come in a wide range of brands and quality levels, allowing you to choose the best option for your needs.
- Disadvantages:
- Variable Quality: The quality of aftermarket parts can vary significantly, with some brands offering higher quality than others.
- Fitment Issues: Aftermarket parts may not always fit perfectly, requiring modifications or adjustments for proper installation.
- Limited Warranty: Aftermarket parts may have limited warranty coverage or no warranty at all.
Considerations When Choosing Parts:
- Budget: Determine your budget for replacement parts and prioritize essential components that require OEM quality.
- Vehicle Age and Model: Consider the age and model of your vehicle when choosing parts. OEM parts may be more important for newer vehicles with advanced technology.
- Repair Scope: Assess the scope of the repairs and choose parts that match the required level of quality and durability.
- Research and Reviews: Read reviews and research different brands of aftermarket parts to identify reputable suppliers and high-quality products.
Example Table:
| Feature | OEM Parts | Aftermarket Parts |
|---|---|---|
| Manufacturer | Original Vehicle Manufacturer | Third-Party Manufacturers |
| Fitment | Guaranteed Fit | May Require Adjustments |
| Quality | High and Consistent | Variable |
| Cost | Higher | Lower |
| Warranty | Often Included | Limited or None |
| Availability | May Be Limited | Widely Available |
Ultimately, the decision between OEM and aftermarket parts depends on your budget, vehicle requirements, and personal preferences. By carefully weighing the advantages and disadvantages of each option, you can make an informed choice that ensures the quality and reliability of your repaired total loss car.
 OEM vs Aftermarket Parts
9. Safety Considerations: Ensuring a Roadworthy Repair
Safety is paramount when repairing a total loss car. Ensuring that the vehicle meets all safety standards and is roadworthy is crucial for your well-being and the safety of others on the road.
Structural Integrity:
- Frame Straightening: Ensure the vehicle’s frame is properly straightened to its original specifications. Any compromise to the frame can affect handling and stability.
- Welding Quality: All welding repairs must be performed by certified welders using appropriate techniques to ensure strong and durable joints.
- Corrosion Protection: Apply corrosion protection to all repaired areas to prevent rust and maintain structural integrity.
Mechanical Systems:
- Braking System: Inspect and repair the braking system, including brake pads, rotors, calipers, and brake lines. Replace any worn or damaged components.
- Suspension and Steering: Ensure the suspension and steering systems are functioning correctly. Replace any worn or damaged components, such as shocks, struts, and ball joints.
- Tires: Check the tires for wear and damage. Replace tires that are worn or have insufficient tread depth.
Electrical Systems:
- Lighting: Ensure all lights, including headlights, taillights, turn signals, and brake lights, are functioning correctly.
- Wiring: Inspect the wiring harness for damage and repair any frayed or damaged wires.
- Airbags: If the airbags were deployed in the accident, replace them with new OEM airbags. Ensure the airbag system is functioning correctly.
Safety Features:
- Seat Belts: Inspect the seat belts for damage and ensure they are functioning correctly. Replace any damaged seat belts.
- Windshield: Replace any cracked or damaged windshields.
- Mirrors: Ensure all mirrors are intact and provide clear visibility.
Professional Inspection:
- Post-Repair Inspection: After completing the repairs, have the vehicle inspected by a certified mechanic to ensure it meets all safety standards.
- State Inspection: Schedule a state inspection to obtain a rebuilt title and ensure the vehicle is roadworthy.
Example Table:
| System/Component | Safety Check | Action if Failed |
|---|---|---|
| Frame | Ensure proper straightening | Correct frame to original specs |
| Brakes | Inspect pads, rotors, lines | Replace worn or damaged components |
| Suspension | Check shocks, struts, ball joints | Replace worn or damaged components |
| Tires | Check tread depth, wear | Replace if worn or damaged |
| Lights | Ensure all lights function properly | Replace faulty bulbs or fixtures |
| Wiring | Inspect for damage | Repair or replace damaged wires |
| Airbags | Replace if deployed, ensure system functions | Install new OEM airbags, calibrate system |
| Seat Belts | Inspect for damage, ensure functionality | Replace damaged seat belts |
| Windshield | Check for cracks, visibility | Replace cracked or damaged windshield |
Prioritizing safety during the repair process is essential for ensuring that your total loss car is roadworthy and safe to drive. By following these guidelines and conducting thorough inspections, you can minimize the risk of accidents and protect yourself and others on the road.
 Car Safety Check
10. DIY vs. Professional Repair: Which Route Should You Take?
Deciding whether to repair a total loss car yourself (DIY) or hire a professional repair shop is a crucial decision that depends on your skills, resources, and budget. Each approach has its own set of advantages and disadvantages.
DIY Repair:
- Advantages:
- Cost Savings: DIY repairs can significantly reduce labor costs, allowing you to save money on the overall project.
- Learning Experience: DIY repairs provide a valuable learning experience, enhancing your mechanical skills and automotive knowledge.
- Flexibility and Control: You have complete control over the repair process and can work at your own pace.
- Disadvantages:
- Time Commitment: DIY repairs can be time-consuming, especially if you lack experience or encounter unexpected challenges.