Discovery 5 Lane Departure Warning (LDW): A Comprehensive Guide

Discovery 5 Lane Departure Warning (LDW) systems are a pivotal safety feature, designed to prevent unintentional lane drifts, and CARDIAGTECH.NET offers advanced tools for its maintenance and optimization, ensuring safer driving experiences. This guide explores LDW’s functionality, benefits, troubleshooting, and how CARDIAGTECH.NET’s solutions can enhance this critical automotive technology, providing peace of mind and improving road safety by reducing accidents and minimizing potential collisions.
1. Understanding Lane Departure Warning (LDW) Systems
Lane Departure Warning (LDW) systems represent a significant advancement in automotive safety technology. These systems are engineered to mitigate accidents caused by unintentional lane departures, a common factor in collisions resulting from driver fatigue, distraction, or misjudgment. By providing timely alerts, LDW systems empower drivers to correct their course, thereby reducing the risk of accidents and enhancing overall road safety.
1.1. Core Functionality of LDW
At its core, LDW functions by continuously monitoring the vehicle’s position within its lane. This is typically achieved through the use of forward-facing cameras that detect lane markings on the road. When the system determines that the vehicle is beginning to drift out of its lane without the driver signaling, it triggers a warning. This warning can take several forms, including:
- Audible Alerts: A beeping sound or a rumble strip-like noise.
- Visual Alerts: A flashing icon on the instrument panel or head-up display.
- Haptic Feedback: Vibration in the steering wheel or seat.
The primary goal of these alerts is to immediately capture the driver’s attention and prompt corrective action.
1.2. Significance in Modern Vehicles
LDW’s significance is underscored by its increasing prevalence in modern vehicles. Regulatory bodies worldwide are recognizing its potential to reduce accidents and injuries, leading to mandates and incentives for its inclusion in new vehicles. For instance, the European New Car Assessment Programme (Euro NCAP) includes LDW as part of its safety rating, encouraging manufacturers to incorporate the technology.
The National Highway Traffic Safety Administration (NHTSA) in the United States has also emphasized the importance of LDW, estimating that it can prevent thousands of crashes each year. This recognition has led to a growing demand for LDW systems, making them a standard feature in many new vehicles and a popular option for those seeking to enhance their vehicle’s safety features.
1.3. Operational Overview
LDW systems operate using a combination of sensors, cameras, and sophisticated algorithms to monitor the vehicle’s position within its lane. The forward-facing camera captures images of the road ahead, and the system’s software analyzes these images to identify lane markings.
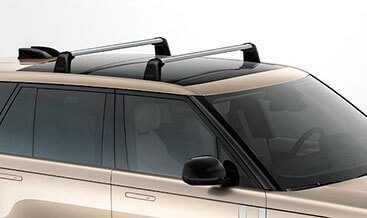
Discovery 5 camera system detects lane markings
Key components include:
- Camera System: High-resolution cameras, often mounted near the rearview mirror, provide the visual data necessary for lane detection.
- Control Unit: This processes the data from the camera and other sensors to determine the vehicle’s position and trajectory.
- Alert Mechanism: This component triggers the appropriate warning (audible, visual, or haptic) when a lane departure is detected.
When the system detects that the vehicle is approaching or crossing a lane marking without the driver signaling, it activates the alert mechanism to warn the driver. The sensitivity and type of alert can often be adjusted by the driver through the vehicle’s settings.
1.4. Benefits of Lane Departure Warning
The benefits of LDW systems extend beyond mere alerts. They actively contribute to safer driving practices and can have a significant impact on accident prevention. Key benefits include:
- Accident Prevention: By providing timely warnings, LDW systems help prevent accidents caused by unintentional lane departures, particularly in situations involving driver fatigue or distraction.
- Reduced Collision Risk: The alerts prompt drivers to correct their course, reducing the likelihood of collisions with other vehicles or roadside obstacles.
- Enhanced Driver Awareness: LDW systems increase driver awareness of their position on the road, encouraging more attentive and cautious driving habits.
- Improved Road Safety: By mitigating accidents and promoting safer driving, LDW systems contribute to overall road safety for all users.
- Insurance Benefits: Some insurance companies offer discounts for vehicles equipped with LDW systems, reflecting their recognition of the technology’s safety benefits.
1.5. Limitations of LDW Systems
Despite their numerous benefits, LDW systems are not without limitations. It’s important to understand these limitations to ensure that drivers use the technology responsibly and do not over-rely on it. Key limitations include:
- Dependence on Lane Markings: LDW systems rely on clear and visible lane markings. In areas with faded, obscured, or absent lane markings, the system may not function effectively.
- Weather Conditions: Adverse weather conditions such as heavy rain, snow, or fog can impair the camera’s visibility, reducing the system’s accuracy and reliability.
- System Sensitivity: The sensitivity of LDW systems can sometimes lead to false alerts, particularly on narrow roads or during sharp turns. Drivers may find these false alerts distracting or annoying, potentially leading them to disable the system.
- Not a Substitute for Attentive Driving: LDW systems are designed to assist drivers, not replace them. Drivers must remain attentive and engaged in the driving task, using LDW as a supplementary safety feature.
- Technical Malfunctions: Like any electronic system, LDW is susceptible to technical malfunctions. Regular maintenance and diagnostics are necessary to ensure its proper functioning.
1.6. Industry Statistics on LDW Effectiveness
Industry statistics provide compelling evidence of the effectiveness of LDW systems in reducing accidents and injuries.
- NHTSA Estimates: The National Highway Traffic Safety Administration (NHTSA) estimates that LDW systems can prevent approximately 80,000 crashes and 34,000 injuries each year.
- IIHS Studies: The Insurance Institute for Highway Safety (IIHS) has conducted numerous studies demonstrating the safety benefits of LDW. One study found that LDW reduced single-vehicle, sideswipe, and head-on crashes by 11 percent.
- HLDI Data: The Highway Loss Data Institute (HLDI) has also analyzed insurance claims data, finding that LDW systems are associated with a reduction in collision claim frequencies.
- Real-World Data: Real-world data from various sources consistently show that vehicles equipped with LDW systems have lower accident rates compared to those without the technology.
These statistics underscore the significant potential of LDW systems to enhance road safety and prevent accidents, making them a valuable addition to modern vehicles.
2. Discovery 5: Specifics of LDW Implementation
The Discovery 5, a popular SUV known for its advanced technology and safety features, incorporates a sophisticated Lane Departure Warning (LDW) system. Understanding the specific implementation of LDW in the Discovery 5 is crucial for owners and technicians alike to ensure its optimal performance and address any potential issues.
2.1. System Components in Discovery 5
The Discovery 5’s LDW system comprises several key components that work together to monitor the vehicle’s position and provide timely alerts. These components include:
- Forward-Facing Camera: A high-resolution camera, typically mounted behind the rearview mirror, captures images of the road ahead. This camera is specifically calibrated to detect lane markings and other road features.
- Image Processing Unit: This unit processes the images from the camera, using advanced algorithms to identify lane markings and determine the vehicle’s position within its lane.
- Steering Angle Sensor: This sensor monitors the angle of the steering wheel, providing data on the driver’s intended direction.
- Vehicle Speed Sensor: This sensor measures the vehicle’s speed, which is used to adjust the sensitivity of the LDW system.
- Control Module: This module integrates data from all the sensors and the camera to determine when a lane departure is occurring. It also controls the alert mechanism.
- Alert Mechanism: The Discovery 5’s LDW system uses both audible and haptic alerts. The audible alert is a distinct tone, while the haptic alert is a vibration in the steering wheel.
2.2. Activation and Deactivation
The LDW system in the Discovery 5 can be activated or deactivated through the vehicle’s infotainment system. To access the settings:
- Navigate to the “Driver Assistance” or “Safety” menu.
- Locate the “Lane Departure Warning” option.
- Toggle the switch to activate or deactivate the system.
When the system is activated, a visual indicator will appear on the instrument panel, typically a lane departure warning icon.
2.3. Sensitivity Settings
The Discovery 5 allows drivers to adjust the sensitivity of the LDW system to suit their preferences and driving conditions. The sensitivity settings determine how close the vehicle must be to a lane marking before an alert is triggered.
- High Sensitivity: The system will trigger alerts when the vehicle is relatively far from the lane marking. This setting is suitable for highways and well-marked roads.
- Normal Sensitivity: The system will trigger alerts when the vehicle is closer to the lane marking. This is a balanced setting for everyday driving.
- Low Sensitivity: The system will trigger alerts only when the vehicle is very close to the lane marking. This setting is suitable for narrow roads or areas with frequent lane changes.
To adjust the sensitivity settings:
- Navigate to the “Driver Assistance” or “Safety” menu in the infotainment system.
- Locate the “Lane Departure Warning” settings.
- Select the desired sensitivity level.
2.4. Common Issues and Troubleshooting
Several common issues can affect the performance of the LDW system in the Discovery 5. These issues and their troubleshooting steps include:
- False Alerts:
- Cause: High sensitivity settings, narrow roads, or faded lane markings.
- Troubleshooting: Adjust the sensitivity settings to a lower level. Ensure that the windshield is clean and free of obstructions. Check the condition of the lane markings and report any issues to the local authorities.
- System Not Activating:
- Cause: The system is deactivated, the camera is obstructed, or there is a malfunction in the system.
- Troubleshooting: Ensure that the system is activated in the infotainment settings. Check the camera for obstructions and clean it if necessary. If the system still does not activate, consult a qualified technician.
- No Alerts:
- Cause: Low sensitivity settings, the system is not detecting lane markings, or there is a malfunction in the alert mechanism.
- Troubleshooting: Adjust the sensitivity settings to a higher level. Ensure that the lane markings are clear and visible. Check the audible and haptic alert settings in the infotainment system. If the alerts are still not working, consult a qualified technician.
- Camera Malfunction:
- Cause: The camera is damaged, misaligned, or there is a software issue.
- Troubleshooting: Check the camera for physical damage and ensure that it is properly aligned. Perform a software update to the latest version. If the camera is still malfunctioning, consult a qualified technician.
2.5. Calibration Requirements
The LDW system in the Discovery 5 requires periodic calibration to ensure its accuracy. Calibration involves aligning the camera and sensors to ensure that they are properly detecting lane markings and other road features.
Calibration is typically required in the following situations:
- After a windshield replacement.
- After a collision that affects the front of the vehicle.
- After suspension work or wheel alignment.
- If the system is consistently providing false alerts or not detecting lane markings.
Calibration should be performed by a qualified technician using specialized equipment. The process typically involves:
- Connecting a diagnostic tool to the vehicle’s computer.
- Positioning the vehicle in a specific location with a calibration target.
- Following the on-screen instructions to align the camera and sensors.
- Verifying the calibration by performing a test drive.
2.6. Integration with Other Safety Systems
The LDW system in the Discovery 5 is often integrated with other safety systems, such as:
- Lane Keep Assist (LKA): LKA provides gentle steering corrections to keep the vehicle in its lane, in addition to the alerts provided by LDW.
- Adaptive Cruise Control (ACC): ACC maintains a safe following distance from the vehicle ahead and can adjust the vehicle’s speed to match the flow of traffic.
- Autonomous Emergency Braking (AEB): AEB can automatically apply the brakes to prevent or mitigate a collision.
The integration of these systems enhances the overall safety of the Discovery 5, providing drivers with a comprehensive suite of driver assistance features.
3. Diagnosing LDW Issues on Discovery 5
Diagnosing Lane Departure Warning (LDW) issues on the Discovery 5 requires a systematic approach, combining visual inspections, diagnostic tools, and a thorough understanding of the system’s components and operation. Accurate diagnosis is crucial for effective repairs and ensuring the LDW system functions as intended.
3.1. Preliminary Checks
Before diving into advanced diagnostics, perform these preliminary checks:
- Visual Inspection:
- Camera: Inspect the forward-facing camera for any obstructions, such as dirt, debris, or damage. Clean the camera lens with a soft, lint-free cloth.
- Windshield: Check the windshield for cracks, chips, or other damage that could impair the camera’s view.
- Sensors: Inspect the sensors for any signs of damage or misalignment.
- System Activation:
- Ensure that the LDW system is activated in the vehicle’s infotainment system. Navigate to the “Driver Assistance” or “Safety” menu and verify that the “Lane Departure Warning” option is enabled.
- Sensitivity Settings:
- Check the sensitivity settings of the LDW system. Adjust the settings to a higher level if the system is not providing alerts or to a lower level if the system is providing false alerts.
- Warning Lights:
- Check the instrument panel for any warning lights related to the LDW system or other driver assistance features. Note any active fault codes.
3.2. Diagnostic Tools
Advanced diagnostics require the use of specialized diagnostic tools, such as:
- OBD-II Scanner: An OBD-II scanner can retrieve diagnostic trouble codes (DTCs) related to the LDW system. These codes can provide valuable information about the nature and location of the fault.
- Advanced Diagnostic Scan Tools: Tools like the Autel MaxiSYS MS906BT, Snap-on Zeus, or Bosch ADS 625 offer in-depth diagnostics, including live data streaming, component testing, and calibration functions.
- Land Rover SDD (Symptom Driven Diagnostics): This is the OEM (Original Equipment Manufacturer) diagnostic software used by Land Rover dealerships. It provides comprehensive diagnostic and programming capabilities.
3.3. Diagnostic Trouble Codes (DTCs)
DTCs are alphanumeric codes that indicate a specific fault in the LDW system. Some common DTCs related to LDW include:
| Code | Description | Possible Causes |
|---|---|---|
| C0051 | Front View Camera Module | Camera malfunction, wiring issue, software problem |
| C0052 | Lane Departure Warning System | System malfunction, sensor issue, calibration problem |
| B1079 | Steering Angle Sensor | Sensor malfunction, wiring issue, calibration problem |
| U0100 | Lost Communication With Engine Control Module (ECM)/Powertrain Control Module (PCM) | Wiring issue, ECM/PCM malfunction, communication error |
| U0121 | Lost Communication With Anti-Lock Brake System (ABS) Control Module | Wiring issue, ABS control module malfunction, communication error |
| U0131 | Lost Communication With Power Steering Control Module | Wiring issue, power steering control module malfunction, communication error |
| C1A63-92 | Front Camera Alignment | Camera misalignment, calibration required |
| B1485-16 | Camera Module – Circuit Voltage Below Threshold | Wiring issue, low voltage, camera malfunction |
| B1485-17 | Camera Module – Circuit Voltage Above Threshold | Wiring issue, high voltage, camera malfunction |
| B102C-87 | Camera System – Missing a Component | Missing camera, wiring issue, system malfunction |
| B1074-01 | Yaw Rate Sensor – General Failure | Sensor malfunction, wiring issue, system malfunction |
| C1A64-00 | Camera System – System Internal Failures | System malfunction, camera malfunction, software problem |
| B10F0-00 | Rain/Light Sensor – General Failure | Sensor malfunction, wiring issue, system malfunction |
Use the diagnostic tool to retrieve and record all DTCs. Research each code to understand the potential causes and troubleshooting steps.
3.4. Live Data Streaming
Live data streaming allows you to monitor the real-time performance of the LDW system’s components. Key data parameters to monitor include:
- Camera Data:
- Camera Status: Indicates whether the camera is functioning correctly.
- Lane Detection: Shows whether the system is detecting lane markings.
- Lane Position: Displays the vehicle’s position relative to the lane markings.
- Sensor Data:
- Steering Angle: Displays the current steering angle.
- Vehicle Speed: Shows the current vehicle speed.
- Yaw Rate: Indicates the vehicle’s rotation rate.
- System Status:
- LDW Status: Shows whether the system is active or inactive.
- Alert Status: Indicates whether an alert is currently being triggered.
Analyze the live data to identify any anomalies or inconsistencies that could be causing the LDW issues.
3.5. Component Testing
Component testing involves testing individual components of the LDW system to verify their functionality. Common component tests include:
- Camera Test:
- Use the diagnostic tool to perform a camera test. This test will check the camera’s functionality and image quality.
- Steering Angle Sensor Test:
- Monitor the steering angle data while turning the steering wheel. Verify that the data is accurate and consistent.
- Alert Mechanism Test:
- Use the diagnostic tool to trigger the audible and haptic alerts. Verify that the alerts are functioning correctly.
If a component fails the test, it may need to be replaced.
3.6. Calibration Verification
If the LDW system is providing false alerts or not detecting lane markings, it may need to be recalibrated. Calibration involves aligning the camera and sensors to ensure that they are properly detecting lane markings and other road features.
- Calibration Procedure:
- Connect a diagnostic tool to the vehicle’s computer.
- Position the vehicle in a specific location with a calibration target.
- Follow the on-screen instructions to align the camera and sensors.
- Verify the calibration by performing a test drive.
- Post-Calibration Test: After calibration, perform a test drive to verify that the LDW system is functioning correctly. Monitor the system’s performance in various driving conditions.
3.7. Wiring and Connections
Faulty wiring and connections can cause a variety of LDW issues. Inspect the wiring harnesses and connectors for any signs of damage, corrosion, or loose connections.
- Wiring Inspection:
- Check the wiring harnesses for any cuts, abrasions, or damage.
- Inspect the connectors for corrosion or loose pins.
- Use a multimeter to check the continuity of the wiring circuits.
- Connector Cleaning:
- Clean the connectors with a specialized electrical contact cleaner.
- Ensure that the connectors are properly seated and secured.
3.8. Software Updates
Outdated software can cause compatibility issues and malfunctions in the LDW system. Check for any available software updates for the LDW system and other related modules.
- Software Update Procedure:
- Connect a diagnostic tool to the vehicle’s computer.
- Check for available software updates.
- Follow the on-screen instructions to install the updates.
- Post-Update Test: After updating the software, perform a test drive to verify that the LDW system is functioning correctly.
By following these diagnostic steps, you can effectively identify and resolve LDW issues on the Discovery 5, ensuring that the system functions as intended and contributes to safer driving.
4. Repairing Discovery 5 LDW Systems
Repairing Lane Departure Warning (LDW) systems on the Discovery 5 requires a methodical approach, encompassing component replacement, wiring repairs, and system calibration. Accurate repairs are vital for restoring the LDW system to its optimal functionality, ensuring driver safety and vehicle performance.
4.1. Component Replacement
Component replacement is often necessary when diagnosing LDW issues. Common components that may require replacement include:
- Forward-Facing Camera:
- Symptoms: Blurry or distorted images, failure to detect lane markings, DTCs related to camera malfunction.
- Replacement Procedure:
- Disconnect the negative battery cable.
- Remove the interior trim around the camera housing.
- Disconnect the electrical connectors from the camera.
- Remove the camera from its mounting bracket.
- Install the new camera in the mounting bracket.
- Connect the electrical connectors to the camera.
- Reinstall the interior trim.
- Reconnect the negative battery cable.
- Calibrate the LDW system using a diagnostic tool.
- Steering Angle Sensor:
- Symptoms: Inaccurate steering angle readings, DTCs related to steering angle sensor malfunction, LDW system not functioning correctly during turns.
- Replacement Procedure:
- Disconnect the negative battery cable.
- Remove the steering wheel.
- Remove the clock spring.
- Disconnect the electrical connectors from the steering angle sensor.
- Remove the steering angle sensor from the steering column.
- Install the new steering angle sensor on the steering column.
- Connect the electrical connectors to the steering angle sensor.
- Reinstall the clock spring.
- Reinstall the steering wheel.
- Reconnect the negative battery cable.
- Calibrate the steering angle sensor using a diagnostic tool.
- Control Module:
- Symptoms: System malfunction, failure to communicate with other modules, DTCs related to control module malfunction.
- Replacement Procedure:
- Disconnect the negative battery cable.
- Locate the control module (typically located under the dashboard or in the center console).
- Disconnect the electrical connectors from the control module.
- Remove the control module from its mounting bracket.
- Install the new control module in the mounting bracket.
- Connect the electrical connectors to the control module.
- Reconnect the negative battery cable.
- Program the new control module using a diagnostic tool.
4.2. Wiring Repairs
Faulty wiring can cause a variety of LDW issues. Common wiring repairs include:
- Repairing Damaged Wires:
- Procedure:
- Identify the damaged wire.
- Cut out the damaged section of the wire.
- Strip the ends of the wire.
- Splice the wires together using a crimp connector or solder.
- Insulate the connection with electrical tape or heat shrink tubing.
- Procedure:
- Replacing Damaged Connectors:
- Procedure:
- Identify the damaged connector.
- Disconnect the connector from the component.
- Cut the wires from the connector.
- Strip the ends of the wires.
- Attach the wires to the new connector using crimp connectors or solder.
- Ensure the connector is properly seated and secured when reconnected.
- Procedure:
- Chasing Short Circuits:
- Procedure:
- Use a multimeter to check for short circuits in the wiring.
- Isolate the short circuit by disconnecting components one at a time.
- Once the short circuit is isolated, repair the damaged wiring or replace the faulty component.
- Procedure:
- Grounding Issues:
- Procedure:
- Locate the grounding points for the LDW system.
- Clean the grounding points to remove any corrosion or debris.
- Ensure that the grounding points are properly secured.
- Procedure:
4.3. System Calibration
Calibration is a critical step in repairing LDW systems. Calibration ensures that the camera and sensors are properly aligned and functioning correctly.
- Calibration Procedure:
- Connect a diagnostic tool to the vehicle’s computer.
- Position the vehicle in a specific location with a calibration target.
- Follow the on-screen instructions to align the camera and sensors.
- Verify the calibration by performing a test drive.
4.4. Post-Repair Testing
After completing the repairs, it is essential to perform thorough testing to ensure that the LDW system is functioning correctly.
- Testing Procedure:
- Activate the LDW system in the vehicle’s infotainment system.
- Drive the vehicle on a well-marked road.
- Monitor the LDW system’s performance.
- Verify that the system is providing timely and accurate alerts.
- Check for any DTCs or warning lights.
4.5. Special Tools and Equipment
Repairing LDW systems requires the use of specialized tools and equipment. These tools include:
- Diagnostic Scan Tools: Tools like the Autel MaxiSYS MS906BT, Snap-on Zeus, or Bosch ADS 625 offer in-depth diagnostics, including live data streaming, component testing, and calibration functions.
- Land Rover SDD (Symptom Driven Diagnostics): This is the OEM (Original Equipment Manufacturer) diagnostic software used by Land Rover dealerships. It provides comprehensive diagnostic and programming capabilities.
- Multimeter: A multimeter is used to check for voltage, continuity, and resistance in the wiring.
- Wiring Repair Kit: A wiring repair kit includes crimp connectors, solder, electrical tape, and heat shrink tubing.
- Calibration Targets: Calibration targets are used to align the camera and sensors during the calibration process.
4.6. Safety Precautions
When repairing LDW systems, it is essential to follow safety precautions to prevent injury or damage to the vehicle.
- Disconnect the negative battery cable before working on the electrical system.
- Wear safety glasses to protect your eyes.
- Use proper lifting techniques when working under the vehicle.
- Follow the manufacturer’s instructions for all tools and equipment.
By following these repair procedures and safety precautions, you can effectively repair LDW systems on the Discovery 5, ensuring that the system functions as intended and contributes to safer driving.
5. Enhancing LDW Functionality with CARDIAGTECH.NET
CARDIAGTECH.NET offers advanced tools and solutions designed to enhance the functionality of Lane Departure Warning (LDW) systems in vehicles like the Discovery 5. These tools empower technicians to optimize, calibrate, and troubleshoot LDW systems, ensuring peak performance and driver safety.
5.1. Diagnostic and Calibration Tools
CARDIAGTECH.NET provides a range of diagnostic and calibration tools specifically designed for LDW systems. These tools enable technicians to:
- Retrieve Diagnostic Trouble Codes (DTCs): Identify and diagnose LDW-related issues.
- Monitor Live Data: Analyze real-time data from sensors and cameras.
- Perform Component Testing: Verify the functionality of individual components.
- Calibrate LDW Systems: Ensure accurate alignment and performance.
Popular tools available at CARDIAGTECH.NET include:
- Autel MaxiSYS MS906BT: An advanced diagnostic scan tool with comprehensive LDW diagnostic and calibration capabilities.
- Snap-on Zeus: A powerful diagnostic platform with extensive coverage for LDW systems.
- Bosch ADS 625: A versatile diagnostic tool with advanced features for LDW troubleshooting and calibration.
5.2. Software and Firmware Updates
CARDIAGTECH.NET offers software and firmware updates for LDW systems, ensuring compatibility and optimal performance. These updates can:
- Improve System Accuracy: Enhance the precision of lane detection and alerts.
- Resolve Known Issues: Fix bugs and glitches that may affect LDW functionality.
- Add New Features: Introduce advanced capabilities and enhancements.
Regular software updates are crucial for maintaining the effectiveness of LDW systems.
5.3. Training and Support
CARDIAGTECH.NET provides comprehensive training and support resources for technicians working on LDW systems. These resources include:
- Online Training Courses: In-depth courses covering LDW diagnostics, calibration, and repair procedures.
- Technical Support: Expert assistance from experienced technicians.
- Knowledge Base: A vast library of articles, guides, and troubleshooting tips.
- Community Forums: A platform for technicians to share knowledge and ask questions.
5.4. Aftermarket Upgrades
CARDIAGTECH.NET offers aftermarket upgrades to enhance the functionality of LDW systems. These upgrades can:
- Improve Camera Performance: Enhance the resolution and sensitivity of the forward-facing camera.
- Add Advanced Features: Introduce features such as lane keep assist (LKA) or adaptive cruise control (ACC).
- Customize Alert Settings: Allow drivers to customize the type and sensitivity of LDW alerts.
5.5. Benefits of Using CARDIAGTECH.NET Solutions
Using CARDIAGTECH.NET solutions for LDW systems offers numerous benefits, including:
- Improved Accuracy: Enhance the precision of lane detection and alerts.
- Enhanced Safety: Improve the effectiveness of LDW systems in preventing accidents.
- Reduced Downtime: Minimize the time required for diagnostics and repairs.
- Increased Customer Satisfaction: Provide customers with reliable and effective LDW systems.
- Expert Support: Access expert technical support and training resources.
5.6. Case Studies
Case Study 1: Calibration Issues
- Problem: A Discovery 5 was experiencing frequent false alerts from the LDW system.
- Solution: A technician used the Autel MaxiSYS MS906BT from CARDIAGTECH.NET to calibrate the LDW system. The calibration process realigned the camera and sensors, resolving the false alert issue.
Case Study 2: Software Update
- Problem: A Discovery 5’s LDW system was not functioning correctly due to a software glitch.
- Solution: A technician downloaded and installed a software update from CARDIAGTECH.NET. The update resolved the software glitch, restoring the LDW system to its proper functionality.
Case Study 3: Camera Replacement
- Problem: A Discovery 5’s forward-facing camera was damaged in a collision.
- Solution: A technician replaced the camera and used the Bosch ADS 625 from CARDIAGTECH.NET to calibrate the LDW system. The calibration process ensured that the new camera was properly aligned and functioning correctly.
By leveraging CARDIAGTECH.NET’s advanced tools and solutions, technicians can optimize the performance and reliability of LDW systems, ensuring driver safety and customer satisfaction. Contact CARDIAGTECH.NET at 276 Reock St, City of Orange, NJ 07050, United States or Whatsapp: +1 (641) 206-8880, or visit CARDIAGTECH.NET for expert assistance and comprehensive solutions.
6. Preventive Maintenance for LDW Systems
Preventive maintenance is crucial for ensuring the long-term reliability and effectiveness of Lane Departure Warning (LDW) systems. Regular maintenance can prevent common issues, extend the lifespan of components, and maintain optimal performance.
6.1. Regular Cleaning
The forward-facing camera is a critical component of the LDW system. Regular cleaning is essential to ensure clear visibility and accurate lane detection.
- Procedure:
- Use a soft, lint-free cloth to clean the camera lens.
- Avoid using harsh chemicals or abrasive cleaners.
- Clean the camera lens at least once a month, or more frequently in dusty or dirty environments.
- Check the windshield for cracks, chips, or other damage that could impair the camera’s view.
6.2. Software Updates
Software updates are essential for maintaining the compatibility and performance of the LDW system.
- Procedure:
- Check for available software updates regularly.
- Follow the manufacturer’s instructions to install the updates.
- Ensure that the diagnostic tool is connected to a stable power source during the update process.
6.3. Calibration Checks
Calibration checks are necessary to ensure that the camera and sensors are properly aligned.
- Procedure:
- Perform a calibration check at least once a year, or more frequently if the vehicle has been involved in a collision or has undergone suspension work.
- Use a diagnostic tool to perform the calibration check.
- Follow the on-screen instructions to align the camera and sensors.
- Verify the calibration by performing a test drive.
6.4. Wiring Inspections
Wiring inspections can help identify and prevent potential issues with the LDW system.
- Procedure:
- Inspect the wiring harnesses and connectors for any signs of damage, corrosion, or loose connections.
- Repair or replace any damaged wiring or connectors.
- Ensure that the connectors are properly seated and secured.
6.5. Sensor Checks
Sensor checks are necessary to ensure that the sensors are functioning correctly.
- Procedure:
- Use a diagnostic tool to monitor the sensor data.
- Verify that the sensor data is accurate and consistent.
- Replace any faulty sensors.
6.6. Battery Maintenance
A weak or failing battery can cause a variety of issues with the LDW system.
- Procedure:
- Check the battery voltage regularly.
- Replace the battery if it is weak or failing.
- Ensure that the battery terminals are clean and corrosion-free.
6.7. Regular System Scans
Regular system scans can help identify potential issues before they become major problems.
- Procedure:
- Use a diagnostic tool to scan the LDW system for DTCs.
- Research and resolve any DTCs that are present.
- Perform a system scan at least once a year, or more frequently if the vehicle is experiencing any LDW issues.
6.8. Benefits of Preventive Maintenance
Preventive maintenance offers numerous benefits, including:
- Improved Reliability: Regular maintenance can prevent common issues and ensure that the LDW system is functioning correctly.
- Extended Lifespan: Preventive maintenance can extend the lifespan of LDW components.
- Optimal Performance: Regular maintenance can ensure that the LDW system is performing at its best.
- Reduced Repair Costs: Preventive maintenance can help prevent costly repairs.
- Enhanced Safety: Preventive maintenance can help ensure that the LDW system is contributing to safer driving.
6.9. Maintenance Schedule
A sample maintenance schedule for LDW systems is shown below:
| Interval | Task | Procedure |
|---|---|---|
| Monthly | Clean Camera Lens | Use a soft, lint-free cloth to clean the camera lens. |
| 6 Months | Inspect Wiring & Connectors | Check for damage, corrosion, and loose connections. |
| 12 Months | Calibration Check | Use a diagnostic tool to perform a calibration check. |
| 24 Months | Software Update | Check for and install available software updates. |
| As Needed | Replace Fault |