How to Fix Cracked Plastic Car Interior: A Comprehensive Guide

Are you frustrated by the sight of a cracked plastic car interior? CARDIAGTECH.NET offers solutions! This guide provides expert advice and step-by-step instructions on how to repair those unsightly cracks, restoring your car’s interior to its former glory. We’ll cover everything from identifying the type of damage to using the right tools and techniques for a professional-looking finish. Discover how to fix cracked interior trim and master the art of automotive plastic repair, enhancing both the aesthetics and value of your vehicle.
1. Understanding the Types of Plastic Cracks in Car Interiors
Before diving into the repair process, it’s crucial to identify the type of crack you’re dealing with. Different types of damage require different approaches and tools. By understanding the cause and severity of the crack, you can choose the most effective repair method. This knowledge will also help you prevent future damage and maintain the pristine condition of your car’s interior.
1.1. Hairline Cracks
1.1.1. Common Causes
Hairline cracks are fine, superficial fractures that appear on the surface of the plastic. These are often caused by:
- Sun Exposure: According to research from the University of California, Davis, prolonged exposure to ultraviolet (UV) rays can cause plastic to degrade and develop hairline cracks.
- Temperature Fluctuations: Extreme temperature changes can cause the plastic to expand and contract, leading to stress fractures.
- Age: As plastic ages, it becomes brittle and more prone to cracking.
1.1.2. How to Identify
Hairline cracks are usually thin and barely visible to the naked eye. You might need to look closely or use a magnifying glass to spot them. They often appear in areas that are frequently exposed to sunlight, such as the dashboard or door panels.
1.1.3. Repair Solutions
- Plastic Polish: A high-quality plastic polish can often fill in and conceal hairline cracks.
- Heat Gun (Carefully): Gentle heat can help the plastic to re-flow and close the crack, but be very careful not to overheat the area.
1.2. Stress Cracks
1.2.1. Common Causes
Stress cracks are deeper and more noticeable than hairline cracks. They are typically caused by:
- Physical Stress: Pressure or impact on the plastic surface.
- Poor Manufacturing: According to a study by the Society of Automotive Engineers (SAE), plastics with inconsistencies or manufacturing defects are more prone to stress cracking.
- Chemical Exposure: Certain cleaning products or chemicals can weaken the plastic and lead to cracking.
1.2.2. How to Identify
Stress cracks are more visible and may have a slightly wider opening than hairline cracks. They often appear around areas of high stress, such as around screws or fasteners.
1.2.3. Repair Solutions
- Plastic Welders: These tools use heat to melt and fuse the plastic back together.
- Epoxy Fillers: These fillers can be used to fill in the crack and provide structural support.
1.3. Impact Cracks
1.3.1. Common Causes
Impact cracks are the most severe type of crack, usually resulting from:
- Accidents: Collisions or impacts can cause significant damage to the plastic interior.
- Forceful Impact: Dropping heavy objects or applying excessive force to the plastic.
1.3.2. How to Identify
Impact cracks are easily visible and may be accompanied by shattered or broken pieces of plastic.
1.3.3. Repair Solutions
- Plastic Replacement: In severe cases, the best option is to replace the damaged plastic component entirely.
- Professional Repair: For complex repairs, it’s best to consult with a professional auto body shop.
2. Essential Tools and Materials for Plastic Car Interior Repair
Having the right tools and materials is essential for achieving a professional-looking repair. Investing in quality equipment will not only make the job easier but also ensure a durable and long-lasting result. CARDIAGTECH.NET offers a wide range of tools and materials specifically designed for automotive plastic repair.
2.1. Cleaning Supplies
- Interior Cleaner: A pH-neutral cleaner is essential for removing dirt, grime, and contaminants from the plastic surface.
- Degreaser: Use a degreaser to remove any oil or grease that may interfere with the repair process.
- Microfiber Towels: Soft, lint-free towels are ideal for cleaning and drying the plastic surface.
2.2. Sanding Tools
- Sandpaper: A variety of grits (e.g., 220, 400, 600, 800, 1000, 2000) is needed for smoothing and preparing the surface.
- Sanding Block: Provides a flat, even surface for sanding.
- Detail Sander: For reaching tight corners and intricate areas.
2.3. Repair Materials
- Plastic Filler: Available in various formulations to match different types of plastic.
- Epoxy Resin: Provides strong adhesion and structural support.
- Plastic Welding Rods: Used with a plastic welder to fuse the plastic together.
2.4. Application Tools
- Putty Knife: For applying and smoothing plastic filler.
- Brushes: For applying epoxy resin or paint.
- Applicator Pads: For applying plastic polish or protectant.
2.5. Finishing Tools
- Heat Gun: Used to soften and reshape plastic.
- Texture Pad: For replicating the original texture of the plastic.
- Plastic Polish: For restoring shine and protecting the surface.
2.6. Safety Gear
- Safety Glasses: Protect your eyes from debris and chemicals.
- Gloves: Protect your hands from chemicals and sharp objects.
- Respirator: Protect your lungs from harmful fumes and dust particles.
3. Step-by-Step Guide to Fixing Cracked Plastic Car Interior
Follow these detailed steps to effectively repair cracked plastic in your car’s interior, achieving a professional finish and extending the life of your vehicle’s interior components. CARDIAGTECH.NET is here to support you with the necessary tools and expertise.
3.1. Preparation
3.1.1. Cleaning the Area
- Apply Interior Cleaner: Spray a generous amount of interior cleaner onto the cracked area and surrounding surface.
- Wipe Thoroughly: Use a microfiber towel to wipe away dirt, grime, and contaminants.
- Degrease if Necessary: If there is any oil or grease present, apply a degreaser and wipe clean.
- Allow to Dry: Ensure the area is completely dry before proceeding to the next step.
Cleaning car interior with spray
Alt text: Cleaning the interior of a car with a spray cleaner to prepare for crack repair, ensuring a smooth surface for adhesion.
3.1.2. Masking
- Apply Masking Tape: Use masking tape to protect the surrounding areas from accidental damage or overspray.
- Ensure Full Coverage: Make sure the tape is securely applied and covers all adjacent surfaces.
3.2. Repairing the Crack
3.2.1. Sanding
- Start with Coarse Grit: Begin with 220-grit sandpaper to remove any rough edges or loose pieces of plastic.
- Progress to Finer Grits: Gradually move to finer grits (400, 600, 800) to smooth out the surface.
- Use a Sanding Block: Wrap the sandpaper around a sanding block to ensure an even sanding surface.
- Clean Between Grits: Wipe away any sanding dust with a clean microfiber towel between each grit.
3.2.2. Applying Plastic Filler or Epoxy Resin
- Mix the Filler/Resin: Follow the manufacturer’s instructions for mixing the plastic filler or epoxy resin.
- Apply Evenly: Use a putty knife or brush to apply the filler/resin to the cracked area.
- Overfill Slightly: Overfill the crack slightly to allow for sanding and shaping.
- Allow to Cure: Let the filler/resin cure completely according to the manufacturer’s instructions.
3.2.3. Plastic Welding (Optional)
- Prepare the Plastic Welder: Turn on the plastic welder and allow it to heat up.
- Select the Correct Rod: Choose a plastic welding rod that matches the type of plastic you are repairing.
- Apply the Rod: Use the plastic welder to melt the rod and fuse it to the cracked area.
- Build Up the Area: Gradually build up the area until the crack is filled and reinforced.
- Allow to Cool: Let the area cool completely before proceeding to the next step.
3.3. Finishing
3.3.1. Sanding (Again)
- Start with Medium Grit: Begin with 400-grit sandpaper to remove any excess filler/resin or welding material.
- Progress to Finer Grits: Gradually move to finer grits (600, 800, 1000, 2000) to smooth out the surface.
- Wet Sanding: Use wet sanding with 2000-grit sandpaper for a super-smooth finish.
- Clean Thoroughly: Wipe away any sanding dust with a clean microfiber towel.
3.3.2. Texturing (If Necessary)
- Heat the Area: Use a heat gun to gently heat the repaired area.
- Apply Texture Pad: Press a texture pad onto the heated area to replicate the original texture of the plastic.
- Allow to Cool: Let the area cool completely before proceeding to the next step.
3.3.3. Painting (Optional)
- Prime the Area: Apply a plastic primer to the repaired area.
- Apply Paint: Use a paint that matches the color of your car’s interior to paint the repaired area.
- Apply Clear Coat: Apply a clear coat to protect the paint and provide a glossy finish.
- Allow to Dry: Let the paint and clear coat dry completely according to the manufacturer’s instructions.
3.3.4. Polishing
- Apply Plastic Polish: Apply a small amount of plastic polish to a clean applicator pad.
- Buff the Area: Use the applicator pad to buff the repaired area in a circular motion.
- Remove Excess Polish: Wipe away any excess polish with a clean microfiber towel.
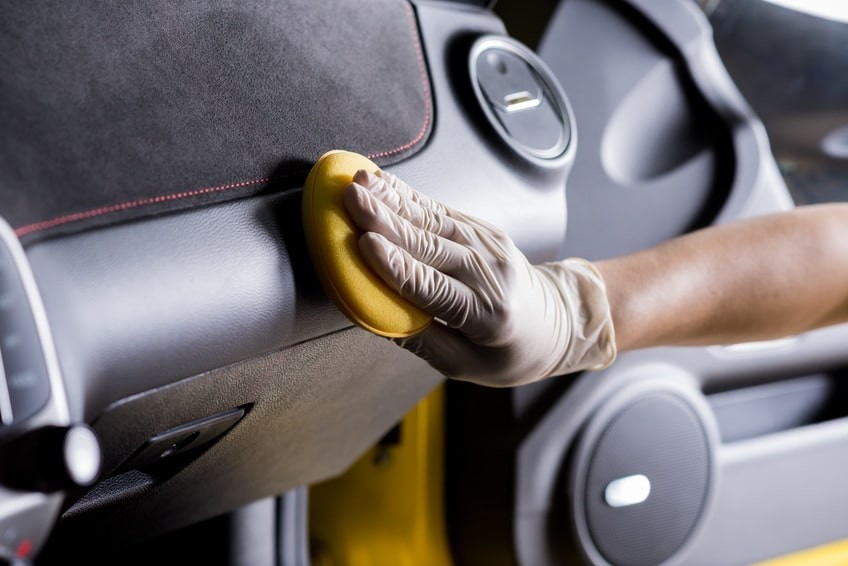 Polishing car interior
Alt text: Polishing the car interior with a soft cloth to restore shine and remove imperfections after crack repair, enhancing the interior aesthetics.
4. Advanced Techniques for Complex Repairs
For more severe damage or complex repairs, consider these advanced techniques to achieve a professional-quality result. With the right approach and tools from CARDIAGTECH.NET, even the most challenging repairs are possible.
4.1. Reinforcing Weak Areas
4.1.1. Using Fiberglass Mesh
- Cut the Mesh: Cut a piece of fiberglass mesh to fit the area being repaired.
- Apply Epoxy Resin: Apply a layer of epoxy resin to the back of the damaged area.
- Embed the Mesh: Embed the fiberglass mesh into the epoxy resin.
- Apply Another Layer: Apply another layer of epoxy resin over the mesh.
- Allow to Cure: Let the epoxy resin cure completely before proceeding to the next step.
4.1.2. Using Metal Reinforcements
- Cut the Metal: Cut a piece of thin metal (e.g., aluminum) to fit the area being repaired.
- Shape the Metal: Shape the metal to conform to the contours of the damaged area.
- Attach the Metal: Use epoxy resin or adhesive to attach the metal to the back of the damaged area.
- Allow to Cure: Let the epoxy resin or adhesive cure completely before proceeding to the next step.
4.2. Matching Texture and Color
4.2.1. Texture Matching
- Use Texture Pads: A variety of texture pads are available to match different types of plastic textures.
- Experiment with Heat: Experiment with different levels of heat to achieve the desired texture.
- Practice on Scrap: Practice on a scrap piece of plastic before applying the texture to the repaired area.
4.2.2. Color Matching
- Use a Color Chart: Use a color chart to find the closest match to your car’s interior color.
- Mix Custom Colors: Mix custom colors using automotive-grade pigments and binders.
- Test the Color: Test the color on a small, inconspicuous area before applying it to the entire repaired area.
4.3. Repairing Large Cracks or Holes
4.3.1. Backing the Area
- Create a Backing: Create a backing for the area using cardboard, foam, or other suitable material.
- Secure the Backing: Secure the backing to the back of the damaged area using tape or adhesive.
4.3.2. Filling the Gap
- Use Expanding Foam: Use expanding foam to fill the gap between the backing and the damaged area.
- Trim the Foam: Trim the excess foam after it has fully expanded and cured.
- Apply Filler/Resin: Apply plastic filler or epoxy resin over the foam to create a smooth surface.
- Sand and Finish: Sand and finish the area as described in the previous steps.
5. Preventative Measures to Avoid Future Cracks
Taking preventative measures can significantly reduce the risk of future cracks and damage to your car’s plastic interior. Implementing these strategies will help maintain your vehicle’s appearance and value. CARDIAGTECH.NET supports your car care efforts with quality products and advice.
5.1. Protecting from Sun Exposure
- Use Sunshades: Sunshades reflect sunlight and reduce the amount of heat that enters your car.
- Park in the Shade: Whenever possible, park your car in the shade to minimize sun exposure.
- Apply UV Protectant: Apply a UV protectant to your car’s interior surfaces to prevent fading and cracking.
5.2. Maintaining Consistent Temperatures
- Avoid Extreme Temperatures: Try to avoid exposing your car to extreme temperatures, both hot and cold.
- Use Climate Control: Use your car’s climate control system to maintain a consistent temperature inside the vehicle.
5.3. Proper Cleaning and Maintenance
- Use the Right Cleaners: Use cleaners specifically designed for automotive plastic interiors.
- Avoid Harsh Chemicals: Avoid using harsh chemicals or abrasive cleaners that can damage the plastic.
- Regular Cleaning: Clean your car’s interior regularly to remove dirt, grime, and contaminants.
5.4. Careful Handling and Storage
- Avoid Sharp Objects: Be careful when handling sharp objects inside your car to avoid scratching or damaging the plastic.
- Store Items Securely: Store items securely to prevent them from moving around and causing damage.
- Gentle Use: Avoid applying excessive force or pressure to plastic surfaces.
6. Cost-Effective Solutions vs. Professional Services
Deciding whether to repair cracked plastic car interiors yourself or hire a professional depends on the severity of the damage, your skill level, and your budget. CARDIAGTECH.NET provides options for both DIY enthusiasts and those seeking professional assistance.
6.1. DIY Repair: Pros and Cons
6.1.1. Pros
- Cost Savings: DIY repairs are typically much cheaper than professional services.
- Flexibility: You can perform the repairs at your own convenience.
- Learning Experience: DIY repairs can be a valuable learning experience.
6.1.2. Cons
- Time Commitment: DIY repairs can be time-consuming.
- Skill Required: Some repairs require specialized skills and knowledge.
- Potential for Errors: There is a risk of making mistakes that could worsen the damage.
6.2. Professional Repair: Pros and Cons
6.2.1. Pros
- Expertise: Professionals have the skills and experience to perform high-quality repairs.
- Convenience: Professional services are convenient and hassle-free.
- Warranty: Many professional services offer a warranty on their work.
6.2.2. Cons
- Higher Cost: Professional services are typically more expensive than DIY repairs.
- Scheduling: You may need to schedule an appointment and wait for the repairs to be completed.
6.3. Cost Comparison
| Repair Type | DIY Cost | Professional Cost |
|---|---|---|
| Hairline Crack | $20 – $50 | $50 – $100 |
| Stress Crack | $50 – $100 | $100 – $200 |
| Impact Crack | $100 – $200 | $200 – $500+ |
Note: Prices are estimates and may vary depending on the location and the extent of the damage.
7. Choosing the Right Products from CARDIAGTECH.NET
CARDIAGTECH.NET offers a comprehensive range of products designed to help you repair and maintain your car’s plastic interior. Selecting the right products is essential for achieving the best results.
7.1. Plastic Repair Kits
- Basic Kits: Ideal for minor cracks and scratches.
- Advanced Kits: Include a wider range of tools and materials for more complex repairs.
- Professional Kits: Designed for professional use and include high-quality equipment and supplies.
7.2. Cleaning and Detailing Products
- Interior Cleaners: Safe and effective for cleaning all types of automotive plastic.
- Protectants: Protect against UV damage and fading.
- Detailing Sprays: Enhance the appearance of your car’s interior.
7.3. Tools and Equipment
- Heat Guns: Adjustable heat settings for precise control.
- Plastic Welders: High-quality welders for durable repairs.
- Sanding Tools: A variety of sandpapers, blocks, and detail sanders.
8. Common Mistakes to Avoid During Repair
Avoiding common mistakes can save you time, money, and frustration during the repair process. These tips will help you achieve a professional-looking result and prevent further damage.
8.1. Overheating the Plastic
- Use Low Heat: Start with a low heat setting on your heat gun and gradually increase the temperature as needed.
- Keep Moving: Keep the heat gun moving to avoid overheating any one area.
- Monitor the Plastic: Monitor the plastic closely to ensure it does not warp or burn.
8.2. Applying Too Much Filler
- Apply in Thin Layers: Apply plastic filler in thin layers to avoid trapping air bubbles.
- Allow to Dry: Allow each layer to dry completely before applying the next layer.
- Sand Smoothly: Sand the filler smoothly to blend it with the surrounding surface.
8.3. Using the Wrong Products
- Check Compatibility: Check the compatibility of the products you are using to ensure they are safe for automotive plastic.
- Follow Instructions: Follow the manufacturer’s instructions for each product.
- Test First: Test the products on a small, inconspicuous area before applying them to the entire repaired area.
9. Enhancing Car Value Through Interior Restoration
Restoring your car’s interior not only improves its appearance but also enhances its value. A well-maintained interior can make a significant difference when it’s time to sell or trade-in your vehicle.
9.1. Improving Aesthetics
- Clean and Fresh: A clean and well-maintained interior creates a positive impression.
- Repair Damage: Repairing cracks, scratches, and other damage can make your car look newer and more appealing.
9.2. Increasing Resale Value
- Higher Price: A car with a well-maintained interior can command a higher price on the used car market.
- Attract More Buyers: A clean and attractive interior can attract more potential buyers.
9.3. Maintaining Comfort and Enjoyment
- Pleasant Environment: A well-maintained interior creates a more pleasant driving environment.
- Pride of Ownership: Taking care of your car’s interior can increase your pride of ownership.
10. Frequently Asked Questions (FAQs) About Fixing Cracked Plastic Car Interiors
Here are some frequently asked questions to help you better understand How To Fix Cracked Plastic Car Interiors.
10.1. Can I use super glue to fix a cracked plastic car interior?
While super glue might seem like a quick fix, it’s generally not recommended for cracked plastic car interiors. According to Popular Mechanics, super glue can create a brittle bond that’s prone to cracking again, and it may damage the surrounding plastic. A better option is to use a specialized plastic adhesive or epoxy designed for automotive use, as these provide a more flexible and durable repair.
10.2. How do I match the color of the repair to the rest of the interior?
Matching the color of the repair to the rest of the interior can be challenging, but it’s essential for a seamless look. Start by identifying the exact color code of your car’s interior, which can often be found on a sticker inside the glove compartment or door jamb. CARDIAGTECH.NET can help you to use this code to order a custom-mixed paint that matches your interior perfectly.
10.3. What is the best way to prevent further cracking in my car’s plastic interior?
To prevent further cracking in your car’s plastic interior, it’s essential to protect it from extreme temperatures and UV exposure. According to the EPA, UV rays can cause plastic to degrade and crack over time. Use sunshades when parking in direct sunlight, apply a UV protectant to the interior surfaces, and try to maintain a consistent temperature inside the vehicle.
10.4. Can I repair a cracked dashboard myself, or should I take it to a professional?
Whether you can repair a cracked dashboard yourself depends on the extent of the damage and your DIY skills. Small hairline cracks might be repairable with a plastic filler and some sanding, while larger cracks or extensive damage may require professional attention. Consider your comfort level and the tools available before deciding whether to tackle the repair yourself.
10.5. What type of plastic filler should I use for repairing car interiors?
When choosing a plastic filler for repairing car interiors, it’s essential to select one that’s specifically designed for automotive use. These fillers are formulated to be flexible, durable, and resistant to cracking and fading. CARDIAGTECH.NET offer a variety of plastic fillers, each with specific benefits for different types of repairs.
10.6. Is it necessary to sand down the plastic before applying a repair product?
Yes, sanding down the plastic before applying a repair product is crucial for ensuring proper adhesion and a smooth finish. Sanding removes any loose particles, rough edges, and contaminants from the surface, creating a better bond for the repair product. Use a fine-grit sandpaper (400-600 grit) to gently sand the area before applying the filler or adhesive.
10.7. How do I remove scratches from plastic car interiors?
Removing scratches from plastic car interiors involves a similar process to repairing cracks. Start by cleaning the area thoroughly, then use a fine-grit sandpaper to gently sand down the scratches. Apply a plastic polish or scratch remover to buff out the scratches and restore the shine to the plastic.
10.8. Can a heat gun damage my car’s plastic interior?
Yes, a heat gun can damage your car’s plastic interior if used improperly. According to the National Highway Traffic Safety Administration (NHTSA), excessive heat can cause plastic to warp, melt, or discolor. It’s essential to use a low heat setting and keep the heat gun moving to avoid overheating any one area.
10.9. What are some common causes of plastic cracks in car interiors?
Common causes of plastic cracks in car interiors include prolonged exposure to sunlight, extreme temperature fluctuations, physical stress or impact, and the use of harsh cleaning chemicals. Taking preventative measures, such as using sunshades and gentle cleaning products, can help minimize the risk of cracks.
10.10. Where can I purchase quality tools and materials for repairing my car’s plastic interior?
You can purchase quality tools and materials for repairing your car’s plastic interior at CARDIAGTECH.NET. We offer a wide range of products, including plastic repair kits, cleaning supplies, sanding tools, and application tools, all designed to help you achieve professional-looking results.
Conclusion
Repairing cracked plastic car interiors is a manageable task with the right tools, materials, and techniques. By following this comprehensive guide and utilizing the products available at CARDIAGTECH.NET, you can restore your car’s interior to its former glory, enhancing its appearance and value.
Don’t let cracked plastic ruin the look of your car’s interior. Contact CARDIAGTECH.NET at 276 Reock St, City of Orange, NJ 07050, United States or Whatsapp us at +1 (641) 206-8880 for expert advice and the best tools and materials for the job. Visit our website at CARDIAGTECH.NET and let us help you bring your car’s interior back to life. Our team is ready to assist you with any questions and help you find the perfect solutions for your car care needs. Take action now and enjoy a pristine, crack-free interior!