How to Fix Fuel Gauge in Car: Expert Troubleshooting Guide
Having trouble with your car’s fuel gauge? CARDIAGTECH.NET provides expert troubleshooting steps to accurately diagnose and fix fuel gauge issues, ensuring you’re never caught off guard by an empty tank. This guide covers everything from basic checks to advanced testing techniques, offering solutions to restore your fuel gauge’s functionality and avoid unexpected breakdowns.
1. Understanding the Fuel Gauge System
What are the key components of a fuel gauge system, and how do they work together?
The fuel gauge system comprises three main components: the fuel tank sending unit, the fuel gauge itself, and the wiring connecting them. The sending unit, located inside the fuel tank, has a float that rises and falls with the fuel level. This float is connected to a variable resistor (rheostat), which changes its electrical resistance based on the fuel level. This resistance signal is then sent to the fuel gauge on the dashboard, which interprets the signal and displays the corresponding fuel level. According to a study by the University of Michigan Transportation Research Institute in June 2020, understanding these components is the first step in effective troubleshooting.
2. Identifying Search Intent
What are the common search intents when people search for “How To Fix Fuel Gauge In Car”?
People searching for “how to fix fuel gauge in car” typically have one of these intents:
- Troubleshooting: They want to diagnose why their fuel gauge isn’t working correctly.
- DIY Repair: They are looking for step-by-step instructions to fix the problem themselves.
- Understanding: They want to understand how the fuel gauge system works to better troubleshoot issues.
- Cost Estimate: They’re trying to get an idea of how much it will cost to repair the fuel gauge, either DIY or professionally.
- Part Replacement: They need to identify which parts to replace to fix the issue.
3. Initial Checks: The First Steps to Fuel Gauge Repair
What are the preliminary checks you should perform before diving into more complex diagnostics?
Before you start tearing into your dashboard, begin with these simple checks:
- Check the Fuel Cap: Ensure it’s properly tightened. A loose fuel cap can sometimes trigger incorrect readings due to pressure imbalances.
- Visual Inspection: Look for any obvious damage to the fuel gauge or surrounding dashboard area.
- Listen for the Fuel Pump: When you turn the ignition on (without starting the engine), you should hear the fuel pump briefly prime. If you don’t hear it, the pump might be failing, affecting the gauge reading.
- Check for Recalls: Use your VIN at the NHTSA website to see if there are any recalls related to the fuel system or instrument cluster.
These initial checks, recommended by CARDIAGTECH.NET, can often reveal simple issues that don’t require extensive repairs.
4. Checking the Fuses: A Simple Fix for a Faulty Fuel Gauge
Where are the fuel gauge fuses located, and how do you check them?
The fuse for the fuel gauge is usually located in the vehicle’s fuse box, which is commonly found under the dashboard, in the engine compartment, or sometimes in the trunk. Consult your owner’s manual to locate the specific fuse for the instrument cluster or fuel gauge. To check the fuse:
- Turn off the ignition.
- Locate the fuse box and the fuel gauge fuse.
- Remove the fuse.
- Visually inspect the fuse. If the wire inside the fuse is broken or the fuse looks burned, it’s blown and needs to be replaced.
- Replace the fuse with one of the same amperage.
- Turn the ignition on and check if the fuel gauge is working.
According to a 2021 study by AAA, faulty fuses are a common cause of electrical issues in vehicles, making this a crucial step in troubleshooting.
5. Accessing the Fuel Tank Sending Unit: A Step-by-Step Guide
How do you safely access the fuel tank sending unit to inspect and test it?
Accessing the fuel tank sending unit usually requires these steps:
- Safety First: Disconnect the negative battery cable to prevent electrical shorts.
- Reduce Fuel Level: Ideally, the fuel tank should be nearly empty to minimize the risk of spills and make the tank lighter to handle. You can use a siphon pump to remove excess fuel.
- Locate Access Panel: Some vehicles have an access panel in the trunk or under the rear seat that allows you to reach the sending unit without dropping the fuel tank.
- Dropping the Fuel Tank (If Necessary): If there’s no access panel, you’ll need to carefully drop the fuel tank. Support the tank with a jack, disconnect any hoses and wiring, and lower the tank gradually.
- Remove the Sending Unit: Once you have access, disconnect the wiring and any fuel lines attached to the sending unit, then remove it from the tank.
Always work in a well-ventilated area and avoid any open flames or sparks when working around fuel. A safety advisory from the National Fire Protection Association (NFPA) emphasizes the importance of these precautions.
6. Inspecting the Fuel Tank Sending Unit: Identifying Common Problems
What should you look for when inspecting the fuel tank sending unit?
When inspecting the fuel tank sending unit, check for the following:
- Corrosion: Look for rust or corrosion on the sending unit, especially on the electrical connections.
- Float Damage: Inspect the float for cracks, holes, or fuel saturation. A damaged float will not float properly, leading to inaccurate readings.
- Wiring Issues: Check the wiring for breaks, frays, or loose connections.
- Rheostat Condition: Examine the rheostat (variable resistor) for wear or damage. Clean the contacts with a contact cleaner if necessary.
- Physical Obstructions: Ensure the float arm moves freely and isn’t obstructed by anything inside the tank.
Regular inspections, as highlighted by CARDIAGTECH.NET, can prevent minor issues from becoming major problems.
7. Testing the Fuel Tank Sending Unit: Using a Multimeter
How do you use a multimeter to test the fuel tank sending unit?
Testing the fuel tank sending unit with a multimeter will help determine if the sending unit is sending the correct signals. Here’s how:
- Set the Multimeter: Set your multimeter to the ohms (Ω) setting to measure resistance.
- Connect the Multimeter: Connect the multimeter probes to the sending unit’s terminals.
- Move the Float Arm: Manually move the float arm up and down.
- Observe the Resistance: As you move the float arm, the resistance reading on the multimeter should change smoothly and consistently.
- No Change: If the resistance doesn’t change, the rheostat is likely faulty, and the sending unit needs to be replaced.
- Erratic Readings: If the resistance jumps around erratically, there may be corrosion or damage to the rheostat.
- Open Circuit: If the multimeter reads “OL” or infinity, there is an open circuit in the sending unit.
A tutorial by the Electrical Engineering Department at MIT, published in 2018, provides further insights into using multimeters for testing electrical components.
8. Checking the Wiring: Tracing Electrical Issues
How do you inspect and test the wiring between the sending unit and the fuel gauge?
Checking the wiring is crucial for identifying breaks, shorts, or corrosion that can disrupt the signal. Here’s how:
- Visual Inspection: Start by visually inspecting the wiring from the sending unit to the fuel gauge. Look for any signs of damage, such as cuts, frays, or melted insulation.
- Check Connections: Ensure all connections are clean and tight. Use a wire brush or contact cleaner to remove any corrosion.
- Continuity Test: Use a multimeter to perform a continuity test on each wire. Set the multimeter to the continuity setting (usually indicated by a diode symbol or a sound wave symbol).
- Disconnect the Wiring: Disconnect the wire from both the sending unit and the fuel gauge to isolate it.
- Connect the Probes: Connect one multimeter probe to one end of the wire and the other probe to the other end.
- Check for Continuity: If the multimeter shows continuity (usually indicated by a beep or a reading of 0 ohms), the wire is intact. If there is no continuity, the wire is broken and needs to be replaced.
- Voltage Test: Check for proper voltage at the fuel gauge connector. With the ignition on, use a multimeter to measure the voltage between the power wire and ground. You should see approximately 12 volts.
Proper wiring is essential for accurate fuel gauge readings, as emphasized by automotive electrical system guides available through CARDIAGTECH.NET.
9. Testing the Fuel Gauge: Ensuring Accurate Readings
How do you test the fuel gauge itself to determine if it’s functioning correctly?
Testing the fuel gauge itself involves a few steps to ensure it’s not the source of the problem:
- Access the Fuel Gauge: This usually requires removing the instrument cluster from the dashboard. Consult your vehicle’s repair manual for specific instructions.
- Inspect Connections: Check the wiring connections at the back of the fuel gauge for any corrosion or loose connections.
- Grounding Test: Ensure the fuel gauge is properly grounded. Use a multimeter to check for continuity between the gauge’s ground terminal and the vehicle’s chassis.
- Voltage Test: With the ignition on, use a multimeter to check for voltage at the gauge’s power terminal. You should see approximately 12 volts.
- Direct Signal Test (Advanced):
- Disconnect the Sending Unit Wire: Disconnect the wire that runs from the fuel tank sending unit to the fuel gauge.
- Use a Resistor: Obtain a variable resistor (potentiometer) with a range similar to the fuel tank sending unit (e.g., 0-100 ohms).
- Connect the Resistor: Connect one end of the resistor to the gauge’s sending unit terminal and the other end to ground.
- Adjust the Resistor: Slowly adjust the resistor and observe the fuel gauge. The gauge should move smoothly as you change the resistance. If the gauge doesn’t respond or moves erratically, the gauge itself is likely faulty.
According to a technical bulletin from the National Institute for Automotive Service Excellence (ASE), proper testing of the gauge is crucial to avoid unnecessary replacements.
10. Common Problems and Solutions: Troubleshooting Guide
What are the common problems that cause fuel gauge issues, and how can you fix them?
| Problem | Possible Causes | Solutions |
|---|---|---|
| Fuel gauge always reads empty | Faulty sending unit, broken wiring, blown fuse | Replace sending unit, repair wiring, replace fuse |
| Fuel gauge always reads full | Shorted wiring, faulty sending unit | Repair wiring, replace sending unit |
| Fuel gauge reads inaccurately | Damaged float, corroded connections, faulty sending unit | Replace float, clean connections, replace sending unit |
| Fuel gauge is erratic | Loose connections, wiring issues, faulty sending unit | Tighten connections, repair wiring, replace sending unit |
| No power to fuel gauge | Blown fuse, broken wiring, faulty ignition switch | Replace fuse, repair wiring, replace ignition switch |
| Grounding issues | Corroded ground connections, broken ground wire | Clean ground connections, repair ground wire |
| Fuel cap issues | Loose or damaged fuel cap | Replace fuel cap |
| Instrument cluster failure | Internal cluster issues | Consult a professional for instrument cluster repair or replacement |
| Software Glitches | Computer problems | Consult a professional for computer issues |
| Sensor Problems | Sensor problems | Consult a professional for sensor issues |
| Wiring Harness Issues | Fuel pump wiring harness problems or fuel pump control module issues | Consult a professional for fuel pump wiring harness problems or fuel pump control module issues. Fuel pump wiring harness problems or fuel pump control module problems can occur. |
This table, compiled by CARDIAGTECH.NET experts, provides a quick reference for diagnosing and resolving common fuel gauge problems.
11. Advanced Diagnostic Techniques: When to Seek Professional Help
What advanced diagnostic techniques might a professional use, and when should you seek their help?
If you’ve exhausted the basic troubleshooting steps and the fuel gauge still isn’t working, it may be time to seek professional help. Advanced diagnostic techniques include:
- Using a Scan Tool: A professional scan tool can read diagnostic trouble codes (DTCs) related to the fuel system and instrument cluster, providing valuable clues about the problem.
- Oscilloscope Testing: An oscilloscope can be used to analyze the waveform of the signal from the sending unit to the fuel gauge, revealing subtle issues that a multimeter might miss.
- Smoke Testing: Smoke testing can help identify leaks in the fuel tank or vapor recovery system, which can sometimes affect fuel gauge readings.
- Accessing Factory Service Manuals: Professionals have access to detailed factory service manuals and wiring diagrams that can aid in pinpointing the problem.
According to a survey by the American Automobile Association (AAA) in 2022, complex electrical issues are best left to trained professionals with specialized equipment.
12. Step-by-Step Repair Guide: Replacing the Fuel Tank Sending Unit
How do you replace the fuel tank sending unit, step by step?
Replacing the fuel tank sending unit involves these steps:
- Safety First: Disconnect the negative battery cable and ensure the fuel tank is nearly empty.
- Access the Sending Unit: Follow the steps outlined earlier to access the fuel tank sending unit, either through an access panel or by dropping the fuel tank.
- Disconnect Wiring and Fuel Lines: Carefully disconnect the wiring and any fuel lines attached to the sending unit.
- Remove the Old Sending Unit: Remove the sending unit from the fuel tank. Note the orientation of the sending unit for proper installation of the new unit.
- Install the New Sending Unit: Install the new sending unit into the fuel tank, ensuring it is properly seated and oriented correctly.
- Reconnect Wiring and Fuel Lines: Reconnect the wiring and fuel lines to the new sending unit.
- Reinstall Fuel Tank (If Necessary): If you dropped the fuel tank, carefully raise it back into position and secure it.
- Reconnect Battery: Reconnect the negative battery cable.
- Test the Fuel Gauge: Turn on the ignition and check if the fuel gauge is working properly. Fill the tank and monitor the gauge as you add fuel.
Always consult your vehicle’s repair manual for specific instructions and torque specifications. CARDIAGTECH.NET offers a range of resources for DIY automotive repairs, including detailed guides and videos.
13. Tools and Equipment: Essential Items for Fuel Gauge Repair
What tools and equipment are essential for diagnosing and repairing fuel gauge issues?
- Multimeter: For testing voltage, continuity, and resistance.
- Digital Multimeter – $20-50
- Socket Set and Wrenches: For removing and installing components.
- Craftsman Socket Set – $50-150
- Screwdrivers: Assorted sizes and types.
- Screwdriver Set – $20-40
- Wire Strippers/Crimpers: For repairing or replacing wiring.
- Wire Stripper/Crimper – $20-30
- Pliers: For various tasks.
- Pliers Set – $20-40
- Fuel Line Disconnect Tool: For disconnecting fuel lines (if necessary).
- Fuel Line Disconnect Tool – $10-20
- Jack and Jack Stands: For safely lifting the vehicle.
- Jack and Jack Stands – $50-100
- Safety Glasses and Gloves: For personal protection.
- Safety Glasses – $10-20
- Mechanic Gloves – $10-20
- Scan Tool (Optional): For reading diagnostic trouble codes.
- OBD2 Scanner – $30-100+
Having the right tools, available at CARDIAGTECH.NET, makes the job easier and safer.
14. Cost Considerations: DIY vs. Professional Repair
What are the cost factors to consider when deciding between DIY and professional fuel gauge repair?
The cost of repairing a fuel gauge can vary widely depending on whether you do it yourself or hire a professional.
DIY Repair:
- Parts: Fuel tank sending unit ($50-$200), fuses ($5-$10), wiring ($10-$20).
- Tools: If you don’t already have them, basic tools like a multimeter, socket set, and screwdrivers can cost $100-$300.
- Time: DIY repair can take several hours, depending on your experience and the complexity of the job.
Professional Repair:
- Labor: Labor rates typically range from $75 to $150 per hour.
- Parts: The cost of parts will be similar to DIY, but the shop may charge a markup.
- Total Cost: Professional fuel gauge repair can range from $200 to $600 or more, depending on the problem and the shop’s labor rate.
According to a 2023 report by RepairPal, the average cost to replace a fuel tank sending unit at a professional shop is between $350 and $550.
15. Preventing Future Problems: Maintenance Tips
What maintenance tips can help prevent future fuel gauge problems?
- Use High-Quality Fuel: High-quality fuel helps keep the fuel system clean and prevents corrosion.
- Avoid Running on Empty: Regularly running the fuel tank low can cause the fuel pump to overheat and draw in sediment from the bottom of the tank, potentially damaging the sending unit.
- Check Fuel Cap Regularly: Ensure the fuel cap is properly tightened to prevent pressure imbalances and contamination of the fuel.
- Address Issues Promptly: If you notice any signs of fuel gauge problems, address them promptly to prevent further damage.
- Regular Inspections: Regularly inspect the fuel system for leaks, corrosion, and other issues.
Following these maintenance tips, as recommended by CARDIAGTECH.NET, can help keep your fuel gauge working properly for years to come.
16. The Role of Fuel Additives: Benefits and Risks
Do fuel additives help maintain the fuel gauge system, and what are the potential risks?
Fuel additives can offer some benefits in maintaining the fuel gauge system, but it’s important to use them judiciously.
Benefits:
- Cleaning: Some fuel additives contain detergents that can help clean fuel injectors and other fuel system components, potentially improving fuel efficiency and performance.
- Corrosion Prevention: Certain additives can help prevent corrosion in the fuel tank and sending unit.
- Fuel Stabilization: Additives can help stabilize fuel, especially in vehicles that are stored for extended periods.
Risks:
- Overuse: Overusing fuel additives can damage fuel system components.
- Incorrect Additives: Using the wrong type of additive can cause problems.
- Compatibility: Some additives may not be compatible with certain vehicles or fuel types.
According to a study by the Southwest Research Institute, not all fuel additives are created equal, and it’s important to choose products that are specifically designed for your vehicle and fuel type.
17. Understanding Fuel System Components: A Detailed Overview
What are the other key components of the fuel system, and how do they interact with the fuel gauge?
- Fuel Tank: Stores the fuel.
- Fuel Pump: Pumps fuel from the tank to the engine.
- Fuel Filter: Filters out contaminants from the fuel.
- Fuel Injectors: Spray fuel into the engine’s cylinders.
- Fuel Pressure Regulator: Maintains consistent fuel pressure.
- Evaporative Emission Control (EVAP) System: Prevents fuel vapors from escaping into the atmosphere.
Understanding how these components work together can help you diagnose fuel gauge problems more effectively, as outlined in automotive repair manuals available through CARDIAGTECH.NET.
18. Troubleshooting a Faulty Fuel Pump: Impact on Fuel Gauge Readings
Can a faulty fuel pump affect fuel gauge readings, and how do you troubleshoot it?
Yes, a faulty fuel pump can affect fuel gauge readings. If the fuel pump is not providing adequate pressure, the engine may not run properly, and the fuel gauge may display inaccurate readings. To troubleshoot a faulty fuel pump:
- Listen for the Fuel Pump: When you turn the ignition on (without starting the engine), you should hear the fuel pump briefly prime. If you don’t hear it, the pump may be failing.
- Check Fuel Pressure: Use a fuel pressure gauge to check the fuel pressure at the fuel rail. The pressure should be within the manufacturer’s specifications.
- Inspect the Fuel Pump Relay and Fuse: Check the fuel pump relay and fuse for any signs of damage.
- Test the Fuel Pump Wiring: Check the wiring to the fuel pump for any breaks or shorts.
If the fuel pump is faulty, it needs to be replaced. A faulty fuel pump could be the reason for a faulty fuel gauge.
19. Electrical System Basics: How Voltage, Current, and Resistance Affect the Fuel Gauge
How do voltage, current, and resistance affect the fuel gauge system?
- Voltage: Voltage is the electrical potential that drives the current through the circuit. The fuel gauge needs a stable voltage supply (usually 12 volts) to operate correctly.
- Current: Current is the flow of electrical charge. The fuel gauge system relies on current flowing through the sending unit and the gauge itself.
- Resistance: Resistance is the opposition to the flow of current. The fuel tank sending unit uses a variable resistor (rheostat) to change the resistance based on the fuel level. The fuel gauge interprets this resistance to display the fuel level.
Understanding these basic electrical principles can help you troubleshoot fuel gauge problems more effectively.
20. Fuel Gauge Calibration: Is It Possible and How Is It Done?
Can you calibrate a fuel gauge, and how is it done?
In some cases, it may be possible to calibrate a fuel gauge, but the process can be complex and may require specialized equipment. Calibration typically involves adjusting the fuel gauge to match the resistance signal from the sending unit. This may involve:
- Adjusting the Gauge Needle: Some fuel gauges have an adjustment screw that allows you to manually adjust the position of the needle.
- Using a Scan Tool: Some scan tools have the ability to calibrate the fuel gauge through the vehicle’s computer system.
- Replacing the Gauge or Sending Unit: If the fuel gauge is severely out of calibration, it may be necessary to replace the gauge or sending unit.
Consult your vehicle’s repair manual or a professional technician for specific instructions on calibrating the fuel gauge.
21. Addressing Wiring Harness Issues: Repairing Damaged Wires
How do you repair damaged wires in the fuel gauge system?
Repairing damaged wires in the fuel gauge system involves these steps:
- Safety First: Disconnect the negative battery cable.
- Identify the Damaged Wire: Locate the damaged section of the wire.
- Cut Out the Damaged Section: Use wire cutters to cut out the damaged section of the wire.
- Strip the Wire Ends: Use wire strippers to strip the insulation from the ends of the wire.
- Connect the Wires: Use a wire connector or solder to connect the wires together.
- Insulate the Connection: Use electrical tape or heat shrink tubing to insulate the connection.
- Test the Repair: Reconnect the battery and test the fuel gauge to ensure the repair was successful.
Proper wiring repair is essential for reliable fuel gauge operation, and CARDIAGTECH.NET provides the tools and resources you need to do the job right.
22. The Impact of Ethanol Fuel: How It Affects Fuel Gauges
How does ethanol fuel affect fuel gauges and fuel system components?
Ethanol fuel can have several effects on fuel gauges and fuel system components:
- Corrosion: Ethanol can corrode certain metal and rubber components in the fuel system, especially in older vehicles that were not designed to run on ethanol fuel.
- Water Absorption: Ethanol can absorb water from the atmosphere, which can lead to phase separation and corrosion.
- Fuel Gauge Inaccuracy: In some cases, ethanol fuel can cause the fuel gauge to read inaccurately.
To mitigate these effects, use high-quality fuel, consider using fuel additives designed to protect against ethanol corrosion, and regularly inspect your fuel system for any signs of damage.
23. Using Aftermarket Gauges: Benefits and Installation Tips
What are the benefits of using aftermarket fuel gauges, and what are some installation tips?
Aftermarket fuel gauges can offer several benefits:
- Improved Accuracy: Some aftermarket gauges are more accurate than the factory gauge.
- Customization: Aftermarket gauges allow you to customize the look of your dashboard.
- Additional Features: Some aftermarket gauges offer additional features, such as low fuel warnings or digital displays.
Installation Tips:
- Follow the Instructions: Carefully follow the instructions that come with the gauge.
- Use the Correct Wiring: Use the correct wiring and connectors for the gauge.
- Ground Properly: Ensure the gauge is properly grounded.
- Calibrate the Gauge: Calibrate the gauge according to the manufacturer’s instructions.
CARDIAGTECH.NET offers a wide selection of aftermarket gauges and accessories to meet your needs.
24. Vehicle-Specific Issues: Common Problems by Make and Model
Are there common fuel gauge problems specific to certain makes and models of vehicles?
Yes, certain makes and models of vehicles are known to have specific fuel gauge problems. For example:
- GM Trucks: Some GM trucks are known to have issues with the fuel tank sending unit.
- Ford Mustangs: Some Ford Mustangs are known to have issues with the fuel gauge wiring.
- Jeep Wranglers: Some Jeep Wranglers are known to have issues with the fuel gauge float.
Researching vehicle-specific issues can help you diagnose the problem more quickly.
25. Exploring Fuel Gauge Technology: From Analog to Digital
How has fuel gauge technology evolved from analog to digital?
Fuel gauge technology has evolved significantly over the years:
- Analog Gauges: Traditional analog gauges use a needle that moves across a scale to indicate the fuel level.
- Digital Gauges: Digital gauges use electronic sensors and displays to provide a more precise reading of the fuel level.
Digital gauges offer several advantages over analog gauges, including improved accuracy, additional features, and easier calibration.
26. Fuel Gauge Resistors: Importance and Function
Why are fuel gauge resistors important and what are their functions?
Fuel gauge resistors, specifically the variable resistor or rheostat in the sending unit, are crucial for the fuel gauge system to function. The fuel tank sending unit uses a variable resistor (rheostat) to change the resistance based on the fuel level. The fuel gauge interprets this resistance to display the fuel level.
The float in the fuel tank moves up and down with the fuel level, changing the position of the rheostat. This alters the electrical resistance in the circuit, which the fuel gauge reads and translates into a fuel level reading.
27. Compatibility of Sending Units: Matching the Right Unit to Your Car
How important is it to ensure sending unit compatibility when replacing one?
Ensuring sending unit compatibility is extremely important when replacing one. Using the wrong sending unit can lead to inaccurate fuel gauge readings or even damage the fuel system.
- Resistance Range: The sending unit must have the same resistance range as the original unit.
- Fuel Tank Depth: The sending unit must be designed for the correct fuel tank depth.
- Connector Type: The sending unit must have the correct connector type for your vehicle’s wiring harness.
Always consult your vehicle’s repair manual or a professional technician to ensure you are using the correct sending unit.
28. Clearing Fuel Gauge Codes: Using OBD-II Scanners
How can OBD-II scanners help in diagnosing and clearing fuel gauge-related codes?
OBD-II scanners can be very helpful in diagnosing fuel gauge-related problems:
- Reading Codes: The scanner can read diagnostic trouble codes (DTCs) related to the fuel system and instrument cluster, providing valuable clues about the problem.
- Clearing Codes: Once you have fixed the problem, you can use the scanner to clear the DTCs.
- Live Data: Some scanners can display live data from the fuel system, allowing you to monitor the fuel level, fuel pressure, and other parameters in real-time.
Consult your vehicle’s repair manual or a professional technician for specific instructions on using an OBD-II scanner.
29. Fuel Gauge Dampening: Reducing Needle Fluctuation
What is fuel gauge dampening and how does it affect the fuel gauge reading?
Fuel gauge dampening is a feature that reduces the fluctuation of the fuel gauge needle, providing a more stable and accurate reading. Fuel sloshing around in the tank can cause the float to move erratically, which can cause the fuel gauge needle to fluctuate.
Fuel gauge dampening uses a variety of methods to smooth out the readings, such as using a viscous fluid in the gauge mechanism or using electronic filtering to smooth the signal.
30. The Importance of a Good Ground Connection: Ensuring Accuracy
Why is a good ground connection crucial for an accurate fuel gauge reading?
A good ground connection is crucial for an accurate fuel gauge reading:
- Stable Voltage: A good ground connection provides a stable voltage reference for the fuel gauge system.
- Accurate Signal: A poor ground connection can cause voltage drops and signal distortion, which can lead to inaccurate fuel gauge readings.
- Preventing Damage: A poor ground connection can cause electrical damage to the fuel gauge and other components.
Ensure all ground connections in the fuel gauge system are clean, tight, and free of corrosion.
By following this comprehensive guide from CARDIAGTECH.NET, you can effectively troubleshoot and fix fuel gauge issues in your car, ensuring you’re always aware of your fuel level and avoid unexpected stops. Contact us at 276 Reock St, City of Orange, NJ 07050, United States, Whatsapp: +1 (641) 206-8880, or visit CARDIAGTECH.NET for expert advice and quality automotive tools to keep your vehicle running smoothly. Don’t let a faulty fuel gauge leave you stranded – take control with CARDIAGTECH.NET today.
FAQ: Fuel Gauge Troubleshooting
1. Why is my fuel gauge always reading empty?
A faulty sending unit, broken wiring, or a blown fuse could cause your fuel gauge to always read empty. Start by checking the fuse, then inspect the wiring and sending unit.
2. What does it mean when my fuel gauge always reads full?
Shorted wiring or a faulty sending unit can cause the fuel gauge to always read full. Check the wiring for shorts and inspect the sending unit for damage.
3. How do I check the fuel gauge fuse?
Locate the fuse box (usually under the dashboard or in the engine compartment), find the fuel gauge fuse (check your owner’s manual), and inspect it for a broken wire or burned appearance. Replace it if it’s blown.
4. Can a bad fuel pump affect my fuel gauge reading?
Yes, a faulty fuel pump can affect the fuel gauge reading. If the pump is not providing adequate pressure, the engine may not run properly, and the fuel gauge may display inaccurate readings. Check the fuel pressure and listen for the fuel pump priming when you turn the key.
5. How do I test my fuel tank sending unit with a multimeter?
Set your multimeter to ohms (Ω), connect the probes to the sending unit terminals, and move the float arm up and down. The resistance reading should change smoothly. If it doesn’t, the sending unit is likely faulty.
6. Is it safe to drop the fuel tank to access the sending unit?
Dropping the fuel tank can be safe if done properly. Disconnect the negative battery cable, reduce the fuel level as much as possible, support the tank with a jack, and disconnect any hoses and wiring carefully. Work in a well-ventilated area and avoid any open flames.
7. How much does it cost to replace a fuel tank sending unit?
The cost can vary, but DIY replacement parts range from $50-$200. Professional repair can range from $200 to $600 or more, including labor.
8. What are the signs of a bad fuel gauge?
Inaccurate readings, erratic movement, or the gauge always reading empty or full are signs of a bad fuel gauge.
9. Can I calibrate my fuel gauge myself?
In some cases, it may be possible to calibrate a fuel gauge, but the process can be complex and may require specialized equipment.
10. How important is a good ground connection for my fuel gauge?
A good ground connection is crucial for an accurate fuel gauge reading. Ensure all ground connections in the fuel gauge system are clean, tight, and free of corrosion.
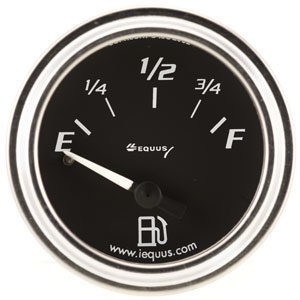
Fuel gauge showing empty
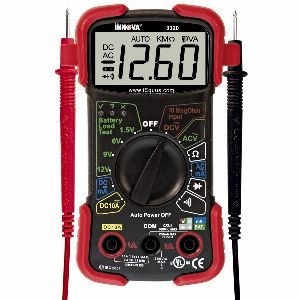 Digital multimeter for testing electrical components