**How Do You Fix Paint Chips On Car Professionally**
Are you tired of seeing unsightly paint chips on your car diminishing its beauty? At CARDIAGTECH.NET, we understand the frustration and offer solutions to restore your vehicle’s flawless finish and stop further damage. Discover the best methods for automotive paint repair and keep your car looking its best.
1. Understanding Car Paint Chips And Their Causes
Car paint chips are small areas of damaged paint, typically caused by flying road debris such as rocks, gravel, and salt. These chips expose the underlying metal, potentially leading to rust and further deterioration if not addressed promptly. Knowing the primary causes helps vehicle owners take preventive measures to minimize future damage.
- Road Debris: Small rocks and gravel kicked up by other vehicles.
- Weather Conditions: Salt and grit used during winter months to de-ice roads.
- Construction Zones: Loose materials from construction sites can damage vehicle paint.
- Driving Habits: Driving too closely behind other vehicles increases the risk of impact from flying debris.
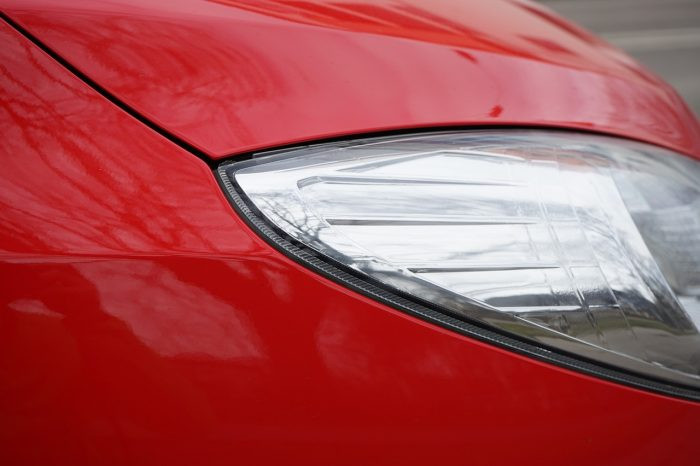
Car paint chip damage close-up
2. Identifying The Severity Of Paint Chips
Before attempting any repair, assess the severity of the paint chip. Minor chips involve only the clear coat or top layer of paint, while severe chips expose the bare metal. Different levels of damage require different repair approaches and tools.
2.1. Minor Paint Chips
- Appearance: Small, shallow marks that don’t reach the metal.
- Repair: Often fixable with touch-up paint and basic tools.
- Risk: Primarily aesthetic, with a low risk of immediate rust.
2.2. Moderate Paint Chips
- Appearance: Chips that penetrate through the paint layers but have minimal exposed metal.
- Repair: Requires more careful application of primer, paint, and clear coat.
- Risk: Moderate chance of rust if not properly sealed.
2.3. Severe Paint Chips
- Appearance: Deep chips that expose bare metal, often with jagged edges.
- Repair: Demands thorough rust removal, priming, painting, and clear coating.
- Risk: High risk of rust and structural damage if left untreated.
3. Essential Tools And Materials For Diy Paint Chip Repair
To effectively fix paint chips on your car, gather the necessary tools and materials. Investing in quality supplies ensures a professional-looking repair and long-lasting results. CARDIAGTECH.NET offers a wide range of tools perfect for this task.
3.1. Cleaning Supplies
- Automotive Soap: To clean the area around the chip.
- Wax and Grease Remover: To eliminate any residues that could prevent paint adhesion.
- Rubbing Alcohol: To ensure a clean surface for painting.
3.2. Sanding Tools
- Fine-Grit Sandpaper (2000-3000 grit): For smoothing rough edges and blending the repair.
- Sanding Block: To provide even pressure and prevent over-sanding.
3.3. Application Tools
- Touch-Up Paint: Matching your car’s exact color code.
- Primer: To create a bonding layer for the paint.
- Clear Coat: To protect the paint and provide a glossy finish.
- Fine-Tipped Applicator Brush: For precise paint application.
- Microfiber Cloths: For wiping and polishing.
3.4. Safety Gear
- Gloves: To protect your hands from chemicals.
- Mask: To avoid inhaling paint fumes.
- Eye Protection: To prevent debris from entering your eyes.
4. Step-By-Step Guide To Fixing Minor Paint Chips
Follow these steps to repair minor paint chips and restore your car’s appearance. This method is suitable for small chips that haven’t exposed bare metal.
4.1. Cleaning The Affected Area
Thoroughly clean the area around the paint chip with automotive soap and water. Remove any wax or grease with a wax and grease remover. Finally, wipe the area with rubbing alcohol and let it dry completely.
4.2. Sanding The Edges
Use fine-grit sandpaper (2000-3000 grit) to gently smooth any rough edges around the chip. Be careful not to scratch the surrounding paint. A sanding block can help maintain even pressure.
4.3. Applying Primer
Apply a thin layer of primer to the chip using a fine-tipped applicator brush. Let it dry according to the manufacturer’s instructions. Primer helps the paint adhere properly.
4.4. Applying Touch-Up Paint
Apply thin, even layers of touch-up paint to the chip, allowing each layer to dry before applying the next. Use a fine-tipped brush for precision. Try to match the paint level with the surrounding surface.
4.5. Applying Clear Coat
Once the paint is completely dry, apply a thin layer of clear coat to protect the paint and provide a glossy finish. Let it dry according to the manufacturer’s instructions.
4.6. Blending And Polishing
After the clear coat is dry, use a polishing compound and a microfiber cloth to blend the repaired area with the surrounding paint. This will smooth out any imperfections and create a seamless finish.
5. Addressing Moderate Paint Chips: A Detailed Approach
For moderate paint chips, which penetrate deeper into the paint layers, a more detailed approach is necessary to ensure a durable and aesthetically pleasing repair.
5.1. Preparing The Surface
Begin by thoroughly cleaning the area with automotive soap and water, followed by a wax and grease remover. Use rubbing alcohol to eliminate any remaining residues. Allow the area to dry completely.
5.2. Rust Removal (If Necessary)
If there’s any rust present, use a rust remover or a small wire brush to carefully eliminate it. Ensure the surface is clean and dry before proceeding.
5.3. Sanding The Area
Use a medium-grit sandpaper (800-1000 grit) to gently sand the edges of the chip and create a smooth transition. Follow with fine-grit sandpaper (2000-3000 grit) to refine the surface.
5.4. Applying Primer
Apply two thin layers of primer, allowing each layer to dry completely before applying the next. Primer ensures proper paint adhesion and corrosion protection.
5.5. Applying Touch-Up Paint
Apply multiple thin layers of touch-up paint, allowing each layer to dry. This step may require several coats to build up the paint to the level of the surrounding surface.
5.6. Wet Sanding
After the paint is fully dry, wet sand the area with 3000-grit sandpaper to level the repair. Use water as a lubricant and apply gentle pressure.
5.7. Applying Clear Coat
Apply two layers of clear coat to protect the paint and provide a glossy finish. Allow each layer to dry completely.
5.8. Polishing And Buffing
Use a polishing compound and a microfiber cloth to polish the repaired area. Follow with a buffing compound for a high-gloss finish. This step is crucial for blending the repair seamlessly with the surrounding paint.
6. Repairing Severe Paint Chips: A Professional-Level Guide
Severe paint chips that expose bare metal require a more extensive repair process to prevent rust and ensure a long-lasting finish.
6.1. Comprehensive Cleaning
Thoroughly clean the area with automotive soap and water, followed by a wax and grease remover. Use rubbing alcohol to eliminate any remaining residues. Ensure the area is completely dry.
6.2. Rust Treatment
If rust is present, use a rust converter or a wire brush to thoroughly remove it. Apply a rust inhibitor to prevent future corrosion.
6.3. Filling The Chip
For deep chips, use a body filler or spot putty to fill the void. Apply the filler in thin layers, allowing each layer to dry before applying the next. Overfill slightly to allow for sanding.
6.4. Sanding The Filler
Use coarse-grit sandpaper (400-600 grit) to sand down the filler to the level of the surrounding surface. Follow with medium-grit (800-1000 grit) and fine-grit (2000-3000 grit) sandpaper for a smooth finish.
6.5. Priming The Area
Apply two to three thin layers of primer, allowing each layer to dry completely. Primer creates a uniform surface for paint adhesion.
6.6. Painting The Area
Apply multiple thin layers of touch-up paint, allowing each layer to dry completely. Blend the paint into the surrounding area for a seamless transition.
6.7. Clear Coating
Apply two to three layers of clear coat, allowing each layer to dry completely. Clear coat protects the paint and provides a glossy, durable finish.
6.8. Wet Sanding And Polishing
Wet sand the area with 3000-grit sandpaper to level any imperfections. Use a polishing compound and a microfiber cloth to polish the repaired area to a high gloss. Finish with a wax for added protection.
7. Advanced Techniques For Seamless Paint Blending
Achieving a seamless paint blend requires advanced techniques and attention to detail. These tips will help you blend the repaired area with the surrounding paint for a professional-looking finish.
7.1. Feathering The Edges
When applying primer, paint, and clear coat, feather the edges by gradually reducing the amount of product applied towards the outer edges. This creates a soft transition and prevents hard lines.
7.2. Using Blending Solvents
Blending solvents can help melt the new paint into the existing paint, creating a seamless transition. Apply the solvent sparingly to the edges of the repaired area.
7.3. Color Matching
Ensure the touch-up paint matches your car’s exact color code. Variations in color can make the repair noticeable. CARDIAGTECH.NET can assist in finding the perfect color match for your vehicle.
7.4. Polishing Compounds
Use a range of polishing compounds, from coarse to fine, to gradually refine the surface and achieve a high-gloss finish. This step is essential for removing imperfections and blending the repair.
7.5. Buffing Techniques
Use a power buffer with a soft foam pad to buff the repaired area. Apply gentle pressure and work in small sections to avoid overheating the paint.
8. Preventing Future Paint Chips
Prevention is key to maintaining your car’s paint and preventing future chips. Consider these strategies to protect your vehicle.
8.1. Paint Protection Film (Ppf)
Apply a clear paint protection film to vulnerable areas such as the hood, bumper, and fenders. PPF provides a durable barrier against road debris.
8.2. Mud Flaps
Install mud flaps behind the wheels to reduce the amount of debris kicked up onto the car.
8.3. Safe Driving Habits
Maintain a safe following distance to reduce the risk of impact from flying debris. Avoid driving on gravel roads whenever possible.
8.4. Regular Washing And Waxing
Regularly wash and wax your car to protect the paint and maintain its shine. Wax provides a protective layer against minor scratches and chips.
8.5. Ceramic Coatings
Consider applying a ceramic coating to your car’s paint. Ceramic coatings provide a hard, durable layer of protection against scratches, chips, and environmental contaminants.
9. When To Seek Professional Help
While DIY repairs can be effective for minor to moderate paint chips, certain situations warrant professional assistance.
9.1. Extensive Damage
If your car has numerous or large paint chips, professional repair services can provide a more comprehensive and seamless restoration.
9.2. Rust Issues
If rust is present, professional rust removal and treatment are essential to prevent further corrosion.
9.3. Color Matching Difficulties
Achieving an exact color match can be challenging. Professionals have the tools and expertise to ensure a perfect match.
9.4. Lack Of Experience
If you’re uncomfortable performing DIY repairs, seeking professional help can save time and ensure a high-quality result.
9.5. Advanced Techniques Required
For seamless blending and professional-level finishes, professional technicians have the skills and equipment necessary.
10. Cost-Effective Solutions For Paint Chip Repair
Repairing paint chips doesn’t have to break the bank. Explore these cost-effective solutions to keep your car looking its best without overspending.
10.1. Diy Repair Kits
DIY paint chip repair kits are an affordable option for minor damage. These kits typically include touch-up paint, primer, and applicators.
10.2. Local Auto Parts Stores
Purchase individual supplies from local auto parts stores to customize your repair kit and save money.
10.3. Mobile Repair Services
Mobile repair services offer convenient and affordable paint chip repairs at your home or office.
10.4. Comparing Quotes
Obtain quotes from multiple repair shops to ensure you’re getting the best price for professional services.
10.5. Preventive Measures
Investing in preventive measures such as paint protection film can save money on future repairs.
11. Maintaining Your Car’s Paint After Repair
Once you’ve repaired the paint chips, proper maintenance is essential to keep your car looking its best.
11.1. Regular Washing
Wash your car regularly to remove dirt, grime, and contaminants that can damage the paint.
11.2. Waxing
Apply wax every three to six months to protect the paint and maintain its shine.
11.3. Promptly Addressing New Chips
Address new paint chips promptly to prevent rust and further damage.
11.4. Avoiding Harsh Chemicals
Avoid using harsh chemicals or abrasive cleaners that can damage the paint.
11.5. Proper Storage
When possible, store your car in a garage or under a car cover to protect it from the elements.
12. Understanding Car Paint Codes For Perfect Matches
Finding the exact paint code for your car is crucial for achieving a seamless repair. Here’s how to locate your car’s paint code:
12.1. Vehicle Identification Plate
The paint code is typically located on the vehicle identification plate, which can be found in the driver’s side door jamb, under the hood, or in the glove compartment.
12.2. Owner’s Manual
The paint code may also be listed in your car’s owner’s manual.
12.3. Online Resources
Use online resources or VIN decoders to look up your car’s paint code based on its vehicle identification number (VIN).
12.4. Dealership
Contact your local car dealership with your VIN to obtain the correct paint code.
12.5. Professional Assistance
CARDIAGTECH.NET can help you identify your car’s paint code and supply the matching touch-up paint.
13. The Role Of Primers In Paint Chip Repair
Primers play a critical role in paint chip repair by providing a bonding layer between the bare surface and the paint.
13.1. Adhesion
Primers improve the adhesion of paint to the surface, ensuring a long-lasting repair.
13.2. Corrosion Protection
Primers provide a barrier against rust and corrosion, protecting the underlying metal.
13.3. Smoothing
Primers fill in minor imperfections and create a smooth, uniform surface for painting.
13.4. Color Uniformity
Primers ensure consistent color by creating a neutral base for the paint.
13.5. Types Of Primers
Choose the right type of primer for your repair, such as etch primer for bare metal or filler primer for filling imperfections.
14. Clear Coats: Protecting And Enhancing Your Repair
Clear coats are essential for protecting the paint and providing a glossy finish.
14.1. Protection
Clear coats protect the paint from UV rays, scratches, and environmental contaminants.
14.2. Gloss
Clear coats provide a high-gloss finish that enhances the appearance of the repair.
14.3. Durability
Clear coats add durability to the paint, making it more resistant to wear and tear.
14.4. Types Of Clear Coats
Choose the right type of clear coat for your repair, such as single-stage or two-stage clear coats.
14.5. Application Techniques
Apply clear coats in thin, even layers, allowing each layer to dry completely before applying the next.
15. Evaluating Paint Chip Repair Kits: What To Look For
When choosing a paint chip repair kit, consider these factors to ensure you’re getting a high-quality product.
15.1. Color Matching
Ensure the kit includes touch-up paint that matches your car’s exact color code.
15.2. Quality Of Materials
Look for kits that include high-quality primers, paints, and clear coats.
15.3. Applicators
Check for fine-tipped applicators that allow for precise paint application.
15.4. Instructions
Ensure the kit includes clear, detailed instructions.
15.5. Customer Reviews
Read customer reviews to gauge the effectiveness of the kit.
16. How Weather Affects Paint Chip Repair
Weather conditions can significantly impact the outcome of your paint chip repair.
16.1. Temperature
Perform repairs in moderate temperatures (65-75°F) for optimal paint adhesion and drying.
16.2. Humidity
Avoid performing repairs in high humidity, as moisture can affect paint adhesion and drying.
16.3. Sunlight
Avoid direct sunlight, as it can cause the paint to dry too quickly and result in imperfections.
16.4. Wind
Perform repairs in a sheltered area to prevent dust and debris from contaminating the paint.
16.5. Precipitation
Avoid performing repairs when rain or snow is expected, as moisture can damage the finish.
17. Enhancing Your Car’s Value Through Paint Maintenance
Maintaining your car’s paint not only improves its appearance but also enhances its resale value.
17.1. First Impressions
A well-maintained exterior creates a positive first impression for potential buyers.
17.2. Preventing Rust
Addressing paint chips promptly prevents rust and corrosion, which can significantly devalue your car.
17.3. Detailing
Regular detailing, including paint correction and protection, can keep your car looking its best and maintain its value.
17.4. Documentation
Keep records of all paint maintenance and repairs to demonstrate your commitment to preserving the car’s condition.
17.5. Professional Appraisals
Obtain professional appraisals to assess the value of your car and identify any areas that need attention.
18. Eco-Friendly Paint Repair Options
Consider these eco-friendly paint repair options to minimize your environmental impact.
18.1. Water-Based Paints
Use water-based paints, which have lower VOC emissions than solvent-based paints.
18.2. Recycled Materials
Choose repair products made from recycled materials whenever possible.
18.3. Proper Disposal
Dispose of waste materials, such as paint cans and sandpaper, properly.
18.4. Minimizing Waste
Use only the amount of product needed to minimize waste.
18.5. Sustainable Practices
Support repair shops that follow sustainable practices, such as using energy-efficient equipment and recycling materials.
19. Case Studies: Successful Paint Chip Repairs
Learn from these real-life case studies of successful paint chip repairs.
19.1. Minor Chip Repair
A car owner successfully repaired a minor paint chip using a DIY repair kit, following the manufacturer’s instructions carefully.
19.2. Moderate Chip Repair
A car enthusiast repaired a moderate paint chip by sanding, priming, painting, and clear coating, achieving a seamless finish.
19.3. Severe Chip Repair
A professional technician repaired a severe paint chip by removing rust, filling the chip, sanding, priming, painting, and clear coating, restoring the car’s appearance.
19.4. Preventive Measures
A car owner applied paint protection film to vulnerable areas, preventing future paint chips.
19.5. Eco-Friendly Repair
A repair shop used water-based paints and recycled materials for an eco-friendly paint repair.
20. Finding The Right Automotive Tools At CARDIAGTECH.NET
At CARDIAGTECH.NET, we offer a wide range of automotive tools and supplies to help you with your paint chip repair needs. From cleaning supplies and sanding tools to applicators and safety gear, we have everything you need to achieve a professional-looking finish.
20.1. Quality Products
We offer only the highest quality products from trusted brands.
20.2. Expert Advice
Our team of experts can provide advice and guidance to help you choose the right tools for your repair.
20.3. Competitive Prices
We offer competitive prices to ensure you’re getting the best value for your money.
20.4. Convenient Shopping
Shop online or visit our store for a convenient shopping experience.
20.5. Customer Satisfaction
We are committed to customer satisfaction and strive to exceed your expectations.
Don’t let paint chips detract from your car’s appearance. With the right tools and techniques, you can restore your vehicle’s flawless finish and keep it looking its best. Visit CARDIAGTECH.NET today to find the automotive tools you need for successful paint chip repair.
Is your car plagued by unsightly paint chips? Do you find yourself constantly battling new blemishes? Don’t despair! CARDIAGTECH.NET offers expert guidance and top-quality tools to help you achieve a flawless finish. Whether you’re a seasoned DIY enthusiast or just starting out, we have the solutions you need to restore your car’s beauty.
- Ready to take action? Contact CARDIAGTECH.NET at 276 Reock St, City of Orange, NJ 07050, United States, or reach out via WhatsApp at +1 (641) 206-8880. Explore our website at CARDIAGTECH.NET for a complete selection of automotive tools. Let us help you protect your investment and keep your car looking its best. Act now and discover the difference CARDIAGTECH.NET can make!
Frequently Asked Questions (FAQ)
1. Can I use regular household paint for touch-ups?
No, household paint is not designed for automotive use. It lacks the durability and UV protection needed for car exteriors. Always use automotive-specific touch-up paint.
2. How do I find the exact paint code for my car?
The paint code is typically located on the vehicle identification plate, in the owner’s manual, or can be obtained from a dealership using your VIN.
3. What is the best way to clean the area before applying touch-up paint?
Use automotive soap and water, followed by a wax and grease remover, and finish with rubbing alcohol for a clean surface.
4. How many layers of touch-up paint should I apply?
Apply thin, even layers, allowing each layer to dry before applying the next. Multiple thin layers are better than one thick layer.
5. What is the purpose of clear coat?
Clear coat protects the paint from UV rays, scratches, and environmental contaminants, while providing a glossy finish.
6. Can I repair paint chips in cold weather?
It is best to perform repairs in moderate temperatures (65-75°F) for optimal paint adhesion and drying.
7. How can I prevent rust from forming in paint chips?
Remove any existing rust, apply a rust converter or inhibitor, and ensure the area is properly sealed with primer and paint.
8. What is paint protection film (PPF)?
PPF is a clear plastic film applied to vulnerable areas of the car to protect against road debris and scratches.
9. How often should I wax my car?
Wax your car every three to six months to protect the paint and maintain its shine.
10. When should I seek professional help for paint chip repair?
Seek professional help for extensive damage, rust issues, color matching difficulties, or if you lack experience with DIY repairs.