How To Fix Cracked Leather Seats In Car

Cracked leather seats in your car can be unsightly and uncomfortable. With the right tools and techniques, however, restoring your vehicle’s interior to its former glory is achievable. CARDIAGTECH.NET offers a wide range of automotive repair tools to help you tackle this project effectively. Learn professional methods for leather repair, conditioning, and restoration to maintain the value and appeal of your car, addressing common problems such as dryness, cracking, and wear, and extending the life of your leather upholstery.
1. Understanding Leather Damage in Car Seats
Leather car seats, while luxurious, are susceptible to damage from various factors. Understanding these causes is the first step in preventing and fixing cracked leather.
- Sun Exposure: Ultraviolet (UV) rays from the sun can dry out the leather, causing it to crack and fade over time, according to a study by the Society of Automotive Engineers (SAE).
- Temperature Fluctuations: Extreme heat and cold can cause the leather to expand and contract, leading to cracks. A report by the National Highway Traffic Safety Administration (NHTSA) highlights the impact of environmental factors on vehicle interiors.
- Lack of Maintenance: Neglecting regular cleaning and conditioning can cause leather to dry out and crack. The Leather Research Laboratory emphasizes the importance of proper leather care.
- Usage: Constant use of the seats leads to wear and tear. Friction from clothes and body weight can cause the leather to crack over time.
1.1. Types of Leather Cracks
Identifying the type of crack is crucial for selecting the appropriate repair method.
- Surface Cracks: These are small, hairline cracks on the surface of the leather. They are often caused by dryness and lack of maintenance.
- Deep Cracks: These cracks penetrate deeper into the leather and are more noticeable. They are usually caused by prolonged neglect and exposure to harsh conditions.
- Tears: Tears are significant rips in the leather, often caused by sharp objects or excessive stress.
- Fading and Discoloration: While not cracks, fading and discoloration can accompany cracking, making the seats look older and more worn.
2. Essential Tools and Materials for Leather Repair
To effectively fix cracked leather seats, gathering the right tools and materials is essential. Here’s a comprehensive list:
- Leather Cleaner: A specialized leather cleaner is necessary to remove dirt, oil, and grime without damaging the leather. Products like Lexol Leather Cleaner are highly recommended.
- Leather Conditioner: Leather conditioner moisturizes the leather and prevents it from drying out and cracking. Brands like Leather Honey are known for their effectiveness.
- Soft Microfiber Cloths: These are used for cleaning and applying conditioner without scratching the leather.
- Leather Repair Kit: These kits typically include leather filler, colorant, and sealant. Leather Magic is a popular brand that offers custom-matched colors.
- 220-Grit Sandpaper: Used for smoothing out the damaged areas before applying filler.
- Putty Knife or Spreader: For applying the leather filler evenly.
- Heat Gun or Hair Dryer: To speed up the drying process of the filler and colorant.
- Scissors or Razor Blade: For trimming excess material when patching tears.
- Linen Subpatch Material: Used for reinforcing tears and holes from the inside.
- Leather Glue: To secure the subpatch material to the underside of the leather.
- Color Matching Kit: If your repair kit doesn’t include a custom-matched color, you’ll need a color matching kit to blend the colorant to the exact shade of your leather.
- Safety Equipment: Gloves and a mask to protect your skin and respiratory system from chemicals.
2.1. Choosing the Right Leather Repair Kit
Selecting the appropriate repair kit is crucial for achieving the best results.
- Custom Color Matching: Ensure the kit offers custom color matching to seamlessly blend the repair with the original leather. Leather Magic provides excellent color matching services.
- Comprehensive Kit Contents: The kit should include all necessary materials, such as leather cleaner, conditioner, filler, colorant, and sealant.
- Quality of Materials: Opt for kits that use high-quality materials to ensure durability and a professional finish.
- User Reviews: Check online reviews to gauge the effectiveness and ease of use of the kit.
3. Step-by-Step Guide to Fixing Cracked Leather Seats
Follow these detailed steps to repair cracked leather seats effectively.
3.1. Cleaning the Leather
- Preparation: Wear gloves and work in a well-ventilated area.
- Application: Apply a small amount of leather cleaner to a microfiber cloth.
- Cleaning: Gently wipe the leather surface in a circular motion to remove dirt and grime.
- Drying: Use a clean, dry microfiber cloth to wipe off any excess cleaner and allow the leather to air dry completely.
3.2. Sanding the Damaged Areas
- Preparation: Use 220-grit sandpaper.
- Sanding: Gently sand the cracked areas to smooth out the surface. Be careful not to apply too much pressure, as this can damage the leather further.
- Cleaning: Use a clean microfiber cloth to remove any sanding dust.
3.3. Applying Leather Filler
- Application: Use a putty knife or spreader to apply a thin layer of leather filler to the cracked areas.
- Smoothing: Smooth out the filler to create an even surface.
- Drying: Allow the filler to dry completely. Use a heat gun or hair dryer on a low setting to speed up the drying process.
- Sanding (Optional): If necessary, lightly sand the dried filler to achieve a smooth finish.
- Repeat: Apply additional layers of filler as needed, allowing each layer to dry before applying the next.
applying leather filler
Alt: Applying leather filler to a car seat tear with a putty knife.
3.4. Color Matching and Application
- Color Matching: If your repair kit doesn’t include a custom-matched color, use a color matching kit to blend the colorant to the exact shade of your leather.
- Application: Apply the colorant to the repaired areas using a soft cloth or sponge.
- Layering: Apply several thin layers of colorant, allowing each layer to dry before applying the next.
- Drying: Use a heat gun or hair dryer on a low setting to speed up the drying process.
3.5. Applying Leather Conditioner
- Application: Apply a small amount of leather conditioner to a clean microfiber cloth.
- Conditioning: Gently massage the conditioner into the leather in a circular motion.
- Absorption: Allow the conditioner to absorb into the leather for at least 24 hours.
- Buffing: Use a clean, dry microfiber cloth to buff the leather and remove any excess conditioner.
3.6. Repairing Tears and Holes
- Preparation: Clean the area around the tear or hole.
- Subpatch Application: Cut a piece of linen subpatch material slightly larger than the tear or hole.
- Gluing: Apply leather glue to the edges of the subpatch and attach it to the underside of the leather, covering the tear or hole.
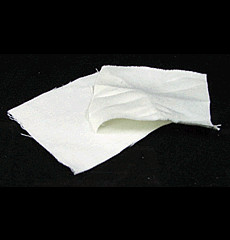 Linen Subpatch Material
Alt: Close-up of linen subpatch material used to reinforce leather repairs.
- Filling: Fill the tear or hole with leather filler, following the steps outlined above.
- Coloring and Conditioning: Apply colorant and conditioner as needed to blend the repair with the surrounding leather.
3.7. Final Touches and Sealing
- Sealing: Apply a leather sealant to protect the repaired areas from future damage.
- Drying: Allow the sealant to dry completely.
- Inspection: Inspect the repaired areas to ensure a seamless finish.
4. Maintaining Leather Seats to Prevent Cracking
Preventive maintenance is crucial for keeping your leather seats in top condition and avoiding future cracks.
4.1. Regular Cleaning
- Frequency: Clean your leather seats every 1-3 months, depending on usage and environmental conditions.
- Products: Use a mild leather cleaner specifically designed for automotive interiors.
- Technique: Gently wipe the seats with a soft microfiber cloth, paying attention to areas that accumulate dirt and grime.
4.2. Conditioning
- Frequency: Apply leather conditioner every 3-6 months to keep the leather moisturized and prevent it from drying out.
- Products: Choose a high-quality leather conditioner that nourishes and protects the leather.
- Application: Apply the conditioner evenly and allow it to absorb into the leather before buffing.
4.3. Protecting from Sunlight
- Parking: Park your car in the shade whenever possible to minimize exposure to direct sunlight.
- Window Tinting: Consider installing window tinting to block UV rays and protect your car’s interior.
- Seat Covers: Use seat covers to protect the leather from sunlight and wear.
4.4. Avoiding Harsh Chemicals
- Cleaning Products: Avoid using harsh chemicals or abrasive cleaners, as these can damage the leather.
- Spills: Clean up spills immediately to prevent staining and damage.
- Professional Cleaning: Consider professional leather cleaning services for thorough maintenance.
5. Common Mistakes to Avoid
When repairing cracked leather seats, avoid these common mistakes to ensure a successful outcome:
- Using the Wrong Products: Always use products specifically designed for leather car seats. Household cleaners can damage the leather.
- Applying Too Much Filler: Applying too much filler at once can result in an uneven finish. Apply thin layers and allow each layer to dry before applying the next.
- Skipping the Cleaning Step: Cleaning the leather before repairing it is essential to remove dirt and grime that can interfere with the repair process.
- Not Matching the Color Properly: Ensure the colorant matches the original leather color to achieve a seamless repair.
- Rushing the Process: Take your time and follow each step carefully to ensure a professional finish.
6. Advanced Repair Techniques
For more severe damage, consider these advanced repair techniques:
6.1. Professional Leather Repair Services
When dealing with extensive damage, hiring a professional leather repair service is often the best option. Professionals have the expertise and tools to restore leather seats to their original condition.
6.2. Replacing Leather Panels
If the damage is beyond repair, consider replacing the damaged leather panels. This involves removing the old leather and installing new leather that matches the original upholstery.
6.3. Custom Upholstery
For a completely new look, consider custom upholstery. This allows you to choose new leather and designs to personalize your car’s interior.
7. Cost Analysis of Leather Repair
Understanding the costs associated with leather repair can help you make informed decisions.
7.1. DIY Repair Costs
- Leather Repair Kit: $30 – $100
- Leather Cleaner and Conditioner: $20 – $50
- Tools (Sandpaper, Putty Knife, etc.): $10 – $30
Total DIY Cost: $60 – $180
7.2. Professional Repair Costs
- Minor Crack Repair: $100 – $300 per seat
- Major Tear Repair: $300 – $500 per seat
- Leather Panel Replacement: $500 – $1000 per seat
7.3. Cost-Benefit Analysis
DIY repair can be a cost-effective option for minor damage. However, for major damage, professional repair services may be more cost-effective in the long run, as they ensure a high-quality, durable finish.
8. Leather Seat Repair Products Available at CARDIAGTECH.NET
CARDIAGTECH.NET offers a range of products to help you repair your cracked leather seats effectively. Here are some of our top recommendations:
| Product | Description | Price |
|---|---|---|
| Leather Repair Kit | Includes leather filler, colorant, sealant, and all necessary tools for repairing minor cracks and tears. | $59.00 |
| Leather Cleaner | A gentle yet effective cleaner that removes dirt, oil, and grime without damaging the leather. | $25.00 |
| Leather Conditioner | A high-quality conditioner that moisturizes and protects the leather, preventing it from drying out and cracking. | $30.00 |
| Linen Subpatch Material | Used for reinforcing tears and holes from the inside, providing a strong and durable repair. | $2.00 |
| Color Matching Kit | Allows you to blend the colorant to the exact shade of your leather for a seamless repair. | $45.00 |
| Professional Leather Repair | Our professional technicians can repair even the most severely damaged leather seats, ensuring a high-quality, durable finish. Contact us for a quote. Address: 276 Reock St, City of Orange, NJ 07050, United States. Whatsapp: +1 (641) 206-8880. | Contact |
9. Real-Life Examples of Leather Seat Repair
9.1. Case Study 1: Minor Crack Repair
- Problem: Minor cracks on the driver’s seat due to sun exposure and lack of maintenance.
- Solution: DIY repair using a leather repair kit from CARDIAGTECH.NET.
- Steps: Cleaned the seat, sanded the cracked areas, applied leather filler, colorant, and conditioner.
- Result: The cracks were successfully repaired, and the seat looked as good as new.
 Before
Alt: Before image of a car seat with visible cracks.
9.2. Case Study 2: Major Tear Repair
- Problem: A large tear on the passenger seat caused by a sharp object.
- Solution: Professional leather repair service.
- Steps: The technician cleaned the seat, applied a subpatch to reinforce the tear, filled the tear with leather filler, color matched the colorant, and applied conditioner.
- Result: The tear was seamlessly repaired, and the seat was restored to its original condition.
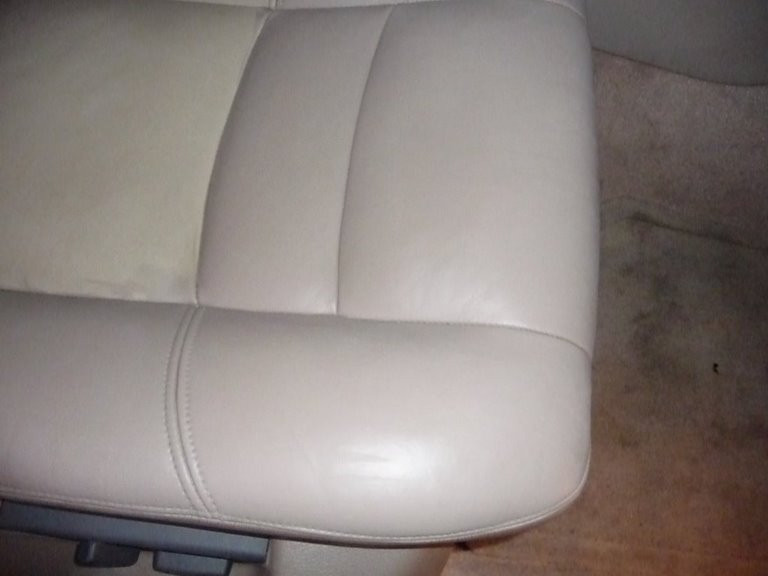 After
After
Alt: After image of a car seat, showing the successful repair of cracks.
10. Why Choose CARDIAGTECH.NET for Your Automotive Repair Needs?
CARDIAGTECH.NET is your trusted partner for all your automotive repair needs. Here’s why:
- Wide Range of Products: We offer a comprehensive selection of high-quality tools and materials for leather repair and other automotive maintenance tasks.
- Expert Advice: Our team of experienced professionals is always available to provide expert advice and support.
- Competitive Prices: We offer competitive prices on all our products and services, ensuring you get the best value for your money.
- Customer Satisfaction: We are committed to providing exceptional customer service and ensuring your complete satisfaction.
11. Frequently Asked Questions (FAQ) About Leather Seat Repair
11.1. How often should I condition my leather seats?
It is recommended to condition your leather seats every 3-6 months to keep them moisturized and prevent cracking.
11.2. Can I use household cleaners on leather seats?
No, you should only use cleaners specifically designed for leather car seats to avoid damaging the leather.
11.3. How can I protect my leather seats from the sun?
Park your car in the shade, use window tinting, and apply leather conditioner regularly to protect your seats from UV rays.
11.4. What is the best way to clean leather seats?
Use a mild leather cleaner and a soft microfiber cloth to gently wipe the seats, paying attention to areas that accumulate dirt and grime.
11.5. Can I repair a tear in a leather seat myself?
Yes, you can repair a tear using a leather repair kit that includes subpatch material, leather filler, colorant, and sealant.
11.6. How much does it cost to repair a cracked leather seat?
DIY repair can cost between $60 and $180, while professional repair can cost between $100 and $500 per seat, depending on the severity of the damage.
11.7. What is the best leather conditioner for car seats?
High-quality leather conditioners like Leather Honey and Lexol are highly recommended for car seats.
11.8. How do I match the color of the leather repair to the original seat color?
Use a color matching kit or purchase a leather repair kit that offers custom color matching services, like Leather Magic.
11.9. What tools do I need to repair a cracked leather seat?
You will need leather cleaner, conditioner, sandpaper, a putty knife, leather filler, colorant, sealant, and microfiber cloths.
11.10. Is it worth repairing cracked leather seats?
Yes, repairing cracked leather seats can restore the appearance and value of your car, making it a worthwhile investment.
12. Call to Action
Ready to restore your car’s leather seats and maintain its luxurious appeal? Contact CARDIAGTECH.NET today for expert advice and the best tools and products for leather repair. Whether you’re tackling minor cracks or major tears, our team is here to help you achieve professional results.
Don’t let cracked leather detract from your driving experience. Reach out to us now and let our team at CARDIAGTECH.NET provide tailored solutions for your leather repair needs. Your car deserves the best care, and we’re here to deliver it.
Contact us today at 276 Reock St, City of Orange, NJ 07050, United States, Whatsapp: +1 (641) 206-8880, or visit our website CARDIAGTECH.NET to explore our full range of products and services. Let us help you transform your car’s interior and keep it looking its best for years to come.
